Table of Contents >> Show >> Hide
- Why Washing Your Makeup Sponge Actually Matters
- What You Need to Clean a Makeup Sponge
- How to Wash Your Makeup Sponge Step by Step
- How Often Should You Wash a Makeup Sponge?
- How to Remove Stubborn Makeup Stains
- Common Makeup Sponge Cleaning Mistakes
- When to Replace Your Makeup Sponge
- Best Habits for Keeping a Makeup Sponge Cleaner Longer
- Real-World Experiences With Washing a Makeup Sponge
- Final Thoughts
- SEO Tags
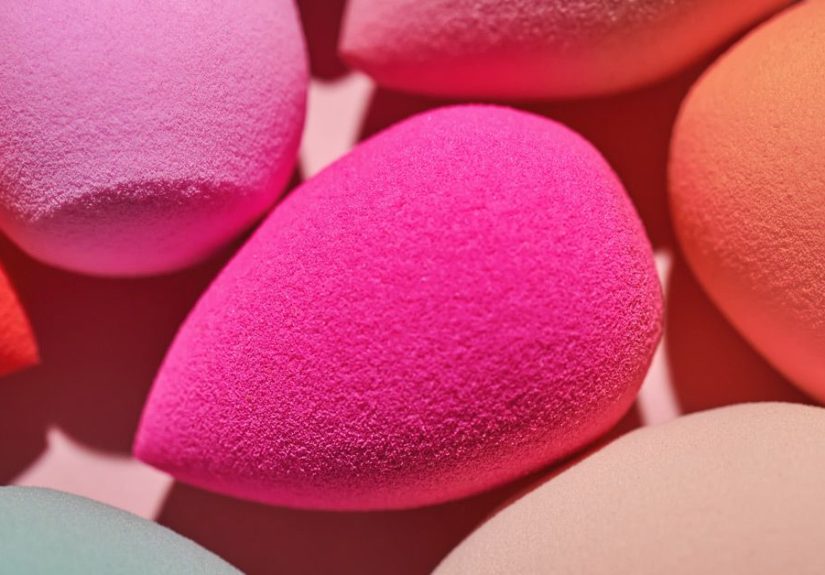
If your makeup sponge could talk, it would probably say two things: “Please stop smashing me into full-coverage foundation like I’m in a boxing match,” and “For the love of clean pores, wash me already.” A makeup sponge may look cute, soft, and harmless, but it spends its life soaking up foundation, concealer, cream blush, skin oils, and whatever mystery residue lives at the bottom of your makeup bag. In other words, it works hard. The least we can do is not let it become a tiny germ condo.
The good news is that learning how to wash your makeup sponge is easy, fast, and far less dramatic than people on social media make it seem. You do not need a chemistry degree, a viral hack, or a ceremonial moon bath. You just need warm water, a gentle cleanser, a little patience, and the willingness to admit your sponge has seen things.
In this guide, you’ll learn why cleaning matters, what to use, how to deep-clean your sponge the right way, how often to wash it, when to throw it out, and what common mistakes can shorten its life. If you want smoother makeup, healthier skin, and fewer “why is my foundation looking weird today?” moments, this is the routine to keep.
Why Washing Your Makeup Sponge Actually Matters
A dirty sponge is not just a cosmetic issue. It can affect how your makeup looks and how your skin feels. Because makeup sponges are designed to be damp when used, they hold onto moisture more than many brushes do. Add trapped makeup, oil, and dead skin cells, and you have the perfect recipe for buildup. That buildup can make your sponge smell funky, apply makeup unevenly, and potentially irritate breakout-prone or sensitive skin.
There is also the performance factor. A freshly washed sponge bounces beautifully, blends evenly, and helps foundation melt into the skin instead of sitting on top like an awkward guest at a dinner party. A clogged sponge, on the other hand, can leave streaks, absorb product unevenly, and muddy the color of whatever you apply next. Yesterday’s bronzer has no business crashing today’s concealer.
So yes, cleaning your makeup sponge is about hygiene. But it is also about getting better results from the products you already paid for. That tiny sponge is either helping your face glow or quietly sabotaging it. There is rarely an in-between.
What You Need to Clean a Makeup Sponge
You do not need a huge setup. Most people can wash a makeup sponge with items they already have at home. The best tools are simple:
1. Warm water
Warm water helps loosen makeup and soften dried residue inside the sponge. Very hot water can be rough on the material, so think comfortably warm, not “I am boiling pasta.”
2. A gentle cleanser
A mild soap, gentle shampoo, face cleanser, or a cleanser specifically made for makeup tools usually works well. The goal is to break down makeup and oil without wrecking the sponge’s soft, bouncy texture.
3. Your hands or a textured cleaning pad
Your palm is often enough, but a silicone cleansing mat or textured pad can help loosen stubborn buildup without making you squeeze the life out of the sponge.
4. A clean towel or paper towel
This helps remove extra water after rinsing so the sponge can air-dry faster.
That is really it. No fireworks. No weird internet stunts. No need to treat your sponge like a science experiment.
How to Wash Your Makeup Sponge Step by Step
Here is the easiest and most reliable method for cleaning a makeup sponge thoroughly.
Step 1: Fully wet the sponge
Run your sponge under warm water until it expands and feels fully saturated. This part matters because a dry or barely damp sponge will not release old product nearly as well. Let it drink first, then clean.
Step 2: Add cleanser
Apply a small amount of gentle cleanser directly onto the sponge or onto your palm. If you are using a cleansing bar, rub the wet sponge across the surface a few times to build up a lather.
Step 3: Work up a lather
Massage and squeeze the sponge gently in your palm. Focus on the areas that are most stained, especially the wider bottom where foundation usually hangs out like it pays rent. If you have a textured cleaning mat, lightly press and roll the sponge against it while lathering.
Step 4: Rinse thoroughly
Hold the sponge under warm running water and keep squeezing until the water runs clear and the soap is gone. If the rinse water is still tinted beige, peach, tan, or “mystery contour,” keep going.
Step 5: Repeat if needed
Some sponges need a second pass, especially if they have been neglected for a while. No judgment. Well, maybe a tiny bit of judgment. Add more cleanser and repeat the lather-and-rinse process until the sponge feels cleaner and lighter.
Step 6: Remove excess water
Gently press the sponge into a clean towel or paper towel. Do not twist it like you are wringing out a wet swimsuit. Too much force can cause tears and shorten the sponge’s lifespan.
Step 7: Let it air-dry completely
Place the sponge in a clean, open, well-ventilated area to dry. Do not toss it immediately into a sealed makeup bag or drawer while damp. That is how you invite moisture to linger, and moisture loves trouble.
How Often Should You Wash a Makeup Sponge?
In a perfect beauty world, you would wash your makeup sponge after every single use. That is the gold standard, especially if you use it with liquid foundation, concealer, cream blush, or products around breakout-prone areas. Daily washing helps prevent buildup before it becomes a problem.
In the real world, people are busy, tired, and occasionally running late while trying to blend under-eye concealer in a moving vehicle. So if daily cleaning is not realistic, aim for at least once a week as your non-negotiable minimum. If you use the sponge every day, more frequent washing is better.
A good practical routine looks like this: rinse the sponge well after use, wash it properly several times a week if possible, and do a thorough deep clean at least weekly. If you have acne-prone skin, sensitive skin, or you use a sponge for complexion products every day, washing after each use is especially worth the effort.
How to Remove Stubborn Makeup Stains
Sometimes your sponge looks clean-ish but still has stains that refuse to leave, like they have signed a lease. That usually happens with long-wear foundation, heavy concealer, cream contour, or bright pigments.
Here are a few ways to deal with stubborn residue:
Use a second cleanse
The simplest fix is often repeating the process. One round loosens the product; the second round removes what is left.
Let the cleanser sit briefly
Massage cleanser into the sponge and let it sit for a minute before rinsing. This gives it more time to break down oils and pigments.
Use a textured cleaning surface
A silicone cleaning pad can help work cleanser into the sponge more effectively without aggressive scrubbing.
Try a gentle oil step for heavy residue
If cream products are really clinging, a tiny amount of plain oil followed by your regular cleanser can help break them down. Just do not stop at the oil. You need the second cleanse to remove leftover slickness so the sponge does not feel greasy afterward.
Also, one important truth: a sponge can be clean without looking brand-new. Some discoloration may remain over time. That is normal. Permanent staining is not ideal, but it is not always the same thing as dirt. What matters more is whether the sponge smells clean, rinses well, dries properly, and still feels soft and intact.
Common Makeup Sponge Cleaning Mistakes
Using super-hot water
Hotter is not automatically better. Overheating can wear down the sponge material and make it more likely to split or lose elasticity.
Using harsh cleansers
Strong detergents, aggressive disinfectants, and rough formulas can break down the sponge and leave behind residue you do not really want bouncing across your face.
Scrubbing too hard
Your sponge is not a frying pan. Excessive twisting, scraping, or clawing at stains can cause tears.
Storing it while damp
This is one of the biggest mistakes. A damp sponge in a closed makeup bag is basically a tiny indoor swamp.
Keeping it forever
No matter how emotionally attached you are, your makeup sponge is not an heirloom. It has a shelf life.
When to Replace Your Makeup Sponge
Even the best-cleaned sponge does not last forever. Most makeup sponges should be replaced around every three months, especially with regular use. Some may need replacing sooner if they are used daily or cleaned poorly. Think of it as seasonal maintenance: new weather, new sponge, fewer regrets.
Here are the signs it is time to say goodbye:
- It smells bad even after washing.
- It has tears, cracks, or chunks missing.
- It feels stiff, rough, or oddly slimy.
- It never seems to rinse clean anymore.
- It has suspicious dark spots or mold-like discoloration.
- Your makeup suddenly applies patchier than usual with no other explanation.
If the sponge looks like it has lived through three eras, two breakouts, and one emotional support foundation phase, let it go. Retirement is not failure. It is growth.
Best Habits for Keeping a Makeup Sponge Cleaner Longer
Good sponge hygiene is easier when you build a few tiny habits into your routine.
Rinse it after using it
Even if you do not do a full wash every time, rinsing out fresh product helps prevent major buildup.
Store it where air can circulate
Open trays, ventilated holders, or breathable pouches work better than cramming it into a sealed cosmetic bag while it is still damp.
Keep more than one sponge
Rotating between two sponges makes cleaning less annoying and gives each one more time to dry properly.
Do not share it
Your makeup sponge is personal. Sharing it is an easy way to swap bacteria, skin oils, and potentially irritation.
Pay attention to how your skin responds
If you are suddenly breaking out more, getting irritation, or noticing a strange smell from the sponge, do not ignore the clues. Your skin can be very honest, sometimes rudely so.
Real-World Experiences With Washing a Makeup Sponge
Ask enough makeup wearers about sponge cleaning, and you will hear a similar confession: “I did not realize how gross it was until I finally washed it properly.” That moment tends to happen when someone squeezes their sponge under warm water and watches a stream of old foundation pour out like a tiny beige horror movie. It is humbling. It is educational. It is also the exact moment many people realize their sponge has been doing a lot more than blending.
One common experience is that makeup looks noticeably better after a wash. Foundation goes on smoother, concealer stops clinging weirdly, and cream blush blends instead of creating random pink islands on the cheeks. People often assume the product is the problem when, in reality, the sponge is clogged with leftover makeup and cannot do its job anymore. Clean sponge, suddenly flawless finish. It is the beauty equivalent of realizing your glasses were dirty the whole time.
Another thing people notice is how much smell matters. A sponge may not look terrible, but if it has a sour, musty, or just plain suspicious odor, that is usually enough to ruin the vibe. Once you have experienced the difference between a fresh, clean sponge and one that smells like it has been trapped in a gym locker, you do not forget it.
There is also the “I left it wet in my makeup bag” phase, which many people sadly experience once and never wish to repeat. A damp sponge tucked into a closed pouch can come back with an odor, weird spots, or a texture that feels wrong immediately. That lesson sticks. Suddenly, air-drying becomes less of a suggestion and more of a personal policy.
People with acne-prone or sensitive skin often report that more frequent sponge washing helps reduce random irritation. It may not solve every skin issue under the sun, but removing one avoidable source of old makeup, oil, and damp buildup can absolutely make a difference. Sometimes skincare gets all the attention while the dirty applicator sitting two inches away is quietly plotting chaos.
And then there is the emotional side of replacing a sponge. Plenty of people hang on too long because the sponge still sort of works, or because it was expensive, or because they believe love can fix a tear down the middle. It cannot. When the sponge starts ripping, smelling weird, or refusing to rinse clean, replacing it usually feels annoyingly necessary at first and completely correct about two uses later.
The most useful real-life takeaway is this: makeup sponge cleaning feels tedious right up until it becomes a habit. Once it is part of the routine, it takes only a few minutes and saves a lot of frustration. Cleaner sponge, better makeup, happier skin, less panic. Not glamorous, perhaps, but very effective. And honestly, that is the kind of beauty wisdom worth keeping.
Final Thoughts
If you have been wondering how to wash your makeup sponge, the answer is refreshingly simple: use warm water, a gentle cleanser, a gentle hand, and enough patience to rinse it thoroughly. Clean it as often as you can, let it dry completely in a ventilated space, and replace it when it starts looking or smelling like it is no longer interested in cooperating.
It is one of those tiny habits that pays off immediately. Your makeup applies better. Your sponge lasts longer. Your skin has one less reason to complain. And perhaps most importantly, you can stop pretending that a sponge coated in last Tuesday’s foundation is “probably fine.”
Because deep down, you already knew it was not.