Table of Contents >> Show >> Hide
- Why Turning a Chair Into a Stool Is Such a Smart DIY Project
- Before You Start: Pick the Right Chair
- Decide What Kind of Stool You Want
- Tools and Materials You May Need
- How To Transform a Chair Into a DIY Stool: Step by Step
- 1. Inspect the chair and tighten the structure
- 2. Remove the seat if possible
- 3. Remove the chair back cleanly
- 4. Check the height and proportions
- 5. Reinforce if needed
- 6. Fill, repair, and sand
- 7. Paint or stain the stool
- 8. Reupholster the seat if you want more comfort
- 9. Reassemble and test for stability
- Best Design Ideas for a Chair-to-Stool Makeover
- Common Mistakes to Avoid
- Where a DIY Stool Like This Works Best
- Experiences and Real-World Lessons From Chair-to-Stool DIY Projects
- Conclusion
- SEO Tags
There comes a moment in every furniture lover’s life when they look at an old chair and think, “You know what? You’d be a fantastic stool.” Maybe the back is cracked, maybe the style feels dated, or maybe the chair has been sitting in the garage collecting dust and opinions. Whatever the reason, turning a chair into a DIY stool is one of those clever upcycling projects that feels equal parts practical, creative, and slightly mischievous.
The beauty of this makeover is that it does not require a full woodworking shop or a reality-TV renovation budget. With the right chair, some basic tools, and a little patience, you can create a sturdy, good-looking stool for a kitchen corner, vanity, mudroom, plant stand zone, or workshop. Better yet, you get to rescue a piece of furniture from the “maybe I’ll deal with it later” pile. That pile is huge, by the way.
This guide walks through the smartest way to transform a chair into a DIY stool, including how to choose the right chair, how to remove the back cleanly, how to refinish the piece, and how to avoid ending up with a wobbly seat that feels like a trust exercise. Whether you want a rustic painted stool, a modern wood finish, or a cushioned seat that looks custom-made, this project can absolutely work.
Why Turning a Chair Into a Stool Is Such a Smart DIY Project
A chair already gives you the hardest part of a stool: a seat and four legs that were originally designed to support weight. That means you are not starting from scratch. Instead, you are modifying an existing structure, which is often easier than building a stool from raw lumber.
It is also a flexible makeover. A dining chair can become a backless vanity stool. A damaged chair with a perfectly solid seat can become a compact plant perch. A chunky wooden chair can become a casual entryway seat that looks intentionally vintage instead of accidentally old. In other words, this project is great for people who like DIY with a side of redemption.
There is another practical advantage too: most standard chairs already sit in a comfortable range for low seating. That makes them especially useful for bedroom, entry, desk, or side-table-adjacent use. If you want a counter-height stool, you need a taller starting piece or more advanced modification. But for a standard-height stool, an old chair is often an excellent candidate.
Before You Start: Pick the Right Chair
Best types of chairs for this project
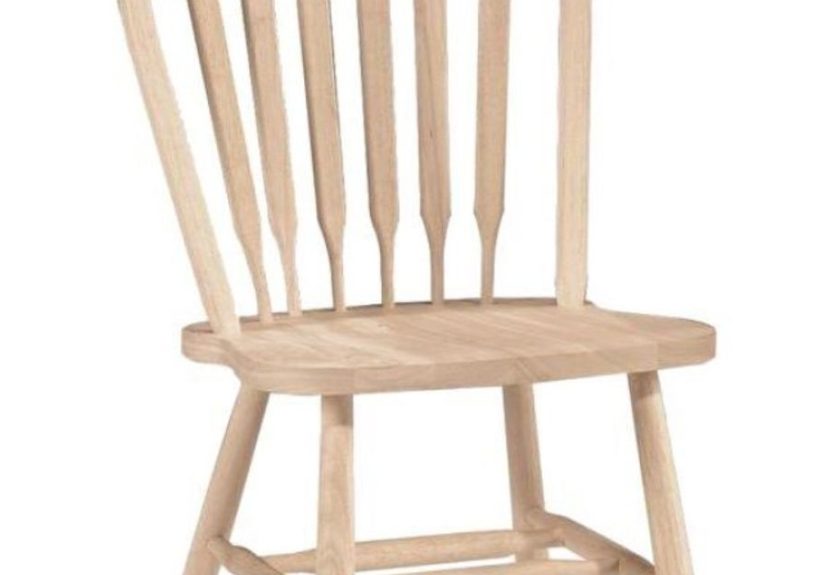
The easiest chair to convert is a solid wood dining chair with a removable seat or a straightforward frame. Look for a chair with sturdy legs, tight joints, and a seat that still feels dependable. If the chair rocks, twists, or groans like it has seen too much, it may need structural repair before you do anything cosmetic.
Good candidates include:
- Simple dining chairs with square or turned legs
- Wood chairs with upholstered drop-in seats
- Vintage chairs with solid hardwood frames
- Thrifted chairs with a damaged back but a sound lower frame
Chairs to avoid
Skip fragile chairs with cracked legs, severe rot, major insect damage, or loose joints that will not tighten properly. Also be careful with ornate antiques that may be more valuable restored as chairs than chopped into stools. Not every old chair wants a second life as a stool. Some of them want professional restoration and a little respect.
If the chair has old paint and may date to before 1978, treat sanding and paint removal carefully. Older painted furniture can pose lead-dust risks, so safe prep matters a lot.
Decide What Kind of Stool You Want
Before you touch a screwdriver, decide on the final look and function. That choice affects how much cutting, reinforcing, and refinishing you will need to do.
Common options include:
- Standard stool: Keep the original chair height and simply remove the back.
- Shortened stool: Trim the legs for a lower, more compact seat.
- Upholstered stool: Add new foam, batting, and fabric for a cushioned finish.
- Painted decorative stool: Prime, paint, and seal for a bold accent piece.
- Natural wood stool: Sand, stain, and finish for a classic look.
If your goal is a kitchen counter stool, measure carefully first. Standard chair seats are usually too low for counters, so not every chair conversion works for that application. In many cases, the smartest path is to turn the chair into a beautiful standard-height stool rather than forcing it into a job it was never built to do.
Tools and Materials You May Need
- Screwdriver or drill
- Wood glue
- Clamps
- Hand saw, pull saw, or oscillating tool
- Sandpaper in coarse, medium, and fine grits
- Tack cloth or clean lint-free cloth
- Wood filler
- Primer and paint, or wood stain and clear finish
- Foam, batting, fabric, and staple gun if upholstering
- Safety glasses and a dust mask or respirator appropriate for the task
- Drop cloth
- Measuring tape and pencil
You may not need every single item, but having the basics nearby keeps the project from turning into a twelve-trip scavenger hunt.
How To Transform a Chair Into a DIY Stool: Step by Step
1. Inspect the chair and tighten the structure
Start by checking the joints, legs, stretchers, and seat. If anything is loose, repair it now. A stool needs to feel stable because it has no back to help brace the body. Tighten screws, re-glue loose joints, and clamp parts until the adhesive fully cures. This is not the glamorous part, but it is the reason your stool will feel solid instead of suspicious.
2. Remove the seat if possible
If the chair has a removable seat, take it out first. This makes it much easier to cut away the back, refinish the frame, and reupholster the seat later. Label screws and hardware so you are not guessing during reassembly.
3. Remove the chair back cleanly
Now for the transformation. If the chair back is attached with screws or bolts, remove it that way. If it is part of the frame, you may need to cut it off. Make your cuts as low and clean as possible while preserving the seat support and the rear legs. Measure both sides carefully so the stool remains symmetrical.
After the back is removed, inspect the cut area. Smooth rough edges and check whether the rear legs still look balanced. In some designs, you may want to round over the top of the rear posts slightly so the finished stool looks intentional rather than abruptly decapitated.
4. Check the height and proportions
Set the frame on a flat surface and see how it looks. If you like the existing seat height, keep it. If the stool feels too tall or visually awkward, mark the amount you want to trim from the legs. Cut all legs evenly and recheck for level before moving on.
This is the part where patience pays off. A stool that is off by even a little can wobble, and wobbly furniture has a special talent for ruining confidence.
5. Reinforce if needed
Some chair backs add a small amount of structural stability, so once the back is gone, the frame may benefit from reinforcement. If the stool feels less rigid than before, consider adding discreet corner blocks under the seat or tightening existing stretchers. This is especially helpful if the stool will get daily use.
6. Fill, repair, and sand
Fill old screw holes, chips, or cut marks with wood filler. Let it dry thoroughly, then sand the entire piece. Start with a grit that can remove roughness and old finish, then move to finer grits for smoothness. Always sand in the direction of the grain when working with wood.
If you are dealing with glossy paint, laminate-like coatings, or a slick factory finish, proper surface prep matters. Clean the dust thoroughly after sanding. Paint and stain do not bond well to dust, and nobody wants their gorgeous new finish to peel because a cloud of sanding residue was feeling clingy.
7. Paint or stain the stool
Here is where the stool starts looking less like a chopped chair and more like a design choice.
If painting: Apply primer if the surface needs adhesion help or has repairs. Once dry, lightly sand if needed, wipe away dust, and apply two even coats of paint. Let each coat dry fully. A topcoat or furniture sealer can improve durability.
If staining: Sand carefully, remove all dust, and apply stain evenly with the grain. Wipe away excess and let it dry before adding a protective clear finish. Stain highlights the wood character, which is a great option for vintage hardwood chairs with pretty grain.
Color choice changes the mood dramatically. Black creates a classic, tailored look. Soft green or navy can make the stool feel charming and custom. Natural stain keeps things warm and timeless. High-gloss red says, “I want my stool to have a personality, and yes, it is louder than the lamp.”
8. Reupholster the seat if you want more comfort
If the seat is removable, this part is wonderfully manageable. Remove the old fabric and inspect the foam and batting. If the cushion is flat, replace the foam or add a fresh layer of batting. Cut your new fabric with enough extra material to wrap under the seat base.
Center the fabric, pull it taut, and staple opposite sides first. Then work around the corners, folding neatly and avoiding the screw holes. The goal is snug, not drum-tight. A little tension is good; a wrestling match with floral fabric is not.
Performance fabric, canvas, ticking stripe, faux leather, and textured solids all work well depending on the room. If the stool is going in a bathroom or mudroom, choose something durable and easy to wipe down.
9. Reassemble and test for stability
Reattach the seat and place the finished stool on a perfectly flat floor. Sit carefully and test it from different angles. If it wobbles, look for uneven legs or a loose joint. Minor wobble can often be corrected with a careful trim, a felt pad adjustment, or joint tightening. Do not ignore instability. A stool should feel boringly reliable.
Best Design Ideas for a Chair-to-Stool Makeover
- Farmhouse stool: White or muted paint, lightly distressed edges, linen seat.
- Modern stool: Matte black frame, crisp neutral upholstery, clean lines.
- Vintage-inspired stool: Walnut stain, brass nailhead trim, patterned fabric.
- Workshop stool: Sealed wood seat, simple painted legs, no upholstery.
- Vanity stool: Soft pastel paint, plush cushion, curved legs.
The easiest way to make the project look custom is to commit to a clear style. Random choices can still work, of course, but “I had leftover paint and feelings” is not always a design strategy.
Common Mistakes to Avoid
Skipping structural repairs
Cosmetics do not fix weak joints. If the chair is loose before the makeover, it will usually be looser after the back comes off unless you repair it properly.
Using the wrong chair for the intended height
A regular chair can make a great standard stool, but it usually will not become a true counter stool without a different starting height. Work with the proportions you have.
Rushing surface prep
Bad prep leads to peeling paint, blotchy stain, and a finish that looks tired before it even cures. Sand, clean, and prime or condition as needed.
Ignoring safety on older painted furniture
If there is any chance the old finish contains lead, use lead-safe practices and do not dry-sand carelessly. This is one of those moments where caution is much cooler than bravado.
Pulling upholstery fabric unevenly
If one side is tighter than the other, the seat can look lopsided fast. Staple in stages and keep checking alignment.
Where a DIY Stool Like This Works Best
A chair-turned-stool is surprisingly versatile. It can work as:
- A vanity stool in a bedroom or dressing area
- An entryway perch for putting on shoes
- An extra seat in a living room corner
- A plant stand or display base
- A compact desk-side stool
- A workshop seat for light-duty tasks
Because you are starting with a chair, the final piece often feels more substantial and comfortable than many flimsy store-bought stools. It also has something mass-produced furniture often lacks: a backstory. Even when that backstory includes a slightly crooked cut you sanded into submission.
Experiences and Real-World Lessons From Chair-to-Stool DIY Projects
One of the most common experiences people have with this project is realizing that the “easy part” is not actually removing the chair back. The real challenge is making the finished stool look intentional. Plenty of first attempts are structurally fine but visually awkward because the proportions were not considered early enough. The rear posts may stick up too high, the seat fabric may feel too busy for the frame, or the paint color may emphasize every flaw instead of disguising it. The good news is that these are usually design problems, not disaster-level mistakes, and they can almost always be corrected with sanding, trimming, or a smarter finish choice.
Another common lesson is that older chairs often hide surprises. Screws are stripped. Joints that looked decent are suddenly loose once the back is removed. Upholstered seats can reveal twenty years of flattened foam and mysterious crumbs that nobody has the emotional strength to identify. That is normal. In fact, it is part of why the finished piece feels satisfying. The project is not just a style upgrade; it is often a rescue mission.
Many DIYers also discover that simple materials go a long way. A basic solid-color fabric can look far more polished than an overly trendy print. A carefully sanded stain finish can make a cheap thrifted chair feel upscale. Even something as small as replacing old screws, adding fresh felt pads, or rounding the cut ends of the rear legs can change the stool from “obviously repurposed” to “Where did you buy that?” That is usually the dream.
There is also a practical comfort lesson. A stool made from a chair tends to feel better when the original seat dimensions are respected. When people try to force a dramatic transformation, such as cutting too much height or thinning the seat too aggressively, the finished piece can lose comfort fast. The most successful projects usually keep what already worked about the chair and edit only what is necessary. In other words, this makeover rewards restraint more than chaos.
One more experience shows up again and again: confidence builds quickly after the first successful conversion. Once someone turns one unwanted chair into a good-looking stool, every neglected furniture piece in the house starts looking like potential. That old side chair becomes a bathroom stool. The extra dining chair becomes a painted seat for the mudroom. A damaged chair with a salvageable frame becomes a workshop stool. This project has a funny way of changing how people see secondhand furniture. You stop looking for perfection and start looking for possibility.
And maybe that is the best part. A chair-to-stool makeover is not just about saving money or avoiding waste, although it does both. It is about developing an eye for structure, proportion, and finish. It is about learning that a piece can be useful even when it is no longer useful in its original form. It is also about the quiet thrill of taking something forgotten, giving it purpose again, and ending up with a handmade stool that feels more personal than anything pulled from a warehouse shelf. That is a pretty great outcome for a project that begins with a chair nobody wanted and ends with a seat everyone suddenly notices.
Conclusion
Transforming a chair into a DIY stool is one of those rare projects that checks all the boxes: practical, affordable, creative, and genuinely fun. With a sturdy chair, thoughtful prep, and a finish that suits your space, you can create a piece that looks custom rather than improvised. The key is to respect the structure, choose the right height, and treat the finishing details like they matter, because they absolutely do.
If you do it well, your new stool will not look like a chair that lost an argument. It will look like a smart, stylish piece of furniture that was always meant to be there.