Table of Contents >> Show >> Hide
- Why Pole Adjustment Matters More Than Most Hikers Think
- How to Adjust Hiking Poles: 8 Steps
- Step 1: Identify Your Pole’s Locking System
- Step 2: Set Your Baseline Length for Flat Ground
- Step 3: Balance the Sections Correctly
- Step 4: Adjust the Wrist Straps the Right Way
- Step 5: Shorten the Poles for Uphill Hiking
- Step 6: Lengthen the Poles for Downhill Hiking
- Step 7: Fine-Tune for Traverses, Stream Crossings, and Soft Ground
- Step 8: Recheck, Walk, and Readjust as Needed
- Common Mistakes to Avoid
- Quick Example Setups
- Trail-Tested Experiences: What Hikers Learn After the First Few Trips
- Conclusion
Hiking poles look simple until you actually use them. Then comes the trailhead shuffle: one pole too short, one too long, straps flopping around, and somehow your shoulders feel like they are doing unpaid overtime. The good news is that learning how to adjust hiking poles is not complicated. The better news is that once you get it right, your knees, balance, and confidence on the trail may all send a thank-you note.
Properly adjusted hiking poles can help you stay more stable on rocky ground, feel less beat up on descents, and move more efficiently on climbs. But “properly adjusted” does not mean one magic number for every trail. Flat trail, steep climb, loose descent, stream crossing, and sidehill traverse all ask for slightly different setups. That is why smart hikers do not just set their poles once and forget them forever. They treat pole length like layers in the mountains: adjust as conditions change.
This guide breaks the process down into eight practical steps, plus real-world trail experience at the end so the advice feels less like a product manual and more like something you can actually use on your next hike.
Why Pole Adjustment Matters More Than Most Hikers Think
When your hiking poles are adjusted correctly, your arms and shoulders stay in a natural position, your wrists are not fighting the straps, and the poles work with your stride instead of against it. When they are adjusted badly, they become expensive aluminum or carbon-fiber suggestions.
Too-long poles can lift your shoulders, throw off your posture, and make downhill sections awkward. Too-short poles can force you to hunch, reduce stability, and make climbs feel clumsy. On technical terrain, even a small adjustment can change how secure you feel. That is why seasoned hikers often make quick changes several times during a long day.
Think of hiking poles as trail tools, not decorations. A hammer works best when you hold it correctly. Same story here, just with more dirt and fewer nails.
How to Adjust Hiking Poles: 8 Steps
Step 1: Identify Your Pole’s Locking System
Before you change the length, figure out how your poles actually lock. Most adjustable hiking poles use one of three systems: external lever locks, twist locks, or push-button mechanisms. Lever locks are popular because they are quick and easy to adjust, even when you are wearing gloves. Twist locks are common too, but they need to be tightened carefully so they do not slip. Some foldable poles use push-button locks and then allow limited length adjustment in one section.
Take ten seconds to inspect the pole before your hike. Open and close the lock once or twice. Make sure it feels secure, not wobbly or half-committed like a tourist deciding whether to climb the observation tower. If a lever lock feels loose, tighten it before you head out. If a twist lock is dirty or not catching, deal with that now, not halfway down a rocky switchback.
Step 2: Set Your Baseline Length for Flat Ground
The standard starting point is simple: stand upright on level ground with the pole tip near your foot and adjust the pole until your elbow forms roughly a 90-degree angle. That is your baseline hiking pole length for normal trail walking.
This neutral setup works for most mellow terrain and gives you a reliable reference point for every adjustment that comes later. If your poles have measurement markings in centimeters, note the number. You do not need to memorize it like a final exam, but knowing your usual setting saves time when you are adjusting on the fly.
For many adults, that baseline lands somewhere around 100 to 130 cm depending on height and pole model. If you are using fixed-length poles, sizing charts can help you choose the nearest option. Adjustable poles are more forgiving, which is one reason they are so popular for hiking and backpacking.
Step 3: Balance the Sections Correctly
If your poles have two or three telescoping sections, do not yank one section way out and ignore the others. Spread the adjustment sensibly so the shafts remain stable and the markings stay below the maximum extension line. That line is not a suggestion. It is a polite engineering warning.
A smart setup for three-section poles is to leave the upper section around the middle of its range and fine-tune with the lower section, or follow the brand’s guidance if it recommends a different order. The goal is to keep the pole strong, evenly balanced, and easy to tweak later without kneeling in the dirt like you are proposing to your backpack.
Step 4: Adjust the Wrist Straps the Right Way
This is where a surprising number of hikers go rogue. To use wrist straps correctly, slide your hand up through the bottom of the strap, then bring your hand down onto the grip so the strap supports the base of your hand. When adjusted properly, the strap helps transfer some pressure without requiring a death grip on the handle.
If you put your hand down through the top of the strap, you lose support and usually grip too tightly. That can tire your hands and wrists faster, especially on long descents. Adjust the strap length so it feels supportive but not restrictive. You want control, not handcuffs.
If your poles are labeled left and right, use them correctly. Yes, the labels matter. No, the poles do not care about your creative independence.
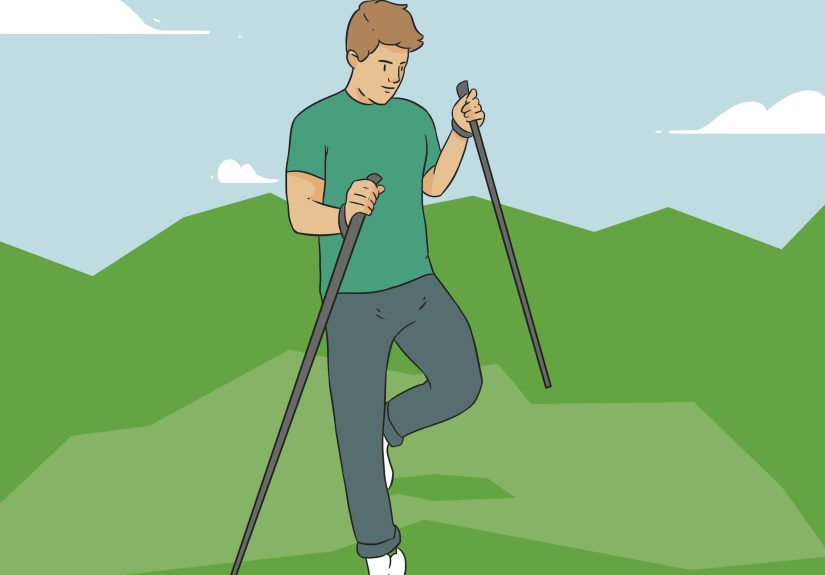
Step 5: Shorten the Poles for Uphill Hiking
When the trail tilts up for more than a brief little bump, shorten both poles. A good rule of thumb is 5 to 10 cm shorter than your baseline. The steeper the climb, the more you may want to shorten them.
Why? Because shorter poles let your hands stay in a more natural position as the slope rises to meet you. If the poles stay too long on a climb, your shoulders can creep upward and your upper body starts working in all the wrong ways. Proper uphill adjustment improves leverage, keeps pole plants more secure, and makes the climb feel smoother.
On very steep sections, many hikers choke down on extended foam grips instead of stopping to adjust. That works well for short bursts. For longer climbs, an actual length change is usually worth the few seconds it takes.
Step 6: Lengthen the Poles for Downhill Hiking
For longer descents, lengthen both poles about 5 to 10 cm from your flat-ground baseline. This helps you stay more upright, improves balance, and gives your legs some relief when gravity decides to become the trail manager.
Longer poles can help absorb some of the jarring impact that normally lands in your knees and ankles on the way down. That does not mean you should plant the poles way out in front and brake like a cartoon skier. Keep the movement controlled and natural. The poles should support you, not star in a dramatic reenactment.
If you are descending steep, uneven terrain, test each plant before trusting it with serious weight. Poles are helpful. They are not miracle wands.
Step 7: Fine-Tune for Traverses, Stream Crossings, and Soft Ground
Not every trail is a simple up-or-down situation. On sidehill traverses, you may be more comfortable shortening the uphill pole and lengthening the downhill pole. This helps even out your hand position and improves stability.
For stream crossings, many hikers prefer slightly longer poles for extra support, especially when the water is deep or the bottom is rocky. Plant each pole carefully and make sure it is secure before shifting weight. Fast water is not the place for guesswork or interpretive dance.
Soft terrain matters too. If you are hiking in mud or snow, use baskets that prevent the poles from sinking too deeply. On hard-packed surfaces, boardwalks, or sensitive terrain, rubber tips can reduce noise, improve grip in some cases, and limit scarring to rocks or trail surfaces. Pole adjustment is not just about your body. It is also about matching the trail conditions.
Step 8: Recheck, Walk, and Readjust as Needed
After making any change, walk for a minute and pay attention. Do your shoulders feel relaxed? Are your elbows bent naturally? Are you planting the poles without overreaching? Do the locks stay secure? If the answer to any of those is no, adjust again.
The best hikers do not obsess over perfection. They notice feedback. If your shoulders feel jammed upward, shorten the poles. If you are hunched and the plants feel weak, lengthen them a bit. If one pole starts slipping, stop and fix it immediately. A quick adjustment early is much better than a dramatic lesson later.
Common Mistakes to Avoid
One of the biggest mistakes is setting the poles once in the parking lot and never changing them all day. Another is gripping too tightly instead of letting the straps do some of the work. Hikers also commonly forget to check whether locks are fully engaged, especially after changing length in cold weather, rain, or mud.
Another classic mistake is planting poles too far ahead of the body. That can slow your rhythm, stress your shoulders, and make movement feel awkward. In most situations, you want a natural arm swing with the poles planting in coordination with your stride, not a dramatic spear-throwing routine.
Finally, be thoughtful with where you place the tips. Stay on the established tread when possible and avoid jabbing fragile vegetation or scar-prone rock unnecessarily. Good technique should help you move better without making the trail look like it lost a fight with a sewing machine.
Quick Example Setups
Easy day hike on rolling terrain: Keep both poles at your baseline 90-degree setup and make only minor changes.
Long steady climb: Shorten both poles 5 to 10 cm and use extended grips if the slope changes often.
Long descent with loose rock: Lengthen both poles 5 to 10 cm, keep plants controlled, and test unstable surfaces.
Steep sidehill traverse: Shorten the uphill pole, lengthen the downhill pole, and focus on careful placement.
Rocky stream crossing: Consider slightly longer poles, plant deliberately, and move one stable point at a time.
Trail-Tested Experiences: What Hikers Learn After the First Few Trips
The funny thing about learning how to adjust hiking poles is that the lesson rarely clicks in your living room. It clicks on the trail, usually right after something mildly annoying happens. Maybe your shoulders start aching on a climb. Maybe you catch yourself leaning too far forward on a descent. Maybe one wrist strap feels perfect and the other feels like it was designed by a spiteful octopus. That is when the theory turns into experience.
Many hikers start out thinking poles are just extra gear to carry around. Then they hit a long downhill section with a loaded backpack and suddenly become passionate evangelists for proper pole length. The difference can be dramatic. With the poles adjusted a little longer, descents often feel less punishing, less wobbly, and less like your knees are filing a formal complaint. You still have to hike carefully, of course, but the extra support can make the whole experience feel more controlled.
On climbs, the most common discovery is that shorter poles just feel better. New hikers often leave the poles too long because stopping to adjust seems annoying. Five minutes later, their shoulders are creeping upward and their pole plants feel clumsy. Once they shorten the poles, the movement usually becomes smoother right away. It is one of those tiny trail fixes that delivers surprisingly big results.
Another real-world lesson is that wrist straps matter more than people expect. Hikers who use them correctly often notice less grip fatigue, especially on longer outings. Hikers who use them incorrectly tend to squeeze the handles too hard, which can tire the hands and forearms faster than necessary. It is not a glamorous breakthrough, but it is a useful one. Trail comfort is often built from small improvements, not heroic suffering.
Experienced hikers also learn that conditions change faster than plans. A route may begin on flat dirt, turn into a rocky climb, cross a creek, and finish with a steep descent through loose gravel. That is why the best approach is flexible, not rigid. The baseline setting gets you started. The smart adjustments keep you comfortable.
And then there is the confidence factor, which is harder to measure but easy to feel. Properly adjusted hiking poles can make a nervous hiker feel steadier on tricky terrain. They can help newer hikers focus less on every possible stumble and more on the actual joy of being outside. That matters. A lot of people do not need to become ultralight philosophers or mountain goats. They just need gear that works with them instead of against them.
So yes, hiking poles are adjustable pieces of equipment. But in practice, they are also teachers. They teach rhythm, awareness, and the value of small changes made at the right time. Once you learn how to adjust them well, you stop fiddling randomly and start hiking more smoothly. And that, on a long trail day, feels like a tiny miracle with carbide tips.
Conclusion
If you remember only one thing, remember this: start with a 90-degree elbow bend on flat ground, then shorten for climbs and lengthen for descents. From there, fine-tune the straps, verify the locks, and adapt to the terrain in front of you. That is the real secret to adjusting hiking poles well. It is not about chasing a perfect number. It is about creating a setup that supports your body, matches the trail, and changes when the trail changes.
Once you get the hang of it, adjusting hiking poles becomes second nature. You will spend less time wrestling your gear and more time enjoying the hike, which is, after all, the whole point of going outside in the first place.