Table of Contents >> Show >> Hide
- Why “where you inject” matters more than most people realize
- The 4 main insulin injection areas (and how to pick the sweet spot)
- The most important habit: rotate your injection sites (seriously)
- How to inject insulin with a syringe (clear, calm, step-by-step)
- How to use an insulin pen (the “tiny clicky device” version)
- Storage and comfort: small tweaks that make injections easier
- Sharps disposal: do it safely (and keep it away from kids and pets)
- Common problems and practical fixes
- Mini checklist you can screenshot
- Real-life experiences: of what people learn after they start
- Conclusion
(English guide) If insulin is part of your diabetes plan, knowing where to inject and how to do it correctly can make your blood sugar more predictableand make the whole routine way less intimidating.
Why “where you inject” matters more than most people realize
Insulin isn’t just about the dosethe injection site affects how quickly insulin gets absorbed. In general, insulin tends to absorb fastest from the abdomen, a bit slower from the upper arms, and slower still from the thighs and buttocks. That doesn’t mean one spot is “best” for everyoneit means consistency and rotation matter, and your care team may recommend certain areas depending on your insulin type and schedule.
Translation: your belly is not a bullseye, but it’s often the most predictable “on-ramp” to your bloodstream. The goal is steady absorption, not injection-site roulette.
The 4 main insulin injection areas (and how to pick the sweet spot)
Insulin injections are typically subcutaneous, meaning the insulin goes into the fatty layer just under your skinnot deep into muscle. The most commonly recommended areas are the abdomen, thighs, upper arms, and buttocks/hips.
1) Abdomen (belly)
Why people like it: It’s easy to reach, and absorption is often fast and consistent.
Aim for: The area between your ribs and your hip line, away from the centerline if that tends to be tender.
Avoid: Within about 2 inches of your belly button (no, it’s not a target), and avoid scar tissue or stretch marks if possible.
2) Thighs
Why people like it: Convenient when you’re seated; some people find it less nerve-wracking than the abdomen at first.
Aim for: The front/outer part of the upper thighthink “side-front pocket area,” not near the knee or groin.
Heads-up: If you’re about to do intense leg exercise (running, cycling), ask your clinician how activity might affect absorption for you.
3) Upper arms
Why people like it: Works well for many people, especially with help from a caregiver.
Aim for: The outer/back portion of the upper arm where there’s a bit of fatty tissue.
Tip: If you’re doing it solo, a mirror can helpthis is not the time for “freestyle accuracy.”
4) Buttocks/hips
Why people like it: Often comfortable and can be a good alternative when other sites need a break.
Aim for: The upper outer buttock/hip area (not near the center where sitting pressure is highest).
Quick rule: If the skin is bruised, hard, lumpy, scarred, irritated, or unusually tenderpick a different spot and tell your clinician if it keeps happening.
The most important habit: rotate your injection sites (seriously)
Using the same exact spot repeatedly can lead to lipohypertrophya buildup of fatty tissue that can feel like a lump or rubbery patch. Besides being annoying, it can make insulin absorb unpredictably, which can throw off blood sugar control.
A rotation system that’s easy to actually follow
- Pick a main area for a period of time (like the abdomen) so absorption stays consistent.
- Rotate within that area instead of bouncing randomly all over your body.
- Use a simple map: divide the abdomen into four “quadrants” (upper-left, upper-right, lower-left, lower-right). Use one quadrant for a week, then move to the next the following week.
- Space your injections aparta good practical goal is at least a finger-width from the previous spot.
Example rotation plan (abdomen)
Week 1: upper-left quadrant (different spot each time) → Week 2: upper-right → Week 3: lower-right → Week 4: lower-left → repeat. If you inject multiple times per day, rotate within that week’s quadrant each time.
Pro tip: Many people use a tiny note in their phone like “Tue AM: upper-right” so they don’t accidentally “favor” one side forever.
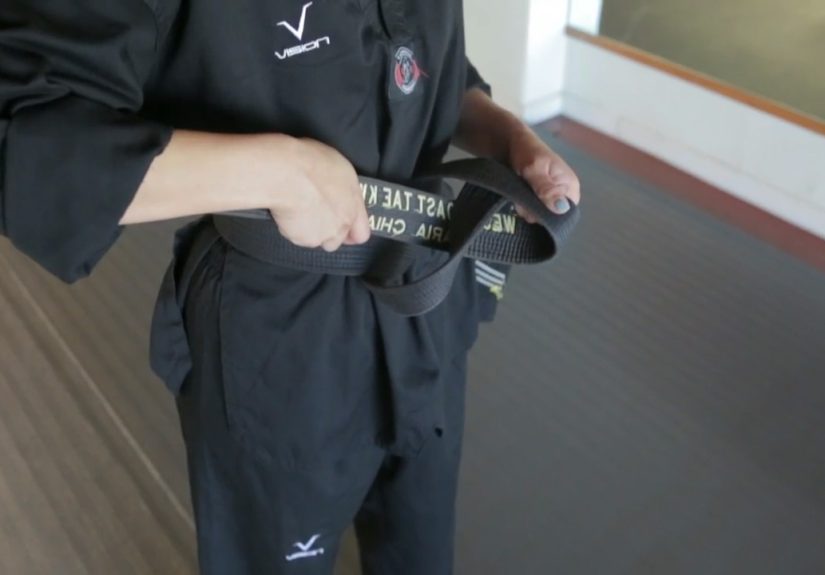
How to inject insulin with a syringe (clear, calm, step-by-step)
This is general educationyour care team’s instructions and your specific insulin’s labeling always win in a tie.
Before you start
- Wash your hands.
- Check the insulin label (right insulin, not expired, looks normal).
- Use a new needle and syringe. Never share injection equipment.
- Pick your site and make sure the skin looks healthy.
The injection
- Clean the skin if you’ve been instructed to (often with an alcohol swab). If you use alcohol, let it dry first to reduce stinging.
- Pinch up a fold of skin (especially if you’re lean) to help keep the injection in the fatty layer.
- Insert the needle into the skin at a 45° angle if recommended, or 90° if your clinician has told you that’s appropriate for your body type and needle length.
- Inject slowly and steadily until all insulin is delivered.
- Pause briefly with the needle in place (commonly a few seconds) to reduce leakage, then pull the needle out straight.
- Apply gentle pressure if there’s a tiny spot of blooddon’t rub hard.
After the injection
- Dispose of the syringe/needle immediately in a proper sharps container.
- Note the site you used so rotation stays easy.
How to use an insulin pen (the “tiny clicky device” version)
Insulin pens are popular because they’re convenient and can reduce some of the fiddly steps. They still require good technique.
Pen basics that prevent mistakes
- Confirm the right pen (many people have more than one type).
- Attach a new pen needle each time. Don’t share pens or needles.
- Prime the pen as instructed to remove air and confirm insulin flow.
Pen injection steps
- Clean the injection site (if instructed) and let it dry.
- Insert the needle straight in at 90° (common recommendation for pen needles).
- Press the injection button until the dose window returns to zero (or per your pen’s instructions).
- Hold the pen in place for about 6–10 seconds to help ensure the full dose is delivered.
- Remove the needle, then remove the pen needle right away and discard it safely.
Why remove the needle after? Leaving a needle on a pen can allow air in or insulin out, which can affect dosing accuracy over time.
Storage and comfort: small tweaks that make injections easier
Cold insulin can sting
Many people notice that injecting insulin straight from the refrigerator can feel more painful. Clinicians often suggest keeping the insulin you’re currently using at room temperature (within the product’s allowed timeframe and storage rules) to reduce discomfortalways follow the instructions for your specific insulin.
Check your insulin’s rules (they vary)
Some insulins can be kept at room temperature for a set number of days once in use, while unopened insulin is generally stored refrigerated. Heat and direct sunlight are not your insulin’s friendsthink “cool, calm, and not on a windowsill.”
Sharps disposal: do it safely (and keep it away from kids and pets)
Used needles and syringes should go into a puncture-resistant sharps container immediately. FDA-cleared sharps containers are widely available, and your clinic or pharmacy can tell you local disposal options (drop-off sites, hazardous waste collection, etc.).
- Don’t toss loose needles into household trash or recycling.
- Don’t recap, bend, or break needles before disposal unless your clinician specifically taught you a safe method for your situation.
- Do keep the container sealed and out of reach.
Common problems and practical fixes
“It stings when I inject.”
- Let alcohol dry fully before injecting (if you use alcohol).
- Make sure you’re not injecting cold insulin unless your instructions require it.
- Try a different spot within the same general area (rotation matters).
“I see a drop of insulin on my skin afterward.”
- With pens, holding the needle in place for the recommended seconds can reduce leakage.
- With syringes, a brief pause after injecting (before withdrawing) may help.
- If leakage happens often, ask your clinician to watch your techniquesmall adjustments can make a big difference.
“I have bruises or bumps.”
- Rotate sites systematically and avoid injecting into bruised or lumpy tissue.
- Use a new needle each time; dull needles can irritate tissue more.
- Bring it up at your next visityour clinician can check for lipohypertrophy and help refine your rotation plan.
Mini checklist you can screenshot
- Right insulin? Check label and expiration.
- Right site? Healthy skin, not too close to belly button, not scarred/lumpy.
- Rotate? New spot, finger-width away from last.
- Inject correctly? Subcutaneous, steady, hold briefly.
- Dispose safely? Sharps container immediately.
Real-life experiences: of what people learn after they start
The first week of insulin injections is often a mix of “I’ve got this” and “Why does my hand suddenly forget how fingers work?” A lot of people say the hardest part isn’t the needleit’s the anticipation. The brain is excellent at creating a full-length disaster movie out of a two-second poke. What helps most is building a routine that makes injections feel boring (boring is the goal).
Many beginners start by choosing one main areaoften the abdomenbecause it’s easier to see and reach. And then they learn the first unofficial rule of insulin: your belly button is not a dartboard. Staying a couple of inches away from it becomes second nature fast, usually right after someone tries “too close” once and decides they prefer peace.
Rotation is where real life gets real. In your head, rotating sounds simple. In reality, humans are creatures of habit, and your hand may keep drifting back to the same comfy square inch like it pays rent there. People who succeed long-term often use a “mapping trick”: they mentally divide an area into sections (quadrants for the abdomen) and rotate on a schedule. Some keep a note on their phonenothing fancy, just “Mon AM: upper-left” and so on. Others place a tiny dot with a washable marker near (not on) the last spot as a reminder. The point isn’t perfection; it’s preventing the “oops, same spot again” pattern that can lead to lumps and unpredictable absorption.
Comfort tricks tend to come from trial and error. People frequently notice that cold insulin can sting more, so they follow their medication’s storage rules and keep the in-use insulin at room temperature when allowed. Another “learned the hard way” lesson: if you use alcohol swabs, letting the alcohol dry fully can reduce that sharp burn. It’s a small pause, but it can make injections feel noticeably smoother.
Then there’s the confidence curve. Day one feels awkward. Day three feels manageable. By day ten, many people report something surprising: injections become a quick pit stop, not a major event. The routine starts to feel like brushing your teethstill important, but not dramatic. And for teens and adults alike, a little humor helps. Some people name their injection rotation plan (yes, really). “Lefty Week,” “Righty Week,” “Thigh Thursday.” If it makes you smile and keeps you consistent, it counts as medical-adjacent excellence.
Finally, people who feel most in control usually do one extra thing: they bring questions back to their clinician early. A quick technique check can prevent months of annoyance. If insulin is part of your life, you deserve it to work welland to feel doable on your busiest, most chaotic day.