Table of Contents >> Show >> Hide
- Why Tying Your Taekwondo Belt Correctly Matters
- Before You Start: Set Yourself Up for a Clean Knot
- How to Tie a Taekwondo Belt Like a Pro: Step-by-Step
- An Easy Belt-Tying Method for Kids and Beginners
- Common Mistakes That Make Your Belt Look Sloppy
- How to Keep Your Taekwondo Belt From Coming Untied
- Taekwondo Belt Etiquette You Should Know
- How Long Should the Belt Ends Hang?
- What If Your School Teaches a Different Method?
- Quick Belt-Tying Checklist
- Real-Life Experiences: What Students Learn After Tying a Taekwondo Belt a Hundred Times
- Conclusion
Every Taekwondo student remembers the moment: uniform on, shoes off, excitement high, and then… the belt turns into a rebellious fabric snake. One end is too long, the knot looks like a potato, and somehow the whole thing is drifting toward your rib cage like it has its own black belt in chaos. The good news? Learning how to tie a Taekwondo belt like a pro is not magic. It is a simple skill built on a few repeatable steps, a little patience, and just enough stubbornness to keep trying when your knot comes out looking like it lost a fight with a bedsheet.
In Taekwondo, your belt is more than a way to keep your dobok closed. It represents rank, progress, discipline, and respect for the art. A neatly tied belt signals that you are ready to train, focused, and paying attention to the details. And in martial arts, details matter. A lot. The same mindset that helps you tie your belt cleanly can also help you sharpen your stance, clean up your kicks, and remember not to wobble like a shopping cart on one wheel during balance drills.
This guide will walk you through exactly how to tie a Taekwondo belt, what mistakes to avoid, why etiquette matters, and how to make your knot stay put through class. By the end, you should be able to tie your belt quickly, neatly, and with enough confidence to stop secretly hoping an instructor will fix it for you.
Why Tying Your Taekwondo Belt Correctly Matters
At first glance, tying a belt can seem like a tiny detail. But in Taekwondo, small habits often reflect larger values. A well-tied belt sits in the front, lies flat around the waist, and hangs evenly on both sides. That clean appearance is part of presenting yourself with discipline and respect.
There is also a practical reason. A sloppy knot loosens during kicks, forms, or sparring drills. That means you spend half the class retying your belt instead of training. A secure knot helps you move comfortably, keeps your uniform neat, and saves you from the classic mid-class panic of realizing your belt is sliding off while everyone else looks composed.
Many schools also teach that caring for your belt is part of caring for your training. In other words, tying it properly is not just a “looks nice” bonus. It is part of the routine of showing up ready to learn.
Before You Start: Set Yourself Up for a Clean Knot
Before you actually tie anything, do two quick checks.
1. Make sure your dobok is straight
Your jacket should sit flat and closed properly before the belt goes on. If the uniform is twisted, the belt will usually follow its bad example.
2. Find the center of the belt
This is the step many beginners skip, and then they wonder why one end reaches their knee while the other barely says hello. Fold the belt in half or visually estimate the midpoint before wrapping it around your waist. Starting from the center gives you the best chance of ending with even belt ends.
3. Smooth out twists
A belt should wrap flat around your waist. If it twists in the back, the knot can feel bulky, look messy, and loosen more easily. Think sleek and streamlined, not “crumpled scarf after a windy bus ride.”
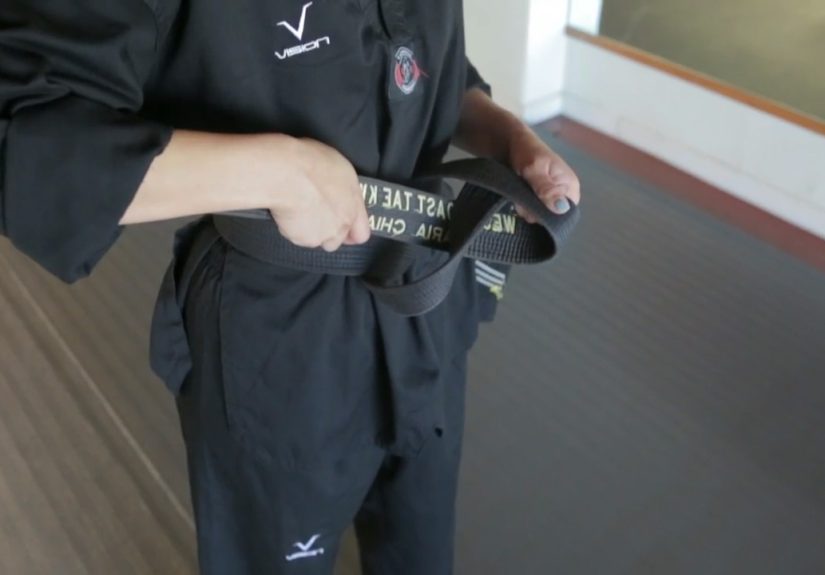
How to Tie a Taekwondo Belt Like a Pro: Step-by-Step
There are different methods depending on your school, but this classic method works well for most students and produces a neat, balanced result.
Step 1: Place the center of the belt just below your navel
Hold the middle of the belt at the front of your waist, just below your belly button. Keep both sides even. This position helps center the knot and gives the belt a tidy look once finished.
Step 2: Wrap both ends around your waist
Bring both ends around your back and back to the front. Keep the belt flat the whole time. The goal is for the back to look like one smooth layer rather than a tangled road map. Depending on your belt length and school method, the belt may wrap once or overlap in a way that still looks like a single clean band from behind.
Step 3: Cross one end over the other in front
Once both ends are in front again, cross them at your navel. Adjust them so the lengths are even. This is the moment to fix any imbalance before you lock the knot into place and regret all your life choices.
Step 4: Tuck the top end under all layers
Take the top end and feed it up underneath all the layers of the belt at your waist. Pull it through. This tightens the belt against your uniform and helps anchor the knot. Make sure the belt still lies flat and snug, but not so tight that breathing becomes an advanced technique.
Step 5: Form the final knot
Now cross the two ends again. Take the top end, loop it through, and pull both ends outward at the same time to tighten. Pulling sideways instead of upward helps the knot sit flat and look cleaner.
Step 6: Check the finish
A properly tied belt should have:
- a centered knot in the front
- two ends hanging at roughly equal length
- a flat wrap around the waist
- a secure knot that does not immediately loosen when you move
If one end is much longer than the other, untie it and adjust. That may feel annoying, but it is completely normal. Nobody becomes a belt-tying wizard on the first try.
An Easy Belt-Tying Method for Kids and Beginners
If the traditional method feels awkward at first, try a simpler approach.
Start from one end instead of the center
Some instructors teach kids by placing one end of the belt at the back or side, wrapping the long side around the waist, then bringing both ends to the front to tie. This can be easier for young students because it reduces fumbling during the wrap.
The downside is that it can take a little more adjustment to get even ends. The upside is that it often feels less confusing for beginners with shorter attention spans, smaller waists, or belts that seem determined to behave like jump ropes.
If you are teaching a child, focus less on perfect elegance at first and more on these basics:
- the knot should be in front
- the belt should be snug
- the ends should be close to even
- the child should begin learning to tie it independently
Common Mistakes That Make Your Belt Look Sloppy
Twisting the belt in the back
This is one of the most common problems. A twist in the back often leads to a bulky front knot. Keep the belt flat from the moment you wrap it.
Starting off-center
If you do not begin at the middle, the finished ends will likely be uneven. Save yourself the trouble and find the center first.
Tying the knot too loosely
If your belt falls apart after two front kicks and a dramatic pivot, the knot is probably too loose. Tighten firmly by pulling both ends outward.
Making the knot too high or too low
The belt should sit around the waist area just below the navel, not halfway up your torso and not down near your hips like low-rise martial arts fashion from an alternate universe.
Ignoring school-specific rules
Some schools have specific preferences for stripe placement, knot style, or where embroidered names should face. Always follow your dojang’s instruction, even if another tutorial teaches a slightly different version.
How to Keep Your Taekwondo Belt From Coming Untied
If your knot looks fine but still loosens during class, try these fixes:
- Make sure the belt is flat before you tie it
- Pull the first tuck firmly under all waist layers
- Use a clean square-style finishing knot
- Pull the ends sideways to tighten the final knot
- Check that the belt is snug before class begins
Also, remember that newer belts can feel stiffer and may loosen more easily until they soften with use. That does not mean you are doing everything wrong. Sometimes the belt is just new and full of attitude.
Taekwondo Belt Etiquette You Should Know
Learning how to tie your belt is one thing. Learning how to treat it is another. Many schools teach basic belt etiquette as part of martial arts respect and discipline.
Keep your belt off the floor
In many dojangs, the belt is treated as a symbol of your progress. Tossing it on the ground is considered careless or disrespectful.
Keep your dobok clean
A neat uniform and a neatly tied belt go together. Looking sharp is not about vanity. It reflects readiness and respect for training.
Turn away if adjusting your belt during class
If you need to fix your uniform or retie your belt during class, many schools teach students to turn away from the instructor or the front of the dojang first. It is a small courtesy, but Taekwondo is built on small courtesies.
Follow your school’s stripe and rank rules
Not every school uses the exact same color order, stripe system, or belt details. Rank systems can vary, so your dojang’s expectations matter more than a random tutorial floating around the internet.
How Long Should the Belt Ends Hang?
In general, the ends should hang evenly and not be wildly long or comically short. The exact preferred length can vary by organization and school, but the visual goal is balance. If the ends look neat and symmetrical, you are usually in good shape.
If one end is much longer, do not try to pretend it is a “style choice.” Retie it. Clean symmetry gives the whole uniform a more polished look.
What If Your School Teaches a Different Method?
That is completely normal. Taekwondo schools often teach slightly different ways to tie the belt. One school may start from the center. Another may start from one end. One may emphasize a specific stripe position. Another may care more about the flat back and even ends than the exact sequence used to get there.
The important thing is the finished result: centered knot, even ends, flat wrap, secure tie, and proper etiquette. If your instructor shows you a method that differs from this guide, follow your instructor. In martial arts, consistency within your school matters more than internet belt diplomacy.
Quick Belt-Tying Checklist
- Dobok straight and flat
- Belt centered before wrapping
- No twists in the back
- Knot centered in front
- Ends even
- Knot snug and secure
- School-specific stripe placement followed
Real-Life Experiences: What Students Learn After Tying a Taekwondo Belt a Hundred Times
There is a funny gap between learning how to tie a Taekwondo belt in theory and actually tying one when you are late for class, your hands are sweaty, and your instructor is already calling everyone to line up. On paper, the process sounds easy: find the center, wrap, tuck, knot, done. In real life, the first few weeks can feel like a mini side quest before training even starts.
Many beginners go through the same pattern. On day one, they watch the demonstration and think, “That seems simple enough.” On day two, they create a knot that somehow has three lumps and one end longer than a scarf. On day three, they try to fix it quickly and make it worse. Eventually, though, something clicks. Their hands start remembering the sequence. The belt stops feeling like a confusing piece of cloth and starts feeling like part of the routine.
Parents of young students often have their own belt-tying journey too. At first, they are the emergency support team, crouched near the edge of class trying to rescue a knot before warm-ups begin. Then they realize that kids usually improve faster when they practice the process themselves. It may not be pretty right away, but that awkward independence is part of the learning. A child who can tie their own belt starts class with a small win already in the bank.
Intermediate students usually notice something else: the cleaner their belt gets, the cleaner their mindset gets. That may sound dramatic for a strip of fabric, but there is truth in it. Tying your belt carefully becomes a cue that training has started. It is a switch from outside-life mode into focus mode. You are no longer checking messages, hunting for snacks, or wondering where your other sock went. You are preparing to move, listen, and improve.
Advanced students often become surprisingly picky about belt appearance. Not in a snobby way, but in a detail-oriented way. They know the difference between a knot that will survive class and one that will surrender during roundhouse drills. They can often spot a twist in the back just by feel. They know when a knot is centered without staring at it for ten seconds like it is a geometry puzzle.
And then there is the confidence factor. A neat belt does not make someone a great martial artist by itself, of course. But it does change how a student carries themselves. They step onto the floor looking prepared. They bow in with less hesitation. They spend less time fussing with their uniform and more time concentrating on techniques. That calm, put-together feeling matters more than people think.
So if your belt still looks a little wonky now and then, do not panic. Every strong student was once the person secretly retying their belt for the third time before class. The trick is not perfection on day one. The trick is repetition. Tie it, retie it, smooth it, adjust it, and keep going. One day you will finish the knot without even thinking about it. That is when you know the beginner chaos is finally losing the fight.
Conclusion
Learning how to tie a Taekwondo belt like a pro is one of those small skills that quietly says a lot about your training. It shows discipline, attention to detail, and respect for the dojang. More importantly, it makes class easier. A secure, centered knot lets you focus on kicks, forms, and sparring instead of wrestling fabric every ten minutes.
The basic formula is simple: start centered, wrap flat, tighten carefully, and finish with even ends. Add in good belt etiquette and a little repetition, and you will go from “Why does this look crooked?” to tying your belt smoothly without needing a rescue mission. It may seem minor, but in Taekwondo, mastering the basics is exactly how you start looking like a pro.