Table of Contents >> Show >> Hide
- What Is Kindling, and Why Does It Matter?
- Before You Start: Fire Safety Comes First
- How to Start a Fire With Different Types of Kindling: 7 Steps
- Step 1: Choose a Safe and Legal Fire Location
- Step 2: Gather Tinder, Kindling, and Fuel Wood Separately
- Step 3: Match the Kindling Type to the Setting
- Step 4: Build a Loose Fire Lay With Airflow
- Step 5: Have a Responsible Adult Light the Tinder or Approved Starter
- Step 6: Add Larger Wood Gradually
- Step 7: Monitor the Fire and Extinguish It Completely
- Best Kindling Types and When to Use Them
- Common Mistakes That Make Fires Smoky or Unsafe
- Indoor Fireplace vs. Outdoor Campfire: What Changes?
- Experience-Based Tips for Starting Fires With Kindling
- Conclusion
- SEO Tags
Starting a fire sounds simple until you are staring at a sad little pile of smoking sticks that looks less like a cozy blaze and more like a campfire having an emotional crisis. The truth is that a good fire is not about throwing a giant log into a pit and hoping for the best. It is about using the right kindling, giving the flame enough air, and keeping safety at the center from the first spark to the final ash.
This guide explains how to start a fire with different types of kindling in a responsible, practical, and safety-first way. It is written for legal fireplaces, backyard fire pits, and established campsites where fires are permitted. A responsible adult should always supervise fire building, and local rules, burn bans, weather conditions, and property guidelines should come before anyone’s campfire dreams.
What Is Kindling, and Why Does It Matter?
Kindling is the middle child of fire building. It sits between tinder and larger fuel wood. Tinder catches quickly but burns out fast. Large logs burn longer but usually need a stronger flame before they ignite. Kindling bridges that gap by catching from the tinder and creating enough heat to light larger pieces of wood.
Think of fire building as a tiny promotion ladder. Tinder is the intern, kindling is the hardworking manager, and full-size firewood is the executive who refuses to get involved until everyone else has done the hard work. If you skip kindling and go straight from a match to a thick log, you usually get smoke, frustration, and a strong desire to pretend you meant to make a “rustic fog machine.”
Common Types of Kindling
Different types of kindling work better in different settings. Dry twigs are common at campsites, split softwood pieces work well in fireplaces, and commercial natural fire starters can be useful when conditions are damp. The key word is dry. Wet or green wood wastes heat, creates more smoke, and can contribute to creosote buildup in chimneys.
Good kindling options include small dry sticks, thin split wood, cedar shavings, pine slivers, dry bark strips from dead and downed wood, untreated wood scraps, and natural fire starters designed for fireplaces or campfires. Materials to avoid include gasoline, lighter fluid, kerosene, plastic, trash, treated wood, painted wood, glossy paper, and anything that releases toxic fumes or burns unpredictably.
Before You Start: Fire Safety Comes First
A fire should only be started where it is legal, safe, and appropriate. That means using a working fireplace, a stable outdoor fire pit, or an established campfire ring. Do not start a fire during high winds, drought conditions, local burn bans, or in places with dry grass, low branches, tents, furniture, or other flammable materials nearby.
Keep water, a shovel, or an appropriate fire extinguisher nearby before anything is lit. Never leave a fire unattended, even if it looks small and polite. Fires are not houseplants; they do not quietly mind their business when ignored. Children, pets, loose clothing, and extra firewood should stay well away from the flame area.
How to Start a Fire With Different Types of Kindling: 7 Steps
Step 1: Choose a Safe and Legal Fire Location
Start by confirming that fires are allowed where you are. At a campground, check posted rules or ask the host. At home, use only a properly maintained fireplace, wood stove, or outdoor fire pit designed for burning wood. If there is a burn ban, strong wind, extremely dry vegetation, or smoke restriction in your area, skip the fire.
For outdoor fires, use an existing fire ring or fire pit whenever possible. Clear the surrounding area of dry leaves, grass, paper, and other flammable clutter. For indoor fireplaces, make sure the chimney has been inspected, the damper is open, and a fireplace screen is in place to help contain sparks.
Step 2: Gather Tinder, Kindling, and Fuel Wood Separately
A reliable fire needs three sizes of material: tinder, kindling, and fuel wood. Tinder is the smallest material and catches first. Examples include dry grass, dry pine needles, fine wood shavings, or a small amount of plain, approved starter material. Kindling is slightly larger, such as pencil-thin sticks or thin split wood. Fuel wood is the larger dry wood added only after the flame is established.
Sort these materials before lighting anything. This prevents the classic beginner mistake of lighting a tiny flame and then running around looking for sticks while the flame gives up and retires. Keep your extra wood upwind and away from the fire so sparks cannot reach the pile.
Step 3: Match the Kindling Type to the Setting
In a fireplace, thin split pieces of dry hardwood or softwood kindling are usually easier to control than random outdoor twigs. In a backyard fire pit, small dry sticks and split kindling work well. At an established campsite, use dead and downed wood only where gathering is allowed, and choose pieces that are small enough to break by hand.
Softwood kindling, such as pine or cedar, usually catches quickly, which makes it useful at the beginning. Hardwood kindling may take slightly longer to catch but can create a steadier heat. Dry bark, wood curls, and shavings can help when conditions are cool or slightly damp, but they should still come from safe, untreated wood. Avoid collecting live branches; they are usually too wet to burn well and damaging to the environment.
Step 4: Build a Loose Fire Lay With Airflow
Fire needs heat, fuel, and oxygen. Many beginner fires fail because the materials are packed too tightly. A dense pile of sticks can smother a small flame before it has a chance to grow. Arrange tinder in the center, then place kindling loosely above or around it so air can move through the structure.
Common fire lays include a small teepee shape, a lean-to, or a simple crisscross stack. The exact shape matters less than the spacing. Leave small gaps between pieces. The flame should be able to reach the kindling without being crushed under a log the size of a sleepy bear.
Step 5: Have a Responsible Adult Light the Tinder or Approved Starter
The ignition step should be handled by a responsible adult or under close adult supervision. Use a match, lighter, or fireplace-approved starter according to product directions. Never use gasoline, lighter fluid, kerosene, aerosol sprays, or other flammable liquids. They can flare up suddenly, spread fire outside the intended area, and cause serious injury.
Once the tinder catches, allow the small flame to work into the kindling. Do not rush to add large logs. At this stage, patience is more useful than enthusiasm. A small fire that grows gradually is safer and more dependable than a smoky pile overloaded with fuel.
Step 6: Add Larger Wood Gradually
When the kindling is burning steadily, add small fuel wood first. Then add larger pieces only after the fire is stable. Place wood gently so sparks do not fly and the fire structure does not collapse. Keep the fire modest. A small, controlled fire provides warmth and atmosphere without turning the evening into a neighborhood emergency drill.
In fireplaces and wood stoves, use dry, seasoned wood. Seasoned wood generally burns hotter, cleaner, and with less smoke than green or wet wood. Outdoors, keep the fire at a size that matches the fire ring and the purpose. You do not need a bonfire to toast a marshmallow. The marshmallow is small. It has no plans to fight back.
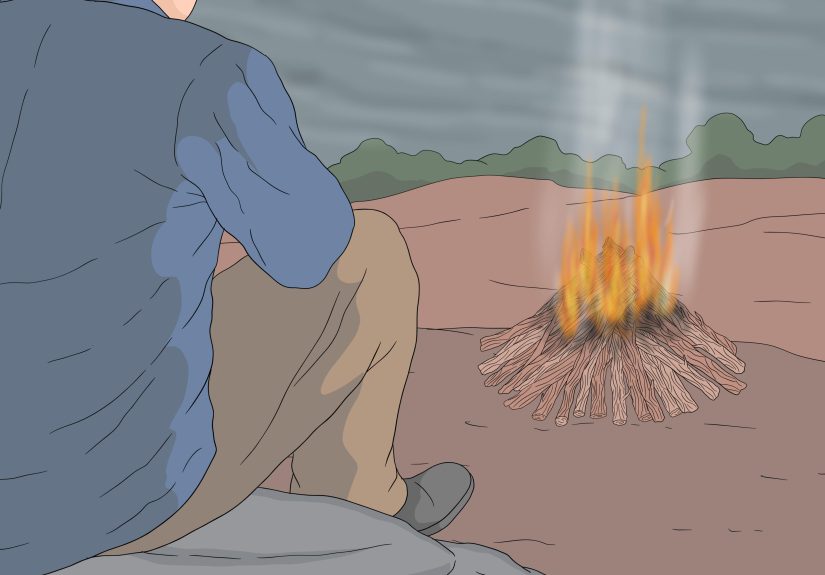
Step 7: Monitor the Fire and Extinguish It Completely
A fire is not finished when the flames look low. Embers can stay hot long after the visible flame disappears. Stay with the fire until it is fully out. For campfires and outdoor fire pits, use plenty of water, stir the ashes and embers, add more water, and check that everything is cool. If it is too hot to touch safely from a distance, it is too hot to leave.
For indoor fireplaces, let ashes cool completely before disposal. Place ashes in a metal container with a lid, and keep that container outside and away from buildings or anything combustible. Never place warm ashes in cardboard boxes, plastic bins, paper bags, or trash cans.
Best Kindling Types and When to Use Them
Dry Twigs
Dry twigs are classic campfire kindling. They are easy to find in wooded areas where gathering is permitted, and they catch quickly when properly dry. Choose dead and downed twigs, not live branches. If the twig bends instead of snapping, it probably contains too much moisture.
Split Softwood Kindling
Thin pieces of split pine, fir, or cedar are popular because they light easily. They are especially useful for fireplaces and backyard fire pits. Softwood kindling should be dry and used in small amounts to help start the fire, not to create an oversized blaze.
Hardwood Slivers
Oak, maple, hickory, and other hardwoods can be split into small slivers for kindling. Hardwood kindling may not catch as fast as softwood, but it produces steady heat once it is burning. It is a good choice when you want a cleaner, longer-lasting fire foundation.
Dry Bark and Wood Shavings
Dry bark strips and wood shavings can help a small flame spread into larger kindling. They are useful when the main sticks are slightly thick or when the air is cool. Use only natural, untreated wood. Painted, stained, glued, or chemically treated wood should never be burned.
Natural Commercial Fire Starters
Natural fire starters can be convenient, especially for fireplaces and damp-weather campfires. Look for products designed specifically for wood fires and follow the package directions. Avoid improvised starters made from unsafe chemicals, plastics, or flammable liquids.
Common Mistakes That Make Fires Smoky or Unsafe
The first common mistake is using wet wood. Wet wood turns your fire into a smoke machine and wastes heat evaporating moisture. The second mistake is skipping kindling and expecting a tiny flame to ignite a large log. The third mistake is smothering the flame with too much material too soon.
Another mistake is building a fire too large. Bigger is not always better. A smaller, hotter, well-managed fire is usually safer and more useful than a large, smoky one. Finally, never treat flammable liquid as a shortcut. It is not a shortcut; it is a bad idea wearing a gasoline-scented hat.
Indoor Fireplace vs. Outdoor Campfire: What Changes?
Indoor fireplaces require extra attention to ventilation, chimney condition, spark screens, and ash disposal. Use seasoned firewood and avoid burning trash, cardboard, glossy paper, or treated wood. Make sure anything that can burn is kept well away from the fireplace.
Outdoor fires require attention to weather, wind, ground conditions, and local rules. Use existing fire rings where available, keep fires small, and fully extinguish every ember before leaving. A campfire is part of the outdoor experience, but it should not leave a permanent scar on the land.
Experience-Based Tips for Starting Fires With Kindling
After you have built a few fires in legal, controlled settings, you start noticing that the best fire builders are rarely the loudest people in the group. They are the ones quietly sorting sticks by size while everyone else debates whether the big log should “probably go on now.” It should not. The big log is almost always too early to the party.
One practical experience is that preparation matters more than the actual lighting. A fire that has a neat pile of tinder, a handful of pencil-thin kindling, a second layer of thumb-thick pieces, and dry fuel wood nearby usually starts smoothly. A fire built from one damp napkin, two heroic sticks, and a giant log usually becomes a smoke festival. The difference is not luck; it is staging.
Another useful lesson is that dry kindling sounds different. When dry sticks snap cleanly, they are telling you they are ready to work. When they bend like noodles, they are not kindling yet; they are future smoke. In damp weather, split pieces of wood can expose a drier interior, which is often more useful than trying to burn the wet outer surface. This is why a small hatchet or pre-split kindling can make fireplace use easier, though tools should only be handled safely by responsible adults.
Airflow is the invisible ingredient beginners often forget. People love to pile materials tightly because it looks organized, but fire is not impressed by neatness alone. Flames need oxygen. A loose teepee or crisscross shape lets heat rise and air move. When the flame begins to strengthen, you can add slightly larger pieces without collapsing the whole structure. Treat the early flame like a tiny camp chef: give it space, give it ingredients in the right order, and do not dump the entire pantry on its head.
In a home fireplace, experience teaches another lesson: the chimney and wood quality matter. Even a well-built fire can smoke if the damper is closed, the chimney is dirty, or the wood is too wet. Seasoned wood is worth the effort because it burns cleaner and produces more usable heat. If your fireplace keeps smoking into the room, do not keep experimenting like a sitcom character. Stop using it and have the setup checked by a qualified professional.
Outdoors, the biggest experience-based rule is to respect conditions. A calm evening in a designated fire ring is very different from a windy afternoon surrounded by dry leaves. Wind can push sparks farther than expected, and dry vegetation can ignite quickly. The smartest fire is sometimes no fire at all. A camp stove, warm jacket, or lantern may not have the same storybook glow, but they also do not create an avoidable emergency.
Finally, the best fire builders are also the best fire extinguishers. They do not wander away when the flames shrink. They drown, stir, check, and wait until everything is truly cold. That final step is not glamorous, but it is the difference between a cozy memory and a preventable problem. A good fire should leave behind warmth, not worry.
Conclusion
Learning how to start a fire with different types of kindling is really learning how to manage heat, fuel, and airflow responsibly. Dry tinder starts the process, kindling builds the heat, and seasoned fuel wood keeps the fire going. Whether you are using a fireplace, backyard fire pit, or established campsite, the safest fire is legal, small, supervised, and completely extinguished before anyone leaves.
The secret is not drama. It is patience. Choose dry materials, build loosely, add wood gradually, avoid dangerous shortcuts, and respect local conditions. Do that, and your fire has a much better chance of becoming cozy instead of smoky, useful instead of risky, and memorable for all the right reasons.