Table of Contents >> Show >> Hide
- What You Need Before You Start
- Why Bike Tubes Fail in the First Place
- How to Replace a Bike Tube Step by Step
- Step 1: Move to a safe workspace
- Step 2: Remove the wheel
- Step 3: Let all the air out
- Step 4: Unseat one side of the tire
- Step 5: Remove the old tube
- Step 6: Find the cause of the flat
- Step 7: Add a little air to the new tube
- Step 8: Insert the valve and tuck in the tube
- Step 9: Reseat the tire bead
- Step 10: Check for pinches before inflating
- Step 11: Inflate slowly and watch the bead line
- Step 12: Reinstall the wheel and test the bike
- Common Mistakes to Avoid
- Roadside Repair vs. At-Home Repair
- Special Notes for Different Bikes
- How to Prevent Your Next Flat
- Experience and Lessons Learned From Replacing Bike Tubes
- Conclusion
A flat tire has a special talent for showing up when you are far from home, low on snacks, and feeling emotionally attached to your afternoon ride. The good news is that replacing a bike tube is not complicated once you know the rhythm. It is one of those cycling skills that feels intimidating for about ten minutes, then makes you feel like a roadside wizard for the rest of your life.
Whether you ride a road bike, mountain bike, hybrid, commuter, or e-bike, the basic process is similar: remove the wheel, get one side of the tire off the rim, pull out the damaged tube, inspect everything like a detective in bike shorts, install a fresh tube, and inflate carefully. The details matter, though. A rushed tube swap can lead to a second flat five minutes later, which is the cycling version of a bad sequel nobody asked for.
This guide walks you through exactly how to replace a bike tube, what tools you need, what mistakes to avoid, and how to make the whole job smoother the next time. By the end, you will know how to fix a flat without turning your ride into a dramatic documentary.
What You Need Before You Start
Before you begin, gather the right tools. Replacing a bike tube is much easier when you are not improvising with a house key, a spoon, or the dangerous confidence of someone who watched half a video once.
Basic tools and supplies
- A replacement inner tube in the correct size
- Matching valve type: Presta or Schrader
- Tire levers
- A bike pump or CO2 inflator
- Optional patch kit for the old tube
- Optional gloves or rag if you are working near a greasy chain
Check the tire sidewall for size information before buying a new tube. You will usually see something like 700x28c, 27.5×2.2, or 26×1.95. Buy a tube that matches that range. Also make sure the valve stem is long enough for your rim, especially on deeper road wheels.
Why Bike Tubes Fail in the First Place
It helps to know why you got a flat, because replacing the tube without finding the cause is like mopping the floor while the sink is still overflowing. Most flats come from one of four troublemakers: glass or thorns in the tire, pinch flats from hitting potholes, damaged rim tape, or old tubes that simply gave up on life.
If you skip inspection and leave the thorn in the tire, your shiny new tube may last about as long as a New Year’s resolution. That is why the inspection step is not optional. It is the difference between a proper repair and a temporary illusion.
How to Replace a Bike Tube Step by Step
Step 1: Move to a safe workspace
If you are on the road or trail, move off to a safe area first. Flip the bike carefully or place it in a repair stand if you have one. If you have a rear-wheel flat, shift into the smallest rear cog before removing the wheel. That makes wheel removal easier and keeps the derailleur drama to a minimum.
Step 2: Remove the wheel
Open the quick-release skewer or remove the thru-axle. If your bike has rim brakes, release the brake to create enough clearance for the tire. For a rear wheel, pull the derailleur back slightly as you guide the wheel down and out. Front wheels are usually simpler and less likely to test your patience.
Step 3: Let all the air out
Even if the tire looks flat, press the valve and release any remaining air. A fully deflated tire is much easier to remove. On a Presta valve, unscrew the small tip before pressing it. On a Schrader valve, press the center pin. This step sounds basic because it is basic, but forgetting it is a classic beginner move.
Step 4: Unseat one side of the tire
Start opposite the valve. Squeeze the tire beads toward the center channel of the rim to create slack. Insert a tire lever under the bead and hook it to a spoke if needed. Use a second lever a few inches away, then slide it around the rim or work the bead off section by section until one side of the tire is free.
Try not to use screwdrivers or random metal objects. They can damage the rim, slice the tube, or turn a small repair into a story you tell with embarrassment later.
Step 5: Remove the old tube
Pull the tube out, leaving the tire partly on the rim. Remove the valve from the rim hole last or first depending on what is easiest with your setup, but do it gently. If the tube is badly shredded, congratulations, at least the diagnosis was obvious.
Step 6: Find the cause of the flat
This is the most important step. Run your fingers carefully along the inside of the tire to check for glass, wire, thorns, or sharp debris. Visually inspect the tread and sidewalls. Also look at the rim strip or rim tape to make sure the spoke holes are properly covered. If the old tube has two small cuts side by side, that often points to a pinch flat caused by low pressure or a hard impact.
Be careful during this inspection. Sharp debris does not become polite just because you found it late.
Step 7: Add a little air to the new tube
Put just enough air into the new tube so it holds its round shape. This tiny puff of air helps prevent twists and reduces the chance of pinching the tube during installation. You do not want it firm, just slightly shaped. Think “sleepy balloon,” not “birthday party.”
Step 8: Insert the valve and tuck in the tube
Push the valve stem through the valve hole in the rim. Make sure it sits straight. Then tuck the rest of the tube evenly into the tire cavity all the way around the wheel. If your valve has a lock ring, thread it on loosely by hand, but do not crank it down hard. It only needs to keep the valve from slipping around.
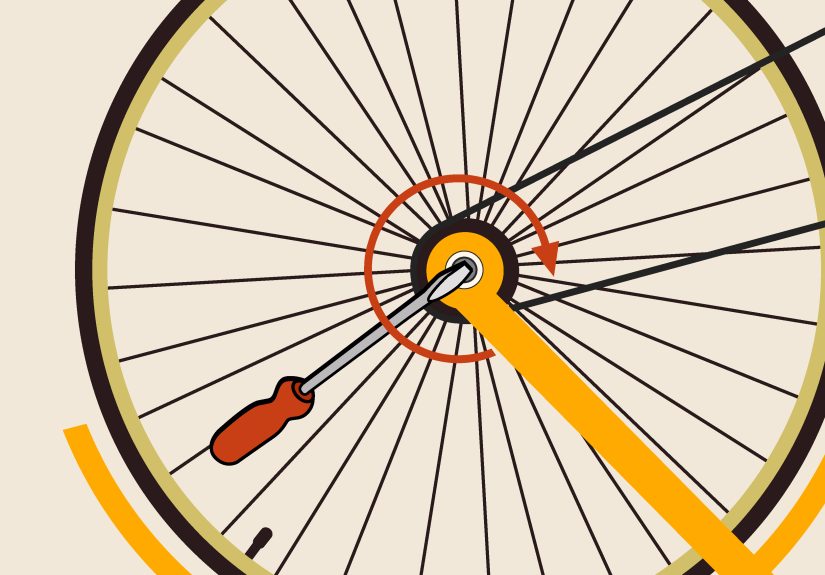
Step 9: Reseat the tire bead
Starting opposite the valve, work the tire bead back onto the rim using your hands. As you go, keep pushing the already-seated sections into the center channel of the rim. That gives you extra slack for the final tight section. Finish near the valve, and push the valve slightly upward to make sure the tube is not trapped beneath the bead there.
If the final section feels ridiculously tight, stop and check your technique before reaching for a lever. In many cases, the problem is not the tire; it is that the bead is not sitting in the center channel. Tire levers can help in a pinch, but use them very carefully to avoid pinching the fresh tube.
Step 10: Check for pinches before inflating
Go around both sides of the wheel and inspect the bead. You should not see any tube peeking out between the tire and rim. Squeeze the tire gently and look closely around the valve area, where many installation errors happen. This thirty-second check can save you from a brand-new flat and a fresh burst of creative vocabulary.
Step 11: Inflate slowly and watch the bead line
Inflate the tube gradually. As the tire takes shape, inspect the molded bead line on both sides of the tire to make sure it sits evenly relative to the rim. If one section looks uneven or bulges, stop, let some air out, and reseat that part before continuing. Once everything looks even, inflate to the recommended pressure range printed on the tire sidewall.
Road bikes usually need more pressure than mountain bikes, while gravel and hybrid bikes live somewhere in the middle. More is not always better. Proper pressure helps prevent flats, improves handling, and keeps your fillings where they belong.
Step 12: Reinstall the wheel and test the bike
Place the wheel back into the dropouts, secure the quick release or thru-axle properly, and reconnect the brake if needed. Spin the wheel to make sure it runs straight and does not rub the brake pads or frame. Give the bike a short test ride before heading off on a full-speed adventure. This is the moment when you either feel triumphant or realize you forgot to close the brake.
Common Mistakes to Avoid
Using the wrong tube size
A tube that is too small stretches too much. A tube that is too large bunches up. Neither option is a great recipe for reliability. Match the tube to your tire size and width range.
Ignoring the tire inspection
If you do not remove the thorn, shard, or wire that caused the first flat, the second flat is already warming up backstage.
Pinching the tube during installation
This usually happens when people rush the last bit of tire onto the rim or use levers too aggressively. Lightly inflating the tube first and keeping the bead in the rim’s center channel helps a lot.
Overtightening the valve lock ring
The lock ring is not a lug nut. Snug is fine. Too tight can stress the valve base or make future tube removal annoying.
Inflating without checking bead seating
A mis-seated tire can bulge, wobble, or even pop off in severe cases. Slow inflation and a quick visual check are worth every second.
Roadside Repair vs. At-Home Repair
On the road, your mission is simple: get rolling again safely. That usually means replacing the damaged tube with a spare as quickly as possible. At home, you have more time to inspect the tire thoroughly, patch the old tube if you want, and double-check tire pressure with less chaos and fewer mosquitoes.
If you commute or ride longer distances, carrying a small repair kit is smart. A spare tube, tire levers, mini pump or CO2 inflator, and patch kit do not weigh much, but they can save a ride. On deeper rims, make sure your spare tube has a valve stem long enough for the wheel. Tiny detail, huge mood swing if forgotten.
Special Notes for Different Bikes
Road bikes
Road tires are often tighter on the rim and run higher pressure, so careful bead seating matters even more. Deep-section wheels may require longer Presta valves or extenders.
Mountain bikes
Lower tire pressures improve traction, but running too low can increase pinch-flat risk if you are using tubes. Always inspect sidewalls after rough trail hits.
Hybrid and commuter bikes
These bikes are generally straightforward to work on, though fenders and racks can make wheel removal slightly more awkward. Patience helps.
E-bikes
E-bikes may have heavier wheels, motor cables, axle hardware, or specific removal steps. If you ride an e-bike, check your manufacturer’s wheel-removal instructions before you need them in a parking lot with fading daylight.
How to Prevent Your Next Flat
You cannot prevent every puncture, but you can stack the odds in your favor. Keep your tires inflated within the recommended range, inspect tread regularly for embedded debris, replace worn tires before they become paper-thin, and consider more puncture-resistant tires if flats are a recurring character in your life story.
Also, avoid the temptation to bunny-hop potholes with the confidence of a stunt rider if your actual skill set is “enthusiastic commuter.” Proper pressure, smoother line choices, and occasional tire checks go a long way.
Experience and Lessons Learned From Replacing Bike Tubes
The first time many riders replace a bike tube, the job feels way more technical than it really is. There is often a strange mix of urgency and confusion, especially if the flat happens during a ride. Your hands are dirty, the chain looks hostile, one tire lever disappears into the grass, and suddenly the humble inner tube feels like a highly specialized engineering component from a spacecraft. Then you do it once, maybe twice, and everything changes. The mystery fades. The confidence grows. By the third flat, you are less “Why is this happening to me?” and more “All right, tube, let’s settle this.”
One of the biggest lessons riders learn from experience is that patience beats force almost every time. When a tire feels impossible to remove or reinstall, the answer is usually not stronger hands or louder sighing. It is technique. Working the bead into the center channel of the rim creates slack. Lightly inflating the tube keeps it from twisting. Checking the tire carefully before installation prevents repeat flats. These are simple habits, but they transform the repair from a wrestling match into a manageable process.
Another common experience is discovering that not all flats are the same. A tiny thorn puncture is different from a pinch flat after smashing into a pothole. A slow leak from old rubber feels different from an instant blowout after running over sharp debris. Riders who pay attention start to recognize patterns. If you keep getting punctures in the same area, it may be a worn tire. If your replacement tubes keep failing near the spoke holes, damaged rim tape may be the real culprit. That kind of pattern recognition is what turns a beginner into a smarter bike owner.
There is also a mental side to learning tube replacement. Mechanical problems on a ride can feel frustrating because they interrupt momentum. But once you know how to replace a bike tube, a flat stops being a disaster and becomes a manageable delay. That shift matters. It makes riders more independent. It also makes longer rides feel less risky, because you know you can handle basic problems without calling for rescue like a stranded Victorian novelist.
Many cyclists also learn that carrying the right gear is half the battle. A spare tube that matches your tire, decent tire levers, and a reliable pump can turn a miserable roadside experience into a ten-minute stop. The opposite is also true. The wrong valve length, a cheap pump that barely works, or no spare at all can make a tiny puncture feel like a major life event. Experience tends to make people build better flat-repair kits, because inconvenience is a powerful teacher.
In the end, replacing a bike tube is one of those small practical skills that pays off over and over again. It saves money, reduces downtime, and gives you a stronger connection to your bike. More importantly, it gives you confidence. And confidence is useful, because the road is full of surprises, some of them scenic, and some of them shaped like broken glass.
Conclusion
Learning how to replace a bike tube is one of the best maintenance skills any rider can have. It is simple, practical, and incredibly useful when a ride goes sideways. The key is to slow down, inspect the tire carefully, install the new tube with a little air in it, and check bead seating before full inflation. Do that, and most flats go from trip-ending catastrophe to minor inconvenience.
Once you have done it a few times, the process becomes second nature. Your future self, standing on the shoulder of a road or next to a trailhead, will be very grateful.