Table of Contents >> Show >> Hide
- Why DIY Clay Mushrooms Work So Well in Whimsical Home Decor
- Choose the Best Clay for Quick DIY Mushrooms
- Supplies You Will Need
- Step-by-Step: How to Make Quick DIY Clay Mushrooms
- How to Paint DIY Clay Mushrooms So They Look Charming
- Easy Styling Ideas for Whimsical Home Decor
- Common Mistakes to Avoid
- Creative Variations to Try
- Experience Notes: What Making DIY Clay Mushrooms Actually Teaches You
- Final Thoughts
Some home decor is elegant. Some is modern. Some whispers, “I own matching storage baskets and probably fold fitted sheets for fun.” And then there is whimsical decor, which cheerfully says, “Yes, that is a tiny mushroom on my bookshelf, and no, I will not apologize.”
If you love interiors with cottagecore charm, fairy-garden energy, woodland warmth, or just a little playful personality, DIY clay mushrooms are one of the easiest ways to add that magic without turning your living room into a theme park gift shop. They are small, affordable, beginner-friendly, and surprisingly versatile. You can tuck them into plant shelves, style them on trays, add them to seasonal centerpieces, or group them in clusters for a soft storybook effect.
Better yet, these quick DIY clay mushrooms do not require a fine arts degree, a kiln, or the patience of a saint. With a few simple supplies, you can make charming little mushrooms in an afternoon and customize them to match your style, whether that means classic red-and-white toadstools, muted neutral mushrooms for a cozy shelf, or funky pastel fungi that look like they wandered in from a very stylish dream.
In this guide, you will learn how to create whimsical home decor with quick DIY clay mushrooms, how to choose the right clay, how to shape and paint them, how to avoid common beginner mistakes, and how to style them so they look intentional instead of like your craft drawer staged a rebellion.
Why DIY Clay Mushrooms Work So Well in Whimsical Home Decor
Mushrooms are having a very long moment in home decor, and honestly, they earned it. Their rounded shapes feel soft and friendly. Their woodland associations make rooms feel cozy and nostalgic. And unlike trendier objects that can start looking dated overnight, mushrooms can lean rustic, vintage, modern-folk, playful, minimalist, or even slightly magical depending on the colors and textures you choose.
That is what makes clay mushrooms such a smart DIY home decor project. They can be styled in all kinds of spaces: on a nursery shelf, beside a stack of books, inside a terrarium display, near candles on a mantel, or mixed into holiday decor when you want something that feels more enchanted forest than red-and-green retail explosion.
They also work because they are tiny sculptural objects. In decor terms, that means they add shape, texture, and personality without demanding an entire redesign. One mushroom says, “Cute.” A cluster of mushrooms says, “This home has character.” A mushroom next to moss, brass, and vintage books says, “A woodland aunt with impeccable taste lives here.”
Choose the Best Clay for Quick DIY Mushrooms
Air-Dry Clay
Air-dry clay is the easiest choice for beginners. It is simple to shape, does not require baking, and works beautifully for decorative home accents. This is a great option when you want a relaxed project with minimal equipment. It is also ideal for small mushrooms that will live indoors on shelves, trays, or tabletops.
The trade-off is that air-dry clay needs time to cure, so “quick” here means quick to make, not instantly finished. Small mushrooms dry faster than large sculptural pieces, but you still need to give them enough time before painting and sealing.
Polymer Clay
Polymer clay is another excellent choice, especially for crisp details, smoother finishes, and smaller decorative mushrooms. It cures in the oven according to package directions, which can feel faster for impatient crafters who would rather bake today than stare dramatically at drying clay until tomorrow.
Polymer clay is especially handy for tiny mushrooms used in shadow boxes, mini displays, ornaments, or whimsical tabletop styling. It also comes in many colors, so you can reduce how much painting you need to do later.
Which One Should You Use?
For quick DIY clay mushrooms meant for whimsical indoor decor, both work well. Choose air-dry clay for an easy, casual project with a handmade look. Choose polymer clay for smaller, cleaner, more polished mushrooms with faster finishing once baked. There is no wrong answer here. There is only your preferred level of patience and how urgently you want your mushroom army to report for decor duty.
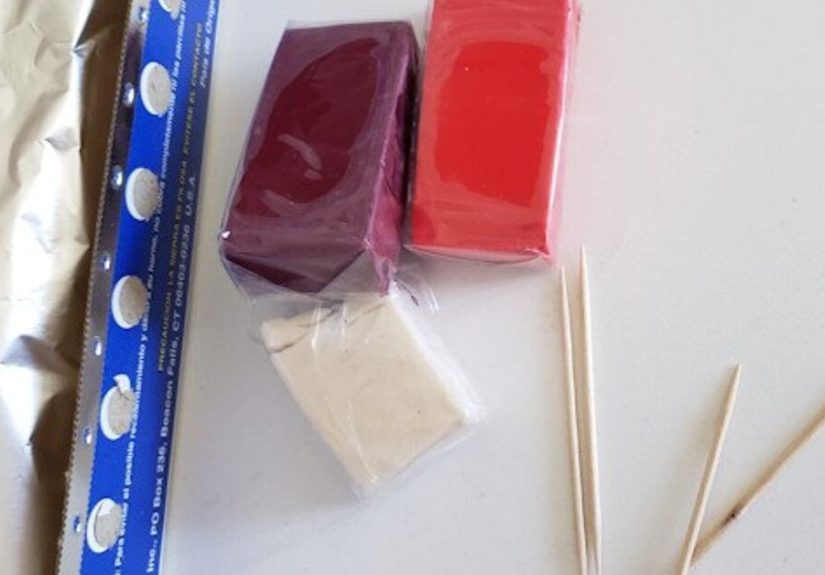
Supplies You Will Need
Basic Materials
- Air-dry clay or polymer clay
- Rolling pin, smooth jar, or small acrylic roller
- Craft knife or small blade tool
- Toothpick, skewer, or dotting tool
- Water in a small bowl for smoothing
- Wax paper, parchment paper, or a silicone mat
- Acrylic paint
- Small paintbrushes
- Clear sealer or varnish
- Optional: paint pens, metallic accents, fine sandpaper, moss, tiny wood slices, or display trays
Helpful Extras
- A small ruler for consistent sizing
- A sponge for soft texture effects
- Cookie cutters or round caps for mushroom caps
- A primer if you want richer color on porous surfaces
- Glue for attaching finished mushrooms to a base or display
Step-by-Step: How to Make Quick DIY Clay Mushrooms
Step 1: Decide on the Mushroom Style
Before touching the clay, decide what kind of mood you want. Classic toadstools have short white stems and red caps with white dots. Woodland mushrooms look more natural in cream, tan, cinnamon, rust, olive, or muted brown. Whimsical mushrooms can go full fantasy with blush pink, sage green, lavender, mustard, or speckled blue.
You can also vary the cap shapes. A rounded dome feels cute and traditional. A flatter cap looks more modern. A wavy cap edge makes the mushroom feel more organic and storybook-like. Mixing sizes and shapes is the fastest route to a curated display.
Step 2: Form the Stems
Take a small piece of clay and roll it into a short log or cylinder. Gently taper the top or bottom depending on the look you want. Many mushrooms look charming with a thicker base and a narrower top where the cap will sit. Keep your stems compact rather than tall and skinny, because overly delicate stems tend to bend, crack, or collapse when the cap goes on top.
For a more natural feel, avoid making every stem identical. Real mushrooms are not out here using measuring tape, and your decor does not need to either.
Step 3: Shape the Caps
Roll a ball of clay, then press it gently into a dome. Use your thumb to hollow out the underside just a bit so the cap sits nicely on the stem. This does not need to be deep. You are aiming for balance, not mushroom architecture school.
For a flatter cap, press down slightly more. For a toadstool look, keep the dome more rounded and puffed. Use your fingers to smooth the edges, or pinch them lightly for a softer, more ruffled silhouette.
Step 4: Attach the Pieces
Lightly score the top of the stem and the underside of the cap with a toothpick or craft tool. Add a tiny bit of water if you are using air-dry clay, then press the pieces together gently. Smooth the seam with a damp fingertip so the mushroom looks like one cohesive little sculpture instead of two suspiciously stacked craft blobs.
This is the moment where patience matters. Do not squish the cap so hard that the stem buckles. Support the stem with one hand while attaching the cap with the other.
Step 5: Add Texture and Character
At this point, you can leave the mushroom smooth or add charming details. Use a toothpick to create subtle gill lines underneath the cap. Press a dry brush, fabric scrap, or sponge very lightly into the cap for texture. Add tiny dots with a tool, or keep them smooth and paint the spots later.
For a more whimsical result, create tiny bends, asymmetry, or gentle imperfections. Those little quirks often make handmade decor feel more expensive and artistic, not less.
Step 6: Let the Mushrooms Dry or Cure
Place the mushrooms on wax paper, parchment paper, or a nonstick mat and let them dry thoroughly if you are using air-dry clay. Turn them carefully as needed so moisture does not linger underneath. For polymer clay, bake according to the package directions and allow the pieces to cool completely before decorating.
Do not rush this step. Painting clay that is not fully dry is a great way to trap moisture, invite cracks, and start a dramatic feud with your own project.
How to Paint DIY Clay Mushrooms So They Look Charming
Start with a Base Color
Once the mushrooms are dry, paint the stems first. White is classic, but creamy ivory, beige, soft gray, or warm taupe often look more elevated in real homes. Then paint the caps in your chosen color palette.
For whimsical home decor, consider these combinations:
- Red and ivory for classic toadstool charm
- Blush and cream for soft romantic cottagecore
- Terracotta and tan for earthy rustic styling
- Sage and oatmeal for quiet, modern whimsy
- Lavender and white for fairy-tale decor with a playful twist
Add Details After the Base Coat
Once the first layer is dry, add dots, shading, or delicate highlights. White dots are iconic, but tiny gold dots, speckles, or faded dry-brush edging can make your mushrooms feel more artistic and less kindergarten bulletin board.
Paint pens can be helpful for precise dots and linework. A nearly dry brush loaded with a slightly lighter shade can create gentle depth along the cap edges. A darker wash around the underside can make even simple mushrooms look more dimensional.
Seal for Durability
When the paint is fully dry, apply a clear sealer. Matte sealers keep the look soft and natural. Satin adds a subtle finished glow. Gloss can be fun for bold toadstools or more playful pieces, though it tends to create a shinier, less earthy effect.
Sealing matters because it helps protect the paint, reduces scuffing, and gives decorative mushrooms a more finished appearance. It is the final polish that says, “Yes, I made this,” instead of, “This was found half-painted near the scissors.”
Easy Styling Ideas for Whimsical Home Decor
Bookshelf Styling
Group two or three clay mushrooms beside stacked books, a framed print, or a tiny brass object. This works especially well with vintage books, botanical art, or natural textures like wood and linen.
Plant Shelf Accent
Tuck mushrooms near potted plants, trailing vines, or terrarium jars. This gives the whole setup a woodland feel without going full forest simulation.
Coffee Table or Console Tray
Add a small cluster to a tray with candles, a bud vase, and a decorative bowl. Mushrooms bring softness to harder materials like glass, ceramic, or metal.
Seasonal Decor
Clay mushrooms fit beautifully into fall styling, winter woodland themes, spring fairy-garden arrangements, and cottage-inspired summer displays. They are surprisingly flexible, which is more than many seasonal decorations can say for themselves.
Kids’ Rooms and Nurseries
For child-friendly decor, use soft colors and rounded shapes. A mushroom display can add imagination without overwhelming the room. Keep pieces out of reach of very young children if they are small enough to become a choking hazard.
Common Mistakes to Avoid
Making the Stems Too Thin
A delicate mushroom sounds lovely until the cap tilts like it has had a long day. Keep stems sturdy enough to support the top.
Skipping Smoothing
Even whimsical decor needs some polish. A little water and fingertip smoothing can make a huge difference in the final look.
Painting Too Soon
Clay that is not fully dry can crack, warp, or resist paint. Give it time. Your future self will be deeply grateful.
Overdecorating Every Mushroom
Not every cap needs spots, glitter, gold trim, faux moss, and a personal backstory. Sometimes a simple mushroom beside a more detailed one creates the best visual balance.
Creative Variations to Try
Neutral Minimalist Mushrooms
Make a set in ivory, sand, taupe, and soft brown for decor that feels whimsical but still grown-up and subtle.
Fairy-Garden Mushroom Cluster
Attach several tiny mushrooms to a wood slice or shallow dish with moss and pebbles for a miniature enchanted display.
Holiday Mushrooms
Paint mushrooms in winter whites, deep green, burgundy, or metallic accents for seasonal styling that feels handmade and fresh.
Speckled Vintage Mushrooms
Use a toothbrush or stiff-bristle brush to flick tiny speckles onto the caps for a weathered, vintage-inspired finish.
Experience Notes: What Making DIY Clay Mushrooms Actually Teaches You
There is something unexpectedly satisfying about making clay mushrooms, and not just because they are cute enough to make even a boring shelf feel like it has a secret social life. The real appeal is the way the project slows you down without feeling complicated. You start with a plain lump of clay, maybe a little unsure whether you are about to make whimsical decor or an unconvincing dumpling, and then the shape begins to emerge. A stem here, a cap there, a little smoothing with water, and suddenly you are holding something that looks like it belongs in a storybook.
One of the first things many people notice is how forgiving this craft can be. Perfect symmetry is not the goal. In fact, the mushrooms that look the best are often the ones with a slight lean, a cap that dips a little, or a stem that feels a bit organic rather than perfectly cylindrical. That is a refreshing experience in a world where so many projects push flawless results. Clay mushrooms are happier when they feel handmade.
Another common experience is discovering how much color changes the mood. Paint one mushroom with a red cap and white dots, and it instantly reads playful and classic. Paint the next one in beige and mushroom-brown, and now it looks sophisticated enough for a coffee table book stack. Paint a third in pale pink or sage green, and suddenly your decor has this sweet, modern fairy-tale charm. The form stays the same, but the personality changes completely.
There is also a practical lesson hiding inside this project: texture matters more than people think. A smooth mushroom feels polished and simple. A mushroom with faint brush texture, tiny speckles, or softly shaded edges feels collected and artistic. A mushroom displayed with moss, wood, linen, or ceramics feels even more intentional. You start to realize that whimsical home decor is not really about filling a room with random cute things. It is about combining shapes, colors, and materials in a way that feels layered and alive.
Many crafters also find that these mushrooms become the gateway project. You make two for a shelf, then decide the plant corner needs three more. Then maybe the entryway tray could use a tiny cluster. Then the holiday mantel starts looking suspiciously mushroom-friendly. Before long, you are the kind of person who casually says, “I think this vignette needs a fungus,” and somehow that makes perfect sense.
The nicest part, though, is how personal the results feel. Store-bought decor can be lovely, but handmade decor carries a different energy. You remember the afternoon you made it. You remember mixing the colors, reshaping a cap, laughing at the first one that looked a little too much like a mushroom-shaped umbrella, and then finally getting the proportions right. That memory becomes part of the object. It is decoration, yes, but it is also experience made visible.
And that is really the magic of crafting whimsical home decor. It is not about chasing perfection or trying to make your house look like a catalog. It is about adding small moments of delight. A tiny clay mushroom on a shelf may not change your life, but it can change the feeling of a space. It can make a room feel softer, warmer, more imaginative, and a little less serious. Sometimes that is exactly what a home needs.
So when you make your quick DIY clay mushrooms, do not worry too much about making them identical. Let one be squat, one be tall, one be extra spotted, and one be slightly lopsided in a charming way. Those are usually the pieces that get the compliments. More importantly, they are the ones that make your decor feel like yours.
Final Thoughts
Learning how to create whimsical home decor with quick DIY clay mushrooms is one of those rare projects that checks every good craft box. It is affordable, beginner-friendly, highly customizable, and charming enough to earn a permanent place in your decor. Whether you go for natural woodland tones, bright toadstool colors, or soft modern neutrals, these little handmade accents can add warmth, humor, and personality to almost any room.
Start simple. Make a few. Style them with confidence. Then act casually when everyone asks where you bought them.