Table of Contents >> Show >> Hide
- Before You Start: Identify Your Tank “Type” (Because That Changes Everything)
- Safety First (Because Tanks Don’t Care About Your Weekend Plans)
- What You’ll Need
- Step-by-Step: Deep Clean a Plastic Water Tank
- Disinfecting the Tank: Bleach Dosages That Make Sense
- Step-by-Step: Disinfect After Cleaning
- How Often Should You Clean a Plastic Water Tank?
- Keep It Cleaner Longer (So You Don’t Have to Do This Again Next Month)
- Special Scenarios (Quick Playbooks)
- of Real-World “Experience” (What People Commonly Run Into)
- Conclusion
Plastic water tanks are basically the stomachs of your water system: they hold a lot, they’re usually out of sight, and if something funky gets in there… you’ll know. Whether your tank stores drinking water, rainwater for the garden, or fresh water for an RV, the cleaning goal is the same: remove gunk, stop growth, and keep your water smelling like… nothing at all.
This guide walks you through a thorough, homeowner-friendly deep clean (physical cleaning + disinfection), plus practical schedules, dosage examples, and “learned-the-hard-way” tips so you don’t turn your Saturday into a chlorine-scented soap opera.
Before You Start: Identify Your Tank “Type” (Because That Changes Everything)
1) Potable (drinking water) tank
If the water is used for drinking, cooking, brushing teeth, or making coffee that keeps you alive during Monday meetings, treat cleaning like a food-safety project. You’ll want a rinseable cleaner, an unscented disinfectant plan, and a full flush before returning it to service.
2) Non-potable tank (irrigation, washing, rainwater catchment)
You still want to reduce algae, slime, and sediment, but the disinfection target can be less strict depending on use. You may prioritize sediment removal and light sanitizing rather than “shock disinfection,” especially if you discharge the water outdoors.
3) RV / mobile fresh-water tank
Smaller volume, lots of plumbing, and long periods of sitting. That combination makes biofilm more likely (that slippery “invisible” layer that laughs at quick rinses). The trick is circulating a properly mixed sanitizing solution through every line and faucet.
Safety First (Because Tanks Don’t Care About Your Weekend Plans)
- Turn off power to pumps, heaters, UV units, or treatment devices before draining or opening the tank.
- Never mix bleach with other cleaners (especially ammonia, acids, vinegar, or “mystery liquids in unmarked bottles”). Pick one chemical approach and stick to it.
- Ventilate if cleaning indoors or in a closed pump room. Even “normal” bleach fumes get intense fast.
- Be careful with tank entry. Many tanks (and cisterns) can act like confined spaces. If you’re not trained and equipped, do not climb in. Clean from the access hatch using long-handled tools instead. If your tank design requires entry to scrub, consider hiring a pro.
- Protect yourself: gloves, eye protection, and clothes you don’t mind smelling like “pool day” for a while.
What You’ll Need
Supplies
- Unscented liquid household bleach (look for plain sodium hypochlorite, no fragrances, no splashless additives)
- Mild dish soap or a gentle, rinseable detergent
- Clean water source for rinsing and refilling
- (Optional) Baking soda for odor polishing (not mixed with bleachseparate step)
Tools
- Long-handled soft brush or tank brush (avoid metal bristles that scratch plastic)
- Bucket(s) and measuring cup
- Wet/dry shop vac or small pump (helpful for sediment)
- Hose with spray nozzle or pressure washer on a gentle setting
- Flashlight/headlamp
- (Optional) Chlorine test strips (useful for knowing when you’ve flushed enough)
Step-by-Step: Deep Clean a Plastic Water Tank
Think of this as a two-part process:
- Cleaning (physical removal of sediment, slime, algae, and biofilm)
- Disinfecting (killing what you can’t see)
Step 1: Plan your drain + discharge
Decide where the water is going before you start. If you’re disinfecting with chlorine, don’t dump highly chlorinated water into storm drains or directly into surface water. Use a sanitary sewer cleanout where allowed, or follow local rules for disposal. If your tank is connected to a septic system, be cautiouslarge volumes of chlorinated water can be rough on it.
Step 2: Shut down, isolate, and empty the tank
- Turn off pump power and close inlet valves.
- Bypass or remove filters and cartridges (don’t bleach your nice filter media to death).
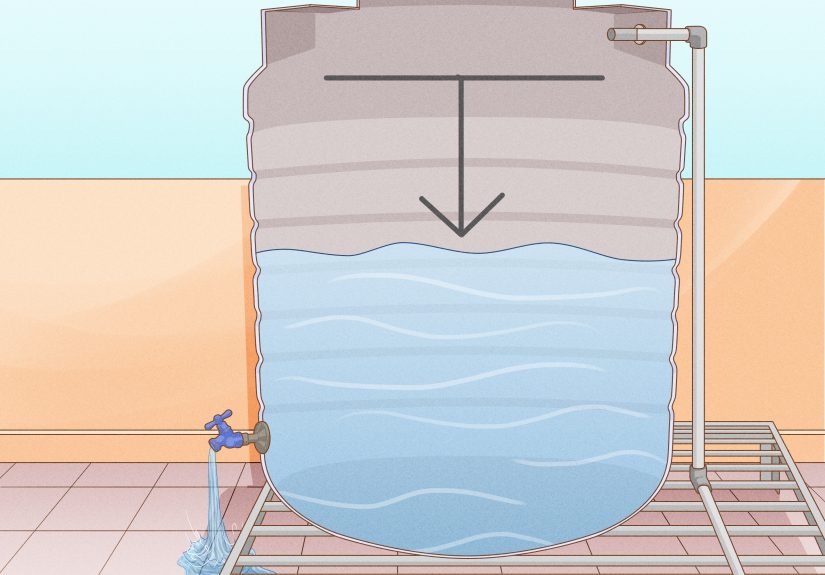
- Drain the tank as fully as possible.
Step 3: Remove sediment and debris (the “gross but satisfying” part)
Sediment is more than dirtit can feed microbial growth and create “dead zones” where disinfectant doesn’t mix well. Remove it first.
- Scoop or vacuum thick sludge from the bottom.
- Use a hose spray to push remaining grit toward the drain.
- If you see leaves, insects, or mystery objects that look like they came from a gutter, remove them.
Step 4: Wash the interior walls
Mix warm water with a small amount of mild dish soap. Using a soft brush, scrub walls, seams, and the floor. Focus on:
- Waterline ring (where oils and dust love to camp)
- Corners and fittings
- Overflow and vent areas
- Access hatch underside (yes, even the lid gets gross)
Tip: If the tank is translucent and sits in sunlight, algae can form faster. Scrub the greenish film now, then later you’ll want to block light (we’ll get there).
Step 5: Rinse thoroughly
Rinse until suds are gone and the water runs clear. Soap left behind can reduce chlorine effectiveness and create weird tastes later.
Disinfecting the Tank: Bleach Dosages That Make Sense
For plastic tanks, household bleach is the most common disinfectant because it’s accessible and effective when used correctly. The “right” amount depends on what you’re trying to accomplish:
Choose your disinfection strength
- Routine sanitizing (light): good for systems that aren’t heavily contaminated, including RV fresh-water systems used regularly.
- Shock disinfection (stronger): good after the tank sat unused for weeks/months, after repairs, after contamination concerns, or after flood/storm intrusion (when recommended by authorities).
- Maintenance residual (tiny ongoing dose): used by some cistern owners to keep a small chlorine residual. This is not the same as deep cleaning.
Option A: RV-style routine sanitizing (easy math)
A common routine sanitizing ratio is:
1/4 cup of household bleach per 15 gallons of tank capacity
This method is popular because it’s simple, it scales, and it’s designed to circulate through RV plumbing and fixtures.
Example: 45-gallon RV tank
45 ÷ 15 = 3 → 3 × (1/4 cup) = 3/4 cup bleach
Mix that bleach into a gallon of water, pour into the empty tank, then fill the tank with fresh water.
Option B: Shock disinfecting a larger cistern or household storage tank
If your tank stores treated public-system water and you’ve been away or suspect contamination, a stronger approach is often used:
3 cups of unscented household bleach for every 100 gallons of water in the tank
Example: 500-gallon cistern that’s half full (250 gallons)
250 ÷ 100 = 2.5 → 2.5 × 3 cups = 7.5 cups bleach
Important: With shock methods, you must flush thoroughly afterward and avoid using the water for drinking until chlorine odor is gone (and ideally confirmed by testing).
Option C: Old-school “ppm” approach (for people who like control)
If you prefer targets, you can think in parts per million (ppm). A common shock range for storage systems is roughly 50–100 ppm free chlorine for an extended contact time. For example, one guideline notes that 1 gallon of laundry bleach per 1,000 gallons can yield about 50 ppm (and higher doses may be needed if organic matter creates “chlorine demand”).
Step-by-Step: Disinfect After Cleaning
Step 6: Add disinfectant solution and fill
- With the tank empty (or partially filled as required by your chosen method), add the measured bleach amount.
- Fill the tank with clean water.
- Mix as well as possible: use recirculation if available, or stir with a clean pole. If you can’t mix mechanically, allow longer contact time.
Step 7: Circulate through plumbing (if connected)
If the tank feeds faucets or an RV system:
- Open each faucet (hot and cold) until you smell chlorine, then close it.
- Don’t forget outside spigots, shower sprayers, and any “rarely used” taps.
Pro tip: Mobile systems have a fun hack: “sloshing” helps coat the interior. Some official logs for mobile fresh-water tanks even suggest driving around briefly to splash the solution over the tank interior.
Step 8: Let it sit (contact time)
Contact time is the quiet part that does the heavy lifting.
- Routine RV-style sanitizing: often 2–4 hours is used, especially when you circulate through the system.
- Shock disinfection for cistern/home tanks: commonly at least 8–12 hours, and sometimes longer if mixing is limited.
Step 9: Drain safely and flush
- Drain the tank to an appropriate disposal point (sanitary sewer where allowed).
- Refill with clean water.
- Flush again: run faucets until chlorine smell is gone.
- Repeat fill-and-drain as needed (especially after strong shock disinfection).
How do you know you’re done? Your nose is a rough indicator, but chlorine test strips are better. For drinking water systems, aim to return to typical safe residual levels (your local utility may publish typical residual ranges).
How Often Should You Clean a Plastic Water Tank?
- Potable household storage tanks: deep clean about once per year, or sooner if you notice sediment, odor, discoloration, or after system work.
- Rainwater tanks: inspect seasonally; clean when sediment builds up, after major storms, or if algae blooms appear.
- RV fresh-water tanks: sanitize every 6 months (common practice), plus after long storage or if water smells off.
Keep It Cleaner Longer (So You Don’t Have to Do This Again Next Month)
Block sunlight
Algae loves two things: water and light. If your tank is clear or translucent, consider shading it, painting it (tank-safe exterior), or using a cover. Opaque tanks typically grow less algae.
Screen vents and overflows
Fine mesh screens help keep insects and debris out while allowing airflow.
Fix “gunk magnets”
- Leaky lids let in dust and bugs.
- Bad gutters/downspouts dump debris (and sometimes wildlife surprises) straight into rainwater systems.
- Old hoses and dirty fill connections can contaminate an otherwise clean tank.
Use filtration where it matters
For potable systems, filtration (sediment + carbon) can improve taste and reduce particulate buildup. But filtration does not replace cleaningfilters can become their own little biology projects if neglected.
Special Scenarios (Quick Playbooks)
If your water smells like “plastic” or “pool” after cleaning
- Plastic taste: often from new tanks, heat exposure, or water sitting too long. Flush, refill, and keep the tank shaded/cool.
- Chlorine taste: keep flushing. You can aerate by running water into an open container and letting it stand (chlorine dissipates over time).
If you see slimy buildup (biofilm)
Biofilm is the reason “I rinsed it twice!” doesn’t work. Scrub physically first, then disinfect, then flush. If it keeps returning quickly, inspect vents, lids, and incoming water sources.
If your tank got storm or flood contamination
If floodwater or heavy debris entered an open catchment cistern, disinfecting alone may not solve it. Physical removal of debris, thorough cleaning, and guidance from local health authorities may be needed before using that water againespecially for drinking.
of Real-World “Experience” (What People Commonly Run Into)
When people talk about cleaning a plastic water tank, the conversation usually starts brave (“I’ll knock this out in an hour”) and ends humbled (“Why is there a leaf that looks… historical?”). Here are the most common real-life lessons and patterns that show up again and again.
Lesson #1: Sediment isn’t just dirtit’s a buffet. A lot of homeowners focus on disinfecting (because it feels scientific), but the biggest improvement often comes from simply removing the sludge layer at the bottom. That sediment can hold nutrients, trap organic matter, and provide cozy hiding spots where disinfectant doesn’t circulate well. People who skip the sediment step often report that odor or cloudiness returns faster, even after a strong bleach treatment.
Lesson #2: The waterline ring is where “invisible” problems become visible. The upper band of the tankright at the fill levelcollects oils, airborne dust, and sometimes a faint slime layer. It’s a small area with an outsized impact on smell and taste. Scrubbing that ring well (and the underside of the lid) is one of those “gross, but wow” moments where people immediately notice better water quality afterward.
Lesson #3: People underestimate how much plumbing matters. On RVs and house systems, the tank isn’t the only thing that needs attention. If you disinfect the tank but don’t run the solution through every faucet, shower, hose bib, and line, the system can re-seed itself. The classic scenario: the cold kitchen tap smells fine, but the bathroom sink smells like a science project because it’s rarely used. Circulating disinfectant everywhere is annoying, but it prevents the “why is it back?” sequel.
Lesson #4: “Splashless” and scented products cause regret. People grab whatever bleach is under the sink and later wonder why the water tastes like a perfume counter or why flushing takes forever. Plain, unscented bleach is boringand boring is exactly what you want when it comes to potable water disinfection.
Lesson #5: The biggest upgrade is preventing contamination, not chasing it. After one deep clean, many people add tiny improvements that pay off for years: a screened vent, a better lid seal, a shaded location, a first-flush diverter on rainwater systems, or a dedicated “drinking-water-only” fill hose stored clean and capped. These small changes often reduce cleaning frequency dramatically. In other words: the best tank cleaning is the one you don’t have to do as often.
Conclusion
Cleaning a plastic water tank isn’t complicated, but it rewards doing things in the right order: drain → remove sediment → scrub → rinse → disinfect → flush. The magic is less about “stronger chemicals” and more about physical cleaning plus correct dosing and enough contact time. Once you’ve done a proper deep clean, a few prevention tweaksshade, screens, clean fill practices, and periodic inspectioncan keep your tank clean, your water clear, and your nose blissfully unbothered.