Table of Contents >> Show >> Hide
- What Is a Dutch Door Paint Kit?
- Why Dutch Doors Need Special Paint Planning
- What Should Be Included in a Good Dutch Door Paint Kit?
- Best Paint Finish for a Dutch Door
- How Much Paint Do You Need?
- Choosing the Right Color for a Dutch Door
- How to Use a Dutch Door Paint Kit
- Common Mistakes to Avoid
- DIY Dutch Door Paint Kit vs. Ready-Made Kit
- Best Places to Use a Dutch Door Paint Kit
- Maintenance After Painting
- Real-Life Experience: What Painting a Dutch Door Actually Teaches You
- Conclusion
A Dutch door already has personality. It is half farmhouse charm, half practical genius, and fully capable of making your entryway look like it belongs in a magazine spread where nobody ever leaves muddy shoes by the door. But even the most adorable split door can start looking tired when the paint fades, chips, or turns into that mysterious shade best described as “weather-beaten oatmeal.” That is where a Dutch door paint kit becomes the hero of the weekend.
A Dutch door paint kit is not just a can of paint with a fancy name. At its best, it is a complete painting setup designed to help you prep, prime, and paint a Dutch door with fewer mistakes and better results. Because Dutch doors have two independently moving sections, extra edges, more hardware, and more opportunities for drips, they need a slightly more thoughtful painting approach than a standard front door. Think of it as painting a regular door’s stylish, slightly high-maintenance cousin.
Whether you are refreshing an exterior Dutch door, painting an interior kitchen door, or giving a mudroom entry a cheerful pop of color, the right kit can save time, reduce guesswork, and help create a finish that looks smooth, durable, and intentional. This guide explains what a Dutch door paint kit should include, how to choose paint, which finishes work best, how to apply it properly, and what real-life experience teaches after the brush actually hits the wood.
What Is a Dutch Door Paint Kit?
A Dutch door paint kit is a bundled set of products and tools used to repaint or refinish a Dutch door. Depending on the brand or the DIY version you assemble yourself, the kit may include primer, enamel or exterior door paint, sandpaper, painter’s tape, brushes, mini rollers, cleaning materials, and instructions.
The goal is simple: give homeowners everything they need to paint one door properly from start to finish. A Dutch door, however, adds a few quirks. Since the upper and lower halves open separately, you have to paint more visible edges than you would on a normal slab door. The shelf ledge, hinge areas, latch points, bolt hardware, and weatherstripping zones all need careful attention. Miss those areas, and the door may look great from the sidewalk but messy up close. Doors are dramatic like that.
Why Dutch Doors Need Special Paint Planning
Dutch doors are beautiful because they are functional. You can open the top half for fresh air while keeping pets, children, or runaway grocery bags inside. They are common in farmhouse-style homes, cottages, kitchens, laundry rooms, nurseries, and back entries. Exterior Dutch doors are especially charming, but they also face sun, rain, humidity, temperature changes, fingerprints, and daily use.
That means the paint needs to do more than look pretty. It should resist moisture, handle cleaning, protect the surface, and flex with normal seasonal expansion and contraction. The split construction also means there are more exposed seams. If paint builds up too thickly along the meeting rail, the two halves may stick, rub, or close unevenly. A good paint kit helps you avoid the classic DIY tragedy: a door that looks gorgeous until you try to shut it.
What Should Be Included in a Good Dutch Door Paint Kit?
A quality kit should cover four stages: cleaning, surface preparation, priming, and painting. If you are buying a ready-made door painting kit, review the contents carefully. If you are creating your own, the following items are worth including.
1. Door Cleaner or Degreaser
Paint does not stick well to dust, oils, old polish, or mystery smudges left by human hands and enthusiastic dogs. A mild cleaner or degreaser helps remove grime before sanding. For kitchen Dutch doors, this step is especially important because cooking oils can settle on surfaces over time.
2. Sandpaper or Sanding Sponge
Most repainting projects need light sanding to dull the old finish and smooth rough spots. A sanding sponge works well around raised panels and molded details. For glossy old paint, sanding is not optional; it is the handshake that introduces the new paint to the old surface.
3. Painter’s Tape
Use painter’s tape for glass panes, hardware you cannot remove, weatherstripping, and adjoining surfaces. Dutch doors often have windows or decorative trim, so clean tape lines matter.
4. Exterior or Interior Primer
Primer improves adhesion, helps block stains, and creates a more even base for color. If you are painting bare wood, switching from a dark color to a light one, covering stains, or painting a previously glossy surface, primer is highly recommended. Exterior Dutch doors should use a primer compatible with outdoor exposure and the chosen topcoat.
5. Durable Door Paint
For exterior Dutch doors, choose high-quality exterior acrylic latex, water-based enamel, alkyd enamel, or another door-and-trim paint designed for weather resistance. Interior doors can use durable interior trim enamel. The paint should dry to a hard, washable finish because doors are touched constantly.
6. Angled Brush
An angled brush helps cut into corners, panels, window trim, and the narrow meeting rail between the top and bottom sections. A brush in the 2-inch to 2.5-inch range is versatile for most door details.
7. Mini Foam or Microfiber Roller
A small roller helps cover flat areas quickly and evenly. Foam rollers can create a smooth finish on flat doors, while microfiber mini rollers work well for slightly textured surfaces.
8. Paint Tray, Stir Stick, and Drop Cloth
These are not glamorous, but neither is discovering paint on your porch floor. A drop cloth protects the work area, and a tray keeps roller application controlled.
Best Paint Finish for a Dutch Door
The most popular finishes for exterior doors are satin, semi-gloss, and sometimes high gloss. Flat paint is usually not ideal for doors because it is harder to clean and less resistant to scuffs.
Satin gives a soft sheen and hides minor imperfections better than glossier finishes. It is a good choice for older Dutch doors with dents, waves, or patched areas.
Semi-gloss is a dependable favorite because it balances durability, cleanability, and shine. It gives the door a crisp, polished look without turning every tiny flaw into a spotlight performance.
High gloss can look stunning, especially on deep colors like black, navy, red, or forest green. However, it requires excellent prep because glossy finishes reveal surface imperfections. If the door has bumps, brush marks, or uneven sanding, high gloss will noticeand it will tell everyone.
How Much Paint Do You Need?
For many standard doors, one quart of paint is enough for two coats, especially if the color change is not extreme. However, Dutch doors may require slightly more attention because you need to paint extra edges, the top of the lower half, the bottom of the upper half, and sometimes both interior and exterior faces.
If your kit is designed for one full door inside and out, check whether it includes enough primer and topcoat for two complete coats. A dramatic color change, such as red to white or dark brown to pale blue, may require additional primer or paint. The safest rule is to plan for two thin coats rather than one thick coat. Thick paint causes drips, slow drying, sticking, and regret.
Choosing the Right Color for a Dutch Door
A Dutch door naturally draws attention, so color selection matters. The best shade depends on your home’s exterior, trim, roof color, landscaping, and personality. Yes, doors have personality. Some say “classic welcome,” while others say “I bought this color during a caffeine incident.”
For a timeless look, consider black, charcoal, navy, deep green, warm white, or rich brown. These colors work with many home styles and tend to feel polished. For a cheerful cottage or farmhouse look, soft blue, sage green, muted yellow, dusty coral, or warm red can be charming. For modern homes, deep espresso, matte black, iron gray, or a clean saturated blue may feel more architectural.
When choosing a color, test a sample on the door or on a movable board. Look at it in morning light, afternoon sun, and evening shade. Exterior color shifts throughout the day. A color that looks refined at 9 a.m. may look like a traffic cone by 3 p.m.
How to Use a Dutch Door Paint Kit
Step 1: Pick the Right Day
If you are painting an exterior Dutch door, choose a dry day with moderate temperatures and low humidity. Avoid painting in direct hot sun, during rain, or when the door will not have enough time to dry before evening moisture arrives. Good weather is part of the paint kit, even if it does not come in the box.
Step 2: Remove or Protect Hardware
Remove knobs, hinges, latches, bolts, and decorative hardware when possible. Dutch doors often have extra locks or slide bolts, so take photos before removing anything. Place screws and parts in labeled bags. If removing hardware is not realistic, tape carefully around it.
Step 3: Clean the Door
Wash the door with mild soap or a recommended cleaner. Pay special attention to the area around handles, the top ledge of the lower door, and any shelf surface where dust collects. Let the door dry completely.
Step 4: Sand the Surface
Lightly sand all painted areas to smooth imperfections and improve adhesion. Sand chipped areas until the edges are feathered. For raised panels or grooves, use a flexible sanding sponge. Wipe away dust with a tack cloth or slightly damp cloth before priming.
Step 5: Prime Where Needed
Apply primer to bare wood, patched areas, stained sections, or the entire door if recommended by your paint system. Use a brush for panels, edges, and corners, then a mini roller for flat sections. Keep primer thin near the meeting rail so the two halves still close cleanly.
Step 6: Paint in the Right Order
Start with detailed areas: panels, trim, glass frames, and edges. Then roll the flat sections. On a Dutch door, paint the top half and lower half separately, paying attention to the horizontal seam where they meet. Do not overload the brush near hinges, latches, or weatherstripping.
For paneled Dutch doors, a good order is: recessed panels first, rails and stiles next, outer edges after that, and broad flat areas last. Smooth out lap marks before the paint begins to dry.
Step 7: Apply Two Thin Coats
Allow the first coat to dry according to the paint label. Lightly sand between coats if the finish feels rough. Apply the second coat thinly and evenly. Two thin coats usually look better and last longer than one heavy coat.
Step 8: Let It Cure Before Heavy Use
Paint may feel dry before it fully cures. Avoid slamming the door, scraping the meeting rail, or hanging wreaths too soon. If weatherstripping presses into fresh paint, it may stick. Give the finish as much cure time as practical before normal daily use.
Common Mistakes to Avoid
Skipping prep is the biggest mistake. Paint is not magic frosting. It will not hide grease, peeling paint, or deep scratches forever.
Painting too thickly is another problem. Thick paint can collect in corners, create drips, and make the upper and lower halves rub together. Dutch doors need clean, controlled coats.
Ignoring edges can also shorten the life of the finish. Exterior doors need sealed edges because moisture can enter from the top, bottom, and sides. On a Dutch door, the split edge deserves extra care.
Choosing the wrong paint may lead to peeling, fading, or a sticky finish. Use paint designed for doors, trim, or exterior surfaces, depending on where the door is located.
Reinstalling hardware too quickly can dent or twist the finish. Give paint time to harden before tightening knobs and latches fully.
DIY Dutch Door Paint Kit vs. Ready-Made Kit
A ready-made Dutch door paint kit is convenient because the products are already selected to work together. This can be especially helpful if you want a premium enamel finish or are unsure which primer matches which paint. A kit may also include instructions specific to doors, which reduces guesswork.
A DIY kit gives you more flexibility. You can choose your preferred brand, color, sheen, brush style, roller type, and primer. It may also be more budget-friendly if you already own supplies. For example, a homeowner repainting an interior pantry Dutch door may only need a quart of trim enamel, a sanding sponge, painter’s tape, and a mini roller.
The best choice depends on your goal. If you want a high-end glossy finish for a front Dutch door, a complete premium kit may be worth it. If you are refreshing a mudroom door that mostly needs durability and clean color, a custom DIY kit may be perfect.
Best Places to Use a Dutch Door Paint Kit
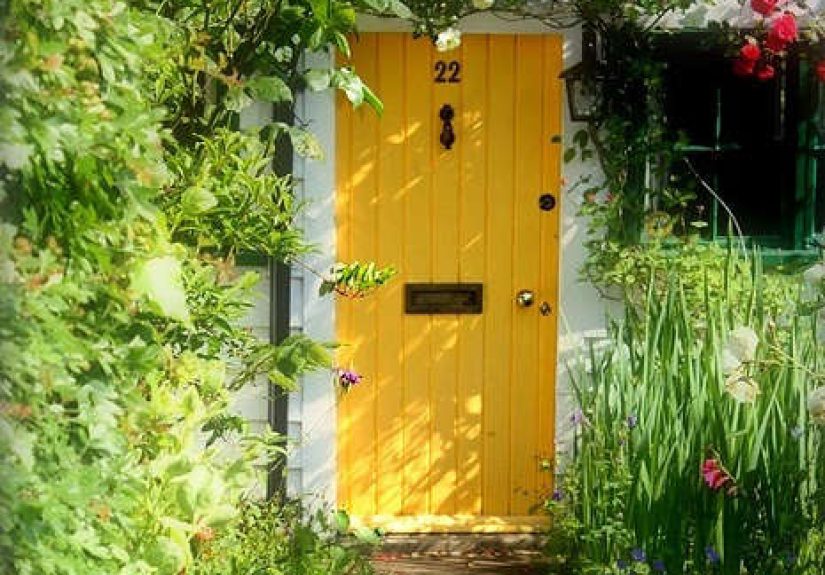
Front entry: A painted Dutch front door can transform curb appeal quickly. Deep green, navy, black, or red can create a classic statement.
Back door: A Dutch back door looks charming in garden-facing spaces. Softer colors like sage, cream, or blue can connect the indoors with the outdoors.
Kitchen: Interior Dutch doors are useful for pantries, breakfast rooms, or pet zones. A washable satin or semi-gloss finish helps handle everyday mess.
Laundry room: A split door can keep pets out while allowing airflow. A cheerful color makes chores feel slightly less like a negotiation with socks.
Nursery or playroom: Dutch doors let adults see into a room while creating a gentle boundary. Use low-odor interior paint and allow proper drying before use.
Maintenance After Painting
After your Dutch door is painted, keep it looking fresh with simple care. Clean fingerprints with a soft cloth and mild soap. Avoid abrasive scrubbers, especially on glossy finishes. Inspect the top ledge and meeting rail regularly because dust and moisture can gather there.
For exterior doors, check the finish once or twice a year. Touch up chips early before water reaches the wood or metal underneath. Keep hinges adjusted so the two halves do not rub. If the door sticks after painting, identify the exact contact point and sand lightly rather than forcing it closed.
Real-Life Experience: What Painting a Dutch Door Actually Teaches You
Painting a Dutch door sounds simple until you are standing there with a brush in one hand, tape stuck to your sleeve, and the top half of the door gently swinging like it has somewhere better to be. The first lesson is that Dutch doors are not difficult, but they do demand patience. A regular door has one main surface. A Dutch door has personalities, plural.
One practical experience is that labeling hardware saves sanity. Many Dutch doors have extra hinges, slide bolts, locks, and sometimes a latch that connects the top and bottom halves. If you toss all the screws into one cup, future you may not send present you a thank-you card. Taking photos before removing hardware makes reassembly much easier.
Another lesson is that the middle seam deserves VIP treatment. The meeting rail between the upper and lower halves is where paint buildup can cause trouble. It is tempting to brush on extra paint there because the area is visible when the top half is open. But too much paint can make the door rub or stick. Thin coats are better. If you want stronger color, add another light coat instead of loading the brush like you are frosting a cupcake.
Testing the door during the process also helps. After primer dries, gently open and close both halves to make sure nothing is catching. Do the same after the first coat of paint. If you wait until the final coat cures, fixing a tight spot becomes more annoying. The goal is a door that looks beautiful and still behaves like a door, not wall art with hinges.
Weather is another real-world factor. On an exterior Dutch door, drying time can change quickly. A coat that dries beautifully on a mild morning may stay tacky on a humid afternoon. If the sun hits one half of the door harder than the other, the paint may dry unevenly. Working in shade or indirect light usually gives a smoother finish. Early morning can be good, but only after dew has evaporated.
Brush and roller choice matters more than beginners expect. A cheap brush can shed bristles into wet paint, which is how a door gets permanent tiny souvenirs. A quality angled brush makes trim and panels cleaner. A mini roller helps with broad sections, but it should not leave heavy texture. After rolling, lightly tipping off the paint with a brush can create a smoother, more professional look.
Color choice also feels different once it is on a full door. A small paint chip can look calm in the store and surprisingly bold on a sunny entry. Dark colors can look elegant, but they may show dust and heat up in direct sun. Light colors feel fresh but may show fingerprints. Medium tones like muted blue, sage, olive, warm gray, and brick red often strike a comfortable balance.
Finally, the most satisfying part is the reveal. A freshly painted Dutch door changes the mood of a home fast. It makes the entry feel cared for, intentional, and welcoming. Even if the rest of the porch still has a rogue flowerpot and a doormat that has seen things, the door says, “Someone stylish lives here.” That is the power of a good Dutch door paint kit: it turns a manageable weekend project into a high-impact upgrade.
Conclusion
A Dutch door paint kit is one of the smartest ways to refresh a split door without turning the project into a hardware-store scavenger hunt. The right kit includes cleaning supplies, sanding tools, tape, primer, durable paint, brushes, rollers, and clear instructions. More importantly, it helps you approach the project in the right order: clean, sand, prime, paint, cure, and maintain.
For exterior Dutch doors, choose weather-resistant paint in a satin, semi-gloss, or gloss finish. For interior doors, focus on washable durability and a smooth trim-grade finish. Pay special attention to the split seam, hardware areas, edges, and drying time. With careful prep and thin coats, your Dutch door can become a standout feature instead of just another thing on the home maintenance list.
In the end, painting a Dutch door is part craft project, part curb appeal upgrade, and part patience test. Do it well, and every time the top half swings open, you get a tiny reminder that good paint can make a home feel happier.