Table of Contents >> Show >> Hide
- Why Toaster Ovens Get So Greasy So Fast
- Before You Start: The Smart, Safe Way to Clean a Toaster Oven
- The Easiest Ways to Degrease Your Toaster Oven
- 1. Start With the Fastest Win: A Warm Wipe-Down
- 2. Degrease the Crumb Tray First
- 3. Use Baking Soda Paste for Baked-On Grease
- 4. Use Diluted Vinegar for Grease on the Door and Light Odors
- 5. Use Gentle Dish Soap for Racks, Pans, and Exterior Grease
- 6. For Stubborn Spots, Repeat Instead of Scrubbing Harder
- What Not to Do When Cleaning a Greasy Toaster Oven
- A Simple Step-by-Step Routine That Actually Works
- How Often Should You Degrease a Toaster Oven?
- How to Keep Grease From Building Up Again
- Common Questions About Cleaning a Toaster Oven
- Real-Life Toaster Oven Cleaning Experiences: What It’s Actually Like
- Final Thoughts
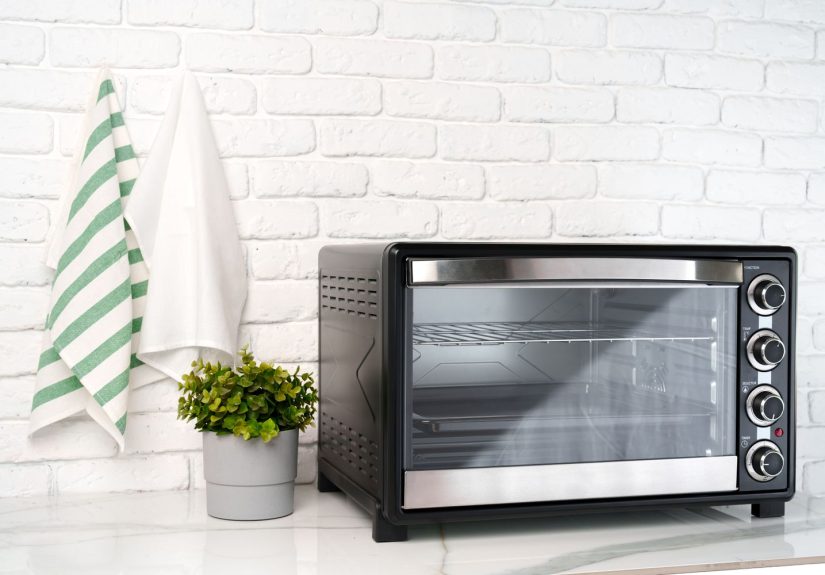
If your toaster oven door has crossed over from “lightly used” to “looks like it survived a bacon explosion,” welcome. You are among friends. Toaster ovens are tiny workhorses, which is lovely when you want crispy leftovers in 8 minutes and less lovely when grease, crumbs, and mystery splatters turn the inside into a sticky little cave.
The good news is that degreasing a toaster oven does not require a hazmat suit, a chemistry degree, or the emotional resilience needed to scrub a full-size oven on a Saturday. Cleaning pros and appliance experts tend to agree on the basics: keep it simple, keep it gentle, and do not drench the thing like you are washing a Labrador. The easiest methods rely on mild dish soap, baking soda paste, diluted vinegar, soft cloths, and a little patience.
In this guide, you’ll learn how to degrease your toaster oven safely, which methods work best for light versus heavy buildup, what mistakes can damage the interior, and how to keep greasy grime from staging a comeback. There is even a section at the end for real-life cleaning experiences, because no one talks enough about the emotional journey of pulling out a crumb tray and seeing what appears to be the fossil record of every bagel you’ve ever toasted.
Why Toaster Ovens Get So Greasy So Fast
Toaster ovens may be compact, but they are absolute overachievers when it comes to collecting mess. A regular oven has more interior space, which means splatters spread out. A toaster oven keeps everything close together: heating elements, door glass, tray, rack, and whatever cheesy thing you reheated at 10:47 p.m. That means grease lands fast and bakes on quickly.
Grease buildup usually comes from foods like pizza, chicken wings, sausages, garlic bread, frozen snacks, and anything topped with cheese or oil. Add in loose crumbs, and suddenly you have a recipe for smoke, stale odors, and sticky residue that seems to get more stubborn every time you use the appliance.
And here is the annoying part: once grease hardens, it attracts even more grime. So a quick wipe now is worth ten dramatic sighs later.
Before You Start: The Smart, Safe Way to Clean a Toaster Oven
Before you attack the grease, slow down for two minutes and do this properly. A toaster oven is still an electrical appliance, not a casserole dish.
- Unplug the toaster oven completely.
- Make sure it is cool, or only slightly warm if you are doing a quick wipe after cooking.
- Remove the crumb tray, rack, baking pan, and any removable accessories.
- Place a towel or paper under the unit if you expect crumbs to fall.
- Use soft cloths, sponges, or non-scratch scrubbers only.
- Never spray cleaner directly onto the heating elements or into the toaster oven cavity.
- Never immerse the appliance in water.
If your owner’s manual has specific care instructions, follow those first. Some toaster ovens have special coatings that do not appreciate aggressive scrubbing. In appliance language, “do not use abrasives” basically means “please stop trying to remove lasagna with steel wool.”
The Easiest Ways to Degrease Your Toaster Oven
1. Start With the Fastest Win: A Warm Wipe-Down
If the toaster oven is no longer hot but still slightly warm, grease is easier to lift. This is the easiest method for light splatters and fresh messes. Mix a little warm water with a few drops of mild dish soap, dampen a microfiber cloth or soft sponge, and wipe the interior walls, door, and bottom panel carefully.
This is not the time for puddles. Your cloth should be damp, not dripping. Think “wrung out after hand-washing a wine glass,” not “just rescued from the bottom of a bucket.”
For everyday maintenance, this may be all you need. If you wipe down the inside after greasy foods, buildup rarely gets dramatic.
2. Degrease the Crumb Tray First
If your toaster oven has a crumb tray, congratulations: that little piece is doing the Lord’s work. It also happens to be one of the greasiest parts of the appliance.
Remove the tray and shake loose crumbs into the trash. Then soak it in hot, soapy water for 10 to 20 minutes. If the grease is stubborn, sprinkle a little baking soda over the tray before scrubbing with a soft sponge. Rinse thoroughly and dry completely before putting it back.
This step matters more than people think. A dirty crumb tray can cause smoke, bad smells, and that unpleasant “something is burning and I hope it’s not important” feeling.
3. Use Baking Soda Paste for Baked-On Grease
For tougher buildup, baking soda paste is the classic move for a reason. It is gentle, affordable, and surprisingly good at loosening greasy grime without being too harsh on delicate interiors.
To make it, combine baking soda with just enough water to form a thick paste. Spread it onto greasy areas with a soft cloth, sponge, or silicone spatula. Focus on the interior walls, bottom, and glass door, but avoid coating the heating elements directly.
Let the paste sit for at least 20 to 30 minutes. For serious buildup, let it sit for several hours or even overnight. Then wipe it away with a damp cloth. If needed, follow with a cloth lightly dampened with diluted vinegar to help remove residue.
This method is best when your toaster oven has reached the “I swear that splatter was not there yesterday” stage.
4. Use Diluted Vinegar for Grease on the Door and Light Odors
White vinegar is handy for cutting through light grease and freshening up the appliance, especially on the glass door. Mix equal parts white vinegar and water, then apply it to a cloth rather than spraying it straight into the toaster oven.
Wipe the glass, door edges, and lightly greasy interior surfaces. Then go over everything again with a clean damp cloth and dry with a microfiber towel to prevent streaks.
Vinegar works especially well when the main problem is a filmy layer of grease instead of thick, sticky buildup. It is also nice when your toaster oven smells faintly like six previous dinners.
5. Use Gentle Dish Soap for Racks, Pans, and Exterior Grease
For removable parts, plain dish soap is often the easiest and most effective option. Fill your sink with hot water and a small amount of dish soap, then soak the rack and tray. After soaking, scrub gently with a non-scratch sponge or soft brush.
On the outside of the toaster oven, dish soap is also a great degreaser. Use a damp cloth with a drop of soap to wipe handles, knobs, buttons, and the exterior body. Then wipe again with plain water and dry thoroughly.
If your toaster oven has a stainless steel finish, wipe with the grain for a cleaner, streak-free look. This makes the appliance look less like a greasy science project and more like something an adult owns on purpose.
6. For Stubborn Spots, Repeat Instead of Scrubbing Harder
Here is a cleaning truth no one enjoys hearing: brute force is overrated. If the grease does not come off after one pass, it is usually better to repeat a gentle method than to go full medieval with a metal scrubber.
Apply more baking soda paste, let it sit longer, and wipe again. Or re-soak the rack and tray. Repeat the vinegar wipe on the glass. Gentle persistence beats scratching the interior coating and making future messes cling even harder.
What Not to Do When Cleaning a Greasy Toaster Oven
Some cleaning mistakes make the problem worse, not better. Avoid these common errors:
- Do not use steel wool or abrasive scouring pads. They can scratch enamel, nonstick coatings, and metal finishes.
- Do not spray cleaner directly inside the oven. Excess liquid can reach electrical components or heating elements.
- Do not soak the whole appliance. Only removable parts belong in the sink.
- Do not clean around live heat. Always unplug first.
- Do not ignore the heating elements. Work around them carefully instead of scrubbing them aggressively.
- Do not wait forever. Old grease gets harder, darker, and more dramatic.
Also, skip harsh oven cleaners unless your manual specifically says they are safe. Many pros recommend mild, food-safe methods for toaster ovens because the cavity is small and harder to rinse thoroughly.
A Simple Step-by-Step Routine That Actually Works
If you want one no-fuss plan, use this routine:
- Unplug the toaster oven and let it cool.
- Remove the crumb tray, rack, and pan.
- Shake out crumbs and soak removable parts in hot, soapy water.
- Wipe loose crumbs from the interior with a dry or slightly damp cloth.
- Apply baking soda paste to greasy interior spots and the glass door.
- Let it sit for 30 minutes, or longer for heavy grease.
- Wipe clean with a damp microfiber cloth.
- Use diluted vinegar on a cloth for any remaining film or streaks.
- Scrub soaked accessories gently, rinse, and dry them completely.
- Wipe the exterior with mild dish soap and dry well.
- Reassemble once every part is fully dry.
This routine is easy, low-cost, and realistic for actual humans with lives. It also works whether your toaster oven needs a basic refresh or a full “I made chicken thighs in here three times this week” recovery.
How Often Should You Degrease a Toaster Oven?
There is no single perfect schedule, because some people use a toaster oven for toast and the occasional cookie, while others basically treat it like a tiny full-service restaurant.
That said, these guidelines are practical:
- Wipe fresh splatters after use whenever possible.
- Empty and clean the crumb tray regularly, especially after greasy foods.
- Deep-clean monthly for moderate use.
- Deep-clean every two weeks if you use it daily or cook a lot of greasy food.
The less buildup you allow, the easier each cleaning session becomes. This is one of those rare cases where a little discipline now prevents a truly annoying problem later.
How to Keep Grease From Building Up Again
Once your toaster oven is clean, the goal is to avoid reliving this experience too soon. A few simple habits help a lot:
- Use the baking pan or tray that came with the appliance when cooking greasy foods.
- Line removable trays with parchment when appropriate for easier cleanup, but do not block vents or elements.
- Clean spills once the oven has cooled.
- Do not let crumbs pile up in the tray.
- Choose lower-splatter settings when possible for greasy leftovers.
- Give the door glass a quick wipe before grease turns into amber-colored history.
In short: a toaster oven is much easier to maintain when you stop treating it like a mysterious black box that cleans itself through vibes.
Common Questions About Cleaning a Toaster Oven
Can I use vinegar and baking soda together?
Yes, but not always at the exact same moment. Baking soda paste works best when it gets time to sit on the grease. Vinegar is useful afterward to help lift residue and cut streaks. If you mix them too early, you get a fizzy science fair and less cleaning power.
Can I use a commercial degreaser?
Only if your appliance manual clearly allows it. Mild cleaners are usually the safer bet for toaster ovens because the interior is compact and not easy to rinse thoroughly.
What if the heating elements are dirty?
Let them cool completely, then wipe around them carefully with a barely damp cloth. Do not soak them, coat them with paste, or scrub aggressively.
Why does my toaster oven still smell after cleaning?
There may be leftover residue on the tray, rack, or door edges. Recheck those spots, then let the toaster oven air out fully before using it again. If your model manual allows it, running it briefly on low after everything is dry can help clear any lingering odor.
Real-Life Toaster Oven Cleaning Experiences: What It’s Actually Like
Anyone who uses a toaster oven regularly knows the mess rarely happens all at once. It starts small. A little cheese bubble escapes from toast. A few fries leave behind oil. One slice of leftover pizza spits like it is auditioning for an action movie. None of it seems urgent in the moment, which is exactly how the interior slowly becomes a scrapbook of snacks past.
A very common experience is realizing the toaster oven is dirty only after it starts smoking. Not dramatic house-fire smoke, thankfully, but that thin, accusatory wisp that appears when you reheat something innocent and suddenly smell burnt grease from three meals ago. That moment tends to inspire a quick inspection, followed by the discovery that the glass is cloudy, the crumb tray is full, and the bottom panel looks like it has been shellacked in old cooking oil.
Another familiar experience is underestimating how much grease the door collects. Because the door is vertical, people assume most mess lands on the bottom. Then one day the light hits the glass just right and reveals a fine greasy film with decorative freckles of sauce. It is not always obvious when the toaster oven is closed, but once you see it, you cannot unsee it. The good news is that the door is often one of the easiest parts to improve quickly. A cloth, a little diluted vinegar, and a few minutes can make it look dramatically better, which is deeply satisfying for such a small effort.
Then there is the crumb tray experience, which deserves its own category. Pulling it out can be strangely humbling. Crumbs, burnt flakes, seeds, and the occasional unidentifiable crisped fragment all gather there like they have been paying rent. The tray is often the source of odors and smoke, yet it is also the easiest part to clean. Soaking it in hot, soapy water usually delivers that instant gratification people hope the whole appliance will provide.
Many people also learn, usually the hard way, that scrubbing harder is not the same as cleaning smarter. The first impulse with sticky grease is often to attack it with force. But once someone tries a gentle soak, a baking soda paste, or a repeated wipe instead of an aggressive scrub, the process gets easier. The mess lifts. The finish stays intact. And the next cleaning session is less of a punishment.
Perhaps the best experience of all is what happens after a proper deep clean. The toaster oven looks brighter inside. The glass is clearer. Food smells like food again instead of “food with a hint of old nuggets.” The appliance heats without sending up a warning signal. In a kitchen full of chores nobody really wants, degreasing a toaster oven is one of the few that pays you back immediately. The next time you make toast, roast vegetables, or revive yesterday’s pizza, everything feels just a little more civilized. Which is honestly a lot to ask from a countertop box that spends most of its life making crumbs on purpose.
Final Thoughts
The easiest ways to degrease your toaster oven are also the smartest ones: mild dish soap for washable parts, baking soda paste for stubborn grease, diluted vinegar for glass and light film, and regular wipe-downs before splatters turn into archaeological evidence. Cleaning pros are not recommending anything especially fancy here, which is good news for your budget and your patience.
If you remember only one thing, make it this: gentle cleaning done regularly beats a heroic deep scrub done once in a panic. Your toaster oven will work better, smell better, and look less like it belongs in a dorm room haunted by mozzarella sticks.