Table of Contents >> Show >> Hide
- What Is Preserving and Canning?
- The Golden Rule: Acidity Decides the Canning Method
- Essential Canning Equipment
- Step-by-Step Basics for Safe Canning
- Popular Foods to Preserve at Home
- Common Canning Mistakes to Avoid
- How Preserving Saves Money and Reduces Waste
- Flavor Ideas for Beginners
- Real-Life Experiences With Preserving & Canning
- Conclusion
- SEO Tags
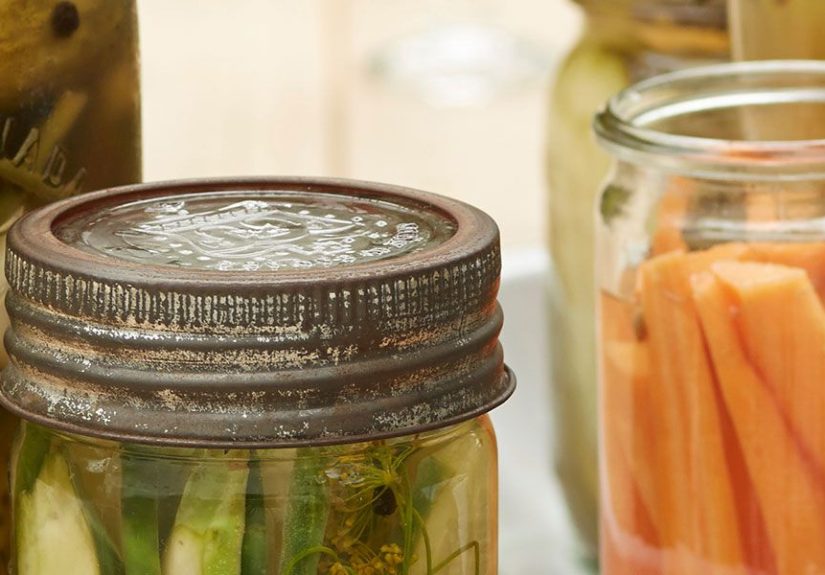
There is something deeply satisfying about lining up jars of homemade jam, pickles, salsa, peaches, or green beans on a pantry shelf. It feels part kitchen magic, part science experiment, and part “I am now the kind of person who owns a jar lifter.” Preserving and canning turn seasonal food into shelf-stable treasures, reduce waste, save money, and give you bragging rights at family dinners. But unlike improvising soup, home canning is not the place to freestyle like a jazz saxophonist. Safe preserving depends on tested recipes, correct equipment, clean habits, and understanding which foods need which method.
This guide breaks down the essentials of preserving and canning in clear, practical language: what canning actually does, which foods belong in a boiling-water canner, which require a pressure canner, how to avoid common mistakes, and how to build confidence without turning your kitchen into a sticky fruit volcano. Whether you are dreaming of strawberry jam, crisp dill pickles, tomato sauce, or pantry-ready vegetables, the goal is the same: delicious food preserved safely.
What Is Preserving and Canning?
Food preservation is the broad art of slowing spoilage and making food last longer. It includes freezing, drying, fermenting, pickling, salting, sugaring, smoking, and canning. Canning is one of the most popular home preserving methods because it creates sealed jars that can be stored at room temperature when processed correctly.
During canning, food is packed into jars and heated for a specific amount of time. This heat destroys many microorganisms, inactivates enzymes that cause spoilage, pushes air out of the jar, and creates a vacuum seal as the jar cools. That seal is the satisfying little “ping” home canners love almost as much as the food itself.
But the big rule is this: canning safety depends on acidity. High-acid foods can usually be processed in a boiling-water canner or atmospheric steam canner. Low-acid foods require a pressure canner. Mixing up those methods can create serious food safety risks, so let’s get friendly with the science before we start filling jars.
The Golden Rule: Acidity Decides the Canning Method
The dividing line in home canning is pH 4.6. Foods with a pH of 4.6 or lower are considered high-acid. Foods above that level are low-acid. High-acid foods include most fruits, jams, jellies, pickles, relishes, fruit butters, and properly acidified tomato products. Low-acid foods include vegetables, meats, poultry, seafood, soups, beans, and mixed dishes that contain low-acid ingredients.
Why does this matter? Low-acid, low-oxygen environments can allow dangerous bacteria to grow if the food is not processed correctly. A sealed jar of vegetables may look harmless, but safe canning is not about appearance alone. It is about using enough heat for enough time to make the food safe.
High-Acid Foods: Boiling-Water Canning
Boiling-water canning is ideal for foods naturally high in acid or recipes made safely acidic with vinegar, lemon juice, or citric acid. Think strawberry jam, peach preserves, apple butter, pickled cucumbers, bread-and-butter pickles, and many fruit sauces. In this method, filled jars are fully submerged in boiling water and processed for the time listed in a tested recipe.
The recipe matters because sugar, acid, jar size, food density, and processing time all work together. A jam recipe is not just fruit plus vibes. It is a carefully balanced formula that helps the product set properly and remain safe.
Low-Acid Foods: Pressure Canning
Pressure canning is required for low-acid foods such as green beans, corn, carrots, potatoes, meats, poultry, seafood, broth, and many vegetable mixtures. A boiling-water canner cannot get hot enough to safely process these foods. A pressure canner raises the temperature above boiling, which is why it is the correct tool for low-acid foods.
A pressure canner is not the same as a pressure cooker, and electric multi-cookers should not be treated as automatic substitutes for tested pressure canning equipment unless a research-based source specifically approves that model and method. In home food preservation, “close enough” is not a safety plan.
Essential Canning Equipment
You do not need a kitchen that looks like a pioneer museum, but you do need the right tools. A basic home canning setup includes canning jars, two-piece lids, a jar lifter, a wide-mouth funnel, a bubble remover or plastic spatula, clean towels, a rack, and either a boiling-water canner or pressure canner depending on the food.
Canning Jars and Lids
Use jars made for home canning. Inspect them for chips, cracks, or sharp edges before every use. A tiny flaw on the rim can prevent a seal, which is annoying after you have spent three hours peeling peaches and questioning your life choices.
Modern two-piece canning lids include a flat metal lid and a screw band. The flat lid is designed for one-time use because the sealing compound may not perform reliably a second time. Screw bands can be reused if they are clean, dry, and not rusty or bent.
Pressure Canner Maintenance
If you use a dial-gauge pressure canner, have the gauge checked for accuracy at least once a year, usually through a county extension office or similar service. Weighted-gauge canners do not need the same calibration, but they still need clean vents, intact gaskets, and proper care. Before canning season, check your equipment like you are preparing for a pantry Olympics.
Step-by-Step Basics for Safe Canning
Every tested recipe has its own instructions, but most safe canning follows a predictable rhythm. Once you understand the flow, the process feels much less mysterious.
1. Choose a Tested Recipe
Start with a recipe from a trusted source such as USDA, the National Center for Home Food Preservation, a state extension program, or a reputable canning book built around research-tested methods. Avoid random online recipes that change jar size, processing time, acid amounts, or ingredient ratios without explanation.
2. Prepare the Food
Wash produce thoroughly, trim damaged areas, and follow the recipe for peeling, chopping, heating, or packing. For best quality, preserve food at peak freshness. Canning does not improve sad produce. It simply preserves its current personality.
3. Prepare Jars and Lids
Wash jars, keep them hot when the recipe requires it, and follow the lid manufacturer’s instructions. Many modern lids no longer need simmering before use, but they should be clean and handled carefully. Keep your workspace tidy so you are not playing hide-and-seek with the funnel while syrup boils over.
4. Fill Jars Correctly
Leave the headspace listed in the recipe. Headspace is the empty space between the top of the food and the rim of the jar. Too little or too much can interfere with sealing. Remove air bubbles, wipe jar rims, add lids, and tighten bands fingertip-tight. Do not crank them down like you are closing a submarine hatch.
5. Process for the Correct Time
Processing time depends on the food, jar size, packing method, altitude, and canning method. Higher altitudes require adjustments because water boils at lower temperatures as elevation increases. Follow the altitude adjustment in your tested recipe or preservation guide.
6. Cool, Check, and Store
After processing, let jars cool undisturbed for 12 to 24 hours. Check seals, remove screw bands, wipe jars, label them with the product name and date, and store them in a cool, dry, dark place. For best quality, use home-canned foods within about a year, although properly processed food may remain safe longer if the seal is intact and there are no signs of spoilage.
Popular Foods to Preserve at Home
Jams, Jellies, and Fruit Preserves
Fruit spreads are often the gateway into canning because they are colorful, rewarding, and less intimidating than pressure canning. Strawberries, blueberries, peaches, apples, pears, and cherries can become jams, jellies, butters, or preserves. The trick is balancing fruit, acid, sugar, and pectin. Low-sugar recipes can work beautifully, but use a recipe designed for low-sugar canning rather than simply cutting sugar from a traditional formula.
Pickles and Relishes
Pickling is where cucumbers become crunchy little legends. Vinegar, salt, spices, and sometimes sugar create the tangy flavor and safe acidity needed for boiling-water canning. Use vinegar with the acidity specified in the recipe, usually 5 percent. Do not dilute vinegar or reduce it unless the recipe says so.
Tomatoes and Salsa
Tomatoes are tricky because modern tomato varieties and growing conditions can vary in acidity. For safety, tested recipes usually call for bottled lemon juice, citric acid, or vinegar. Bottled lemon juice is preferred over fresh lemon juice because its acidity is standardized. Salsa recipes deserve extra respect because peppers, onions, garlic, and herbs are low-acid ingredients. Use a tested salsa recipe and resist the urge to add “just a little more onion” unless you plan to refrigerate or freeze it instead.
Vegetables, Beans, Meat, and Stock
Plain vegetables, dried beans, meat, poultry, fish, seafood, and stock must be pressure canned. These foods are useful pantry staples, especially if you cook often, garden heavily, or like the idea of dinner starting with a shelf-stable jar instead of a grocery run.
Common Canning Mistakes to Avoid
Home canning is safe when done correctly, but small shortcuts can cause big problems. The most common mistakes include using untested recipes, processing low-acid foods in a boiling-water canner, guessing processing times, changing jar size, reusing flat lids, skipping altitude adjustments, thickening recipes with flour or starch before canning, and storing jars with screw bands still tightened.
Another mistake is trusting appearance alone. Spoiled food may smell bad, leak, foam, discolor, or grow mold, but dangerous contamination is not always visible. If a jar spurts, leaks, bulges, has a broken seal, smells off, or makes you suspicious, do not taste it. Throw it out safely. Your pantry is not a courtroom; suspicious jars do not deserve a lengthy trial.
How Preserving Saves Money and Reduces Waste
Preserving and canning shine brightest when food is abundant. If your garden produces 40 tomatoes in a single weekend, canning sauce or crushed tomatoes can prevent waste and future grocery spending. If peaches are inexpensive at the farmers market, jam and canned slices can stretch that seasonal bargain into winter.
That said, home canning is not always cheaper if you buy every jar, lid, tool, and ingredient new for one small batch. The savings grow when you reuse jars, preserve garden harvests, buy in-season produce, and make foods your household actually eats. There is no glory in 26 jars of pickled beets if everyone in the house treats beets like edible punishment.
Flavor Ideas for Beginners
For a first project, try strawberry jam, peach jam, apple butter, dill pickles, pickled red onions, or canned applesauce from a tested recipe. These projects teach jar handling, headspace, bubbling, sealing, and processing without requiring a pressure canner.
Once you feel comfortable, move into tomato sauce, salsa, chutney, relishes, and pressure-canned vegetables. Build skills one method at a time. Home preserving is much more enjoyable when you do not attempt jam, pickles, salsa, and 20 pounds of green beans on the same chaotic Saturday.
Real-Life Experiences With Preserving & Canning
The best preserving lessons often come from the kitchen, not the cookbook. One of the first things many home canners learn is that preparation matters more than enthusiasm. Enthusiasm says, “Let’s make jam tonight!” Preparation says, “Do we have enough lids, clean jars, sugar, lemon juice, labels, and counter space?” Enthusiasm is adorable. Preparation is what keeps you from driving to the store at 8:47 p.m. wearing an apron decorated with blueberry splatter.
A smart habit is to set up the kitchen before heating anything. Wash the jars, read the recipe twice, measure ingredients, clear a cooling area, and lay out tools in the order you will need them. This makes the process feel calm instead of frantic. Canning rewards the person who thinks ahead. Once syrup is boiling or tomatoes are simmering, you will not want to search through three drawers for the bubble remover.
Another practical experience: small batches are your friend. A beginner may look at a bushel of peaches and imagine a glowing pantry full of golden jars. Then reality arrives with sticky floors, tired feet, and a sink full of peels. Starting with four to six jars helps you learn the rhythm without turning the day into a fruit-based endurance sport. As your confidence grows, larger batches become easier.
Labeling is also more important than it seems. At first, you may believe you will remember what every jar contains. You will not. Three months later, apple butter and barbecue sauce can look suspiciously similar in dim pantry lighting. Label each jar with the name, date, and any useful details such as “low sugar,” “extra cinnamon,” or “spicy.” Future you will be grateful, and future toast will be safer from accidental salsa.
Storage teaches its own lessons. Keep jars away from heat, sunlight, and moisture. Remove screw bands before storing because a failed seal can be hidden by a tight band. Without the band, you can quickly see whether a lid has loosened. It also prevents bands from rusting onto jars, which is one of those small annoyances that can make a peaceful pantry feel like a hardware store argument.
Sharing home-canned food is one of the joys of preserving, but share responsibly. Give jars to people who will store them properly and use them within a reasonable time. Include the product name and date. If the food needs refrigeration after opening, say so. Homemade preserves make wonderful gifts, especially when paired with biscuits, bread, cheese, or a note that says, “Yes, I made this, and yes, I am accepting compliments.”
Finally, preserving becomes more meaningful when it connects to the seasons. Strawberry jam in spring, cucumber pickles in summer, tomato sauce in late summer, apple butter in fall, and pressure-canned stock in winter create a kitchen calendar that feels grounded and useful. Each jar becomes a small reminder of when the food was fresh, abundant, and worth saving. That is the heart of preserving and canning: not just storing food, but capturing time in a glass jar.
Conclusion
Preserving and canning are practical, creative, and deeply rewarding skills. They help reduce food waste, stretch seasonal abundance, stock the pantry, and create homemade foods with personality. The key is respecting the science. Use tested recipes, choose the correct canning method, adjust for altitude, maintain your equipment, and never guess when safety is involved.
Once you learn the basics, canning becomes less intimidating and more joyful. You begin to see summer berries as jam, cucumbers as pickles, tomatoes as sauce, and a quiet afternoon as a chance to fill the pantry with something beautiful. The jars may look old-fashioned, but the satisfaction is timeless.