Table of Contents >> Show >> Hide
- What Is Charcoal Line Drawing?
- Why Charcoal Is Perfect for Line Drawing
- Essential Materials for Charcoal Line Drawing 01
- Core Techniques in Charcoal Line Drawing
- How to Create a Charcoal Line Drawing Step by Step
- Best Subjects for Charcoal Line Drawing 01
- Common Mistakes Beginners Make
- How Charcoal Line Drawing Builds Artistic Skill
- Charcoal Line Drawing in Modern Art and Design
- Practice Exercises for Charcoal Line Drawing 01
- Experience Notes: What Charcoal Line Drawing 01 Feels Like in Real Practice
- Conclusion
Charcoal line drawing has a wonderfully dramatic personality. Pencil politely asks permission before making a mark; charcoal kicks open the studio door, leaves fingerprints on the table, and somehow makes the page look more alive. That is exactly why artists, designers, students, hobby sketchers, and curious beginners keep coming back to it. A simple black line on white paper can describe a face, a hand, a vase, a skyline, a memory, or the suspicious shape of your cat judging you from across the room.
Charcoal Line Drawing 01 is a beginner-friendly way to understand the power of line before getting lost in the smoky magic of shading. Instead of trying to create a fully realistic masterpiece on day one, this approach focuses on the essential building blocks: line weight, gesture, contour, value, texture, negative space, and expressive mark-making. In plain English, it teaches you how to make charcoal behave just enough while still letting it stay charmingly wild.
Charcoal is one of the oldest drawing materials in art history, and it remains popular because it is affordable, flexible, forgiving, and bold. You can use it for loose sketches, classical figure studies, expressive portraits, landscape drawings, still-life practice, abstract compositions, and dramatic black-and-white art. The best part? You do not need a luxury studio or a mysterious beret. A stick of charcoal, paper, an eraser, and a willingness to get a little dusty will do just fine.
What Is Charcoal Line Drawing?
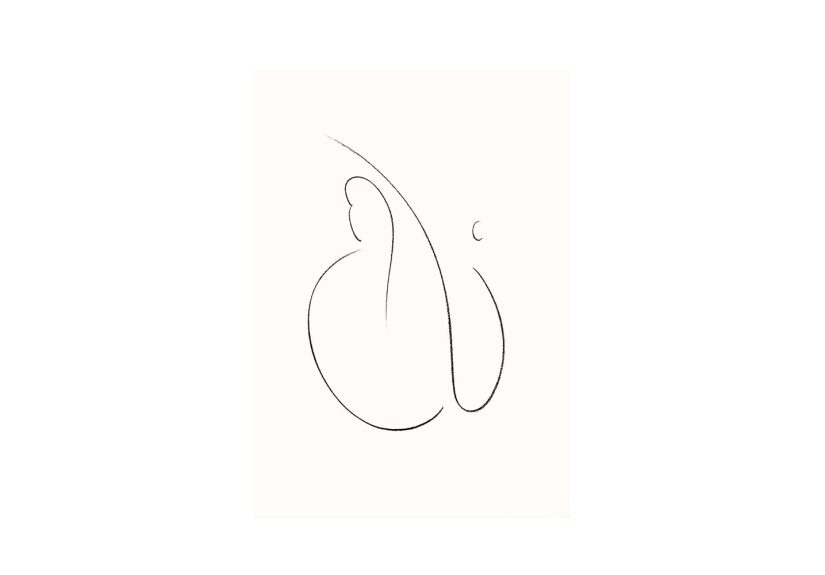
Charcoal line drawing is the practice of using charcoal to create images primarily through lines rather than heavy shading or full tonal rendering. The drawing may be simple or detailed, but the main visual language comes from the line itself. A thin line can suggest delicacy. A thick line can create strength. A broken line can feel nervous, weathered, or energetic. A sweeping line can show motion faster than a paragraph ever could.
In traditional drawing education, line is often the first step because it helps artists study proportion, direction, structure, and rhythm. Charcoal makes that process especially exciting because it responds quickly to pressure and movement. Press lightly and you get a pale, whispery mark. Press harder and the line becomes rich, dark, and confident. Turn the stick on its side and suddenly one line becomes a broad shape. Charcoal is basically the drama teacher of drawing tools.
Why Charcoal Is Perfect for Line Drawing
Charcoal has a unique visual quality that sets it apart from graphite, ink, colored pencil, and marker. It produces deep blacks, soft grays, velvety edges, and expressive textures. Because charcoal particles sit loosely on the surface of the paper, marks can be blended, erased, softened, or layered. That makes it excellent for both controlled line work and spontaneous sketching.
It Teaches Confidence
Charcoal does not reward timid scratching forever. It invites larger arm movements, clearer decisions, and stronger visual rhythm. Beginners often start by making tiny hesitant lines, but charcoal encourages broader gestures. This helps train your eye and hand to work together.
It Shows Line Weight Clearly
Line weight means the thickness, darkness, or strength of a line. In charcoal drawing, line weight can change instantly with pressure, angle, and speed. You can use darker lines for shadows, closer objects, or focal points. Lighter lines can describe distant edges, delicate forms, or areas where light hits the subject.
It Is Forgiving
Unlike ink, charcoal allows corrections. A kneaded eraser can lift lines, soften mistakes, or pull out highlights. You can smudge an awkward mark into a shadow, redraw an edge, or reshape a composition. Charcoal understands that creativity sometimes enters the room wearing mismatched socks.
Essential Materials for Charcoal Line Drawing 01
You do not need a mountain of supplies to begin. In fact, too many tools can slow you down. Start with a small, reliable set and learn how each item behaves.
Vine or Willow Charcoal
Vine and willow charcoal are soft, lightweight, and easy to erase. They are excellent for gesture drawing, early sketches, and loose line studies. These sticks create pale to medium-dark marks and are ideal when you want a drawing that can change as you work.
Compressed Charcoal
Compressed charcoal is darker, denser, and harder to erase than vine charcoal. It is great for bold lines, deep shadows, final accents, and expressive marks. Use it when you want strong contrast or dramatic emphasis.
Charcoal Pencils
Charcoal pencils offer more control than sticks. They are useful for small details, facial features, architectural lines, and refined edges. A charcoal pencil is helpful when your drawing needs precision without losing that soft charcoal character.
Drawing Paper
Charcoal works best on paper with some texture, often called “tooth.” Smooth paper can feel slippery and may not hold charcoal well. Medium-textured drawing paper, newsprint, toned paper, or charcoal paper can all work depending on the style you want.
Kneaded Eraser
A kneaded eraser is not just for fixing mistakes. It is a drawing tool. You can pinch it into a point to lift thin highlights, dab it over an area to lighten a value, or drag it through charcoal to create clean lines. It is part eraser, part sculpting tool, part tiny gray stress ball.
Blending Stump or Soft Cloth
For pure line drawing, blending should be used lightly. Still, a blending stump, tissue, or cloth can soften harsh marks and create subtle transitions. Just avoid turning every line into fog. A good charcoal drawing needs contrast, not a weather report.
Core Techniques in Charcoal Line Drawing
Charcoal line drawing becomes more powerful when you understand several basic techniques. These methods help you move from random marks to intentional visual storytelling.
1. Gesture Lines
Gesture drawing captures movement, energy, and overall form. Instead of obsessing over details, you draw quickly to understand the subject’s pose or direction. For example, if you are drawing a standing figure, a sweeping gesture line might show the curve of the spine, the tilt of the shoulders, or the weight on one leg.
Gesture lines are especially useful for figure drawing, animals, dancers, athletes, and anything that feels alive. The goal is not perfection. The goal is rhythm. Think of it as drawing the subject’s “body language” before drawing the subject’s buttons, eyelashes, or left shoelace.
2. Contour Lines
Contour drawing focuses on the outline and visible edges of a subject. A contour line can describe the curve of a cheek, the rim of a cup, the edge of a leaf, or the fold of fabric. Slow contour drawing trains observation because it forces you to look carefully rather than assume what an object looks like.
One useful exercise is blind contour drawing. Look at the subject, keep your eyes mostly off the paper, and draw the edges slowly. The results may look like your hand went on vacation without telling your brain, but the exercise improves hand-eye coordination.
3. Varying Line Weight
A drawing made with one identical line thickness can feel flat. Varying line weight adds depth and interest. Use heavier lines where forms overlap, where shadows fall, or where you want to guide the viewer’s eye. Use lighter lines for delicate edges or background details.
For instance, when drawing a simple bowl, the front rim may use a darker line because it is closer to the viewer. The back rim can be lighter. This small change creates depth without adding complicated shading.
4. Broken Lines
Not every edge needs to be fully drawn. Broken lines allow the viewer’s eye to complete the form. This technique can make charcoal drawings feel fresh, modern, and airy. It is especially useful for hair, fabric, foliage, clouds, and reflective objects.
5. Cross-Contour Lines
Cross-contour lines travel across the surface of a form rather than around its outer edge. Imagine lines wrapping around an apple, a cylinder, or a human arm. These marks help show volume and direction. They can make a flat page feel three-dimensional.
6. Subtractive Line Drawing
Subtractive drawing begins by covering part of the paper with charcoal, then using an eraser to “draw” light lines back into the surface. This technique is excellent for highlights, glowing edges, hair strands, reflective glass, and atmospheric effects. It reverses the usual process: instead of drawing darkness, you draw light.
How to Create a Charcoal Line Drawing Step by Step
For a beginner project, choose a simple subject such as a mug, plant, shoe, hand, chair, or portrait reference. Avoid overly complex scenes at first. Charcoal already has enough personality; you do not need to begin with a cathedral, a horse race, and seventeen bicycles.
Step 1: Set Up Your Workspace
Place your paper on a drawing board or flat surface. Keep a paper towel nearby because charcoal dust loves adventure. Good lighting is important. If you are drawing from life, use a lamp to create clear shadows and visible edges.
Step 2: Warm Up With Loose Marks
Before starting the final drawing, make a page of practice lines. Try light lines, dark lines, fast strokes, slow strokes, curved lines, sharp angles, thick side strokes, and erased lines. This warm-up helps your hand understand the charcoal.
Step 3: Sketch the Big Shapes
Use vine charcoal to lightly block in the main shapes. Do not begin with details. Look for the largest angles, proportions, and relationships. If drawing a vase, ask: How tall is it compared with its width? Where is the widest point? Is the neck centered? Does it lean?
Step 4: Find the Main Contours
Once the big shapes feel right, strengthen the important contours. Use confident lines, but keep them adjustable. At this stage, your drawing should look clear but not overworked.
Step 5: Add Line Weight
Decide where the drawing needs emphasis. Darken the lines closest to the viewer, under overlapping forms, or near shadow areas. Leave some edges light or incomplete. This contrast gives the drawing life.
Step 6: Use the Eraser as a Drawing Tool
Lift out highlights, clean up edges, or create thin light marks with a kneaded eraser. If the drawing becomes too heavy, gently dab areas to reduce darkness. Do not scrub the paper like you are trying to erase a bad life decision.
Step 7: Finish With Selective Detail
The final stage is about restraint. Add details only where they improve the drawing. A few sharp accents can be more effective than covering every inch with information. Let the viewer’s eye participate.
Best Subjects for Charcoal Line Drawing 01
Choosing the right subject can make practice more enjoyable. The best beginner subjects have clear shapes, visible edges, and interesting shadows.
Still Life Objects
Cups, bottles, fruit, keys, books, scissors, and folded cloth are excellent for charcoal line studies. They teach proportion, perspective, and edge control.
Portraits
Charcoal is famous for portrait drawing because it can create expressive lines and soft transitions. Start with simple head shapes and focus on the major planes of the face before adding features.
Hands
Hands are challenging but rewarding. They teach gesture, structure, and expressive contour. Start with quick hand poses rather than highly detailed renderings.
Plants and Flowers
Leaves, stems, and petals offer beautiful line variety. Broken lines work especially well for organic subjects because nature rarely uses a ruler.
Architecture and Interiors
Windows, chairs, doorways, and street corners help you practice perspective and confident straight lines. Charcoal can make even a humble chair look moody and important.
Common Mistakes Beginners Make
Every beginner makes mistakes, and most of them are useful. The trick is knowing what to watch for.
Using Only One Kind of Line
If every line is the same darkness and thickness, the drawing may feel stiff. Practice changing pressure and speed to create variety.
Over-Blending
Charcoal blends easily, but too much blending can make a drawing muddy. Keep some crisp lines and clean edges so the image does not disappear into gray soup.
Ignoring Negative Space
Negative space is the area around and between objects. Drawing negative shapes can improve accuracy. For example, when drawing a chair, look at the shapes between the legs instead of only drawing the legs themselves.
Pressing Too Hard Too Soon
Start lightly. Dark marks are harder to remove, especially with compressed charcoal. Build the drawing gradually so you can adjust proportions.
Trying to Finish Too Quickly
Charcoal line drawing rewards observation. Slow down long enough to compare angles, measure relationships, and notice subtle edges. Your drawing will thank you by looking less confused.
How Charcoal Line Drawing Builds Artistic Skill
Charcoal line drawing improves more than your ability to make attractive marks. It develops core art skills that transfer to painting, illustration, design, animation, digital art, and visual storytelling.
First, it strengthens observation. You learn to see shapes, edges, proportions, and spaces more accurately. Second, it improves hand control. The pressure of your hand changes the emotional tone of the drawing. Third, it teaches composition. A few strong lines can guide the viewer through the page. Finally, it builds confidence because charcoal encourages boldness. You cannot hide forever behind tiny, scratchy marks.
Charcoal Line Drawing in Modern Art and Design
Charcoal is not limited to classroom studies or traditional realism. Contemporary artists use it for large-scale drawings, expressive portraits, abstract work, animation studies, concept art, fashion sketches, and mixed-media pieces. Designers may use charcoal to explore form quickly before refining an idea digitally. Fine artists may use it for finished works that feel raw, emotional, and immediate.
The beauty of charcoal line drawing is that it can look ancient and modern at the same time. A charcoal mark connects us to early human image-making, yet it also fits perfectly in contemporary galleries, sketchbooks, classrooms, and social media portfolios. It is proof that simple tools can still create powerful visual experiences.
Practice Exercises for Charcoal Line Drawing 01
To improve quickly, use short focused exercises rather than waiting for the perfect grand project. Practice is where the magic happens, though it sometimes arrives covered in charcoal dust.
Five-Minute Gesture Drawings
Set a timer for five minutes and draw a subject quickly. Focus on movement and major shapes. Do several in a row. This builds speed and confidence.
One-Line Contour Drawing
Draw an object without lifting the charcoal from the paper. This helps you connect forms and observe transitions.
Line Weight Scale
Create a row of lines from the lightest possible mark to the darkest. Repeat with different charcoal tools. This exercise teaches pressure control.
Negative Space Study
Place a plant, chair, or kitchen object in front of you. Draw only the spaces around it. This improves accuracy and composition.
Subtractive Drawing Practice
Cover a small area with charcoal, then use a kneaded eraser to draw light lines. Try hair, grass, fabric folds, or reflected light.
Experience Notes: What Charcoal Line Drawing 01 Feels Like in Real Practice
Working on Charcoal Line Drawing 01 feels different from sitting down with a pencil sketch. The first surprise is how physical charcoal is. You do not simply draw with your fingers; you draw with your wrist, elbow, shoulder, and sometimes your whole upper body. A long line across the page feels like a small performance. If pencil drawing is handwriting, charcoal drawing is closer to dancing while holding a burnt twig.
One of the most useful experiences is learning to stop fearing bold marks. Many beginners try to control charcoal too tightly at first. They make tiny lines, erase constantly, and worry about smudges. But charcoal becomes more enjoyable when you accept its nature. It will smudge. It will leave dust. It may decorate the side of your hand like you have been repairing a chimney. That messiness is not a flaw; it is part of the medium’s expressive power.
A good beginner experience is drawing a simple object, such as a white mug under a desk lamp. At first, the mug may look uneven. The ellipse might wobble. The handle might resemble an ear with ambitions. But after a few minutes of comparing angles and adjusting the contour, the object starts to appear. A thicker line under the cup gives it weight. A lighter line on the far rim creates distance. A small erased highlight makes the surface feel round. Suddenly, the drawing is not just a mug; it is a study of light, pressure, and attention.
Another memorable experience is discovering how powerful the eraser can be. In charcoal drawing, erasing does not mean failure. It means editing, shaping, and adding light. Pulling a clean line out of a dark charcoal field can feel almost magical. This is especially satisfying when drawing hair, fabric, leaves, or reflective objects. You realize that drawing is not only about adding marks. Sometimes it is about removing them at exactly the right moment.
Charcoal line drawing also teaches patience in a sneaky way. Because the medium is fast, you may expect instant results. Yet the best drawings often come from slowing down: looking longer, measuring more carefully, and deciding which lines matter most. The blank paper becomes less intimidating once you understand that not every edge needs to be explained. Some of the most beautiful charcoal drawings use restraint. A few confident marks can say more than a page crowded with nervous detail.
The biggest lesson from practicing Charcoal Line Drawing 01 is that imperfection can be expressive. A slightly broken line may feel more human than a perfect one. A smudge can become atmosphere. A dark accent can create drama. A lifted highlight can rescue a form. Over time, you begin to see charcoal not as a messy beginner tool but as a serious artistic partner. It responds to your mood, your speed, your pressure, and your attention. It makes your decisions visible.
For anyone starting out, the best advice is simple: use cheap paper, draw often, and make many small studies. Do not wait for the perfect idea. Draw your shoe, your coffee cup, your hand, your houseplant, your hallway, or the chair that somehow collects laundry faster than science can explain. Each drawing will teach something. Some will be awkward. Some will surprise you. All of them will move your eye and hand closer together.
Conclusion
Charcoal Line Drawing 01 is more than a beginner art exercise. It is an invitation to understand how much expression can live inside a single line. With a few basic tools and regular practice, charcoal can teach you gesture, contour, line weight, proportion, contrast, texture, and visual confidence. It is bold enough for dramatic artwork, soft enough for delicate studies, and forgiving enough for beginners who are still negotiating with their hand-eye coordination.
Whether you want to create portraits, still-life drawings, expressive sketches, or modern black-and-white artwork, charcoal line drawing gives you a strong foundation. Start simple. Use varied lines. Observe carefully. Let mistakes become part of the process. And keep a paper towel nearby, because charcoal may be beautiful, but it is not known for respecting clean fingers.