Table of Contents >> Show >> Hide
- What Winterizing a Mercruiser Really Means
- Before You Start: Safety and Supplies
- Step 1: Read Your Mercruiser Manual First
- Step 2: Treat the Fuel Before the Final Run
- Step 3: Warm the Engine and Change the Oil
- Step 4: Replace the Fuel-Water Separator
- Step 5: Flush the Cooling System
- Step 6: Drain the Raw Water Completely
- Step 7: Add Marine Antifreeze the Right Way
- Step 8: Fog or Internally Protect the Engine
- Step 9: Change the Sterndrive Gear Lube
- Step 10: Inspect the Prop, Bellows, and Drive
- Step 11: Take Care of the Battery
- Step 12: Lubricate, Protect, and Clean
- Step 13: Cover and Store the Boat Correctly
- Common Mercruiser Winterization Mistakes to Avoid
- DIY or Professional Service?
- A Practical Mercruiser Winterization Checklist
- Real-World Experience: Lessons From Winterizing a Mercruiser
- Conclusion
- SEO Tags
Winterizing a Mercruiser is one of those boat-owner chores that sounds intimidating until you break it into small, sensible steps. Then it becomes less like “marine surgery” and more like putting your boat into a cozy, antifreeze-flavored hibernation. The goal is simple: protect your engine, sterndrive, fuel system, cooling passages, battery, and expensive metal parts from freezing, corrosion, stale fuel, and surprise springtime repair bills.
If you own a Mercruiser sterndrive or inboard, proper winterization is not optional in freezing climates. Water trapped inside the block, manifolds, hoses, coolers, or sterndrive can expand when it freezes. That expansion can crack parts that cost far more than a few gallons of marine antifreeze and an afternoon of careful work. Even in milder areas, winter storage can invite corrosion, fuel problems, dead batteries, and sticky components if the boat sits neglected.
This guide explains how to winterize your Mercruiser in a practical, step-by-step way. It is written for owners who want to understand the process before doing it themselves or before checking whether a shop did the job correctly. Your exact engine model matters, so use this article as a detailed roadmap, not a replacement for your Mercruiser owner’s manual or a certified Mercury Marine technician.
What Winterizing a Mercruiser Really Means
To winterize a Mercruiser means preparing the engine and drive system for months of storage. A complete Mercruiser winterization usually includes stabilizing the fuel, changing the engine oil and filter, replacing or checking the fuel-water separator, flushing the cooling system, draining raw water, adding marine antifreeze, fogging or internally protecting the engine when appropriate, changing sterndrive gear lube, servicing the battery, lubricating key parts, and storing the boat clean and dry.
The job is not just about freezing temperatures. Winterization also protects against rust, acidic oil contaminants, moisture inside cylinders, ethanol fuel issues, and gear-case water intrusion. Think of it as sending your Mercruiser to winter camp with a warm jacket, clean socks, and strict instructions not to make expensive noises in April.
Before You Start: Safety and Supplies
Gather supplies before the boat is half apart. You may need marine fuel stabilizer, engine oil, an oil filter, a fuel-water separating filter, marine-grade propylene glycol antifreeze, fogging oil or manufacturer-recommended storage products, sterndrive gear lube, a gear-lube pump, basic hand tools, a motor flusher or winterizing kit, a garden hose, drain-pan containers, rags, marine grease, corrosion inhibitor, and battery maintenance tools.
Safety matters. Work in a well-ventilated area, keep hands, clothing, and tools away from belts and pulleys, never run the engine without cooling water, and do not run the engine in an enclosed garage. Used oil, gear lube, and old filters should be collected and taken to an approved recycling or disposal location. Do not pour fluids onto the ground, into storm drains, or into the water. Your boat deserves care, and so does the lake you want to enjoy next season.
Step 1: Read Your Mercruiser Manual First
The first step in learning how to winterize your Mercruiser is finding the correct procedure for your exact model. A 3.0L, 4.3L, 5.0L, 5.7L, 6.2L, or 8.2L Mercruiser may have different drain points, cooling layouts, filters, hose routing, and fogging recommendations. Some engines have manual drain plugs. Others use single-point or three-point drain systems. Some are raw-water cooled, while others have closed cooling with a heat exchanger.
Do not guess where the drains are. A missed drain plug can leave water trapped in a low spot. A hose that looks empty may still hold enough water to freeze and cause trouble. Your manual or a service diagram will show the block drains, manifold drains, coolers, hoses, seawater pump, and other areas that need attention.
Step 2: Treat the Fuel Before the Final Run
Add a marine fuel stabilizer to the fuel tank before your final run of the season. Then run the engine long enough for treated fuel to circulate through the lines, fuel pump, injectors or carburetor, and fuel-water separator. This helps reduce varnish, gum, and phase-separation problems during storage.
Many boaters prefer to store the tank nearly full to reduce condensation, but you should follow your local fuel guidance and your boat manufacturer’s recommendation. Ethanol-blended gasoline can absorb moisture, so stabilizing the fuel is especially important. If your boat has old fuel or suspected water contamination, deal with that before winter. Stabilizer is helpful, but it is not magic juice from a wizard marina.
Step 3: Warm the Engine and Change the Oil
Changing the engine oil before storage is one of the smartest things you can do for a Mercruiser. Old oil contains moisture, fuel dilution, acids, and combustion byproducts. Letting those contaminants sit inside the engine all winter is like storing your favorite tools in a damp basement and hoping for the best.
Run the engine on the hose or in the water until it reaches operating temperature, making sure cooling water is flowing properly. Warm oil drains or pumps out more easily. Then shut the engine down, extract or drain the old oil according to your setup, replace the oil filter, and refill with the oil grade specified for your Mercruiser. Check for leaks after restarting briefly.
Step 4: Replace the Fuel-Water Separator
The fuel-water separator is a small part with a big job. It helps catch water and debris before they reach the engine. Replacing it during winterization is cheap insurance, especially if the boat has been used in humid weather, rough water, or inconsistent fueling conditions.
Before removing the old filter, place absorbent pads or a drain pan beneath it. Spin it off carefully, inspect the contents if possible, lubricate the gasket on the new filter, and install it snugly by hand. Do not overtighten. Afterward, check for fuel leaks when the engine is run again.
Step 5: Flush the Cooling System
Flush the Mercruiser cooling system with fresh water to remove salt, sand, silt, and debris. This is especially important if the boat has been used in saltwater or brackish water. Attach the proper motor flusher or water supply setup, confirm strong water flow, and run the engine only as directed.
Flushing is not the same as winterizing. It cleans the system, but it does not guarantee freeze protection. After flushing, you still need to drain water and protect the system with the correct marine antifreeze procedure for your engine. A clean cooling system simply gives antifreeze and corrosion protection a better chance to do their job.
Step 6: Drain the Raw Water Completely
This is the heart of Mercruiser winterization. Water must be drained from the engine block, exhaust manifolds, coolers, hoses, seawater pump, and other raw-water sections. Depending on your model, this may involve removing blue drain plugs, opening a single-point drain system, disconnecting hoses, or using factory drain fittings.
Do not rush this step. Remove the correct drains and make sure water actually flows out. If no water comes out, the drain may be clogged with rust flakes or sediment. Carefully clear the opening according to the manual until water drains freely. A drain plug that is “open” but clogged is basically a locked door wearing a welcome sign.
Raw-water-cooled engines require especially careful draining because lake or seawater circulates through the block and manifolds. Closed-cooled engines still have raw-water components, such as the heat exchanger and exhaust system, that must be drained or protected. Never assume “closed cooling” means “nothing can freeze.”
Step 7: Add Marine Antifreeze the Right Way
After draining, add marine-grade propylene glycol antifreeze according to your engine’s winterization procedure. Use a product rated for temperatures lower than your expected winter conditions. Marine antifreeze is not the same as automotive antifreeze, and propylene glycol products are commonly used because they are designed for marine winterizing applications.
Some procedures use a winterizing tank and motor flusher to draw antifreeze through the drive and engine until it exits the exhaust. Others require pouring antifreeze into hoses after draining. The best method depends on the engine and cooling system design. On many Mercruiser engines, draining first is critical because thermostats and trapped pockets can prevent antifreeze from reaching every vulnerable area if you only run it through quickly.
When in doubt, drain thoroughly first, then add antifreeze as the manufacturer recommends. The point is not to make the exhaust look pink for social media. The point is to protect every water-filled passage that freezing temperatures can attack.
Step 8: Fog or Internally Protect the Engine
Fogging helps coat internal engine surfaces so they are less likely to corrode during storage. The correct approach depends on whether your Mercruiser is carbureted, throttle-body injected, multi-port fuel injected, or equipped with emissions-sensitive components. Older carbureted engines are often fogged through the intake while running. Some fuel-injected engines require a different storage mixture or procedure and should not be fogged through the throttle body unless the manual specifically allows it.
If your manual recommends fogging through the spark plug holes, remove the plugs, apply the correct storage oil, rotate the engine as directed, and reinstall or replace the plugs. If your engine uses a manufacturer-specific method, follow that instead. This is one area where “my buddy did it this way in 1998” is not a service manual.
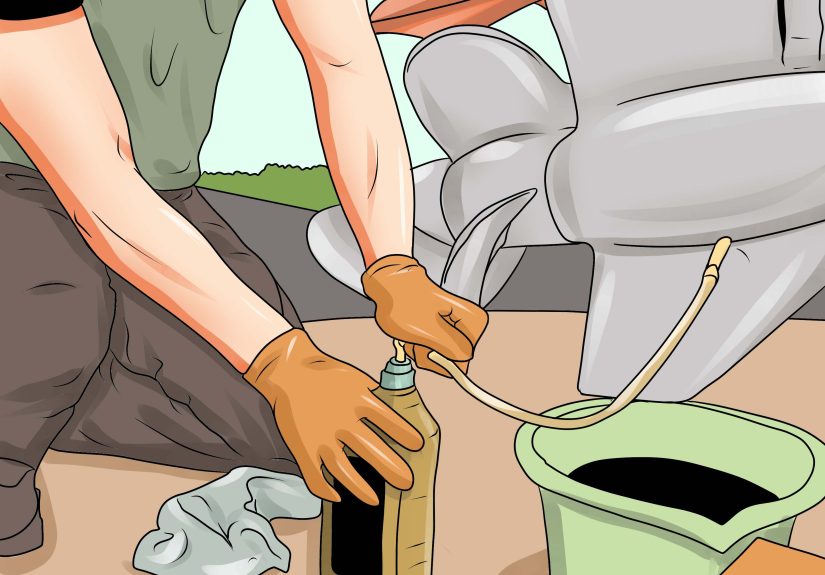
Step 9: Change the Sterndrive Gear Lube
Changing the sterndrive gear lube before winter is important because it lets you check for water intrusion. Milky, gray, foamy, or coffee-colored gear lube can indicate water in the drive. Metal shavings may point to internal wear. Either problem should be handled before storage, not discovered at the launch ramp while everyone else is having a cheerful spring.
Drain the gear lube from the lower unit according to the drive procedure, usually from the bottom drain with the upper vent opened. Refill from the bottom with the specified Mercruiser-compatible gear lube until it reaches the vent, then reinstall seals and plugs with new gaskets if required. Check the remote gear-lube reservoir if your boat has one.
Step 10: Inspect the Prop, Bellows, and Drive
Remove the propeller and inspect the prop shaft for fishing line. Fishing line can cut into seals and allow water into the gear case. Grease the prop shaft with the recommended marine grease before reinstalling the prop. Inspect the prop for damage, the skeg for impact marks, and the anodes for wear.
Look closely at the bellows, shift cable area, gimbal bearing area, trim rams, and hydraulic hoses. Cracked bellows can allow water into places water should not be. If you see dry rot, splits, leaking oil, or suspicious corrosion, schedule service before winter storage or before spring launch.
Step 11: Take Care of the Battery
A neglected battery can turn spring boating into spring muttering. Disconnect the battery, clean the terminals, and store it in a cool, dry place if appropriate for your setup. Charge it fully and use a smart maintainer designed for marine batteries. Avoid leaving a battery discharged through the winter because deep discharge can shorten its life.
If the battery remains in the boat, make sure all loads are off and the battery is protected from moisture. Label cables if needed so reconnection is easy. A simple photo before disconnecting can prevent the classic spring game called “Which Red Cable Was That Again?”
Step 12: Lubricate, Protect, and Clean
Winterization is a good time to lubricate steering components, throttle and shift linkages where applicable, hinges, latches, and other moving parts. Spray corrosion inhibitor on appropriate metal surfaces, but keep it away from belts, pulleys, and surfaces where it does not belong.
Clean the bilge, remove wet gear, dry storage compartments, and wash the boat. Mildew loves trapped moisture, forgotten towels, and snack crumbs. Remove electronics, life jackets, and valuables. Open compartments slightly for airflow if the boat will be covered. A dry boat is a happier boat.
Step 13: Cover and Store the Boat Correctly
A quality boat cover or shrink wrap protects against rain, snow, leaves, UV exposure, and curious critters looking for waterfront real estate. Make sure the cover is supported so water and snow do not pool. Provide ventilation to reduce condensation and mildew.
If the boat is stored on a trailer, check tire pressure, support the trailer properly, and consider blocking it according to safe storage practices. Remove the drain plug so water cannot collect in the bilge. Store the plug somewhere obvious, such as clipped to the steering wheel or taped near the ignition, so it does not become the star of a very wet spring story.
Common Mercruiser Winterization Mistakes to Avoid
Running Antifreeze Without Draining First
On some systems, simply drawing antifreeze through the intake may not protect every area, especially if the thermostat does not open or water remains trapped. Follow the manual and drain thoroughly.
Forgetting Manifold or Cooler Drains
Engine blocks get attention, but exhaust manifolds, power-steering coolers, fuel coolers, and hoses can also hold water. Missing one small component can create one large bill.
Ignoring Milky Gear Lube
Water in the sterndrive gear case is a warning sign. Do not refill and pretend you never saw it. Pressure testing and seal repair may be needed.
Using the Wrong Antifreeze
Use marine-grade antifreeze suitable for winterizing. Do not randomly substitute automotive coolant. Your cooling system, storage environment, and local regulations matter.
Skipping Fuel Stabilizer
Untreated fuel can create hard starts, poor running, and fuel-system deposits. Stabilize fuel before the final run so it circulates throughout the system.
DIY or Professional Service?
You can winterize your Mercruiser yourself if you are comfortable with basic mechanical work, have the correct manual, and understand your engine’s cooling system. However, professional winterization is wise if you are unsure about drain locations, have a newer fuel-injected engine with special storage procedures, suspect drive leaks, or store the boat in a region with hard freezes.
A certified technician can also spot problems you might miss, such as cracked bellows, worn belts, leaking hoses, weak batteries, corroded terminals, or early signs of drive trouble. Paying for skilled service can feel annoying until you compare it with the price of a cracked block. Suddenly, the technician looks less like an expense and more like a financial guardian angel with a socket set.
A Practical Mercruiser Winterization Checklist
- Review the owner’s manual for your exact Mercruiser model.
- Add marine fuel stabilizer and run the engine to circulate treated fuel.
- Warm the engine and change the oil and oil filter.
- Replace or inspect the fuel-water separator.
- Flush the cooling system with fresh water.
- Drain the block, manifolds, coolers, hoses, and raw-water sections.
- Add marine-grade propylene glycol antifreeze as specified.
- Fog or internally protect the engine only as recommended for your engine type.
- Change sterndrive gear lube and inspect for water or metal particles.
- Remove the prop, inspect for fishing line, and grease the prop shaft.
- Inspect bellows, anodes, trim rams, belts, hoses, and clamps.
- Disconnect, charge, and maintain the battery.
- Clean the bilge, dry the interior, remove valuables, and ventilate compartments.
- Cover the boat securely and store it with the drain plug removed.
Real-World Experience: Lessons From Winterizing a Mercruiser
The first time you winterize a Mercruiser, the job can feel like a scavenger hunt designed by engineers with a sense of humor. You find one blue drain plug, feel proud, then realize there are more hiding behind hoses, brackets, and shadows. That is why the manual matters so much. Experienced boat owners often say the same thing: once you learn your specific engine, winterization becomes routine, but the first season should be slow, careful, and checklist-driven.
One of the most useful habits is taking photos during the process. Snap pictures of hose routing, drain plug locations, battery cable positions, gear-lube color, and anything that looks questionable. These photos become your personal Mercruiser winterization map. Next fall, instead of standing in the driveway wondering where that “one little plug” went, you can check your photos and move with confidence.
Another lesson is to prepare for mess. Oil extraction sounds clean until the hose slips. Gear lube has a smell that seems scientifically engineered to stay in your memory. Antifreeze can splash when you least expect it. Use drain pans, absorbent pads, gloves, and old clothes. Keep a trash bag nearby. A neat work area makes the job safer and keeps you from tracking marine grease into the house, where your family may not appreciate your dedication to boating.
Timing also matters. Do not wait until the first freeze warning to start. Boat shops get busy, parts sell out, and cold fingers make small tasks feel twice as annoying. Winterize when the season is ending but the weather is still comfortable. A calm Saturday in October is better than a flashlight repair session in freezing wind while your neighbors pretend not to laugh.
Pay attention to what the fluids tell you. Clean oil is reassuring. Milky gear lube is not. Rusty drain water, cracked hoses, weak clamps, or heavy corrosion are clues. Winterization is not only a storage procedure; it is an annual inspection. The best boat owners use this moment to catch little problems before they become dockside drama.
Finally, label everything. Put drain plugs in a marked bag. Tag the ignition with a reminder if the engine has been drained or if the battery is disconnected. Keep receipts for oil, filters, antifreeze, and gear lube. Write down the date, engine hours, and what was completed. This record helps with maintenance planning, resale value, and your own peace of mind.
The biggest experience-based tip is simple: do not treat winterization as a race. Slow is smooth, and smooth prevents cracked castings, dry starts, dead batteries, and springtime regret. A properly winterized Mercruiser should wake up in spring like it had a nice nap, not like it spent the winter plotting revenge.
Conclusion
Learning how to winterize your Mercruiser is one of the best investments you can make as a boat owner. The process protects the engine from freeze damage, shields internal parts from corrosion, preserves fuel quality, keeps the sterndrive healthy, and makes spring commissioning much easier. The key is to follow a complete plan: stabilize the fuel, change contaminated fluids, drain raw water thoroughly, add the right marine antifreeze, protect the cylinders if required, service the drive, care for the battery, and store the boat clean and dry.
Every Mercruiser model has its own details, so never rely on guesswork alone. Use your owner’s manual, consult a certified Mercury Marine technician when needed, and create a repeatable checklist for your boat. Done correctly, Mercruiser winterization is not just seasonal maintenance. It is a promise to your future self that the first warm boating day of spring will involve more cruising and less cursing.
Note: This article is written for general educational and publishing purposes. Always follow the off:icial owner’s manual for your exact Mercruiser model, use marine-rated products, recycle used fluids responsibly, and consult a certified marine technician if you are unsure about any step.