Table of Contents >> Show >> Hide
- Why Nail Polish Bottles Get Stuck
- How to Open Stuck Nail Polish: 9 Steps
- Step 1: Check the Bottle Before You Start
- Step 2: Wipe the Cap and Bottle Dry
- Step 3: Add a Rubber Band for Better Grip
- Step 4: Run Warm Water Over the Cap Only
- Step 5: Soak the Cap Upside Down
- Step 6: Use Nail Polish Remover Around the Neck
- Step 7: Try Gentle Leverage, Not Brute Force
- Step 8: Clean the Bottle Neck After Opening
- Step 9: Store Nail Polish the Right Way
- What Not to Do When a Nail Polish Bottle Is Stuck
- How to Prevent Nail Polish Caps From Getting Stuck Again
- When Should You Throw Away Stuck Nail Polish?
- Extra Tips for Different Types of Stuck Bottles
- Real-Life Experience: What Actually Works Best
- Conclusion
A stuck nail polish bottle is one of those tiny household dramas that feels wildly personal. One minute you are ready for a quick manicure, the next you are wrestling a half-ounce glass bottle like it owes you rent. The good news: you usually do not need superhero strength, a toolbox worthy of a mechanic, or dramatic background music. You just need the right method, a little patience, and a healthy respect for the fact that nail polish is basically pretty paint with an attitude.
This guide explains how to open stuck nail polish safely using nine practical steps. You will learn how to loosen dried polish around the cap, improve your grip, use warm water correctly, clean the bottle neck, and prevent the problem from happening again. We will also cover what not to do, because smashing the bottle on the counter is not a manicure technique, no matter how tempting it feels.
Why Nail Polish Bottles Get Stuck
Most stuck nail polish caps are caused by dried polish around the bottle neck. When you paint your nails, a small amount of lacquer can collect on the rim or threads. Once the cap is screwed back on, that polish dries and acts like colorful glue. Over time, the seal becomes tighter, especially if the bottle was stored sideways, exposed to heat, or closed with polish still smeared around the neck.
Another common reason is poor grip. Many nail polish caps are smooth, narrow, or glossy, which makes them hard to twist even when they are not truly sealed shut. That is why a simple rubber band can feel like magic. It is not magic, technically. It is traction. But when your favorite red polish finally opens, you may still want to call it sorcery.
How to Open Stuck Nail Polish: 9 Steps
Step 1: Check the Bottle Before You Start
Before you attack the cap, inspect the bottle. Look for cracks in the glass, dried polish around the rim, or signs that the cap is crooked. If the bottle is cracked, leaking, or bulging, do not force it open. Nail polish and remover products can contain strong solvents, and many are flammable, so it is smarter to discard a damaged bottle than risk a spill near heat, candles, or electronics.
Place the bottle on a stable surface and work in a well-ventilated area. Keep paper towels nearby. If you plan to use acetone or nail polish remover, avoid open flames and wash your hands afterward. Beauty should involve sparkle, not emergency room paperwork.
Step 2: Wipe the Cap and Bottle Dry
Sometimes a bottle feels stuck simply because the cap is slippery. Lotion, cuticle oil, water, or old polish residue can make the cap difficult to grip. Use a dry towel or paper towel to wipe the cap and glass body. Hold the bottle low around the square or round glass base, not by the neck, so you are less likely to strain the glass.
Try twisting again with steady pressure. Avoid sudden jerks. A smooth, controlled twist works better than a dramatic wrenching motion. If it opens, congratulations: the problem was grip, not glue. Clean the rim before putting the bottle away so it does not turn into tomorrow’s tiny beauty villain.
Step 3: Add a Rubber Band for Better Grip
Wrap a thick rubber band around the cap several times. The rubber creates friction, making it easier for your fingers to hold the lid firmly. If the glass body is also slippery, wrap another rubber band around the bottle itself. Now twist slowly while keeping the bottle upright.
This is one of the easiest ways to open a stuck nail polish bottle because it solves the grip issue without using chemicals or heat. It is especially helpful for mini bottles, glossy caps, and caps shaped like smooth cylinders. A silicone jar opener, dishwashing glove, or textured kitchen towel can also work.
Step 4: Run Warm Water Over the Cap Only
If the rubber band trick fails, try warm water. Hold the bottle so only the cap and upper neck are under warm running water for about 30 to 60 seconds. Do not use boiling water. Extreme heat can stress the glass, damage the formula, or make a mess if the bottle slips.
The goal is to gently soften the dried polish around the threads. After warming the cap, dry it completely and try twisting again with a rubber band or towel. Keep the bottle upright as much as possible so water does not seep into the polish. Water and nail polish are not exactly best friends; they are more like awkward coworkers forced into the same elevator.
Step 5: Soak the Cap Upside Down
For a cap that is seriously sealed, fill a small cup with warm water and turn the bottle upside down so only the cap is submerged. Let it sit for three to five minutes. You can balance the bottle across the rim of the cup or hold it carefully. The key is to avoid dunking the entire bottle.
Remove the bottle, dry the cap thoroughly, and twist again. This method gives the dried polish a little more time to soften. If you see colored residue in the water, that is a clue that old lacquer is loosening. Try not to celebrate too early; dry the cap first, then twist.
Step 6: Use Nail Polish Remover Around the Neck
If warm water is not enough, use a small amount of nail polish remover or acetone. Dip a cotton swab into the remover, turn the bottle upside down, and carefully apply the liquid into the gap between the cap and the glass neck. Wait one to two minutes, then try opening the bottle again.
Acetone is effective because it dissolves dried nail polish, but it can also dry out skin and damage some surfaces. Use only a little, work over a protected surface, and wash your hands after. Do not pour remover into the bottle unless you are intentionally trying to thin old polish, and even then, nail polish thinner is usually a better choice than acetone for preserving the formula.
Step 7: Try Gentle Leverage, Not Brute Force
If the cap still refuses to move, use gentle leverage. A silicone gripper, rubber gloves, or a soft cloth can help you hold the cap more securely. If you use pliers, wrap the cap in a thick cloth first and apply very light pressure. The goal is to grip the cap, not crush it.
Avoid squeezing the glass bottle with tools. Nail polish bottles are small, and glass can break if pressure is uneven. If you feel the cap suddenly loosen, stop and switch back to your hand. Tools can turn a small twist into an accidental spill very quickly. Your countertop does not need a surprise manicure.
Step 8: Clean the Bottle Neck After Opening
Once the bottle opens, do not immediately close it and pretend nothing happened. That is how the sequel begins. Dip a cotton pad or cotton swab in nail polish remover and wipe the bottle neck, rim, and cap threads. Remove any dried polish that could glue the cap shut again.
Be careful not to drip remover into the polish unless you are okay with slightly changing the consistency. Wipe the brush stem if it has thick buildup, then close the bottle firmly but not aggressively. A clean rim creates a better seal and makes the bottle easier to open next time.
Step 9: Store Nail Polish the Right Way
Proper storage prevents stuck caps, clumpy polish, and sad little bottles that age before their time. Store nail polish upright in a cool, dry, dark place, away from direct sunlight, heaters, and steamy bathrooms. Temperature changes can affect the formula and may make polish thicken faster.
After each manicure, wipe the rim before closing the bottle. Keep the cap snug, but do not twist it with all your strength. If you have a large polish collection, organize bottles upright in a drawer, storage case, or shelf where they will not tip over. A neat polish collection is not just pretty; it is practical damage control.
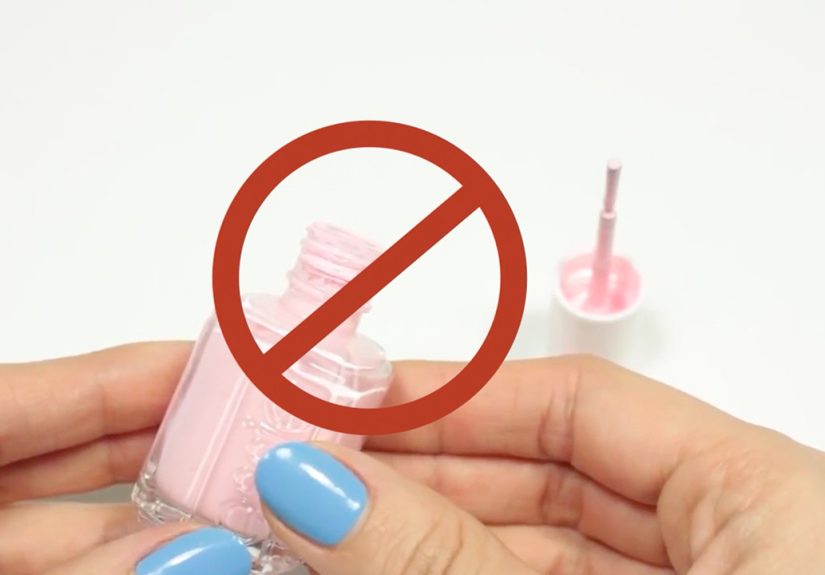
What Not to Do When a Nail Polish Bottle Is Stuck
Do Not Use Boiling Water
Warm water can help loosen dried polish, but boiling water is too risky. Sudden temperature changes may stress the glass bottle, and excessive heat can affect the nail polish formula. Stick with warm water that is comfortable to touch.
Do Not Microwave Nail Polish
Never microwave nail polish. Nail polish contains solvents, and heating it in a microwave can be dangerous. It can also ruin the polish, damage the bottle, or create fumes. This is one shortcut that should stay firmly in the land of bad ideas.
Do Not Bang the Bottle on a Counter
Tapping may seem harmless, but hitting a glass bottle can cause cracks or breakage. If dried polish is acting like glue, impact will not solve the problem as safely as warmth, remover, and grip. Also, nobody wants to explain why there is glitter polish on the ceiling.
Do Not Pour Too Much Acetone Into the Bottle
A little remover around the cap can help open the bottle, but dumping acetone into nail polish can change how it applies, dries, and wears. If the polish itself has thickened, use a proper nail polish thinner and add it drop by drop.
How to Prevent Nail Polish Caps From Getting Stuck Again
Prevention is simple: keep the neck clean, store bottles upright, and close caps properly. After painting your nails, take ten seconds to wipe the rim with a cotton pad lightly dampened with remover. This removes the sticky ring of polish before it hardens.
Also avoid painting directly over the open bottle when possible. Extra drips tend to land on the neck and threads. Instead, wipe one side of the brush on the inside lip and apply thin coats. Thin coats dry better, look smoother, and create less mess around the bottle opening.
If you notice a polish getting thick, do not shake it violently. Rolling the bottle between your palms is gentler and helps mix the formula without creating as many bubbles. For old polish, add nail polish thinner according to the product directions. If the polish smells strange, separates permanently, or refuses to apply smoothly, it may be time to let it retire with dignity.
When Should You Throw Away Stuck Nail Polish?
Not every bottle is worth saving. Toss nail polish if the glass is cracked, the brush has hardened beyond repair, the formula is stringy or chunky even after thinner, or the smell seems unusually strong or off. You should also discard polish that has leaked, dried around the cap repeatedly, or changed color dramatically.
A sentimental shade can be hard to release. Maybe it was your wedding-weekend pink, your first interview nude, or the glitter polish you bought during an optimistic craft-store trip. Still, old nail polish can become frustrating to apply and difficult to remove. Sometimes the most beautiful manicure choice is making room for a fresh bottle that behaves itself.
Extra Tips for Different Types of Stuck Bottles
Mini Nail Polish Bottles
Mini bottles are adorable until you need to grip them. Use a rubber band around both the cap and the bottle body. If your fingers keep slipping, wear rubber gloves or use a silicone jar opener.
Square Bottles
Square bottles are easier to hold, but their decorative caps can sometimes separate from the inner screw cap. If the outer cap spins without opening the bottle, gently pull it off if possible, then twist the smaller inner cap with a rubber band.
Old Glitter Polish
Glitter polish can dry around the rim like sparkly cement. Warm water plus a small amount of remover around the neck usually works best. Clean the rim thoroughly after opening because glitter particles love to create repeat problems.
Real-Life Experience: What Actually Works Best
In real life, opening stuck nail polish is usually less about one perfect trick and more about combining small fixes. The first time I dealt with a truly stuck bottle, I made the classic mistake: I twisted harder. Then I twisted even harder, because apparently my brain believed determination could dissolve dried lacquer. It could not. All I achieved was a red mark on my palm and a new respect for tiny caps.
The method that worked best was surprisingly simple. I wiped the cap dry, wrapped a rubber band around it, and tried again. No movement. Then I held only the cap under warm running water for about a minute, dried it completely, added the rubber band again, and twisted slowly. The cap finally opened with a tiny pop, which felt more dramatic than it had any right to feel.
Since then, I have learned that patience matters. When a bottle is glued shut with dried polish, forcing it immediately can make the situation worse. Your hand slips, the cap gets scratched, and you start considering tools that were never meant to be part of a manicure. A better approach is to work in stages: grip first, warmth second, remover third, tools last.
One useful habit is keeping a small “polish rescue kit” near your manicure supplies. Mine includes cotton swabs, cotton pads, a few rubber bands, a small towel, nail polish remover, and a silicone jar gripper. Nothing fancy. No secret salon gadget. Just ordinary items that prevent a stuck cap from turning into a half-hour negotiation.
The biggest lesson is to clean the bottle neck every time. It sounds boring, and it is. But it works. After finishing a manicure, I quickly wipe the rim before closing the bottle. That one tiny step has prevented most stuck-cap problems. It also keeps the cap from sitting crooked, which helps reduce air exposure and keeps the polish smoother longer.
Another experience-based tip: do not store polish in the bathroom if you can avoid it. Bathrooms get humid and warm, then cool, then humid again. Nail polish prefers a calmer life. A drawer in a bedroom, closet, or vanity area is usually better. Keep bottles upright so polish does not creep into the cap threads and dry there.
If you are opening a favorite bottle for a special event, test it the day before. Nothing adds unnecessary chaos like discovering your perfect shade is sealed shut ten minutes before you need to leave. Open it, clean the rim, check the consistency, and make sure the brush is usable. Your future self will be grateful, probably while holding coffee in one hand and looking impressively prepared.
Finally, know when to quit. If a polish is ancient, goopy, separated, or impossible to open safely, replacing it may be the best choice. A bottle of nail polish should make your day prettier, not turn you into a frustrated raccoon trying to open a jar. Save the colors you love, maintain the bottles you use, and let the hopeless ones go.
Conclusion
Learning how to open stuck nail polish is mostly about solving the real cause: dried lacquer around the cap or not enough grip. Start with a dry towel and rubber band, move to warm water, then use a small amount of nail polish remover around the neck if needed. Avoid dangerous shortcuts like boiling water, microwaving, or smashing the bottle. Once the cap opens, clean the rim before storing the polish upright in a cool, dry place.
With these nine steps, your favorite shade has a much better chance of surviving its dramatic little tantrum. Even better, you now know how to prevent stuck caps in the future. Your manicure routine can go back to being relaxing, glossy, and only mildly chaotic.