Table of Contents >> Show >> Hide
- What You’ll Need Before You Start
- Step 1: Pick the Right Email Provider (Fast Comparison)
- Step 2: Choose a Username That Works (and Won’t Haunt You)
- Step 3: Create Your Email Account (The Universal Steps)
- Fast Step-by-Step: Create a Gmail Account
- Fast Step-by-Step: Create an Outlook.com Email Account
- Fast Step-by-Step: Create an iCloud Email Address (Apple)
- Fast Step-by-Step: Create a Yahoo Email Account
- Fast Step-by-Step: Create an AOL Email Account
- Step 4: Add Your New Email to Your Phone or Computer
- Step 5: Secure Your Email Account (Do This Immediately)
- Common Problems (and Quick Fixes)
- Email Setup Tips That Save You Time Later
- Quick FAQ
- Conclusion
- Real-World Experiences: What People Run Into (and How They Solve It)
Need an email address todaylike, right now? You’re not alone. Email is still the universal “passport” for the internet:
it’s how you sign up for apps, reset passwords, get receipts, apply for jobs, and prove to websites that yes, you are a real human
(and not a rogue toaster with Wi-Fi).
The good news: making an email account is quick, free, and easier than assembling furniture with instructions written in “interpretive Swedish.”
This guide walks you through the whole process step by step, shows you the fastest setup paths for the most popular providers,
and explains how to secure your new inbox so it doesn’t become a spam magnet.
What You’ll Need Before You Start
Most email providers will ask for a few basics. If you have these ready, setup takes just a few minutes:
- Your name (or the name you want shown to people)
- A username idea (you’ll pick the part before the “@”)
- A strong password (more on how to make one that won’t betray you later)
- A phone number (sometimes optional, often used for security and account recovery)
- A backup email (optional but helpful for recovery)
- 5–10 minutes and a device with internet
Step 1: Pick the Right Email Provider (Fast Comparison)
If you’re thinking, “Email is email,” you’re not wrongbut different providers shine in different ways.
Here are the common picks and who they’re best for:
Gmail (Google)
Great if you use Google services like YouTube, Google Drive, Docs, Android phones, or Google Calendar.
Gmail is widely accepted everywhere (which matters more than you’d think).
Outlook.com (Microsoft)
A strong choice if you use Windows, Microsoft 365, OneDrive, Teams, or want a clean inbox with good built-in organization.
It also plays nicely with the Outlook apps.
iCloud Mail (Apple)
Ideal if you’re in the Apple ecosystem (iPhone, iPad, Mac). An iCloud email can keep things smooth across Apple devices.
Yahoo Mail / AOL Mail
Still very common, especially for long-time users and anyone who wants a separate inbox for shopping, newsletters, or “sign up for this once”
situations. (No judgmentwe all have at least one inbox for “discount codes and regrets.”)
Quick tip: If this email will be used for work, school, banking, or anything important, pick a provider you plan to keep for years.
Changing emails later is possible, but updating every login on the planet is… a character-building exercise.
Step 2: Choose a Username That Works (and Won’t Haunt You)
Your email address is part identity, part first impression. If you’re making an email account for professional use, keep it simple:
a name + initials + maybe a number if needed.
Examples that age well
- jordan.taylor@…
- j.taylor92@…
- jordantaylor.design@… (great for freelancers)
Examples that may not age well
- xxDragonSlayerxx@…
- ilovecheeseforever@… (unless you truly do, forever)
- hotstuff2009@… (no explanation needed)
If the username you want is taken, try small tweaks: add a middle initial, your city abbreviation, or a short number.
Avoid using sensitive info (like your full birthdate) in the address if you can.
Step 3: Create Your Email Account (The Universal Steps)
Most sign-up flows look very similar, no matter which provider you choose. Here’s the “works everywhere” checklist:
- Go to the provider’s sign-up page and choose “Create account.”
- Enter your name and desired email address (username).
- Create a strong password and confirm it.
- Add recovery options (phone number and/or backup email) if prompted.
- Verify your identity (usually by entering a code sent via text or email).
- Accept terms and complete setup.
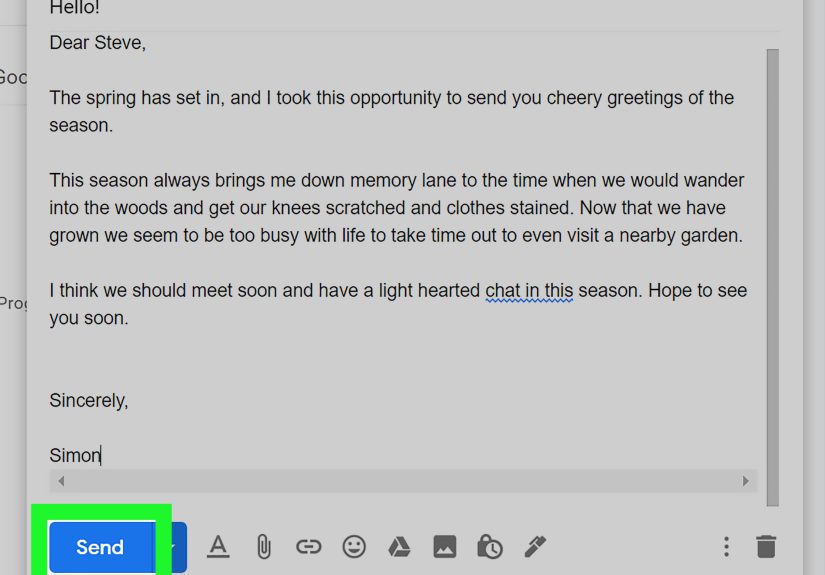
- Sign in and send yourself a test email (yes, reallymake sure it works).
Now let’s make it even easier with provider-specific steps for the most popular services.
Fast Step-by-Step: Create a Gmail Account
- Open Google’s account creation page and select Create account.
- Choose whether it’s for personal use (or another option if needed).
- Enter your name, pick your username, and create a password.
- Add a phone number and/or recovery email if prompted (recommended).
- Verify using the code you receive, then finish setup.
Pro move: Gmail can also be used with a non-Gmail address for a Google account in some cases,
but if your goal is a brand-new email inbox, choosing a new @gmail.com address is the simplest route.
Fast Step-by-Step: Create an Outlook.com Email Account
- Go to Outlook.com and click Create free account.
- Choose your email address (like [email protected]).
- Create a password, then enter requested info (like name and region).
- Verify your identity (often a code via text/email) and complete setup.
If you already use Windows or Microsoft apps, this can be a very “set it and forget it” choiceespecially on a PC.
Fast Step-by-Step: Create an iCloud Email Address (Apple)
Apple is a little different: you typically create an Apple Account first, then create your @icloud.com email address.
If you already have an Apple Account, you may still be able to add an iCloud email address through iCloud Mail settings.
- Create (or sign in to) your Apple Account on your device.
- Open iCloud Mail settings (on iPhone/iPad: Settings → your name → iCloud → Mail/iCloud Mail).
- Follow the prompts to create your iCloud Mail address if you don’t already have one.
Heads up: If you go to iCloud Mail on the web and you see an inbox instead of “Create Email Address,”
you probably already have a primary iCloud email set up.
Fast Step-by-Step: Create a Yahoo Email Account
- Open Yahoo’s sign-up page and enter the required details.
- Pick your email username and create a password.
- Verify your phone number (often required) to finish setup.
Fast Step-by-Step: Create an AOL Email Account
- Go to AOL’s account creation page and click Create an account.
- Enter your details, choose your new @aol.com email address, and create a password.
- Verify if prompted and complete setup.
Step 4: Add Your New Email to Your Phone or Computer
Creating the account is step one. The next move is making sure you can actually use it conveniently on the devices you check every day.
You can sign in through a browser (like Chrome or Safari), but adding it to an email app makes life smoother.
Add email to Outlook (Windows)
- Open Outlook and choose Add Account.
- Enter your email address and select Connect.
- Sign in and follow prompts until setup finishes.
Most modern apps (Apple Mail, Gmail app, Outlook mobile) will auto-detect settings for big providers,
so you usually won’t need to touch scary-looking server names.
Step 5: Secure Your Email Account (Do This Immediately)
Email security isn’t “extra credit.” Your inbox is the reset button for many of your other accounts.
If someone gets into your email, they can often get into everything else.
Use a strong passphrase (not a flimsy password)
A good modern approach is a long passphrase you can rememberlike 4–6 unrelated wordsplus a couple tweaks.
Longer is usually safer than “short but complicated.”
- Better: BlueCoffeeRiverGuitar!27
- Not great: P@ssw0rd123
Security standards increasingly emphasize longer passwords (and letting users create long ones),
and many systems discourage weird “must include 3 symbols and a haiku” composition rules.
In plain English: aim for length + uniqueness.
Turn on 2-step / two-factor authentication (2FA)
Two-factor authentication (also called multi-factor authentication) adds a second checklike an app prompt, a code, or a security key
so a stolen password alone isn’t enough.
- Google: Enable 2-Step Verification in your Google Account security settings.
- Microsoft: Turn on two-step verification in your Microsoft account security settings.
- Apple: Turn on two-factor authentication under Sign-In & Security on your device.
- Yahoo: Use 2-step verification options in Account Security (some methods may vary by account/app).
If you do one security thing today, make it this. Future-you will be gratefulpossibly while sipping coffee instead of filing “my email got hacked” reports.
Set up recovery options (so you can get back in)
Add a recovery phone number or backup email if your provider allows it. This is how you prove you’re you if you forget your password,
lose a device, or get locked out after suspicious activity.
Common Problems (and Quick Fixes)
“The username I want is taken.”
Totally normal. Try adding a middle initial, a keyword related to your work, or a short number. If you’re making a professional email,
keep it clean and easy to say out loud.
“I didn’t get the verification code.”
- Wait a minute and try again (networks get moody).
- Check if you blocked unknown numbers or have poor signal.
- Use a different verification method if offered (email instead of phone, or an authenticator app).
“I forgot my password already (don’t judge me).”
No judgmentthis is why recovery options exist. Use the provider’s password reset or account recovery flow and follow the prompts.
This is also why a password manager can be a lifesaver.
“My inbox is already getting spam.”
Some spam is unavoidable, but you can reduce it fast:
- Don’t post your email publicly online unless necessary.
- Use aliases (or “plus addressing” where supported) for newsletters and shopping.
- Mark spam as spam (don’t just delete)it helps the filter learn.
Email Setup Tips That Save You Time Later
Create a simple folder/label system
- Receipts
- Work/School
- Accounts & Security
- Travel
Use filters for instant organization
Most providers let you auto-sort mail from specific senders (like “all shipping emails go to Receipts”). This keeps your inbox from turning into a junk drawer.
Send a test email
It sounds basic, but it’s the quickest way to confirm everything works: send an email to a friend, or to another address you already have.
Quick FAQ
Is it free to create an email account?
Yesmajor providers offer free email accounts. Some have paid upgrades (more storage, custom domains, extra features), but you can get started for $0.
Do I need a phone number?
Sometimes. Some providers require it for verification or recovery, while others allow alternatives like authenticator apps or security keys.
Even when optional, adding a recovery method is strongly recommended.
Can I have more than one email address?
Absolutely. Many people keep separate accounts for work, personal use, and online shopping/newsletters. It’s a great way to stay organized and reduce spam.
Conclusion
Making an email account is one of the simplest “adulting” wins on the internet. Pick a provider you’ll actually stick with, choose a username you won’t regret,
set a strong password, and turn on 2FA right away. After that, you’re ready to sign up for services, apply for jobs, and finally stop borrowing a sibling’s email
like it’s a shared Netflix password.
Real-World Experiences: What People Run Into (and How They Solve It)
The sign-up steps are easyuntil real life shows up with snacks and chaos. Here are common “been there” moments people experience when creating a new email account,
plus the practical fixes that actually help.
Experience #1: “Every username is taken, and now I’m emotionally attached to one.”
It happens fast: you type in the perfect email address, hit next, and the website politely tells you it’s unavailablelike it’s already dating someone else.
People often solve this by adding a middle initial or a short keyword that still looks professional. For example, if “alex.jackson” is taken,
“alexm.jackson” or “alex.jackson.design” usually feels less random than “alexjackson938274.” The big lesson: aim for something you can say on the phone without
sounding like you’re reading a password out loud.
Experience #2: “Verification codes never arrive when you’re in a hurry.”
This is practically a law of the universe. Many users find codes arrive late when they’re in low-signal areas, on public Wi-Fi, or if their phone blocks unknown
numbers. The quick fix is boring but effective: wait a minute, request a new code, and double-check that the phone number was typed correctly.
If the provider offers multiple methods (like email verification, app prompts, or security keys), switching methods can save timeand stress.
Experience #3: “I made a ‘fun’ email in middle school and now I’m applying for internships.”
A surprisingly common scenario: someone has an old email like “sparkleunicornxx@…” and realizes it doesn’t exactly scream “hire me.”
The best move people make here is creating a clean, professional email for resumes and job applications, while keeping the old inbox for personal use.
It’s not about being fancy; it’s about making it easy for a recruiter, professor, or client to take you seriously in the first three seconds.
Experience #4: “My inbox got messy in week one.”
New accounts tend to get flooded with welcome emails, confirmations, and newsletters you didn’t realize you checked “yes” to.
People who stay organized usually do two simple things early: (1) unsubscribe aggressively from non-essential lists, and (2) set up one or two filters.
A filter like “all receipts to a Receipts folder” makes your inbox feel instantly calmer without you changing your personality into a spreadsheet.
Experience #5: “I forgot my password because I was ‘definitely going to remember it.’”
If you’ve ever said “I’ll remember this,” you’ve also probably said “Why can’t I remember this?” later.
Real users avoid lockouts by using a password manager or writing down a recovery plan: keep recovery email/phone updated, store backup codes safely,
and turn on 2FA with at least two methods if possible (like an authenticator app plus a backup phone).
That way, losing one device doesn’t turn into a weekend-long account recovery saga.
The takeaway: Creating an email account is easy. Keeping it usable and secure is where smart habits matter.
Spend an extra five minutes on security and organization now, and your future self won’t have to do damage control later.