Table of Contents >> Show >> Hide
- Why an oversized door handle works so well
- Before you build: the “please don’t drill yet” checklist
- Three DIY oversized door handle builds (pick your personality)
- Tools and materials you’ll actually use
- Step-by-step: DIY and install your oversized door handle
- Step 1: Mock it up first (your future self will clap)
- Step 2: Mark your mounting holes precisely
- Step 3: Drill like a pro (clean holes, less splintering)
- Step 4: Choose the right fasteners (this is not the time for “whatever screws were in the junk drawer”)
- Step 5: Install and tighten carefully
- Step 6: Finish it so it survives real life
- Special situations: entry doors, locksets, and when holes matter
- Design details that make DIY hardware look expensive
- Troubleshooting (because doors love drama)
- Safety and smart-home reality
- Wrap-up: a small DIY with big “wow” energy
- Real-world DIY experiences: what people learn after the first “oops”
If your door looks fine-but-boring, you don’t need a whole renovation. You need a moment. And nothing says
“I have opinions about design” quite like an oversized door handleaka a statement pull that makes a plain door look
custom, intentional, and maybe a little expensive (even if it was built with $18 worth of parts and pure confidence).
This guide walks you through planning, building, and installing a unique oversized door handle that looks high-end,
feels great in the hand, and doesn’t wobble like a shopping cart with one tragic wheel. You’ll also get real-world
tips for different door types (interior, exterior, barn/sliding), finishing ideas, and the small details that make
DIY hardware look professionally done.
Why an oversized door handle works so well
Oversized pulls are the design equivalent of a bold eyebrow: they frame the whole face. A larger handle can make a
standard door feel taller, more modern, and more “architectural.” It also improves usabilityespecially on heavier
doors, pantry doors, laundry doors, and sliding barn doors where you want a confident grab without pinching your
fingertips like you’re trying to open a bag of chips silently during a movie.
- Visual impact: A long pull adds strong lines that instantly modernize a flat door.
- Better grip: More surface area and clearance makes it easier for kids, guests, and tired hands.
- Custom look on a budget: You can mimic designer hardware with smart materials and clean installation.
- Flexibility: DIY lets you choose length, finish, and style so it fits your spacenot a catalog.
Before you build: the “please don’t drill yet” checklist
1) Decide what kind of door this is (because doors have feelings)
The right mounting method depends on the door’s construction and how it’s used.
- Solid wood door: Most forgiving. Screws and through-bolts both work well.
- Hollow-core interior door: Needs extra care. For heavy pulls, use through-bolts with washers or a backer plate.
- Exterior entry door: Choose weather-resistant materials and secure mounting. Avoid designs that compromise a lockset or door seal.
- Sliding/barn door: Oversized pulls are perfect herejust plan inside clearance so the door can slide fully without hitting trim or a jamb.
2) Pick a handle height that feels natural
Most homes land the center of the grip around the “handshake zone,” often near 36 inches from the floor, but you
have flexibility. For accessibility-minded placement, keep operable hardware within a comfortable reach range and
make sure it’s usable without awkward twisting.
- Common placement: Center of grip around 36–42 inches from the floor for many interior doors and barn doors.
- Accessibility-friendly range: Keep the operable part roughly within 34–48 inches from the floor when possible.
- Tall doors (8-foot): You can keep the grip comfortable but extend the handle length upward for better proportions.
3) Know what “oversized” means (so you don’t build a canoe paddle)
Oversized pulls usually range from 12 inches to 24+ inches long. The sweet spot depends on door size and style:
- 12–16 inches: Subtle statement; great for pantry, linen, laundry doors.
- 18–24 inches: Bold, modern, very “designer”; ideal for tall doors and sliding doors.
- 30+ inches: Dramatic and architectural; best on oversized doors or commercial-inspired entries.
4) Choose your mounting method (this is where pros win)
The biggest difference between “custom hardware” and “why is this handle spinning?” is mounting. You generally have three options:
- Wood screws (surface mount): Quick and easy. Best for lightweight pulls on solid doors.
- Through-bolts: Bolts run through the door and secure into the handle hardware. Strong, stable, and recommended for long/heavy pulls.
- Back-to-back: Two pulls on opposite sides share bolts through the door. Great for double-sided use (like patio or pantry doors).
Three DIY oversized door handle builds (pick your personality)
Option A: Modern “designer” rod pull (sleek + minimal)
This style looks like high-end architectural hardware: a straight metal rod with standoffs. You can build the look
using a metal rod (brass, stainless, or aluminum) plus two mounting posts (standoffs). The key is clean lines and
rock-solid fastening.
Best for: modern homes, tall doors, minimalist interiors, statement pantry/barn doors.
Materials idea: 3/4″–1″ diameter metal rod cut to length + two standoffs + through-bolts + washers.
Style tip: Longer pulls look more expensive when the standoff spacing is balanced and level.
Option B: Industrial pipe pull (bold + budget-friendly)
Want a handle that looks like it was rescued from a cool old factory (the nice kind, not the asbestos kind)?
Black pipe fittings are a classic DIY move: sturdy, grippy, and easy to customize in length.
Best for: farmhouse, industrial, rustic modern, laundry and mudroom doors, barn doors.
Materials idea: black iron pipe (or galvanized), two elbows, a center pipe section, and two flanges or mounting feet.
Style tip: For a cleaner look, choose matte black paint over shiny galvanized, and keep the fittings symmetrical.
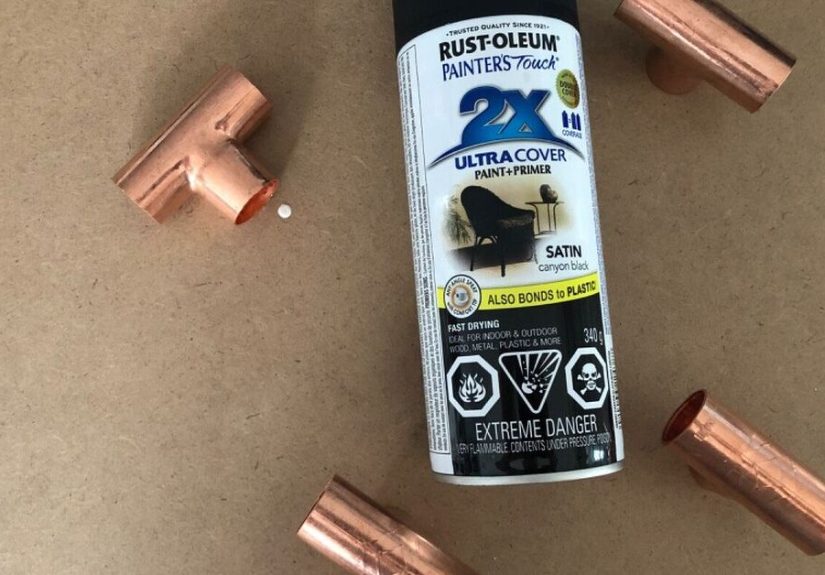
Option C: Warm wood dowel pull (soft + sculptural)
This one feels custom because it’s simple: a smooth dowel becomes the grip, and the ends are capped or anchored with
metal fittings (copper T’s are popular) or minimalist brackets. It’s cozy, modern, and surprisingly versatile.
Best for: Scandinavian, Japandi, modern cottage, kid-friendly spaces.
Materials idea: 5/8″–1″ wood dowel + two end supports (metal fittings or brackets) + screws/bolts.
Style tip: A light stain and a satin topcoat keeps it looking “designed,” not “shop class.”
Tools and materials you’ll actually use
Basic tools
- Tape measure
- Pencil and painter’s tape
- Level (or a phone level if you promise to be honest)
- Drill/driver
- Drill bits (pilot size + bolt size if through-bolting)
- Screwdriver (hand tightening prevents over-torquing)
- Sandpaper (120/220 grit) if finishing wood
Helpful upgrades
- Door hardware jig/template (helps keep holes centered and clean)
- Hole saw kit (especially if you’re also changing a lockset)
- Clamps (for steady drilling)
- Washers and a backer plate (for hollow-core or thin doors)
Step-by-step: DIY and install your oversized door handle
Step 1: Mock it up first (your future self will clap)
Cut a strip of painter’s tape where the handle will go and mark your proposed mounting points. Then “test grab”
itpretend to open the door using an imaginary handle. Yes, you will look ridiculous. Yes, it works.
- Stand naturally and reach for the door where your hand wants to land.
- Check swing clearance: will your knuckles hit casing, a wall, or another handle?
- For sliding doors, confirm the inside pull won’t hit the jamb when the door closes.
Step 2: Mark your mounting holes precisely
Use a level and measure twice. Oversized handles exaggerate tiny mistakes; a 1/8″ tilt looks like a whole degree of
regret when the handle is 24 inches long.
- Mark the top hole first.
- Measure down to the second hole (use the handle’s center-to-center measurement).
- Use the level to ensure the marks align vertically (or horizontally if your design calls for it).
Step 3: Drill like a pro (clean holes, less splintering)
Start with a pilot hole to guide the bit and reduce splitting. If you’re drilling larger holes (for bolts), work up
gradually in bit size.
- Wood doors: Drill slowly; back the bit out to clear chips.
- To reduce tear-out: If drilling through, drill halfway from one side, then finish from the other side.
- Hollow-core doors: Use light pressure and plan on through-bolts with washers or a backer plate.
Step 4: Choose the right fasteners (this is not the time for “whatever screws were in the junk drawer”)
Your handle’s weight and leverage increase with length. Long pulls put more stress on screw holes, especially if
people yank the door like it owes them money.
- Light pull on solid wood: Quality wood screws + pilot holes can be enough.
- Heavy pull or hollow-core door: Through-bolts with washers on both sides (or a backer plate) for stability.
- Double-sided use: Back-to-back mounting so both sides share the load.
Step 5: Install and tighten carefully
Position the handle, insert fasteners, and tighten graduallyalternating between top and bottom to keep the pull
centered. If you’re using through-bolts, tighten until snug, not until the door starts making uncomfortable noises.
Step 6: Finish it so it survives real life
A handle gets touched constantly, so the finish matters. The goal is a surface that looks good and holds up to oils,
moisture, and cleaning.
- Metal: Clean thoroughly (remove oils), scuff lightly if painting, then prime if required and apply multiple thin coats.
- Wood: Sand smooth, condition if staining softwood, stain/paint, then protect with a durable topcoat (satin is forgiving).
- Exterior doors: Use weather-resistant materials and finishes, and allow full cure time before heavy use.
Special situations: entry doors, locksets, and when holes matter
If you’re also replacing a lockset or handleset
Many locksets and handlesets rely on standard door prep measurements. If your door is already bored, you’re likely
working with standard sizes. If you’re drilling fresh holes, use a template or jig to keep everything aligned.
- Common cross-bore size: 2-1/8″
- Common latch edge bore: 1″
- Common backset: 2-3/8″ or 2-3/4″
- Common door thickness: 1-3/8″ to 1-3/4″
For a modern entry look, some people pair a long pull handle with a separate deadbolt and latch system, or use a
“dummy” pull (non-turning) with a smart lock elsewhere. The best choice depends on your security needs and door
layoutespecially on exterior doors.
Design details that make DIY hardware look expensive
Balance and spacing
- Keep consistent margins from the door edge (often 2″–4″ depending on stile width).
- Center-to-center mounting should match the handle’s design proportions; avoid “almost centered” placement.
Comfort and clearance
- Aim for enough knuckle clearance behind the pull so hands don’t scrape the door.
- Round edges or sand wood smoothhands notice everything.
Finish coordination
- Match (or intentionally contrast) hinges, lighting, and nearby hardware.
- Mixing metals can work if you repeat each finish at least twice in the space.
Troubleshooting (because doors love drama)
“My handle is loose or wobbly.”
- Upgrade to through-bolts if possible.
- Add washers or a backer plate to spread the load.
- Make sure pilot holes weren’t oversized for the screws you used.
“The door splintered when I drilled.”
- Use painter’s tape over the drilling area next time.
- Drill halfway from one side, then finish from the other.
- Sand and touch up paint/stainmost chips disappear with a calm finish plan.
“The handle hits the trim/wall.”
- Move it inward slightly or choose a handle with less projection.
- On sliding doors, switch the inside to a recessed pull for clearance.
“The paint is scratching off.”
- Clean and degrease before painting (skin oils are sneaky).
- Use thin coats and allow full cure time.
- Consider a more durable topcoat or a factory-finished metal option if it’s a high-traffic door.
Safety and smart-home reality
Wear eye protection when drilling, keep fingers clear of bits, and don’t freehand big holes with a wobbly drill.
If this handle is for an exterior door, prioritize secure mounting and hardware that won’t interfere with locks,
seals, or the door’s structural integrity.
Wrap-up: a small DIY with big “wow” energy
An oversized door handle is one of the rare projects that’s both practical and instantly visiblelike a haircut for
your house. With a solid plan, the right fasteners, and a finish that can handle real life, you can turn a plain door
into a statement piece that feels custom every time you walk by it. And the best part? You’ll touch it every day,
which is basically the highest compliment a DIY project can receive.
Real-world DIY experiences: what people learn after the first “oops”
DIY oversized door handles are famous for one thing: looking simple on paper and becoming suspiciously educational in
real life. A lot of DIYers start with the same mindset“It’s just two holes!”and end up understanding fasteners, door
construction, and why carpenters measure like they’re defusing a movie bomb. Below are common, experience-based lessons
people run into when they build a statement pull, plus how they usually fix it.
The surprise of leverage: A longer handle makes opening a door feel smooth, but it also amplifies the
force on the mounting points. DIYers often discover that short cabinet screws are no match for a 24-inch pull when
someone yanks the door open with enthusiasm. The “aha” moment is usually the upgrade to through-bolts with washers,
which spreads the load and stops the dreaded slow loosening that turns a crisp handle into a wiggly handshake.
The hollow-core plot twist: People love putting oversized pulls on pantry doorsuntil they realize the
door is hollow-core and the screws are basically biting into hope and a thin veneer. The fix most DIYers land on is
either (1) through-bolting with wide washers, (2) adding a slim backer plate inside the door skin, or (3) choosing a
lighter handle design (like a dowel pull) with multiple mounting points. After this, many become passionate advocates
of knocking on doors before buying hardware. (A new hobby!)
The “why is it crooked?” phase: With a small knob, a tiny misalignment is invisible. With an oversized
pull, it looks like the Leaning Tower of Hardware. DIYers often learn that a level is not optionaland that measuring
from the door edge alone can fool you if the door stile isn’t perfectly uniform. The smartest workaround people share:
use painter’s tape, mark both holes, then step back and visually confirm the line before drilling. If you want to be
extra cautious, make a paper template that matches your handle’s hole spacing so you can test-fit and reposition
without committing to a drill bit.
Finish regrets (and redemption): Spray paint is popular for pipe handles, but the finish can scratch
if the metal wasn’t cleaned well or if the paint didn’t cure long enough. Many DIYers end up redoing the finish with
better prep: degrease thoroughly, scuff lightly, apply several thin coats, and let it cure fully before daily use.
A lot of people also discover that satin or matte finishes hide fingerprints better than high-glossespecially on
doors that get opened mid-cooking, mid-laundry, or mid-“my hands are definitely not clean.”
Clearance surprises on sliding doors: Barn doors are handle heaven, but inside clearance can be tricky.
A common experience is installing a beautiful pull… and then realizing the door can’t slide all the way because the
handle hits trim or a jamb. DIYers often solve this by using a recessed pull on the inside (flush style) and keeping
the oversized statement pull on the outside. The lesson: test the full slide path before drilling, especially near
stops and casings.
The best outcome: Once installed properly, people tend to love oversized handles because they change
how the whole space feels. A pantry door becomes a design feature. A laundry door looks intentional. A plain slab door
suddenly reads “custom.” And because it’s a touchpoint you use every day, it delivers that little hit of satisfaction
dailylike a tiny home upgrade that keeps earning its keep.