Table of Contents >> Show >> Hide
- What Is a U Shaped Haircut?
- Why Choose a U Shaped Cut?
- Tools You Need Before Cutting U Shaped Hair
- Should You Cut U Shaped Hair Wet or Dry?
- Before You Start: Important Safety and Style Rules
- Easy Method 1: The Front Ponytail Method for a Soft U Shape
- Easy Method 2: The Three-Section U Cut
- Easy Method 3: The Professional-Inspired Guideline Method
- How to Add Soft Face-Framing Pieces
- How to Blend the Ends Naturally
- Common Mistakes When Cutting U Shaped Hair
- How to Maintain a U Shaped Haircut
- Best Styling Ideas for U Shaped Hair
- Who Should Avoid Cutting a U Shape at Home?
- Real-Life Experience Tips for Cutting U Shaped Hair
- Conclusion
A U-shaped haircut is the kind of hairstyle that looks effortlessly polished from behind, even when your morning routine is mostly “find coffee, locate brush, hope for the best.” Instead of cutting the ends straight across or tapering them into a sharp V, a U-shaped haircut creates a soft curve: shorter pieces near the front and sides, gradually blending into longer hair at the center back. The result is movement, bounce, and a fuller-looking shape without sacrificing too much length.
The good news? You can understand the basics of how to cut U shaped hair at home. The better news? You do not have to attack your hair like a craft project gone rogue. With clean sectioning, sharp haircutting shears, careful trimming, and a “cut less than you think” mindset, you can freshen up the shape, remove scraggly ends, and create a soft U silhouette that looks intentionalnot accidental.
This guide walks you through easy ways to cut U shaped hair, including beginner-friendly prep, step-by-step cutting methods, mistakes to avoid, and real-life experience tips for getting a smoother result. Whether you have long straight hair, soft waves, thick layers, or fine strands that need a little visual fullness, this tutorial will help you approach the U cut with confidence and common sense.
What Is a U Shaped Haircut?
A U-shaped haircut is a rounded haircut where the back forms a gentle “U” when viewed from behind. The longest point is usually in the center back, while the hair near the front and sides is slightly shorter. Unlike a blunt haircut, which has one straight line across the bottom, the U cut gives the ends a curved outline. Unlike a V cut, it is softer and less dramatic.
This style is especially popular for medium to long hair because it keeps length while adding shape. It can also make the hair look lighter, bouncier, and more layered without creating choppy steps. For people with thick hair, a U shape removes some visual heaviness. For people with fine hair, the rounded perimeter can make the ends appear fuller than overly thinned-out layers.
Why Choose a U Shaped Cut?
The U-shaped haircut works because it gives your hair a designed finish while still looking natural. It is not too severe, not too trendy, and not too high-maintenance. Think of it as the haircut equivalent of a good pair of jeans: flattering, reliable, and easy to style.
It Keeps Length While Adding Shape
Many people want movement but panic at the phrase “take off a few inches.” A U shaped haircut lets you clean up the ends and shape the perimeter without losing the overall long-hair feel. The front and side pieces are trimmed slightly shorter, but the center back stays longer.
It Adds Movement to Long Hair
Long hair can sometimes hang like a curtainbeautiful, but a little flat. A U cut softens the bottom line and helps the hair swing more naturally. When paired with light face-framing layers, it can make the entire hairstyle look more alive.
It Works With Many Hair Types
Straight hair shows the U shape clearly. Wavy hair makes the curve look relaxed and beachy. Curly hair can also wear a U shape beautifully, but curls should be cut with shrinkage in mind. If your hair springs up when dry, always trim less than you think you need.
Tools You Need Before Cutting U Shaped Hair
Before you cut, gather the right tools. This is not the moment for kitchen scissors, paper scissors, or those mystery scissors hiding in the junk drawer next to batteries from 2014. Dull scissors can crush the hair ends and create frizz or split ends.
- Sharp haircutting shears
- A wide-tooth comb or detangling brush
- Fine-tooth comb for clean sectioning
- Hair clips
- Two mirrors or a mirror and phone camera
- Spray bottle if cutting slightly damp hair
- Hair ties for ponytail methods
- A cape or old towel
Good lighting matters more than people think. Cut near natural light if possible. If your bathroom lighting makes everyone look like a dramatic movie villain, move to a brighter room.
Should You Cut U Shaped Hair Wet or Dry?
For most beginners, cutting dry hair is safer because you can see the true length, natural texture, and final shape immediately. Wet hair stretches, especially wavy or curly hair, which can lead to cutting more than intended. Dry cutting is also helpful if your hair has layers, waves, or cowlicks.
Slightly damp hair can be easier to control if your hair is very straight or slippery. However, avoid cutting soaking wet hair unless you are experienced. If you choose to dampen your hair, mist lightly and comb it smooth. Do not pull it tightly while cutting, because too much tension can create uneven results when the hair relaxes.
Before You Start: Important Safety and Style Rules
Cutting your own hair can be convenient, but it has limits. If you want a major transformation, heavy layers, a dramatic U shape, or correction after a bad haircut, a professional stylist is the safer choice. At home, focus on small trims and gentle shaping.
Cut Less Than You Think
Start with a tiny amountabout a quarter inch to half an inch. You can always cut more. You cannot politely ask the hair to reattach itself after an enthusiastic snip.
Work in Small Sections
Big chunks of hair are harder to control. Small sections help you keep the shape even and make better decisions as you go.
Check Symmetry Often
Bring both front sections forward and compare them. Look at the back using a second mirror or your phone camera. Pause often. A careful haircut is mostly checking, adjusting, and resisting the urge to rush.
Easy Method 1: The Front Ponytail Method for a Soft U Shape
This is one of the easiest ways to create a soft U-shaped haircut at home, especially for long hair. It works best if you want a gentle curve and light face-framing effect.
Step 1: Detangle and Part Your Hair
Brush your hair thoroughly. Create a clean middle part from your forehead to the nape of your neck. Bring both sides forward over your shoulders.
Step 2: Make Two Low Front Ponytails
Tie each side into a low ponytail near the front of your shoulders. Make sure both hair ties sit at the same height. The more forward you bring the hair, the more curved the back will appear when released.
Step 3: Slide the Hair Ties Down
Slide each hair tie down to the length you want to trim. Keep your head straight and shoulders relaxed. If you tilt your head, the cut may become uneven.
Step 4: Cut Small Amounts
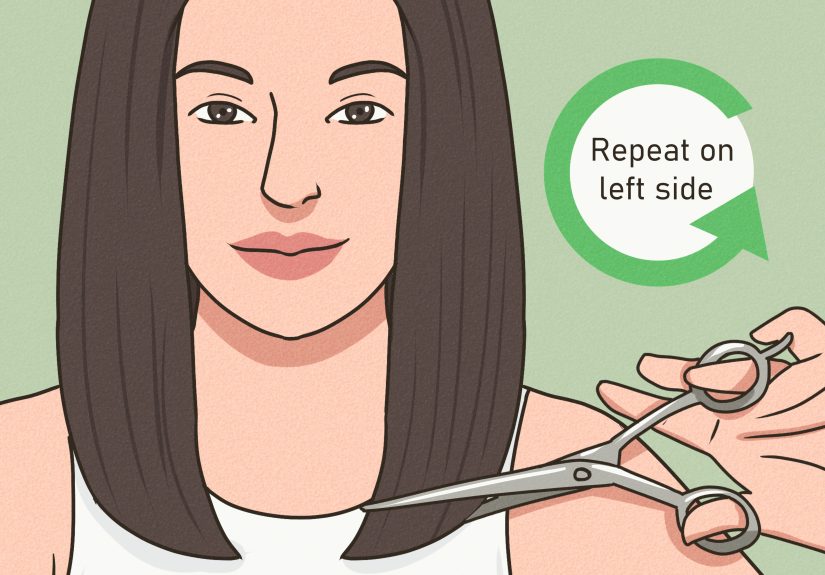
Hold the ends firmly and cut straight across below the hair tie. Start with less than you think. Repeat on the other side, matching the length carefully.
Step 5: Soften the Ends
Release the ponytails and comb your hair down. If the ends look too blunt, use point cutting. Hold the shears vertically and make tiny upward snips into the ends. This softens the line and helps the U shape blend.
Easy Method 2: The Three-Section U Cut
The three-section method gives more control than the ponytail method. It is useful if you want a cleaner U shape and already feel comfortable sectioning your hair.
Step 1: Divide Hair Into Three Sections
Part your hair down the middle. Then separate it into three sections: left front, right front, and back. Clip each section neatly. The back section should include the hair from behind the ears.
Step 2: Trim the Back Guide
Comb the back section straight down. Decide how much length you want to remove from the center back. Cut a small, clean guide at the very bottom center. This guide becomes the longest point of your U.
Step 3: Connect the Sides
Release one side section. Comb it down and slightly forward. Trim the side so it gradually connects to the longer back guide. Repeat on the other side. The goal is not a steep diagonal line, but a soft curve.
Step 4: Refine the Curve
Comb all hair down and check the shape. Use small snips to remove any corners. If the ends look too heavy, point cut lightly. Avoid over-thinning the bottom, especially if your hair is fine.
Easy Method 3: The Professional-Inspired Guideline Method
This method is slower but more precise. It is best for people who want to trim an existing U-shaped haircut rather than create one from scratch.
Step 1: Create a Center Back Guide
Comb the hair into its natural fall. Take a small section at the center back and trim the desired amount. Keep the scissors steady and cut only a small amount.
Step 2: Work From the Center Outward
Take a small section next to the guide. Comb it down naturally and trim it so it connects to the center. Continue outward on both sides, always using the previous section as your guide.
Step 3: Keep Tension Light
Do not pull the hair too tightly. Hair should fall naturally so the final shape does not jump up unevenly. This is especially important for wavy, curly, or thick hair.
Step 4: Cross-Check the Shape
After trimming, comb the hair straight down, then part it slightly differently and check again. A good U-shaped haircut should still look balanced even when the part shifts a little.
How to Add Soft Face-Framing Pieces
Face-framing layers can make a U shaped haircut look more modern and flattering. The key is subtlety. You are not carving a staircase into your hair; you are creating a soft transition around the face.
Start by taking a small front section on each side. Decide where you want the shortest face-framing piece to beginusually around the chin, collarbone, or lower depending on your comfort level. Point cut lightly downward from the shortest front piece into the longer side length. Repeat on the other side and compare both pieces often.
If you have curly hair, cut face-framing pieces dry and curl by curl. Curly hair shrinks, and one bold snip can turn a chin-length piece into a surprise cheekbone-length piece. Surprises are great for birthdays, not bangs.
How to Blend the Ends Naturally
A U cut looks best when the ends are soft, not blocky. After cutting the main shape, use point cutting to blend. Hold your shears vertically and make tiny snips into the bottom edge. Do not cut deep into the hair. The goal is to break up the line slightly, not remove a large amount of thickness.
For thick hair, you may need a little more softening at the ends. For fine hair, keep point cutting minimal so the perimeter still looks full. If your hair is very dense, avoid using thinning shears unless you know how they work; over-thinning can create frizz, gaps, or wispy ends.
Common Mistakes When Cutting U Shaped Hair
Using Dull Scissors
Dull scissors can bend, chew, or fray the hair. Use sharp haircutting shears only. This one tool upgrade can make the difference between a clean trim and ends that look stressed two weeks later.
Cutting Too Much at Once
The fastest way to regret a DIY haircut is to remove too much length in the first cut. Start small, check the shape, then trim more if needed.
Forgetting About Shrinkage
Waves and curls can spring up after cutting. Always account for your natural texture. When in doubt, cut dry and trim less.
Creating a V Instead of a U
A U shape should be rounded. If the sides are cut too steeply toward the back, the result becomes a V shape. To avoid this, keep the transition soft and gradual.
Skipping the Final Check
Always check your haircut from the front, sides, and back. Move your head naturally. Flip your part. Let the hair settle. Small uneven spots are easier to fix before you clean up and declare victory.
How to Maintain a U Shaped Haircut
A U shaped haircut usually stays fresh with regular trims. Many people can maintain the shape every eight to twelve weeks, depending on hair growth, damage, heat styling, and personal preference. If your ends tangle easily, feel rough, or lose their curve, it may be time for a trim.
Keep the style healthy by using conditioner, limiting excessive heat, applying heat protectant before styling, and sleeping on a smooth pillowcase if your hair tangles overnight. Long hair often looks best when the ends are cared for, not just when the shape is freshly cut.
Best Styling Ideas for U Shaped Hair
Smooth Blowout
A round brush blowout shows off the curve beautifully. Blow-dry the ends inward to emphasize the soft U shape and add bounce.
Loose Waves
Loose waves make the U cut look romantic and effortless. Curl away from the face, then brush through gently for a softer finish.
Air-Dried Texture
If you have natural waves, apply a lightweight styling cream or mousse and let the hair air dry. The U shape gives the ends structure even when the styling is relaxed.
Half-Up Styles
A half-up hairstyle works well with a U cut because the longer back pieces remain visible while the front layers frame the face.
Who Should Avoid Cutting a U Shape at Home?
You may want to see a professional stylist if your hair is very curly, heavily layered, extremely thick, recently chemically processed, or already uneven from a previous cut. A stylist can customize the U shape to your density, curl pattern, face shape, and desired maintenance level.
Also, if you want a dramatic changesuch as going from waist-length hair to shoulder-length layersbook the appointment. At-home cutting is best for small trims and gentle shaping. Big transformations deserve professional eyes, professional tools, and someone who can see the back of your head without using a bathroom mirror gymnastics routine.
Real-Life Experience Tips for Cutting U Shaped Hair
One of the most useful lessons from cutting U shaped hair is that confidence should arrive after preparation, not before it. People often get into trouble because they think, “It’s just hair,” and then start cutting without a plan. Technically, yes, it is hair. Emotionally, it is also the thing you stare at every morning while deciding whether today is a ponytail day. A little planning saves a lot of dramatic mirror conversations.
A smart experience-based approach is to do a “practice check” before making the first cut. Comb your hair into the position you plan to cut, place your fingers where the scissors would go, and look at how much length would disappear. Many beginners realize that what looked like half an inch in their mind is actually two inches in real life. Hair has a funny way of making measurements feel personal.
Another helpful tip is to take progress photos. Snap a quick picture of the back before cutting, after the first small trim, and after blending. This gives you a more honest view than twisting around in the mirror. A phone camera can reveal uneven corners, heavy spots, or one side that is quietly trying to become its own haircut.
If your hair is thick, patience matters. Thick hair can hide unevenness until you move, brush, or style it. Work in smaller sections and avoid cutting a heavy chunk all at once. After trimming, shake the hair out and let it settle. Sometimes the shape looks different after the hair relaxes into its natural fall.
For fine hair, the biggest lesson is to preserve fullness at the ends. It is tempting to point cut enthusiastically because it feels professional, but too much texturizing can make the bottom look thin. Use tiny vertical snips only where the line looks too blunt. Fine hair usually benefits from a clean, healthy perimeter with just enough softness to avoid a harsh edge.
Wavy and curly hair require extra caution. The curl pattern may not be identical on both sides, so perfect mathematical symmetry is not always the goal. Visual balance is more important. Cut dry when possible, trim curl groupings carefully, and remember that curls can shrink dramatically. If a curl looks too long, remove the tiniest amount first, then reassess after it springs back.
Another real-world trick is to stop before you feel completely done. That may sound strange, but many DIY haircuts go wrong in the “just one more tiny fix” stage. Fixing one side leads to fixing the other, then the first side again, and suddenly your gentle U cut is auditioning for a bob. When the shape looks balanced and the ends look cleaner, put the scissors down.
Finally, style your hair after cutting before making additional changes. Blow-dry it, air-dry it, wave it, or wear it how you normally do. A U shaped haircut can look slightly different depending on styling, so judge the final result in your everyday routine. The goal is not salon perfection under a spotlight. The goal is hair that looks healthier, moves better, and makes you feel like you made a good decision in your bathrooman underrated life achievement.
Conclusion
Cutting U shaped hair at home is possible when you keep the process simple, slow, and realistic. Start with sharp haircutting shears, clean sections, and a conservative trim. Choose the front ponytail method for an easy soft curve, the three-section method for more control, or the guideline method for maintaining an existing U shape. Blend with light point cutting, check symmetry often, and always respect your hair texture.
The U-shaped haircut remains popular because it flatters many hair types, keeps length, and adds natural movement without looking overly styled. Whether you wear your hair straight, wavy, curly, blown out, or air-dried, the rounded shape can make your ends look healthier and your style more intentional. Just remember: cut small, check often, and never trust kitchen scissors with your beauty destiny.