Table of Contents >> Show >> Hide
- What Is a Thermoelectric Freezer?
- How Thermoelectric Coolers Work
- Can a Peltier Module Really Make a Freezer?
- Best Uses for a DIY Thermoelectric Freezer
- Parts You Need to Build a Thermoelectric Freezer
- Step-by-Step Build Overview
- Common Mistakes That Ruin Performance
- How Cold Can You Expect It to Get?
- Design Example: A Small Desktop Thermoelectric Freezer
- Safety Tips Before You Plug It In
- Ways to Improve Efficiency
- My Experience Building and Testing a Thermoelectric Freezer
- Conclusion
Building your own freezer with thermoelectric coolers sounds like the kind of weekend project that begins with confidence, continues with wires everywhere, and ends with someone asking, “Why is the hot side so hot?” Good news: that question means you are already learning the most important lesson of thermoelectric refrigeration. A Peltier cooler does not magically create cold. It moves heat from one side of a module to the other. If you remove that heat quickly, the cold side gets colder. If you do not, congratulationsyou have built a very expensive hand warmer.
A DIY thermoelectric freezer can be a smart project for electronics hobbyists, off-grid experimenters, science classrooms, van-life tinkerers, and anyone who enjoys turning aluminum plates, foam insulation, fans, and 12-volt power supplies into something that frosts up like a tiny Arctic cave. But it is important to set realistic expectations. Thermoelectric coolers are excellent for compact, quiet, vibration-free cooling. They are not usually the best choice for a full-size household freezer, because compressor-based refrigeration is generally more efficient for large heat loads and deep freezing.
That said, if your goal is to build a small insulated freezer chamber for ice packs, lab samples, electronics testing, or a desktop “because I can” project, thermoelectric cooling can be surprisingly satisfying. This guide explains how a thermoelectric freezer works, what parts you need, how to design the cold chamber, and what mistakes to avoid before your project turns into a lukewarm box with a fan club.
What Is a Thermoelectric Freezer?
A thermoelectric freezer is a small cooling chamber that uses one or more thermoelectric cooler modules, often called Peltier modules or TECs, to move heat out of an insulated space. The module has two ceramic faces. When direct current flows through it, one face becomes cold and the other becomes hot. Reverse the polarity, and the hot and cold sides switch places.
The basic idea is simple: mount the cold side inside the box, mount the hot side outside the box, add heat sinks and fans, seal everything carefully, and control the module with a thermostat. In practice, the details matter. Heat sneaks in through thin walls, door gaps, screws, wires, and impatient people opening the lid every three minutes to “check progress.” Your freezer is only as good as its insulation, airflow, and hot-side heat removal.
How Thermoelectric Coolers Work
Thermoelectric coolers operate using the Peltier effect. Inside a typical TEC module are many pairs of semiconductor elements connected electrically in series and thermally in parallel. When DC power flows through the module, heat is absorbed on one side and released on the other. The module does not destroy heat; it pumps heat. That distinction is the difference between a successful freezer and a tiny ceramic disappointment.
A common hobby module, such as a TEC1-12706, is often rated around 12 volts and several amps. Sellers may advertise a maximum temperature difference of 60°C or more, but that number is usually measured under ideal conditions with no meaningful heat load on the cold side. In the real world, your insulated box contains air, moisture, shelves, food packs, wiring holes, and heat leaking through the walls. The actual temperature difference will be smaller.
This is why hot-side cooling is the king of the project. The hot face must reject both the heat pulled from the freezer chamber and the electrical power consumed by the module. If a module draws 60 watts and pumps 30 watts from the chamber, the hot-side heat sink may need to dump around 90 watts into the room. That is not a suggestion. That is physics with a clipboard.
Can a Peltier Module Really Make a Freezer?
Yes, but with limits. A well-built thermoelectric system can reach below freezing in a small, well-insulated chamber. Reaching and holding 0°F (-18°C), the standard freezer temperature for safe long-term food storage, is much harder. Ambient room temperature, module quality, insulation thickness, heat sink performance, door sealing, and internal load all determine the final result.
For a first project, think “mini freezer” rather than “family lasagna storage facility.” A chamber between 1 and 5 liters is a practical starting point. The smaller the chamber, the easier it is to pull down the temperature. If you try to cool a 40-quart box with one budget Peltier module, you may technically build a cooler, but the ice cream will file a complaint.
Best Uses for a DIY Thermoelectric Freezer
A thermoelectric freezer is most useful when compact size, low vibration, simple DC power, and precise temperature control matter more than maximum energy efficiency. It can be used for freezing small gel packs, testing how electronics behave in cold conditions, chilling camera batteries before astrophotography experiments, keeping small science samples cold, or creating a portable demonstration of heat transfer.
For food storage, be cautious. Do not trust homemade refrigeration with perishable food until you have tested it thoroughly with a reliable thermometer over several days in realistic conditions. If the chamber cannot hold 0°F (-18°C) consistently, treat it as a cold box or experimental chiller, not a true food freezer.
Parts You Need to Build a Thermoelectric Freezer
1. Thermoelectric Cooler Modules
Start with one or more Peltier modules matched to your chamber size. A TEC1-12706 is popular because it is cheap, easy to find, and runs from a 12-volt supply. More powerful modules exist, but they draw more current and create more hot-side heat. Bigger is not always better. An oversized module with a weak heat sink is like buying a race car and installing bicycle brakes.
2. Hot-Side Heat Sink and Fan
The hot side needs a serious heat sink, preferably with forced airflow. A large CPU cooler, aluminum fin heat sink, or liquid cooling loop can work. The heat sink should be mounted with firm, even pressure and a thin layer of thermal paste. Do not run a Peltier module without a heat sink. It can overheat quickly and fail.
3. Cold Plate or Internal Heat Sink
On the cold side, use an aluminum cold plate or a smaller heat sink to spread cooling into the chamber. A bare ceramic module face cools only a tiny area. A cold plate distributes the cooling effect and helps reduce frost concentration. For better air circulation, add a small internal fan rated for cold conditions, but keep moisture protection in mind.
4. Insulated Box
Use rigid foam insulation, polyurethane panels, vacuum-insulated panels, or a heavily modified cooler. For a freezer, thick insulation is not optional. Aim for at least 1 to 2 inches of high-quality insulation for a small build. Seal corners with silicone, aluminum tape, or foam-safe adhesive. Air leaks are thermal termites; they quietly eat your performance.
5. 12V or 24V Power Supply
Choose a DC power supply with enough current for the Peltier modules and fans. If one module draws 6 amps at 12 volts, and you use two modules, the supply should comfortably handle more than 12 amps, plus fan current, with some safety margin. Use properly sized wires, fuses, and connectors. Avoid mystery power bricks from the drawer labeled “probably fine.”
6. Temperature Controller
A digital thermostat controller lets you set a target temperature and cycle the Peltier modules on and off. A controller with a probe, relay output, and adjustable hysteresis works well. Place the probe in the chamber air or against a thermal mass, depending on what you want to control. For smoother performance, some builders use PWM or dedicated TEC controllers, but a thermostat is easier for beginners.
7. Thermal Paste and Mounting Hardware
Use thermal paste between the Peltier module and both metal surfaces. Apply a thin, even layer. Too much paste becomes insulation with an ego. Clamp the assembly evenly, but do not crush the ceramic module. Peltier modules dislike bending, twisting, and uneven pressure.
Step-by-Step Build Overview
Step 1: Design the Chamber First
Decide how much space you actually need. A smaller chamber is easier to cool and cheaper to power. For a first freezer, a 2-liter internal volume is a good challenge. Sketch the box, lid, module location, airflow path, and wiring exits before cutting anything.
Step 2: Cut the Module Opening
Create a clean opening in one wall for the cold plate and hot-side assembly. The Peltier module should sit between the internal cold plate and external hot-side heat sink. The module itself should not be exposed to air gaps. Use gasket material or closed-cell foam around the assembly to block air leaks.
Step 3: Build the Thermal Sandwich
The stack should look like this: internal cold plate, thermal paste, Peltier cold side, thermal paste, hot-side heat sink. Make sure the cold and hot sides are correctly oriented before powering the module. Test briefly with a low-current supply or quick touch test, but never run the module for long without proper heat sinking.
Step 4: Add Fans and Airflow
The external fan should push or pull room air through the hot-side heat sink. Good airflow is essential. The internal fan, if used, should gently circulate cold air inside the chamber. Keep wiring tidy and away from fan blades. Fan blades have no respect for optimism.
Step 5: Seal Every Leak
Seal the lid, seams, screw holes, and wire pass-throughs. Use weatherstripping around the door or lid. Even a small leak can introduce warm, humid air, causing frost buildup and raising the internal temperature. A homemade freezer lives or dies by its seal.
Step 6: Wire the Controller
Wire the thermostat so it switches power to the Peltier module or to a relay controlling the module. Fans may run continuously or cycle with the module. Many builders keep the hot-side fan running whenever the Peltier is powered. Add a fuse near the power supply and use wire rated for the current.
Step 7: Test Before Trusting It
Run the freezer empty and record temperatures every 10 to 15 minutes. Then test it with a small thermal load, such as a sealed water bottle or gel pack. Watch how long it takes to pull down, how low it stabilizes, and how quickly it warms when the lid opens. A freezer that looks good for 20 minutes may tell a different story after six hours.
Common Mistakes That Ruin Performance
Weak Hot-Side Cooling
This is the classic mistake. The cold side cannot get very cold if the hot side is allowed to cook itself. Use a heat sink larger than you think you need. If the hot-side heat sink is too hot to touch comfortably, your system is struggling.
Thin Insulation
A Peltier freezer with thin walls is basically cooling the room with extra steps. Thick insulation reduces the heat load and gives the module a fighting chance. For freezer temperatures, insulation matters more than shiny gadgets.
Too Much Internal Volume
Large chambers require more cooling power. Start small. Once you understand the performance of your module and heat sink, scale carefully.
Ignoring Condensation
Cold surfaces attract moisture. Moisture becomes frost, drips, corrosion, and occasionally a tiny indoor weather system. Protect electrical connections, seal the Peltier cavity, and consider adding a drain path or removable frost tray.
Expecting Compressor-Level Efficiency
Thermoelectric coolers are elegant, compact, and quiet, but they are usually less efficient than compressor systems for deep cooling and larger spaces. Build one because it solves your specific problem or because it is a great projectnot because it will beat your kitchen freezer on the electric bill.
How Cold Can You Expect It to Get?
In a small, well-insulated chamber, a single strong Peltier module may pull temperatures below 32°F (0°C), especially if the room is cool and the hot side is well managed. Reaching 0°F (-18°C) may require multiple modules, excellent insulation, a very small chamber, aggressive hot-side cooling, and careful sealing. In warm rooms, performance drops.
A realistic target for a first build is to freeze a small amount of water or hold a small chamber below freezing. Once you achieve that, improve the design gradually. Add insulation, upgrade the heat sink, reduce air leaks, and experiment with cold plate geometry. Thermoelectric projects reward patient testing more than dramatic shopping carts.
Design Example: A Small Desktop Thermoelectric Freezer
Imagine a 2-liter chamber made from 1.5-inch rigid foam board with an inner plastic liner. The cooling system uses two TEC1-12706 modules mounted side by side between a thick aluminum cold plate and two large CPU heat sinks. A 12-volt, 20-amp power supply feeds the modules through a thermostat controller and fused circuit. The hot-side fans run whenever the modules run, while a small internal fan circulates air inside the box.
This kind of build is not pocket-sized, but it is manageable. The cold plate spreads cooling across the chamber wall, while the foam reduces heat gain. With careful sealing and a decent room temperature, the system may reach below freezing and hold small loads cold. Whether it reaches true freezer temperature depends on workmanship and heat load. In other words, the parts list matters, but the build quality matters more.
Safety Tips Before You Plug It In
Use a DC power supply from a reputable source, add a fuse, and keep mains wiring enclosed. Do not leave early tests unattended. Check wire temperature, connector tightness, fan operation, and heat sink temperature. Keep water and condensation away from electrical parts. If you plan to store food, use a separate appliance thermometer and verify temperatures over time.
Also remember that Peltier modules can become very hot on one side. Mount them to nonflammable materials near the heat sink area, and avoid foam contact with hot components. A freezer project should produce ice, not smoke signals.
Ways to Improve Efficiency
First, reduce the heat load. Use thicker insulation, smaller internal volume, and a better lid gasket. Second, improve the hot side with a larger heat sink, stronger fan, or liquid cooling. Third, use a cold plate that spreads cooling evenly. Fourth, add thermal mass inside the chamber, such as a small metal block or sealed cold pack, to reduce temperature swings. Fifth, use a controller so the Peltier modules do not run continuously when they do not need to.
If you want to get fancy, test different fan speeds, cold plate shapes, and module voltages. Some Peltier modules operate more efficiently below their maximum rated current. Running a module at full blast can create more waste heat than your hot-side system can comfortably reject. Sometimes backing off the current gives better real-world cooling. Yes, the module may be less dramatic, but so are most good engineering decisions.
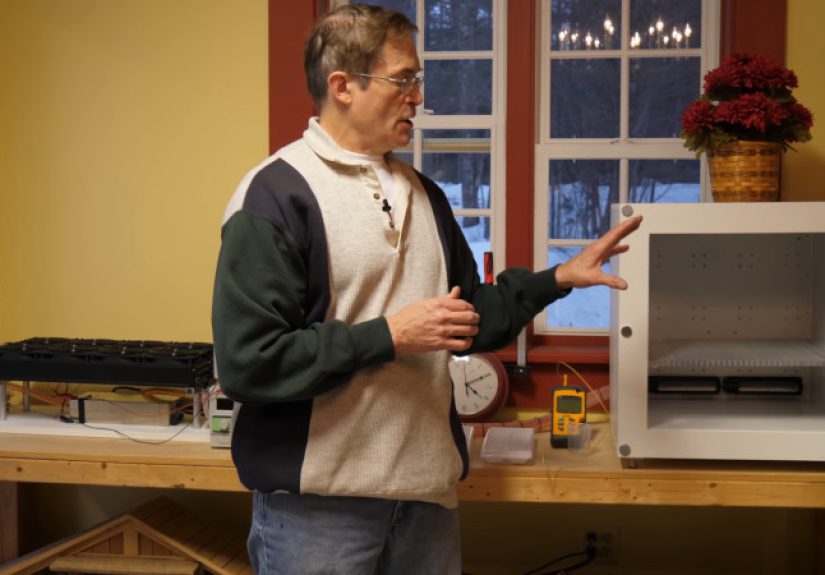
My Experience Building and Testing a Thermoelectric Freezer
The first time I built a small freezer with thermoelectric coolers, I made the same mistake almost everyone makes: I focused on the cold side because cold is exciting. I bought the Peltier module, admired the frosty ceramic face during a quick test, and assumed the rest of the project would be easy. Then I mounted it to a small heat sink that looked large enough in the product photo but performed like a decorative cheese grater. Within minutes, the hot side warmed up, the cold side stopped being impressive, and the whole box settled into a temperature range best described as “optimistic refrigerator.”
The breakthrough came when I stopped treating the hot side as an accessory and started treating it as the main event. I upgraded to a much larger CPU cooler, used better thermal paste, and tightened the mounting pressure evenly. The difference was immediate. The cold plate pulled down faster, frost appeared more evenly, and the chamber finally dropped below freezing. That taught me the most useful rule of thermoelectric cooling: the cold side is only as good as the hot side is calm.
Insulation was the second lesson. My first box had thin foam and a lid that technically closed, in the same way a screen door technically separates indoors from outdoors. Warm, humid air leaked in constantly, which caused frost to build near the cold plate while the rest of the chamber lagged behind. After rebuilding the box with thicker foam, aluminum tape on the seams, and proper weatherstripping around the lid, the freezer behaved like a completely different machine. It held temperature longer, cycled less often, and no longer seemed personally offended by room temperature.
The third lesson was patience. A thermoelectric freezer is not a blast freezer. It does not love warm loads. If I placed a room-temperature bottle of water inside, the temperature climbed and took a long time to recover. But when I pre-chilled the contents and used the chamber for small frozen packs, it performed much better. This is where expectations matter. The project felt disappointing when I judged it against a kitchen freezer. It felt excellent when I judged it as a compact, quiet, DC-powered mini freezer built on a workbench.
I also learned to respect condensation. Any wire passing into the chamber became a potential drip path. Any unsealed metal screw became a tiny heat bridge. Any exposed electrical connection near the cold zone made me nervous, and rightly so. After adding gaskets, sealing cable entries, and moving electronics away from moisture, the build became more reliable and less messy. Frost is charming until it melts into your wiring.
The most enjoyable part of the project was tuning it. I tested fan directions, added a small internal circulation fan, adjusted thermostat hysteresis, and measured pull-down times with different loads. Each small change taught me something. A DIY thermoelectric freezer is not just a gadget; it is a hands-on lesson in heat transfer, electrical power, airflow, insulation, and humility. Especially humility. The laws of thermodynamics do not care how cool your project looks on the bench.
If I were building another one, I would start with the best insulation I could reasonably fit, choose the hot-side heat sink before choosing the box, and design for easy access to every part. I would also build smaller than my ego wanted. A compact chamber that reaches below freezing is far more satisfying than a large box that gently chills disappointment. For hobbyists, that is the sweet spot: small, sealed, well-cooled, carefully wired, and tested with a thermometer instead of wishful thinking.
Conclusion
Building your own freezer with thermoelectric coolers is absolutely possible, as long as you design around the strengths and weaknesses of Peltier technology. Thermoelectric modules are compact, quiet, solid-state devices that can create below-freezing temperatures in small insulated spaces. But they demand excellent hot-side heat removal, thick insulation, careful sealing, moisture control, and realistic expectations.
If you want a full-size freezer for groceries, buy a compressor freezer. If you want a fascinating DIY project that teaches real engineering principles and can freeze small loads in a compact chamber, a thermoelectric freezer is a rewarding build. Start small, cool the hot side aggressively, seal every gap, and test everything. With enough patience, your little foam box can become a surprisingly capable mini freezerand you will never look at a heat sink the same way again.