Table of Contents >> Show >> Hide
- Where is the Witch Crest in Hollow Knight: Silksong?
- Step 1: Complete Greyroot’s Rite of the Pollip in Shellwood
- Step 2: Reach Bilewater and get the Twisted Bud
- Step 3: Return to Greyroot and accept the Rite of Rebirth
- Step 4: Escape the curse sequence and find Yarnaby in Greymoor
- Step 5: Get the Steel Spines from Sinner’s Road
- Step 6: Return to Yarnaby and unlock the Witch Crest
- What does the Witch Crest do?
- Is the Witch Crest worth getting?
- Common mistakes players make when hunting the Witch Crest
- Best tip for getting the Witch Crest with less frustration
- What the Witch Crest experience feels like in real play
- Conclusion
Note: This guide reflects the currently confirmed Witch Crest route and avoids rumor-heavy shortcuts or made-up map advice.
If you are hunting for the Witch Crest in Hollow Knight: Silksong, here is the spoiler-light truth: this is not a simple “walk into a room, bonk an enemy, grab shiny thing, leave feeling clever” kind of collectible. The Witch Crest is tied to one of the game’s strangest and most memorable quest chains, and Team Cherry clearly designed it to feel a little uncomfortable, a little mysterious, and a lot more complicated than your average pickup. So yes, you can find it, but first you have to earn it the hard way.
The short version is this: the Witch Crest location in Hollow Knight Silksong is tied to the Twisted Bud questline. You must complete Greyroot’s early quest in Shellwood, reach Bilewater, obtain the Twisted Bud, accept the Rite of Rebirth, survive the cursed detour, speak with Yarnaby in Greymoor, get the Steel Spines from Sinner’s Road, and return to finish the operation. Only then do you finally unlock the Witch Crest.
In other words, the Witch Crest is less “found under a rock” and more “earned through a deeply suspicious medical procedure.” Very Silksong. Very on-brand.
Where is the Witch Crest in Hollow Knight: Silksong?
The Witch Crest is ultimately obtained through the Infestation Operation quest path, not from a chapel pedestal or random treasure chest. While many players search Bilewater or Greymoor expecting a direct pickup, the crest is actually the reward at the end of a multi-step storyline. That is the biggest reason so many people miss it at first: they are looking for an item location when they should really be following a quest chain.
If your map-reading brain wants a cleaner answer, think of the route like this:
- Shellwood starts the questline with Greyroot.
- Bilewater gives you the Twisted Bud.
- Greymoor connects you to Yarnaby after the curse sequence begins.
- Sinner’s Road gives you the Steel Spines needed to finish the operation.
- Yarnaby rewards you with the Witch Crest after the parasite is removed.
So if you want the most accurate answer to “where to find Witch Crest in Hollow Knight Silksong,” the answer is: you find it at the end of the Twisted Bud and Infestation Operation questline, after returning to Yarnaby.
Step 1: Complete Greyroot’s Rite of the Pollip in Shellwood
The first real requirement for the Witch Crest is not in Bilewater at all. It begins with Greyroot in Shellwood. Before Greyroot will let you move into the later Witch Crest path, you need to complete the Rite of the Pollip. This early quest is easy to ignore if you are sprinting through the map like a speedrunner with caffeine in their veins, but do not skip it.
This matters because Greyroot is the character who later handles the Rite of Rebirth, the part of the questline that infects Hornet with the Twisted Bud. If you have not finished the Pollip step, the rest of the Witch Crest path will not unfold correctly.
Practical advice: do this quest as soon as you reasonably can. Even if you are not ready to chase the Witch Crest yet, clearing Greyroot’s first request early saves you a lot of backtracking later. Silksong loves turning one ignored NPC into two hours of “Wait, why won’t this trigger?”
Step 2: Reach Bilewater and get the Twisted Bud
Once Greyroot’s first quest is done and your campaign has progressed far enough, your next goal is the Twisted Bud in Bilewater. This is the item that transforms the Witch Crest hunt from a tidy side quest into a gloriously cursed mess.
Bilewater is not exactly the kind of place you stroll through for relaxation. It is messy, hostile, and full of the sort of atmosphere that makes you think, “This can’t possibly end well.” Correct. It does not.
The important thing is that the Twisted Bud is the key object that unlocks the next stage of the route. If you are in Bilewater and wondering whether this weird crying thing is important, the answer is yes. Uncomfortably yes.
Many players get stuck here because they assume picking up the Twisted Bud should immediately give them the Witch Crest. It does not. Getting the bud only moves the quest into its next phase. Think of it like picking up the world’s least reassuring key item.
Step 3: Return to Greyroot and accept the Rite of Rebirth
After obtaining the Twisted Bud, head back to Greyroot in Shellwood and continue the questline by accepting the Rite of Rebirth. This is the moment where the Witch Crest route becomes serious.
Once you commit, Hornet is placed into a cursed state. That means your normal setup gets heavily restricted. You lose access to your standard crest flexibility, tool usage becomes limited or unavailable, and your normal healing flow gets disrupted. Translation: the game politely removes your comfort blanket and asks whether you still think you are tough.
This step is why many players describe the Witch Crest route as one of the more memorable progression chains in Silksong. It does not just ask you to travel somewhere. It changes how you play for a while. Suddenly, basic movement decisions, enemy rooms, and resource management all feel more dangerous.
If you are worried that you made a mistake by accepting the Rite of Rebirth, relax. You are still on the correct path. The discomfort is the point.
Step 4: Escape the curse sequence and find Yarnaby in Greymoor
After the infection sequence, your next key objective is Yarnaby in Greymoor. Some players get nudged in the right direction by NPC dialogue, especially around Bellhart, but the important takeaway is simple: once you are cursed, Yarnaby is the person who helps you move toward the cure and, eventually, the Witch Crest.
Yarnaby is not just random quest seasoning. This NPC is essential. Without Yarnaby, the Witch Crest remains a miserable half-finished nightmare, and Hornet remains stuck dealing with the parasite setup.
When you reach Yarnaby and begin the next objective, you unlock the Infestation Operation. This is the final stretch of the Witch Crest route, though “final stretch” in Silksong often still means a decent amount of danger, detours, and mild emotional damage.
Step 5: Get the Steel Spines from Sinner’s Road
Yarnaby’s quest sends you to Sinner’s Road to obtain the Steel Spines. This is the item check that prevents the Witch Crest from being a freebie. If you are following the route correctly, this is where your search turns from mystery-solving into errand-running with consequences.
The Steel Spines come from Crull and Benjin, and in the standard version of the route you need 260 Rosaries to get them. That number is worth stressing because it can catch players off guard. You do not want to drag your cursed self all the way through the route just to discover you showed up broke.
So before you charge ahead like a heroic genius, make sure your wallet is not held together by optimism and pocket lint.
There is one more detail worth knowing: depending on your progression point, this interaction can play slightly differently, but the overall goal stays the same. You need the Steel Spines, and you need to bring them back to Yarnaby.
Step 6: Return to Yarnaby and unlock the Witch Crest
Once you have the Steel Spines, return to Yarnaby and complete the operation. This is the moment the parasite is removed and the entire cursed detour finally pays off. Your reward is the Witch Crest.
That is the exact answer to the search query everyone keeps typing into Google at two in the morning: you get the Witch Crest by finishing Infestation Operation after the Twisted Bud and Rite of Rebirth questline.
It is not a loose collectible. It is a quest reward. Once that clicks, the whole route makes much more sense.
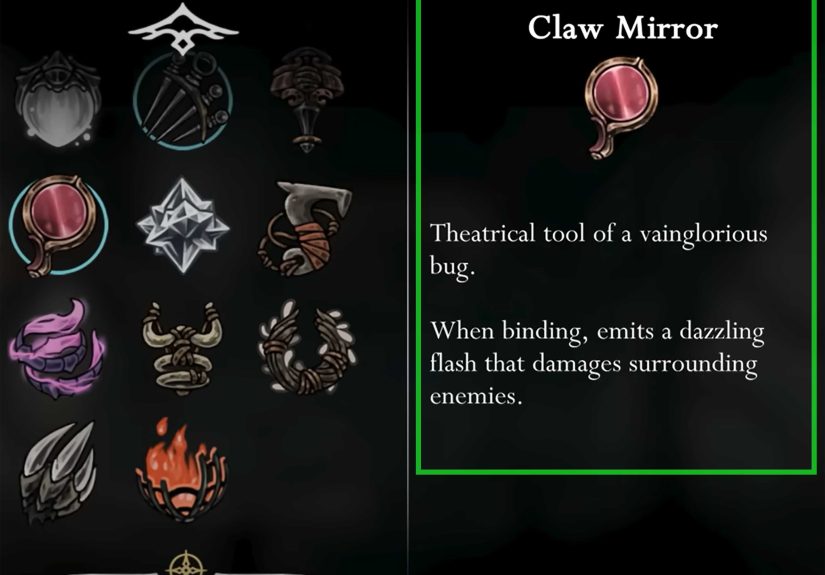
What does the Witch Crest do?
The Witch Crest is not just rare. It is also weird in a way that makes it stand out from more straightforward combat options. Its moveset leans into longer, whip-like slashes and changes the way Hornet’s healing-related action behaves. Instead of functioning like a safe, traditional recovery button, the Witch Crest turns that bind-style action into something more aggressive and situational.
That makes the crest feel powerful, but not always comfortable. You are trading predictability for style, range, and the ability to generate value through offense. Some players love this immediately. Others equip it, swing around for five minutes, and quietly switch back to something less dramatic.
In plain English: the Witch Crest can be excellent, but it asks you to commit to its logic. If you want passive safety, it may feel awkward. If you enjoy turning pressure into healing opportunities and controlling space with broader attacks, it can be fantastic.
Is the Witch Crest worth getting?
Absolutely, but the real answer depends on what kind of player you are.
If you like flexible, reactive combat and you are comfortable playing aggressively, the Witch Crest is one of the more interesting build options in Silksong. It offers a genuinely distinct feel instead of acting like a minor statistical variation on another crest. That alone makes it worth unlocking.
It is also worth getting for completion, experimentation, and build variety. Even if it never becomes your main crest, it is part of what makes Silksong’s combat system fun. It changes how encounters feel. It changes how you approach risk. And in a game built around movement, precision, and adaptation, that matters.
On the other hand, if your favorite thing in combat is safe recovery, clean consistency, and not feeling like you just agreed to battle while haunted by forest medicine, the Witch Crest may take practice. It is powerful, but it is not exactly cozy.
Common mistakes players make when hunting the Witch Crest
1. Looking for a direct map pickup
The Witch Crest is not waiting in a neat treasure room. Stop hunting for a pedestal and follow the questline instead.
2. Skipping Greyroot early
If you ignore the Rite of the Pollip, you delay the entire chain. Do Greyroot’s first quest before you start panicking about missing triggers.
3. Picking up the Twisted Bud without understanding the consequence
The Twisted Bud is not the reward. It is the problem that leads to the reward. Those are very different vibes.
4. Arriving at Sinner’s Road without enough Rosaries
The 260 Rosary requirement can turn a clean route into an annoying detour if you are not prepared.
5. Thinking the cursed state means you are off-track
Nope. That miserable, restricted phase is a normal part of the Witch Crest path. Welcome to the plan.
Best tip for getting the Witch Crest with less frustration
The smartest way to approach this route is to treat it like a mini-campaign instead of a collectible run. Finish Greyroot’s early content first, stockpile Rosaries before you begin the later steps, and be mentally ready for the cursed section to interfere with your usual rhythm.
That mindset shift helps a lot. Once you stop expecting a quick item grab, the Witch Crest route becomes much more enjoyable. It starts to feel like what it really is: a bizarre, atmospheric side storyline with a strong gameplay payoff.
What the Witch Crest experience feels like in real play
One of the best things about the Witch Crest questline is that it creates a very specific emotional arc. At first, it feels like a normal side objective. Then it becomes suspicious. Then it becomes funny in a dark, “this is definitely a bad idea” sort of way. Then, for a while, it becomes genuinely tense.
That shift is what makes the whole experience stick in your memory. A lot of games hand out powerful items by attaching them to a boss room or a secret wall. Silksong does something more interesting here. It makes you participate in the item’s identity before you fully own it. The discomfort of the curse, the weirdness of Greyroot, the scavenger-hunt energy of Yarnaby’s request, and the return trip with the Steel Spines all help the Witch Crest feel earned rather than merely collected.
In practice, that means your first hours chasing this crest are often messy in the best possible way. You second-guess your route. You wonder whether you accidentally locked yourself into a bad state. You poke through Greymoor with far more caution than usual. You start noticing how much your normal habits depend on systems the curse temporarily disrupts. Even familiar rooms feel meaner. Small enemies feel more annoying. Benches feel like luxury resorts.
Then, once the route clicks, the whole chain becomes weirdly satisfying. You stop wandering and start understanding the design. Greyroot is not just a creepy NPC. Bilewater is not just another gross biome. Yarnaby is not just a random quest giver hiding in a corner. Everything is connected. The Witch Crest hunt transforms from confusion into payoff.
That payoff continues after you unlock the crest. The Witch Crest does not feel like a generic stat stick; it feels like the final form of the strange detour you just survived. The long-reaching attacks and aggressive healing rhythm make much more sense after you have lived through the quest that created them. You do not just equip the crest. You remember where it came from, and that gives it personality.
There is also something delightfully Silksong about how the route toys with your expectations. Most players begin by asking a simple question: “Where is the Witch Crest?” But the game answers with a bigger one: “How badly do you want it?” That is a much better design punchline than placing it in a fancy room with dramatic lighting and a free applause track.
For completionists, this questline is rewarding because it is layered. For build experimenters, it is rewarding because the crest actually changes how combat feels. For explorers, it is rewarding because the route threads together several memorable regions. And for players who enjoy a little suffering with their success, it is practically a love letter.
So if you are struggling to find the Witch Crest, do not think of it as a missing item marker problem. Think of it as a story-shaped puzzle. Once you follow the chain from Greyroot to Bilewater to Greymoor to Sinner’s Road and back again, the whole thing stops being confusing and starts being one of the cooler side arcs in the game. Annoying at times? Sure. Worth doing? Definitely. Memorable? Absolutely.
And honestly, that is probably the highest compliment you can pay a hidden build option in a metroidvania: not only do you remember where you got it, you remember how weird it felt to become the kind of player who could use it well.
Conclusion
If you want to know where to find Witch Crest in Hollow Knight Silksong, the answer is simple once the noise is stripped away: complete Greyroot’s questline, obtain the Twisted Bud in Bilewater, survive the Rite of Rebirth curse, work with Yarnaby in Greymoor, get the Steel Spines from Sinner’s Road, and finish Infestation Operation. That is the full route.
It is not the shortest side objective in Silksong, but it is one of the most flavorful. And once you unlock the Witch Crest, you get more than a collectible. You get a new way to fight, a memorable questline, and the satisfaction of surviving one of the game’s most gloriously suspicious errands.