Table of Contents >> Show >> Hide
- Why Sneakers Stop Looking Fresh So Fast
- What You’ll Need Before You Start
- How to Make Your Sneakers Look New Again: 15 Steps
- Step 1: Check the Material First
- Step 2: Remove the Laces and Insoles
- Step 3: Dry-Brush Away Loose Dirt
- Step 4: Mix a Gentle Cleaning Solution
- Step 5: Patch-Test an Unseen Area
- Step 6: Clean the Uppers Gently
- Step 7: Treat Stains Based on the Material
- Step 8: Clean the Rubber Soles and Midsoles
- Step 9: Refresh the Laces
- Step 10: Deodorize the Insoles
- Step 11: Tackle Odor Inside the Shoe
- Step 12: Rinse Without Soaking
- Step 13: Stuff the Shoes to Restore Shape
- Step 14: Air-Dry the Right Way
- Step 15: Protect and Maintain Them
- Bonus Tips for Different Sneaker Types
- Mistakes That Make Sneakers Look Worse
- Real-Life Experiences: What Actually Works When Sneakers Look Hopeless
- Conclusion
- SEO Tags
If your sneakers have gone from “fresh out of the box” to “survived a small natural disaster,” don’t panic. Most pairs can bounce back with the right cleaning routine, a little patience, and the willingness to scrub where grime fears to tread. Whether you’re dealing with dingy white sneakers, muddy running shoes, scuffed leather kicks, or canvas classics that have seen one too many coffee runs, there’s good news: you usually do not need a miracle. You need a method.
This guide walks you through exactly how to make your sneakers look new again in 15 practical steps. Along the way, you’ll learn how to clean sneakers by material, brighten soles, fix funky odors, and avoid the mistakes that quietly ruin perfectly good shoes. The goal is simple: cleaner sneakers, longer-lasting wear, and that deeply satisfying moment when someone asks, “Wait, are those new?”
Why Sneakers Stop Looking Fresh So Fast
Sneakers are basically magnets for everyday life. Dust, sidewalk grime, grass stains, salty slush, spilled coffee, sweaty insoles, and mysterious marks that seem to appear from another dimension all pile up fast. White sneakers show every offense. Mesh traps dirt. Suede throws a tantrum if you look at it wrong. And rubber midsoles? They collect scuffs like they’re building a scrapbook.
The trick to sneaker restoration is not using the harshest cleaner you can find. It is using the right cleaner for the material, cleaning in the right order, and drying your shoes without cooking the glue, shrinking the fabric, or warping the shape. In other words: no chaos, no shortcuts, no tossing every pair into the washer and hoping for the best.
What You’ll Need Before You Start
- Soft-bristled brush or old toothbrush
- Microfiber cloth or soft white rag
- Mild dish soap or mild laundry detergent
- Warm or lukewarm water
- Magic eraser or melamine sponge for rubber soles
- Baking soda
- White vinegar
- Paper towels or plain newspaper
- Suede brush or suede eraser for suede sneakers
- Leather conditioner for leather sneakers
- Mesh laundry bag if machine washing is appropriate
How to Make Your Sneakers Look New Again: 15 Steps
Step 1: Check the Material First
Before you do anything heroic, figure out what your sneakers are made of. Canvas, mesh, knit, leather, faux leather, and suede all need different handling. A cleaning method that works beautifully on white canvas sneakers can wreck suede in record time. If your shoes still have care instructions, start there. This one step can save you from turning a small stain into a full-blown footwear tragedy.
Step 2: Remove the Laces and Insoles
Take the laces out and remove the insoles if they come out easily. This gives you access to the tongue, eyelets, and footbed, which are usually hiding half the dirt. It also helps everything dry faster later. Think of it as taking the sneakers apart just enough to clean the whole story, not only the cover.
Step 3: Dry-Brush Away Loose Dirt
Always start dry. Use a soft brush to knock off surface dirt, dust, and dried mud before you introduce water. If the shoes are muddy, let the mud dry first so you can brush it away instead of smearing it deeper into the fabric. For outsole grooves, a firmer brush or a toothpick can help remove pebbles and packed dirt without much drama.
Step 4: Mix a Gentle Cleaning Solution
In a bowl, mix a small amount of mild dish soap or mild detergent with warm or lukewarm water. Keep it simple. This is sneaker care, not a chemistry competition. Harsh cleaners, bleach on the wrong material, and hot water can fade color, damage delicate uppers, or weaken adhesives. A mild solution does the job more often than people think.
Step 5: Patch-Test an Unseen Area
Dip a cloth or brush into the solution and test it on a small hidden spot, such as the edge of the tongue or heel. This matters most for dyed canvas, leather, and any pair with contrast stitching or specialty finishes. It takes thirty seconds and can prevent a two-hour regret session.
Step 6: Clean the Uppers Gently
Now scrub the uppers with a soft brush or microfiber cloth using small circular motions. Do not attack the shoe like it insulted your family. Gentle, repeated passes work better than brute force. For mesh or knit sneakers, be especially careful not to snag the fabric. For canvas, you can be slightly firmer, but not wild. Wipe away loosened dirt as you go so you are lifting grime off the shoe instead of redistributing it like a bad houseguest.
Step 7: Treat Stains Based on the Material
This is where sneaker cleaning gets smarter.
For white canvas sneakers, a baking soda paste or a mild detergent paste can help lift stubborn discoloration. For white leather sneakers, a soft brush with a little baking soda can help on trouble spots, followed by a clean damp wipe. For suede sneakers, skip soaking entirely. Use a suede brush, suede eraser, or minimal targeted treatment. A tiny amount of white vinegar on a cloth may help some marks, but do not drench the shoe. For mesh shoes, stick with mild soap and controlled moisture.
Step 8: Clean the Rubber Soles and Midsoles
If your uppers look better but the midsoles still look like they just finished a mud marathon, your sneakers will still read as tired. Use a Magic eraser or melamine sponge on rubber soles and foxing to remove scuffs and dinginess. This is one of the fastest ways to make sneakers look new again. Use light pressure and keep the sponge away from delicate fabric uppers unless the material can handle it.
Step 9: Refresh the Laces
Never underestimate the power of clean laces. Dirty laces can make clean shoes look suspicious. Soak them in warm, soapy water for about 15 to 30 minutes, then scrub stubborn spots with a toothbrush if needed. Rinse and lay them flat to dry. If they are beyond saving, replacing them is a cheap, high-impact sneaker upgrade that makes the entire pair look fresher.
Step 10: Deodorize the Insoles
If your sneakers look great but smell like they have opinions, deal with the insoles next. Wipe removable insoles with a cloth and mild soap solution, then let them air-dry completely. If odor lingers, sprinkle baking soda on them and let it sit overnight before brushing it off. A clean-looking sneaker with a swampy interior is still a problem, just with better lighting.
Step 11: Tackle Odor Inside the Shoe
For the shoe interior, sprinkle a light layer of baking soda inside and leave it overnight. You can also use a sneaker deodorizer or odor-absorbing inserts if the smell is serious. The real culprit is usually trapped moisture. If you wear your sneakers hard, rotate pairs and let each one dry between wears. Your nose will thank you, and so will anyone standing nearby.
Step 12: Rinse Without Soaking
Use a clean damp cloth to wipe away soap residue rather than running the whole shoe under heavy water. The goal is to remove cleaner, not flood the shoe. This is especially important for leather, suede, glued construction, and shoes with layered materials. Sneakers like moderation. They are not soup ingredients.
Step 13: Stuff the Shoes to Restore Shape
Once cleaned, stuff the sneakers with plain newspaper or paper towels. This helps absorb moisture and keeps the toe box from collapsing while the shoes dry. Change the stuffing if it gets very damp. This small step makes a big difference when you want sneakers to look crisp instead of tired and slouchy.
Step 14: Air-Dry the Right Way
Let your sneakers air-dry indoors in a well-ventilated area. Avoid direct heat, heaters, radiators, and the dryer. High heat can warp soles, weaken glue, shrink fabric, and distort shape. If you want to speed things up, put them near a fan. Fast is nice, but not if your sneakers come out looking like they lost a bar fight.
Step 15: Protect and Maintain Them
After the sneakers are fully dry, apply a material-appropriate protector if desired, especially for canvas, leather, or suede. Then build a low-drama maintenance routine: spot-clean scuffs early, brush off dirt after wear, wash laces regularly, and deep-clean once grime starts building. Monthly touch-ups on your favorite pairs can keep them looking far newer than a once-a-year panic scrub.
Bonus Tips for Different Sneaker Types
How to Clean White Sneakers
White sneakers need frequent light cleaning instead of occasional extreme cleaning. Wipe marks as soon as you see them, clean the midsoles often, and avoid chlorine bleach unless the material clearly tolerates it. On many white sneakers, bleach can yellow rubber or damage trim. Gentle cleaning done consistently beats aggressive whitening experiments nine times out of ten.
How to Clean Leather Sneakers
Leather sneakers respond well to gentle wiping, mild soap, and patience. Once dry, apply a leather conditioner to help prevent stiffness and cracking. If you skip conditioning, the shoes may look cleaner but feel older. That is not the vibe we are going for.
How to Clean Suede Sneakers
Suede is the diva of the sneaker world. Brush first, use minimal moisture, and rely on suede-specific tools whenever possible. Never soak suede. Never scrub it while drenched. Never assume “more water” equals “more clean.” Suede remembers.
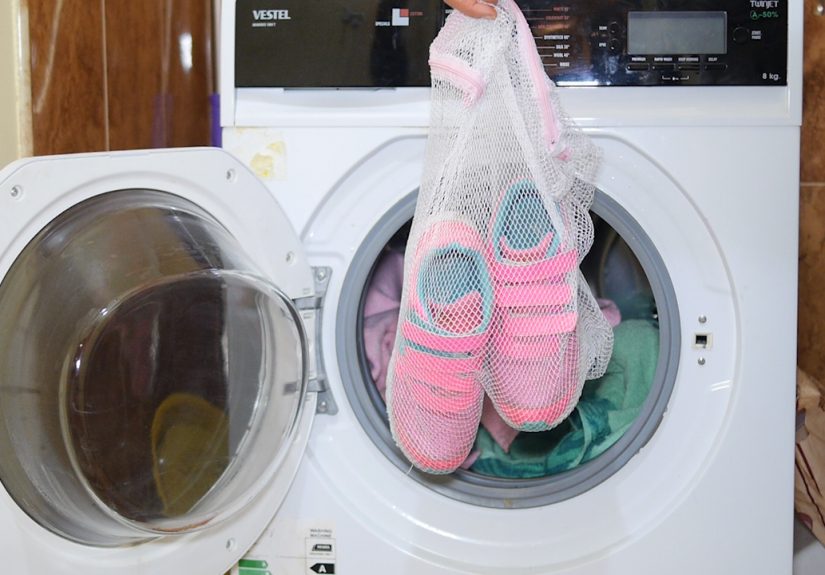
Can You Machine-Wash Sneakers?
Sometimes, but not always. Some fabric sneakers can survive a gentle cycle if placed in a mesh bag with towels to balance the load. But hand-washing is usually safer, especially for newer shoes, leather, suede, structured sneakers, and anything with glue-heavy construction. If you machine-wash, use cold or warm water, low spin, and air-dry only. The dryer is not your sneaker’s friend.
Mistakes That Make Sneakers Look Worse
- Using hot water
- Soaking suede or leather
- Scrubbing delicate mesh too aggressively
- Using bleach on everything like it is magical
- Putting shoes in direct sun or a hot dryer
- Ignoring the laces and insoles
- Cleaning the uppers but forgetting the midsoles
- Wearing shoes again before they are fully dry
Real-Life Experiences: What Actually Works When Sneakers Look Hopeless
One of the funniest things about sneaker cleaning is how often people assume a pair is finished when it is really just filthy. A lot of “old sneakers” are not old at all. They are just carrying six months of sidewalk evidence. I have seen white sneakers come back from coffee splashes, mystery grayness, and midsoles so scuffed they looked permanently moody. The biggest difference was rarely some fancy product with dramatic branding. It was consistency, patience, and cleaning the right part of the shoe in the right order.
A common experience goes like this: someone wipes the upper, glances proudly, and declares victory. But the laces are still grimy, the outsole edge is gray, and the insoles smell like a gym bag with unresolved trauma. The shoes look better, but not truly refreshed. Then they finally clean the laces, hit the rubber with a Magic eraser, stuff the shoes so the shape returns, and suddenly the whole pair transforms. It is almost rude how much difference clean laces can make.
White sneakers are usually the most dramatic before-and-after case. They also teach the best lesson: clean them lightly and often. People tend to wait until their sneakers look like they have crossed three states on foot. At that point, every stain feels personal. But when you do quick spot cleaning, the dirt never gets a long-term lease. That means less scrubbing, less fading, and far less muttering under your breath over a sink.
Leather sneakers are often easier than people expect. They usually do not need a deep soak or weird online hacks. They need a soft cloth, mild soap, careful drying, and conditioner. Suede, on the other hand, humbles everyone. Anyone who has ever tried to “just wipe off” a suede stain with lots of water has probably learned a colorful vocabulary that day. Suede rewards restraint. Gentle brushing, erasing marks carefully, and accepting that subtle improvement is still success tends to work much better than trying to force perfection.
Another real-world truth: odor matters more than people admit. A pair of sneakers can look fantastic and still feel worn out if the inside is damp or funky. Cleaning insoles separately, using baking soda overnight, and giving shoes time to breathe between wears can make an older pair feel surprisingly fresh again. It is not glamorous advice, but neither is being betrayed by your shoes in a quiet room.
The most satisfying part of the whole process is that it changes how you treat your sneakers afterward. Once you have rescued a pair properly, you are much more likely to brush off dirt early, clean scuffs before they settle in, and avoid tossing them into a hot dryer just because you are impatient. In other words, sneaker restoration creates better sneaker habits. That is a sentence nobody expected to read today, but here we are.
Conclusion
If you want to make your sneakers look new again, the winning formula is simple: identify the material, clean gently, treat stains strategically, refresh the laces and insoles, and always air-dry with care. These 15 steps work because they are practical, repeatable, and much kinder to your shoes than random internet hacks. Whether you are restoring white sneakers, everyday trainers, or your favorite weekend pair, a smart cleaning routine can save money, extend wear, and bring back that fresh-sneaker confidence. Not bad for a bucket, a brush, and a little determination.