Table of Contents >> Show >> Hide
- What Is a Cribbage Board?
- Materials and Tools You Will Need
- Step 1: Choose the Right Wood
- Step 2: Decide on the Cribbage Board Layout
- Step 3: Prepare a Template
- Step 4: Cut and Square the Board
- Step 5: Mark the Holes Carefully
- Step 6: Drill the Peg Holes
- Step 7: Add Start, Finish, and Game Counter Holes
- Step 8: Shape the Edges
- Step 9: Sand the Board Smooth
- Step 10: Test the Peg Fit
- Step 11: Add Peg and Card Storage
- Step 12: Apply the Finish
- Step 13: Personalize the Board
- Common Mistakes to Avoid
- Design Ideas for a Homemade Cribbage Board
- How Long Does It Take to Make a Cribbage Board?
- Is It Better to Use a Template or Make Your Own Pattern?
- Extra Experience: Lessons Learned from Making Cribbage Boards
- Conclusion
Making your own cribbage board is one of those woodworking projects that looks impressively official but does not require a wizard robe, a secret handshake, or a garage full of museum-grade machinery. At its heart, a cribbage board is a simple wooden scoring track with carefully spaced holes, a few pegs, and enough personality to make game night feel handmade in the best possible way.
Whether you are building a gift, upgrading from a flimsy travel board, or finally giving your card table the wooden trophy it deserves, this step-by-step guide will walk you through how to make a cribbage board from planning and layout to drilling, sanding, finishing, and adding those tiny pegs that do all the dramatic scorekeeping.
A standard cribbage game is usually played to 121 points, and the board helps players track the race with pegs that move along rows of holes. That means accuracy matters. If your hole spacing wanders like a shopping cart with one bad wheel, the finished board will still work, but it may look like it had a difficult morning. The goal here is simple: build a clean, durable, attractive cribbage board that is enjoyable to play and nice enough to leave on the coffee table.
What Is a Cribbage Board?
A cribbage board is a scoring tool used in the card game cribbage. Players move pegs along a track to record points during play. Most modern boards include tracks for two or three players, a starting area, a finish or game hole, and sometimes extra holes for counting games won. Traditional boards often use two pegs per player so the newest score and previous score are both visible. That little leapfrog system is one of cribbage’s quiet genius moves: it keeps everyone honest without needing a spreadsheet, calculator, or suspicious squinting.
For a homemade cribbage board, the most common design is a flat rectangular wooden board with parallel rows of holes. You can keep it classic with straight lines, create a continuous “race track” loop, or design a custom shape such as a fish, state outline, canoe, mountain, guitar, or family name plaque. Just remember: creativity is welcome, but the pegs still need a logical path from start to finish.
Materials and Tools You Will Need
You can make a cribbage board with basic woodworking supplies. A drill press is ideal because it keeps the holes straight and consistent, but a hand drill can work if you use a reliable template, a steady setup, and plenty of patience. Patience, in this project, is not optional. You will be drilling many small holes, and the board will know if you rush.
Materials
- Hardwood board, such as maple, walnut, cherry, oak, or mahogany
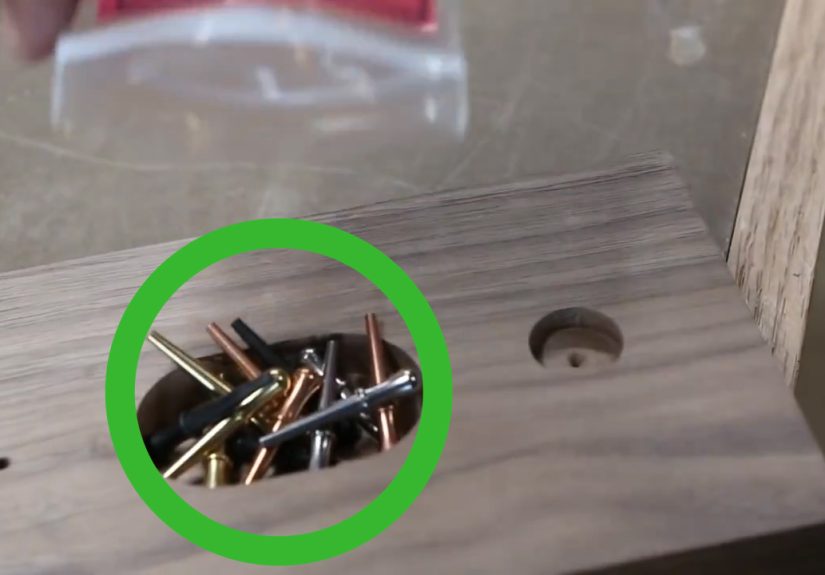
- Cribbage pegs, usually metal or hardwood
- Printed cribbage board template or acrylic drilling template
- Painter’s tape or spray adhesive for securing the template
- Wood finish, such as oil, polyurethane, lacquer, or hardwax oil
- Sandpaper in several grits, such as 120, 180, and 220
- Optional: small hinges, magnets, felt, cork, or a sliding drawer for peg storage
Tools
- Drill press or hand drill
- 1/8-inch drill bit, or the size required by your pegs
- Clamps
- Ruler, square, and pencil
- Saw for cutting the board to size
- Router, roundover bit, or sanding block for softening edges
- Awl or center punch for marking holes, if not using a rigid drilling template
- Vacuum or compressed air for clearing sawdust
Safety note: Wear eye protection, clamp the workpiece securely, and ask an experienced adult for help if you are not fully comfortable using power tools. A cribbage board should be the only thing getting drilled today.
Step 1: Choose the Right Wood
The best wood for a cribbage board is stable, attractive, and dense enough to hold clean peg holes. Maple is a great beginner-friendly choice because it is hard, light-colored, and easy to read when you add markings. Walnut looks rich and dramatic, like it owns a leather chair and says “strategy” a lot. Cherry ages beautifully and gains warmth over time. Oak is strong and classic, though its open grain can make tiny holes look a little less crisp unless you drill carefully.
A good starting size for a standard board is about 4 inches wide, 14 to 18 inches long, and 3/4 inch thick. This gives you enough space for three tracks, labels, skunk lines, and a comfortable border. You can go smaller for a travel board or larger for a decorative showpiece. If you are adding storage for cards and pegs, use a thicker blank or build a box-style base.
Step 2: Decide on the Cribbage Board Layout
Before cutting or drilling anything, choose your layout. The most common homemade cribbage board designs include:
- Straight track: Simple rows running down and back along the board.
- Continuous track: A rounded rectangle or “paperclip” pattern that feels like a race course.
- Three-player track: Three parallel lanes for flexible game nights.
- Custom shape: Decorative outline with the holes following the design.
For beginners, a straight or continuous template is the easiest. A standard 121-point board should clearly show the path from start to finish. Many boards also mark every five points to help players count quickly. You may also add a skunk line around 90 points and a double-skunk line around 60 points if you want traditional reference marks and a little friendly humiliation baked into the furniture.
Step 3: Prepare a Template
The template is the boss of this project. You can design your own using graph paper or software, download a printable cribbage board pattern, or use a reusable acrylic or wooden drilling template. If this is your first board, a commercial drilling template is worth considering because it saves time and helps keep the holes neat and consistent.
If you print a paper template, make sure it prints at actual size. Do not use “fit to page” unless you enjoy discovering that your pegs no longer fit the universe you created. After printing, measure a known distance on the template with a ruler to confirm accuracy. Tape the template securely to the wood, or use a light adhesive that will not damage the surface.
Plan for peg spacing. Holes should be far enough apart that pegs do not bump into each other, but close enough to keep the board compact. If you are using standard cribbage pegs, a 1/8-inch hole is common, but always test your exact pegs in scrap wood first.
Step 4: Cut and Square the Board
Cut your board blank to final size or slightly oversized. Square edges make layout easier and help the finished board look intentional instead of “found behind a shed.” Use a table saw, miter saw, circular saw with a guide, or handsaw depending on what you have available. After cutting, check that the corners are square and the surface is flat.
If your board has rough lumber marks, plane or sand the faces before attaching the template. It is much easier to drill clean, accurate holes into a flat surface than into a board that still thinks it is a tree.
Step 5: Mark the Holes Carefully
If you are using a paper pattern, mark each hole with an awl or sharp center punch. This creates a tiny starting point so the drill bit does not wander. If you are using a rigid drilling template, align it carefully, secure it with tape or clamps, and follow the guide holes.
Take your time here. A cribbage board may have hundreds of holes depending on the number of tracks and game counters. One crooked hole is not the end of civilization, but a whole row drifting sideways will be obvious. Work in sections, keep the template flat, and check alignment often.
Step 6: Drill the Peg Holes
Drilling is the main event. Use a sharp bit that matches your pegs. For most standard pegs, a 1/8-inch bit works well, but peg sizes vary, so test first. Drill into scrap wood and check the fit. The peg should slide in easily but not wobble like a loose tooth.
Set a depth stop so every hole is the same depth. If you do not have a depth stop, wrap painter’s tape around the drill bit as a visual guide. A depth of about 1/2 inch to 5/8 inch is often enough for standard pegs, but the right depth depends on peg length. Avoid drilling through the board unless your design specifically calls for it.
Use light pressure and clear dust frequently. If the bit heats up or clogs, back it out and clean it. Clamp the board securely, especially if using a drill press. A small board can spin unexpectedly if it catches, and that is not the kind of surprise craftsmanship anyone ordered.
Step 7: Add Start, Finish, and Game Counter Holes
Once the main track holes are drilled, add the start and finish holes. Many boards have a starting area slightly separated from the scoring track and a final game hole at 121. You can also add small groups of holes for tracking games won in a match. These extra features make the board more useful and polished.
Labeling can be simple or decorative. You might burn in numbers, carve small marks, use paint, add metal inlay, or keep the design minimal with only five-point ticks. The best markings are readable without turning the board into a highway sign.
Step 8: Shape the Edges
After drilling, soften the edges. A slight roundover makes the board feel better in the hand and reduces splintering. You can use a router with a roundover bit, a block plane, or sandpaper wrapped around a small block.
Do not overdo it near the holes. Heavy sanding across the top can soften crisp hole edges or push dust into them. A clean, small roundover around the outside edge is usually enough. If you want a more rustic look, a live-edge slab can be beautiful, but make sure the playing surface remains flat and stable.
Step 9: Sand the Board Smooth
Sanding turns a drilled board into something that feels finished. Start with 120 grit if the wood is already smooth, or 80 grit if you need to remove saw marks. Move through 180 and finish with 220 grit. Sand with the grain whenever possible.
Use a vacuum or soft brush to clean dust from the peg holes. You can roll a small piece of sandpaper into a cone to gently clean rough holes, but avoid enlarging them too much. The pegs need a consistent fit, not a luxury hot tub.
Step 10: Test the Peg Fit
Before applying finish, test several pegs in different parts of the board. They should sit upright, move smoothly, and feel consistent from hole to hole. If a hole is too tight, carefully re-drill it with the same bit or clean it with a small round file. If a hole is too loose, you may need slightly larger pegs or a creative fix such as using that hole for decoration instead of scoring.
This is also the moment to check the path. Move a peg along the track and make sure the scoring direction is obvious. If your board requires a treasure map and emotional support to find hole 47, add clearer markings.
Step 11: Add Peg and Card Storage
Storage is optional, but it makes a handmade cribbage board feel complete. Common storage ideas include:
- A small drilled compartment underneath with a sliding cover
- A routed channel with magnets
- A narrow drawer for pegs and cards
- A felt-lined recess on the bottom
- A small hinged box attached to the board
If you are new to woodworking, keep storage simple. A shallow underside groove with a wooden plug or magnetic lid is easier than building a tiny drawer. Save the miniature furniture engineering for your second board, when confidence has arrived and brought snacks.
Step 12: Apply the Finish
A good finish protects the wood and makes the grain pop. Oil finishes are easy to apply and give a natural look. Polyurethane adds more surface protection, which is useful if the board will live near snacks, coffee, or competitive relatives. Hardwax oil offers a modern low-sheen appearance and pleasant feel.
Apply thin coats according to the finish manufacturer’s directions. Wipe away excess oil, let each coat dry fully, and lightly sand between coats if needed. Avoid flooding the peg holes with finish. Too much finish inside the holes can make pegs stick. A cotton swab or pipe cleaner can help clear any buildup.
Let the board cure before using it. Dry to the touch does not always mean fully cured. If you stack cards and pegs on a finish too early, you may get marks, smudges, or a board that smells like a hardware store during game night.
Step 13: Personalize the Board
The beauty of making your own cribbage board is that it does not have to look like everyone else’s. Add initials, a family name, a date, a favorite quote, or a small design that matches the person receiving it. A lake outline, mountain silhouette, cabin name, or sports-inspired color scheme can turn a simple board into a keepsake.
For a classy look, use subtle engraving or wood burning. For a playful board, paint lane colors or add bright pegs. For a premium gift, use contrasting wood inlays or brass accents. Just keep the scoring path easy to follow. A cribbage board can be artistic, but it still has a job.
Common Mistakes to Avoid
Using Soft or Unstable Wood
Very soft wood can dent easily and may not hold peg holes well over time. Construction lumber can work for practice, but hardwood is better for a lasting board.
Skipping the Test Holes
Always test your bit and pegs in scrap wood. Peg sizes vary more than people expect. Testing takes five minutes and can save the entire project.
Letting the Template Shift
A shifting template creates crooked rows. Secure it with tape, clamps, or indexing pegs. Check alignment regularly, especially after clearing dust.
Drilling Too Deep
Consistent hole depth matters. Use a depth stop. If the holes are too shallow, pegs fall out. Too deep, and the pegs may disappear like tiny metal submarines.
Over-Sanding the Top
Heavy sanding after drilling can blur hole edges and make the board look worn before its first game. Sand the board smooth before drilling, then lightly clean up afterward.
Design Ideas for a Homemade Cribbage Board
If you want your DIY cribbage board to stand out, consider a theme. A travel board can be compact with magnetic pegs. A cabin board can use rustic wood and burned-in markings. A luxury board can combine walnut, maple inlay, and brass pegs. A family board can include names or a meaningful date. A sports-themed board can use team colors for different tracks, though you may want to keep the design tasteful unless your game room already looks like a mascot exploded.
You can also experiment with shape. Long rectangular boards are easiest, but oval, fish-shaped, state-shaped, or live-edge boards are popular. The key is to keep the route understandable. Players should not need GPS to finish fourth street.
How Long Does It Take to Make a Cribbage Board?
A simple board can be completed in a weekend. Layout and drilling usually take the most time, especially if you are making a three-track board. Cutting and sanding may take a few hours, while finishing can stretch over several days because coats need drying time.
If you use a commercial template, the process moves faster. If you design your own layout from scratch, expect more planning. The project is not technically difficult, but it rewards careful work. Think of it as woodworking meditation, except the mantra is “please let this hole be straight.”
Is It Better to Use a Template or Make Your Own Pattern?
For your first cribbage board, a template is the easiest route. It reduces measuring errors and helps create a professional-looking board. A rigid template is especially helpful because it guides the drill bit and keeps spacing consistent.
Making your own pattern gives you more creative freedom. It is a great option if you want a custom shape or unusual layout. Just double-check the hole count, spacing, and direction before drilling. Print the design, mark the path with arrows, and walk through the scoring route with a pencil first. Future you will be grateful. Future you may even write a thank-you note.
Extra Experience: Lessons Learned from Making Cribbage Boards
The first thing you learn when making a cribbage board is that small holes have big opinions. From across the room, a cribbage board looks simple. Up close, every hole wants to be perfectly spaced, perfectly vertical, and perfectly clean. This is why the best experience-based advice is to slow down before drilling. The board is not racing you. The game will do that later.
One practical lesson is to prepare the board surface before you attach the template. If the wood is cupped, rough, or dusty, the template may not sit flat. Even a tiny lift in the template can make the bit enter at a slight angle. Sand or plane the board first, wipe away dust, and then secure the template firmly. A clean start makes the rest of the project less fussy.
Another useful experience is to label the drilling direction. When you are drilling dozens or hundreds of holes, it is surprisingly easy to lose track of where you are. Lightly mark completed sections with removable tape or pencil. If you are using a template with separate indexing positions, move slowly and verify each new position before drilling. The phrase “I think this lines up” has ruined many peaceful afternoons.
Peg fit also deserves more attention than beginners expect. Metal pegs and wooden pegs may fit differently, even when sold for the same general hole size. Wooden pegs can swell slightly with humidity or finish. Metal pegs may taper differently from one brand to another. That is why testing in scrap wood is not just a suggestion; it is the tiny insurance policy of cribbage board making.
Finishing teaches its own lessons. Oil can make walnut glow beautifully, while polyurethane provides tough protection for a board that will see frequent use. However, heavy finish inside the holes can create sticky pegs. The best approach is thin coats and careful cleanup. After each coat, check the holes before the finish fully hardens. A toothpick, cotton swab, or blast of air can keep the holes open and clean.
Personalization is where the project becomes memorable. A plain board is useful, but a board with initials, a date, or a design tied to a family cabin, favorite lake, or long-running card rivalry becomes a story. The trick is restraint. Add enough detail to make it special, but do not overcrowd the playing surface. Cribbage already has enough counting; the board does not need visual traffic.
The final lesson is that small imperfections rarely ruin the board. A slightly imperfect handmade cribbage board still carries warmth, character, and bragging rights. Most players will not notice one hole that is a hair off line. They will notice that you made the board yourself. They will notice the smooth edges, the grain, the comfortable pegs, and the fact that the board feels like it belongs at the table. And if they beat you by one point on your own handmade board, they will absolutely notice that too.
Conclusion
Learning how to make a cribbage board is a satisfying woodworking project because it blends accuracy, creativity, and everyday usefulness. You get to practice layout, drilling, sanding, finishing, and design while creating something people can actually use. The project is approachable for beginners, flexible enough for experienced woodworkers, and personal enough to make a thoughtful gift.
Start with good wood, use a reliable template, test your pegs, drill carefully, and apply a finish that protects the surface without clogging the holes. Add storage or custom engraving if you want extra polish. In the end, your homemade cribbage board does not need to be perfect. It needs to be clear, smooth, durable, and ready for the next dramatic comeback from 30 points behind.
And yes, once you build one, you may start seeing cribbage board possibilities everywhere: scrap walnut, leftover maple, live-edge cutoffs, old shelves, and that mysterious board in the corner of the garage. That is normal. Welcome to the club. We have pegs.