Table of Contents >> Show >> Hide
- Why Learning How to Iron Clothes Still Matters
- What You Need Before You Start Ironing
- Step 1: Read the Care Label and Sort by Fabric
- Step 2: Set Up the Ironing Area Safely
- Step 3: Iron Clothes in the Right Order
- Step 4: Let Clothes Cool Before Wearing or Storing
- Common Ironing Mistakes to Avoid
- Fabric-Specific Ironing Tips
- Ironing vs. Steaming: Which Is Better?
- How to Prevent Wrinkles Before Ironing
- Extra Experience: Real-Life Lessons From Ironing Clothes
- Conclusion
Ironing clothes is one of those life skills that looks suspiciously easy until your shirt comes out with more creases than a folded road map. The good news? You do not need a fashion degree, a fancy laundry room, or the patience of a museum curator to get crisp, smooth clothing. You just need the right setup, the right temperature, and a simple method that keeps you from accidentally turning your favorite blouse into a shiny, sad lesson.
This guide breaks down how to iron clothes in 4 simple steps, using practical fabric-care principles, common laundry-label rules, and real-world tips that work for everyday shirts, pants, dresses, skirts, and school or office outfits. Whether you are preparing for a job interview, a first day of school, a wedding, or simply trying to look like you did not sleep in your outfit, these ironing tips will help you remove wrinkles safely and confidently.
Before we begin, here is the golden rule of ironing: heat is powerful. Used correctly, it relaxes fabric fibers and smooths wrinkles beautifully. Used carelessly, it can scorch, melt, shine, stretch, or stain clothes. In other words, your iron is not a tiny spaceship; do not launch it across your laundry pile at full power.
Why Learning How to Iron Clothes Still Matters
In a world full of wrinkle-release sprays, steam dryers, and handheld garment steamers, ironing may sound old-fashioned. But a traditional iron still gives the crispest finish, especially on cotton shirts, linen pants, pleated skirts, collars, cuffs, and structured clothing. Steamers are great for quick touch-ups, but irons provide direct heat, pressure, and control. That is why a freshly ironed dress shirt looks sharp instead of merely “less wrinkled than before.”
Ironing also helps clothing look cleaner and more intentional. A smooth shirt can make a simple outfit appear polished, while wrinkled clothes can make even expensive pieces look neglected. The best part is that ironing gets easier once you stop guessing and start following a repeatable process.
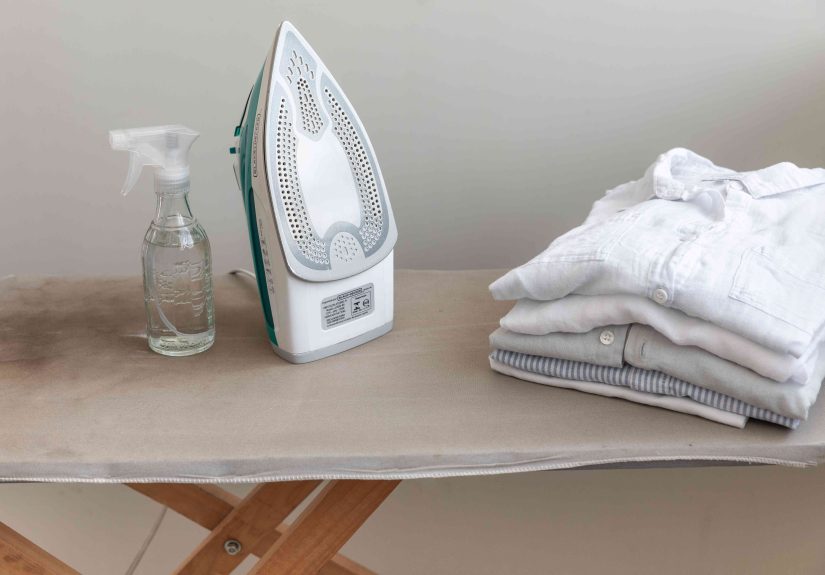
What You Need Before You Start Ironing
Gathering your tools first saves time and prevents that awkward moment when your iron is hot, your shirt is ready, and your spray bottle is nowhere to be found because it has apparently joined a witness protection program.
- A clean steam iron
- A sturdy ironing board or a firm, heat-safe surface
- Clean water, preferably distilled if your area has hard water
- A spray bottle for stubborn wrinkles
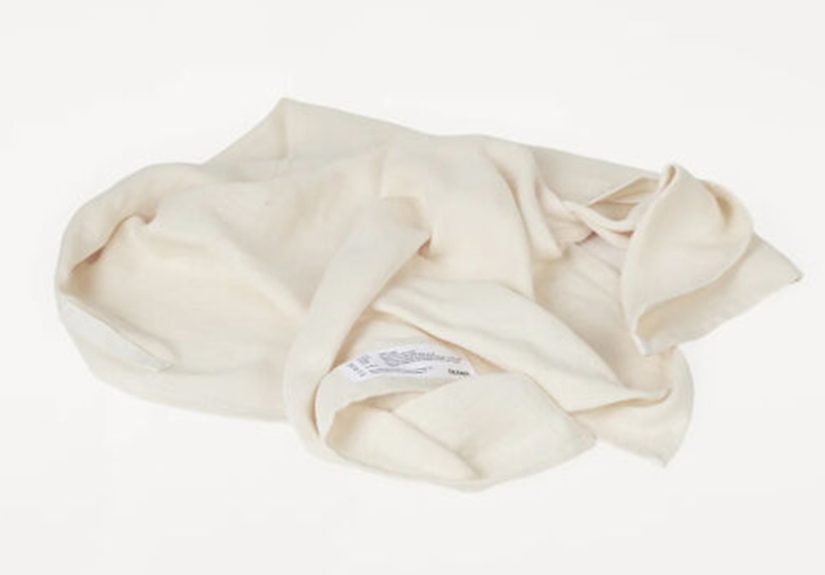
- A pressing cloth, such as a clean cotton towel or thin cloth
- Hangers for cooling clothes after ironing
- Optional starch or sizing spray for extra crispness
Make sure the iron soleplate is clean before it touches fabric. Sticky residue, mineral buildup, or melted synthetic fibers can transfer to clothing. Also check that the garment itself is clean. Ironing over stains can set them deeper into the fibers, turning a removable spot into a permanent souvenir.
Step 1: Read the Care Label and Sort by Fabric
The first step in learning how to iron clothes is reading the care label. This tiny tag is not just there to tickle your neck. It tells you whether the garment can be ironed, whether steam is allowed, and what temperature is safe.
Look for the iron symbol. One dot usually means low heat, two dots mean medium heat, and three dots mean high heat. If the iron symbol has an X through it, do not iron the garment. If the label says “cool iron,” “warm iron,” “iron inside out,” or “do not steam,” take it seriously. Fabric labels are basically the garment’s last will and testament.
General Iron Temperature Guide
- Low heat: acetate, nylon, acrylic, delicate synthetics
- Low to medium heat: polyester, rayon, blends
- Medium heat: wool, silk, some synthetic blends
- High heat: cotton and linen
When in doubt, start low. You can always increase the heat gradually, but you cannot un-melt polyester. That is not a skill; that is a tragedy.
Sorting clothes by fabric also saves time. Start with garments that need low heat, then move to medium, and finish with cotton or linen at higher temperatures. This avoids constantly waiting for the iron to cool down. It also reduces the risk of pressing a delicate fabric with leftover high heat from your denim shirt mission.
Step 2: Set Up the Ironing Area Safely
A good ironing setup makes the entire process smoother. Place your ironing board on a stable surface with enough room to move the garment. The cover should be clean, padded, and flat. Ironing on a soft bed or uneven table can create new wrinkles, stretch fabric, or make the iron unstable.
Fill the water reservoir if you plan to use steam. Do not overfill it. Select the correct heat setting for the first garment and allow the iron to heat fully. Many irons have indicator lights that turn off or change when ready. Patience matters here; ironing with a half-heated iron is like trying to toast bread with confidence and a flashlight.
Safety Tips Before Ironing
- Keep the cord away from the edge of the board so it cannot be pulled down.
- Always rest the iron upright when not moving it across fabric.
- Never leave a hot iron unattended.
- Keep children and pets away from the ironing area.
- Unplug the iron when finished and let it cool completely before storing.
If you are new to ironing, practice first on a cotton pillowcase, old T-shirt, or washable napkin. This helps you understand pressure, movement, and steam before you graduate to your favorite white shirtthe one that somehow attracts stains from three rooms away.
Step 3: Iron Clothes in the Right Order
Once your iron is ready, place the garment flat on the board. Smooth it with your hands before using the iron. Never iron over a wrinkle and hope it magically disappears. Heat can press wrinkles into fabric if they are folded under the iron, creating a crease so sharp it could file paperwork.
Move the iron in smooth, steady strokes. Press gently but firmly. Do not leave the iron sitting in one place, especially on delicate or dark fabrics. For stubborn wrinkles, use steam or lightly mist the area with water, then iron slowly. Slightly damp fabric is often easier to smooth than bone-dry fabric.
How to Iron a Shirt
Dress shirts are the classic ironing challenge, but they become simple when you follow the right order:
- Collar: Open the collar flat and iron from the points toward the center. Flip and repeat if needed.
- Cuffs: Unbutton the cuffs and iron the inside first, then the outside.
- Sleeves: Lay one sleeve flat, align the seams, and iron from shoulder to cuff. Flip and repeat.
- Front panels: Iron around buttons using the pointed tip or button groove of the iron.
- Back panel: Spread the shirt back across the board and iron in sections.
- Shoulders: Fit the shoulder area over the narrow end of the board and smooth carefully.
For button areas, do not press directly on plastic buttons with high heat. Iron around them or iron from the wrong side of the fabric. This prevents buttons from warping, melting, or developing a dramatic personality.
How to Iron Pants
For pants, start with pockets and waistband. Then iron the upper section, working around seams and pleats. Lay one leg flat and iron from top to hem. If the pants have a center crease, align the seams carefully before pressing. For casual pants, skip the sharp crease unless you enjoy making jeans look like they are applying for a bank job.
How to Iron Dresses and Skirts
Dresses and skirts vary widely, so always check the care label. Start with the bodice or waistband, then move to larger panels. For pleated skirts, arrange each pleat carefully and press one section at a time. Use a pressing cloth on delicate fabrics, dark fabrics, embroidery, lace, or anything with shine-prone areas.
Step 4: Let Clothes Cool Before Wearing or Storing
The final step is simple but often ignored: let freshly ironed clothes cool before folding or wearing. Warm fibers are still setting into shape. If you fold a shirt immediately, you may create new creases right after removing the old ones. Congratulations, you have invented laundry déjà vu.
Hang shirts, dresses, and blouses on sturdy hangers. Lay pants flat or hang them properly along the crease. Let garments cool for several minutes before placing them in a closet. Do not cram them into a crowded wardrobe, or the wrinkles will come back like they were invited.
If you are ironing multiple garments, create a system. Iron one item, hang it, move to the next. This keeps your workspace organized and prevents clean clothing from collapsing into a warm, wrinkly pile.
Common Ironing Mistakes to Avoid
Even careful people make ironing mistakes. The most common ones are easy to prevent once you know what to watch for.
Using Too Much Heat
High heat does not mean faster success. It means higher risk. Cotton and linen can handle more heat, but synthetics may melt or become shiny. Wool can flatten or develop marks if pressed too aggressively. Silk needs gentle handling and usually benefits from a pressing cloth.
Ironing Dirty Clothes
Heat can lock in stains and odors. If a garment has food, sweat, oil, makeup, or deodorant residue, wash it first. Ironing a dirty shirt is like putting a picture frame around a mess.
Skipping the Pressing Cloth
A pressing cloth protects delicate fabrics from direct heat. It is especially useful for dark clothing, wool, silk, rayon, embroidered pieces, and anything with a printed design. Think of it as sunscreen for your clothes.
Folding Clothes While Warm
Freshly ironed clothes need a short cooling period. Fold or wear them too soon, and body movement or pressure can create fresh wrinkles.
Fabric-Specific Ironing Tips
Cotton
Cotton usually responds well to high heat and steam. For best results, iron cotton while it is slightly damp or use a spray bottle. Dress shirts, pillowcases, and cotton pants often look crisp after steady steam and firm pressure.
Linen
Linen wrinkles easily, but it also irons beautifully. Use high heat, plenty of steam, and iron while damp. For a relaxed linen look, do not chase every tiny wrinkle. Linen is supposed to look breezy, not like it just passed military inspection.
Polyester
Polyester needs lower heat and careful handling. Turn the garment inside out, use a pressing cloth, and avoid letting the iron rest in one spot. Steam can help, but check the care label first.
Wool
Wool should usually be pressed rather than aggressively ironed. Use medium heat, steam, and a pressing cloth. Lift and press instead of sliding the iron back and forth. This helps avoid stretching or flattening the fibers.
Silk
Silk is delicate and should be ironed on low heat from the wrong side. Use a pressing cloth and avoid heavy steam unless the label allows it. Never spray silk randomly with water, because droplets can leave spots.
Ironing vs. Steaming: Which Is Better?
Both ironing and steaming remove wrinkles, but they do it differently. Ironing uses heat, pressure, and often steam to flatten fabric. Steaming uses moisture and heat without direct pressure. A steamer is excellent for delicate garments, travel clothing, curtains, and quick touch-ups. An iron is better for crisp collars, cuffs, pleats, and structured garments.
If you want a polished button-down shirt, use an iron. If you want to refresh a lightly wrinkled blouse before leaving the house, a steamer may be faster. If you want both convenience and crispness, having both tools is ideal. If you only have one, choose based on your wardrobe. Lots of cotton shirts? Iron. Lots of delicate tops? Steamer.
How to Prevent Wrinkles Before Ironing
The easiest wrinkles to remove are the ones you never create. Shake clothes out before drying, avoid overloading the dryer, and remove garments as soon as the cycle ends. Hanging or folding clothes promptly helps prevent deep creases.
For shirts, button the top button before hanging so the collar keeps its shape. For pants, hang them along the crease or fold them neatly over a hanger. For travel, roll soft clothes and use garment folders for dress shirts or formal pieces.
Extra Experience: Real-Life Lessons From Ironing Clothes
After ironing enough clothes, you learn that technique matters more than speed. The first real lesson is that rushing usually creates more work. If you throw a shirt on the board, press randomly, and hope for the best, you may finish quicklybut the shirt will look like it had an emotional weekend. Taking thirty extra seconds to smooth the fabric with your hands before ironing makes a huge difference.
Another useful experience is learning that moisture is your friend, but only when used correctly. Cotton shirts often transform when lightly misted. A stubborn wrinkle that laughs at a dry iron may disappear after a small spritz and a slow pass of steam. However, delicate fabrics do not always appreciate surprise water attacks. Silk, for example, may spot if sprayed unevenly. That is why testing a hidden area is a smart habit.
One of the most practical ironing habits is working from small areas to large areas. Collars, cuffs, pockets, pleats, and seams should come first because they require detail. Large panels, like the back of a shirt or the front of a skirt, are easier once the tricky parts are already finished. This order also prevents you from re-wrinkling the main fabric while wrestling with a sleeve.
Experience also teaches you to respect the cooling stage. A shirt can look perfect on the board, then wrinkle again if tossed onto a chair while still warm. Hanging clothes immediately after ironing is not optional if you want lasting results. Give the garment a few minutes to cool and set. It is a tiny step that makes the difference between “freshly pressed” and “briefly optimistic.”
Another lesson: not every garment deserves the same level of effort. A linen shirt does not need to look like a laminated document. Some fabrics naturally wrinkle as part of their charm. On the other hand, collars, cuffs, and front plackets can make or break a shirt’s appearance. If you are short on time, focus on the visible areas: collar, cuffs, front, and upper back. For pants, focus on the front panels and crease. Smart ironing is not laziness; it is laundry strategy.
Finally, the best ironing experience comes from building a routine. Keep the iron clean, store a spray bottle nearby, use hangers before you start, and sort garments by heat level. The process becomes faster and less annoying when everything is ready. Ironing may never become your favorite hobby, but it can stop feeling like a household punishment. And when you put on a crisp shirt that looks sharp all day, the effort suddenly feels worth it.
Conclusion
Learning how to iron clothes in 4 simple steps is mostly about preparation, temperature control, smart technique, and patience. Read the care label, set up a safe ironing area, iron garments in the right order, and let clothes cool before wearing or storing. Once you understand fabric types and avoid common mistakes, ironing becomes less intimidating and much more rewarding.
A good iron can turn wrinkled clothing into polished outfits in minutes. Start low, use steam wisely, protect delicate fabrics, and never underestimate the power of a clean ironing board. Your clothes will look better, last longer, and stop announcing to the world that they spent the night crumpled in a laundry basket.
Note: This article was written for web publication and synthesized from widely accepted garment-care, laundry-label, appliance, and fabric-care guidance. No source links or content reference markers are included in the publishable HTML.