Table of Contents >> Show >> Hide
- What Is a Parallelogram?
- Tools You Need to Draw a Parallelogram
- Method 1: How to Draw a Parallelogram with a Ruler
- Method 2: How to Draw a Parallelogram with a Ruler and Protractor
- Method 3: How to Construct a Parallelogram with a Compass
- How to Draw a Parallelogram on Graph Paper
- How to Label a Parallelogram Correctly
- Common Mistakes When Drawing a Parallelogram
- How to Check If Your Drawing Is a True Parallelogram
- Why Learning to Draw a Parallelogram Matters
- Practice Exercises
- Extra Experience: What Drawing Parallelograms Teaches You in Real Practice
- Conclusion
Learning how to draw a parallelogram is one of those geometry skills that looks suspiciously simpleuntil your lines start leaning in three different directions and your “parallelogram” begins auditioning as a confused trapezoid. The good news? Drawing a clean parallelogram is not magic, and it does not require a secret handshake from your old math teacher. With a ruler, pencil, and a little patience, you can create a neat, accurate parallelogram step by step.
A parallelogram is a four-sided shape, also called a quadrilateral, with two pairs of opposite sides that are parallel. That means the top and bottom sides run in the same direction, and the left and right sides also run in the same direction. In a true parallelogram, opposite sides are equal in length, opposite angles are equal, and neighboring angles add up to 180 degrees. In plain English: it is a slanted rectangle’s cooler cousin.
This guide explains how to draw a parallelogram by hand using basic geometry tools. You will learn the easiest ruler method, a more accurate protractor method, a compass-based construction method, and practical tips for checking your work. Whether you are a student finishing homework, a parent helping at the kitchen table, or an adult who suddenly needs geometry after years of peaceful non-parallelogram living, this step-by-step guide will help.
What Is a Parallelogram?
A parallelogram is a flat, two-dimensional shape with four sides. Its defining feature is simple: both pairs of opposite sides are parallel. If one pair of opposite sides is not parallel, the shape is not a parallelogram. It may still be a quadrilateral, but it has officially left the parallelogram club.
Common examples of parallelograms include rectangles, squares, and rhombuses. Yes, a square is technically a parallelogram. It is just a very well-behaved one that keeps all its angles at 90 degrees and all its sides equal. A typical parallelogram, however, has a slanted look, with two sharp angles and two wider angles.
Key Properties of a Parallelogram
- It has four sides.
- Opposite sides are parallel.
- Opposite sides are equal in length.
- Opposite angles are equal.
- Adjacent angles are supplementary, meaning they add up to 180 degrees.
- Diagonals bisect each other, meaning they cross at their midpoints.
These properties are useful because they help you draw and check your parallelogram. If your opposite sides are not parallel or your top side is much longer than your bottom side, something has gone sidewaysliterally.
Tools You Need to Draw a Parallelogram
You do not need fancy equipment to draw a parallelogram. A few simple school supplies will do the job nicely.
- A pencil
- An eraser
- A ruler
- A protractor
- A compass, optional but helpful
- Graph paper, optional for beginners
If you are just practicing, graph paper is your best friend. It keeps lines straight, spacing consistent, and your confidence from packing a suitcase and leaving the room.
Method 1: How to Draw a Parallelogram with a Ruler
This is the easiest way to draw a parallelogram. It works well for beginners and for quick sketches where perfect measurement is not required.
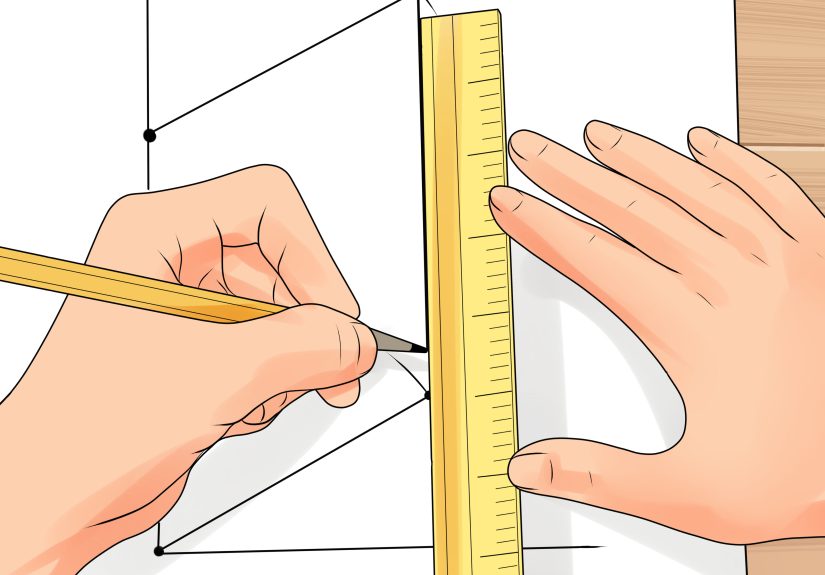
Step 1: Draw the Base
Start by drawing a straight horizontal line. Label the left endpoint A and the right endpoint B. This line will be the base of your parallelogram.
For example, you might draw line AB as 6 inches long. Keep your pencil light at first so you can erase easily if needed. Geometry rewards precision, but it also forgives a clean eraser.
Step 2: Choose the Slant Direction
From point A, draw a slanted line upward and to the right. This line will become one side of your parallelogram. Label the endpoint D.
The slant can be steep or gentle. A steeper slant creates a taller, narrower parallelogram. A gentler slant creates a flatter, wider one. For a standard classroom drawing, a moderate slant usually looks best.
Step 3: Copy the Slanted Side from Point B
Now draw another slanted line starting from point B. This line should go in the same direction and be the same length as line AD. Label the new endpoint C.
This step is important because side BC must be parallel and equal to side AD. If one side leans more than the other, your parallelogram may start looking like it skipped leg day.
Step 4: Connect the Top Side
Use your ruler to connect point D to point C. This creates the top side of the parallelogram. The top side DC should be parallel to the base AB.
You now have a parallelogram named ABCD. Read the letters around the shape in order: A to B to C to D.
Step 5: Check Your Shape
Look at the opposite sides. AB should be parallel to DC, and AD should be parallel to BC. If they are, congratulationsyou have drawn a parallelogram, and no geometry goblins were harmed.
Method 2: How to Draw a Parallelogram with a Ruler and Protractor
If your teacher asks for an accurate parallelogram with specific measurements, use a ruler and protractor. This method gives you more control over side lengths and angles.
Example Measurements
Let us draw a parallelogram with a base of 8 centimeters, a side length of 5 centimeters, and an angle of 60 degrees at point A.
Step 1: Draw the Base AB
Use your ruler to draw a horizontal line segment 8 centimeters long. Label the left endpoint A and the right endpoint B.
Step 2: Measure the Angle at A
Place the center of your protractor on point A. Line up the baseline of the protractor with AB. Mark a point at 60 degrees above the base.
This angle controls how much your parallelogram slants. A 60-degree angle creates a classic slanted shape that is easy to recognize.
Step 3: Draw Side AD
Use your ruler to draw a line from A through the 60-degree mark. Measure 5 centimeters along this line and label the endpoint D.
Step 4: Draw a Matching Angle at B
At point B, draw a line that is parallel to AD. The easiest way is to use the same 60-degree angle direction. Measure 5 centimeters from B along this slanted line and label the endpoint C.
Step 5: Connect D and C
Draw a straight line from D to C. This top line should measure 8 centimeters and be parallel to AB.
Your parallelogram is complete. You can check it by measuring both pairs of opposite sides. AB and DC should both be 8 centimeters. AD and BC should both be 5 centimeters.
Method 3: How to Construct a Parallelogram with a Compass
A compass helps you copy lengths accurately. This method is especially useful when you want opposite sides to match exactly.
Step 1: Draw Two Connected Sides
Draw line segment AB. Then draw a slanted line segment AD from point A. These two sides form the starting corner of your parallelogram.
Step 2: Copy the Length of AD
Open your compass to the length of AD. Without changing the compass width, place the compass point on B and draw a small arc in the direction where point C should be.
Step 3: Copy the Length of AB
Now open your compass to the length of AB. Place the compass point on D and draw another arc that crosses the first arc. The intersection of the arcs is point C.
Step 4: Connect the Final Sides
Use your ruler to connect B to C and D to C. You have constructed a parallelogram because opposite sides have matching lengths and directions.
This compass method feels slightly more advanced, but it is reliable. Think of the compass as your geometry measuring robot, minus the dramatic sci-fi music.
How to Draw a Parallelogram on Graph Paper
Graph paper makes drawing a parallelogram much easier because the grid helps you keep the slopes consistent.
Step 1: Plot the First Two Points
Choose two points on the same horizontal grid line. For example, mark A at one grid intersection and B six squares to the right.
Step 2: Create the Slanted Side
From point A, move three squares up and two squares right. Mark that point D.
Step 3: Repeat the Same Movement from B
From point B, move three squares up and two squares right. Mark that point C.
Step 4: Connect the Points
Connect A to B, B to C, C to D, and D to A. Because you used the same movement from A and B, the slanted sides are parallel and equal.
This grid method is excellent for students because it teaches the idea of translation: moving a side the same distance and direction to create a matching parallel side.
How to Label a Parallelogram Correctly
When labeling a parallelogram, write the letters in order around the shape. A common order is ABCD. Start at one corner and move clockwise or counterclockwise.
For example, if A is the bottom-left corner, B may be the bottom-right corner, C the top-right corner, and D the top-left corner. This order makes it easier to describe opposite sides: AB is opposite DC, and AD is opposite BC.
Common Mistakes When Drawing a Parallelogram
Mistake 1: Making Only One Pair of Sides Parallel
A shape with only one pair of parallel sides is usually a trapezoid, not a parallelogram. Always check both pairs of opposite sides.
Mistake 2: Changing the Slant
If one slanted side leans more than the other, the opposite sides will not be parallel. Use a ruler, protractor, or graph paper to keep the slant consistent.
Mistake 3: Forgetting Equal Opposite Sides
In a parallelogram, opposite sides are equal. If your top side is shorter than your base, recheck your measurements.
Mistake 4: Drawing Too Dark Too Soon
Start with light pencil lines. Once the shape is correct, darken the final outline. This small habit saves paper, time, and emotional damage.
How to Check If Your Drawing Is a True Parallelogram
After drawing your parallelogram, use this quick checklist:
- Are there four sides?
- Is the top side parallel to the bottom side?
- Is the left side parallel to the right side?
- Are opposite sides equal in length?
- Do opposite angles look equal?
- Do the diagonals cross at their midpoints?
You do not always need to check every property, but the more accurate your drawing needs to be, the more checks you should use.
Why Learning to Draw a Parallelogram Matters
Drawing a parallelogram is not just a classroom exercise. It builds important geometry skills, including measuring, constructing parallel lines, understanding angles, and recognizing shape properties. These skills appear in architecture, engineering, design, art, construction, and computer graphics.
For example, floor tiles, window frames, road signs, furniture patterns, and digital icons often use parallelogram-like shapes. Even perspective drawing uses similar ideas when artists create depth and slanted surfaces. Geometry may look quiet on a worksheet, but out in the real world, it is doing push-ups.
Practice Exercises
Exercise 1: Basic Parallelogram
Draw a parallelogram with a base of 6 centimeters and a side length of 4 centimeters. Choose any slant you like.
Exercise 2: Angle-Based Parallelogram
Draw a parallelogram with AB = 7 centimeters, AD = 5 centimeters, and angle A = 70 degrees.
Exercise 3: Graph Paper Parallelogram
On graph paper, draw a base that is 8 squares long. From each endpoint, move 4 squares up and 3 squares right to create the slanted sides.
Exercise 4: Diagonal Check
Draw both diagonals of your parallelogram. Measure each diagonal from the corner to the crossing point. The crossing point should divide each diagonal into two equal parts.
Extra Experience: What Drawing Parallelograms Teaches You in Real Practice
The first time many people try to draw a parallelogram, they treat it like a rectangle that got pushed over by a strong breeze. That mental image is actually helpful. If you imagine starting with a rectangle and sliding the top side to the right while keeping the base fixed, you can see how a parallelogram forms. The top and bottom remain parallel. The left and right sides lean but still match each other. This simple image makes the shape much easier to understand.
In practice, the biggest challenge is not drawing four lines. Anyone can do that. The real challenge is keeping the relationships between the lines accurate. Opposite sides must work as partners. If AB is horizontal, DC needs to follow the same direction. If AD slants upward at a certain angle, BC needs to copy that same slant. A parallelogram is basically a geometry team project where every side has a job and nobody gets to freelance.
One useful experience-based tip is to draw the base first and make it your anchor. A clean base gives the entire shape stability. Once the base is drawn, choose the side length and slant carefully. If you are using plain paper, make small guide marks before drawing the full lines. If you are using graph paper, count squares instead of guessing. Counting squares may feel basic, but it is one of the fastest ways to make your drawing look neat.
Another helpful habit is to measure twice before darkening your final lines. Many students draw a parallelogram too quickly, then realize the top side does not quite line up. Instead of pressing hard with the pencil immediately, sketch lightly. After checking the measurements and parallel sides, trace the final shape with a darker line. This gives your work a cleaner, more professional appearance.
When teaching or learning this topic, it also helps to compare a parallelogram with similar shapes. A rectangle is a parallelogram with four right angles. A rhombus is a parallelogram with four equal sides. A square is both a rectangle and a rhombus. A trapezoid, however, usually has only one pair of parallel sides. These comparisons help you understand why the definition matters. Geometry is not just about what a shape looks like; it is about what the shape must prove.
A final real-world tip: use diagonals as a secret quality-control test. After you draw your parallelogram, draw a line from A to C and another from B to D. If the diagonals bisect each other, your shape is likely accurate. This check is especially useful for advanced assignments because it confirms more than just appearance. It shows that the internal structure of the shape works correctly.
With enough practice, drawing a parallelogram becomes almost automatic. You begin to see parallel sides, matching angles, and equal opposite lengths before you even put pencil to paper. That is when geometry starts to feel less like memorizing rules and more like understanding a visual language. And once you can draw a good parallelogram, you are ready for related topics such as area, perimeter, transformations, vectors, and coordinate geometry.
Conclusion
Drawing a parallelogram is simple once you understand the basic rule: both pairs of opposite sides must be parallel. Start with a straight base, draw one slanted side, copy that slant from the other endpoint, and connect the top. For more accuracy, use a protractor, compass, or graph paper. Then check your work by measuring opposite sides, comparing angles, and drawing diagonals.
The more you practice, the easier it becomes to recognize and create accurate parallelograms. Soon, you will be drawing them confidentlyand maybe even correcting other people’s suspiciously trapezoid-looking “parallelograms” with gentle kindness and a very sharp pencil.