Table of Contents >> Show >> Hide
- Why This DIY Jewelry Heart Craft Works So Well
- Materials You’ll Need for a Framed Heart Made With Old Jewelry
- How to Choose the Best Jewelry for Your Valentine Heart Art
- Step-by-Step: How to Create a Pretty Framed Heart for Valentines Day Using Old Jewelry
- Design Tips to Make Your Jewelry Heart Look Expensive
- Common Mistakes to Avoid
- Creative Variations for This Old Jewelry Valentine Craft
- Where to Display Your DIY Framed Jewelry Heart
- Why This Craft Feels So Personal
- Extra Experiences and Lessons From Making a Framed Heart With Old Jewelry
- Conclusion
Some Valentine’s Day gifts are sweet. Some are stylish. And some manage to be both while also rescuing that lonely pile of old brooches, clip-on earrings, broken necklaces, and mystery beads hiding in your drawer like retired beauty queens. A framed heart made from old jewelry checks every box: it is personal, eye-catching, budget-friendly, sentimental, and just dramatic enough to make people say, “Wait… you made that?”
If you love upcycled decor, vintage-inspired crafts, or meaningful handmade gifts, this project is an absolute charmer. It turns forgotten costume jewelry into wall art that feels romantic without being cheesy, elegant without being stuffy, and creative without requiring the patience of a medieval monk. Better yet, it works for Valentine’s Day, anniversaries, bridal showers, Mother’s Day, or any moment when you want your craft to say I care without shouting it through a glitter megaphone.
In this guide, you’ll learn exactly how to create a pretty framed heart using old jewelry, how to choose the right frame and background, how to arrange pieces so the final design looks polished, and how to avoid the common mistakes that can turn “vintage romance” into “craft table chaos.”
Why This DIY Jewelry Heart Craft Works So Well
A framed heart made from old jewelry has a special kind of magic. It combines texture, shine, memory, and design in one compact piece of decor. Unlike flat paper crafts, this project has dimension. Unlike store-bought wall art, it tells a story. Every rhinestone pin, faux pearl earring, chain link, charm, and pendant adds character.
That is what makes this DIY Valentine wall art so appealing. You are not just gluing random shiny objects into a heart shape. You are creating a layered collage that can reflect a person’s style, family history, favorite colors, or shared memories. Grandma’s brooch? In it goes. That broken bracelet you swore you would fix in 2019? It finally has a purpose. That single earring with no surviving partner? Congratulations, it has entered its solo era.
This kind of upcycled jewelry art also fits beautifully with current decorating habits. People want meaningful decor, thrifted pieces, creative reuse, and handmade gifts that feel one-of-a-kind. A jewelry heart frame delivers all of that while staying surprisingly accessible for beginners.
Materials You’ll Need for a Framed Heart Made With Old Jewelry
You do not need a professional studio or a suspiciously perfect craft closet. Most of these supplies are easy to find at home, in a thrift store, or at a basic craft shop.
Core supplies
- Old jewelry such as brooches, clip-on earrings, pendants, charms, beads, chains, pins, costume pearls, and decorative buttons
- A picture frame or shadow box frame
- Background material such as velvet, linen, cardstock, scrapbook paper, or fabric-covered mat board
- Heart template made from paper or cardstock
- Strong craft glue or a low-temperature hot glue gun
- Tweezers for placing tiny pieces
- Scissors
- Pencil
- Ruler
Optional extras
- Spray paint or acrylic paint for updating an old frame
- Ribbon, lace, or tiny faux flowers
- A mat for a more polished gallery-style finish
- Glass cleaner if your frame includes glass
- Wire cutters or jewelry pliers for trimming chains and separating pieces
If your jewelry is chunky, layered, or heavily embellished, choose a shadow box instead of a standard frame. A shadow box gives you the depth needed for dimensional pieces and helps prevent the glass from pressing against your design like an overenthusiastic sandwich lid.
How to Choose the Best Jewelry for Your Valentine Heart Art
The prettiest framed heart designs are not always the ones with the most expensive-looking pieces. They are the ones with thoughtful variety. You want a mix of shapes, sizes, finishes, and textures that still feel cohesive.
Look for visual contrast
Combine round pearls with angular rhinestones. Mix smooth metal charms with textured brooches. Add delicate chain in the smaller gaps between larger statement pieces. This keeps the heart shape interesting and prevents it from looking flat.
Choose a loose color story
You can go classic with gold, pearl, and blush. You can lean vintage with antique brass, ivory, and faded rose. You can get bold with red, pink, silver, and crystal. You can even make a neutral framed jewelry heart using cream, champagne, and muted metallics for decor that works beyond February.
The key is not to force perfect matching. A little variation gives the piece depth. The trick is making the jewelry look intentionally collected, not accidentally dumped.
Use sentimental pieces strategically
If you have heirloom or meaningful items, place them near the center or at the top curves of the heart where the eye naturally goes. Even one special brooch can become the star of the whole composition.
Step-by-Step: How to Create a Pretty Framed Heart for Valentines Day Using Old Jewelry
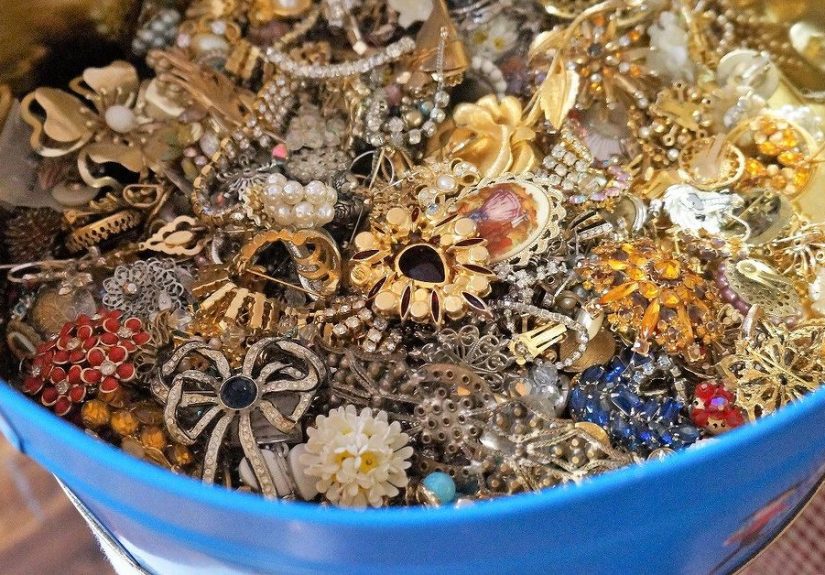
Step 1: Sort and edit your jewelry stash
Spread everything out on a table and sort by color, size, and type. Separate the big statement pieces from the filler pieces. Remove anything that feels too heavy, too plain, or oddly off-theme. Yes, even if you are emotionally attached to that neon plastic dolphin pendant. Not every icon is right for every role.
Step 2: Prep the frame
Clean the frame thoroughly. If it is thrifted or outdated, paint it before you begin assembling the design. White, gold, cream, black, and soft pink are all reliable choices depending on your style. Let it dry fully. If you are using a shadow box, remove the backing and plan your layout on that surface.
Step 3: Create your background
Cut your chosen fabric or paper to fit the backing board. Velvet and linen create an elegant, boutique look. Cardstock or scrapbook paper is easier for beginners and offers plenty of color options. Secure the background neatly so there are no wrinkles, bubbles, or awkward corners trying to steal the spotlight.
Step 4: Trace a heart template
Use a pencil to lightly trace a heart shape onto the background. Keep it centered and proportionate to the frame. A heart that is too small will look lost; a heart that is too large can feel crowded. Aim for enough room around the shape so the design can breathe.
Step 5: Dry-fit everything before gluing
This is the step that separates “pretty framed heart” from “why did I glue the giant brooch there first?” Start with your largest pieces and place them around the outline of the heart. Then fill inward with medium-size pieces. Use the tiniest beads, chains, and charms to close small gaps.
Stand back often while arranging. Squint a little. Seriously. It helps. You want the heart shape to read clearly from a distance, not just when someone is six inches away admiring your bead placement.
Step 6: Glue in layers
Once you are happy with the arrangement, start gluing from the larger anchor pieces outward. Use glue sparingly. Too much glue can seep around the edges and dull the finished look. If you are working with layered items, build slowly so the design stays balanced and secure.
Tweezers are especially helpful here for tiny rhinestones, earring backs, and fiddly chain sections. This is also the stage where patience matters most. Not fun, I know. But beautiful crafts and reckless speed are rarely best friends.
Step 7: Fill tiny gaps with intention
Small empty spaces are not a problem unless they distract from the heart shape. Fill only the gaps that need it. A few open areas can actually help the design look lighter and more elegant. Use pearl strands, mini beads, or chain links to soften hard edges and connect visual sections.
Step 8: Reassemble and display
Once the glue is completely dry, place the backing into the frame. If your frame has glass and the jewelry is bulky, leave the glass out unless there is enough depth. Then hang, prop, or gift your finished framed heart. Cue the compliments.
Design Tips to Make Your Jewelry Heart Look Expensive
Use one statement focal point
A cameo brooch, oversized floral pin, jeweled pendant, or dramatic cluster earring can act as the visual centerpiece. This gives the eye a place to land and makes the composition feel intentional.
Repeat finishes throughout the design
If you have gold-toned pieces, sprinkle them around the entire heart instead of clumping them in one corner. The same goes for pearls, silver, or pink gems. Repetition creates rhythm.
Balance heavy and delicate elements
If one side of the heart has several chunky brooches, offset them with a similar amount of visual weight on the other side. Symmetry does not have to be exact, but balance matters.
Let the background support the jewelry
Busy backgrounds compete with intricate pieces. If the jewelry is ornate, keep the backdrop simple. If the jewelry is minimal, a soft texture or subtle pattern can help the heart feel fuller.
Common Mistakes to Avoid
Using too many similar-size pieces
If everything is medium-sized, the heart can look muddy. Use a mix of large, medium, and tiny elements for better depth.
Skipping the dry layout
Do not freestyle with hot glue unless chaos is part of your artistic vision. Arrange first, glue second.
Forgetting frame depth
Standard frames are great for flatter pieces. Bulky brooches and layered pendants need a deeper frame or shadow box.
Overstuffing the heart
More sparkle is not always better. Sometimes the best choice is leaving a little breathing room so the design looks refined.
Creative Variations for This Old Jewelry Valentine Craft
Monochrome romance
Use all white, ivory, and pearl jewelry for a soft bridal look.
Bold Valentine palette
Mix red stones, pink enamel, crystal pieces, and gold charms for a cheerful holiday statement.
Family memory frame
Use inherited jewelry from mothers, grandmothers, or aunts and add a small nameplate or date beneath the heart.
Minimal modern version
Choose only silver and clear rhinestone pieces on a black or cream background for a cleaner, contemporary style.
Mixed-media heart art
Combine jewelry with ribbon, lace, dried flowers, tiny love notes, or a favorite photo in the center of the frame for more storytelling.
Where to Display Your DIY Framed Jewelry Heart
This craft is versatile enough to work in more places than you might expect. Display it on a bedroom dresser, entryway console, bookshelf, mantel, gallery wall, or craft room shelf. It also makes a thoughtful handmade Valentine gift for a spouse, partner, mom, sister, best friend, or anyone who appreciates sentimental decor.
If you are creating one for gifting, wrap it in tissue, add a handwritten note explaining where some of the jewelry came from, and prepare for emotional reactions. The good kind. Probably.
Why This Craft Feels So Personal
There is a reason a framed heart made from old jewelry feels more meaningful than a generic seasonal decoration. Jewelry often carries memory. It may remind you of a family member, a certain decade, a special occasion, or a phase of life you can now laugh about. Turning those pieces into art lets them stay visible and appreciated, even if they are no longer wearable.
That emotional layer is what elevates this project. You are not just making Valentine decor. You are making a keepsake. One that sparkles, yes, but also one that preserves stories in a form you can actually display every day.
Extra Experiences and Lessons From Making a Framed Heart With Old Jewelry
One of the most interesting things about this project is how often people begin with the idea of making simple Valentine’s Day decor and end up creating something much more emotional. On paper, it sounds like a straightforward DIY: take old jewelry, arrange it into a heart, glue it down, and frame it. In real life, it often becomes a small walk through memory lane wearing rhinestones.
Many crafters discover that the sorting stage takes longer than expected, not because the project is difficult, but because every piece seems to come with a little backstory. A broken pin might remind someone of a grandmother’s church outfit. A single pearl earring might bring back memories of a high school dance. A tangled chain might have no sentimental value at all, but somehow still feels too pretty to throw away. That emotional texture changes the whole experience. The finished heart becomes more than wall art; it becomes a visual scrapbook.
Another common experience is realizing that perfection is wildly overrated. A lot of people start out trying to make both sides of the heart exactly symmetrical. Then they discover that the most beautiful designs often have a slightly organic look. One side may feature a larger brooch, while the other side uses a cluster of smaller earrings and beads. As long as the overall shape is balanced, the result feels lively rather than rigid. This is one of the biggest lessons beginners learn: polished does not have to mean stiff.
There is also usually a moment, right in the middle of the process, when the project looks questionable. The table is covered in jewelry parts. The heart outline seems messy. Nothing appears to match. It is the classic craft panic stage. Then the filler pieces go in, the chains soften the edges, the tiny beads close the awkward gaps, and suddenly everything clicks. That transformation is part of the fun. It is proof that good design is often about layering and editing, not instant perfection.
People who make these framed jewelry hearts as gifts often say the reactions are stronger than they expected. Store-bought gifts can be lovely, but handmade keepsakes tend to land differently. They show time, thought, and attention. When the frame includes recognizable pieces from family collections or shared memories, the emotional impact gets even stronger. It becomes the kind of gift people keep on a shelf long after the Valentine candy has mysteriously vanished.
There is a practical lesson here too: old jewelry is far more useful than many people think. Pieces that are missing clasps, missing pairs, or too uncomfortable to wear can still be perfect for art. That realization can completely change how someone sees their clutter drawer. Suddenly, the broken bracelet is not junk. It is border detail. The lone earring is not a problem. It is accent sparkle. The weird pendant no one wanted to wear becomes the quirky little piece that gives the heart personality.
In the end, the experience of making a framed heart for Valentine’s Day using old jewelry is equal parts crafting, curating, and remembering. It is creative without being overly complicated, sentimental without becoming syrupy, and decorative without feeling disposable. Best of all, it proves that beautiful things do not always need to be bought new. Sometimes they are already sitting in a drawer, waiting for their comeback tour.
Conclusion
If you have been looking for a handmade Valentine’s Day project that feels charming, meaningful, and surprisingly elegant, a framed heart made from old jewelry is a wonderful choice. It gives forgotten pieces a second life, turns sentimental objects into display-worthy decor, and creates a gift that feels personal from the first bead to the final frame.
Whether you keep the palette soft and vintage, bright and romantic, or sleek and modern, the secret is simple: choose a good frame, plan the shape carefully, layer the jewelry with intention, and let the memories do some of the decorating. The result is a beautiful piece of Valentine wall art that looks heartfelt because it genuinely is.