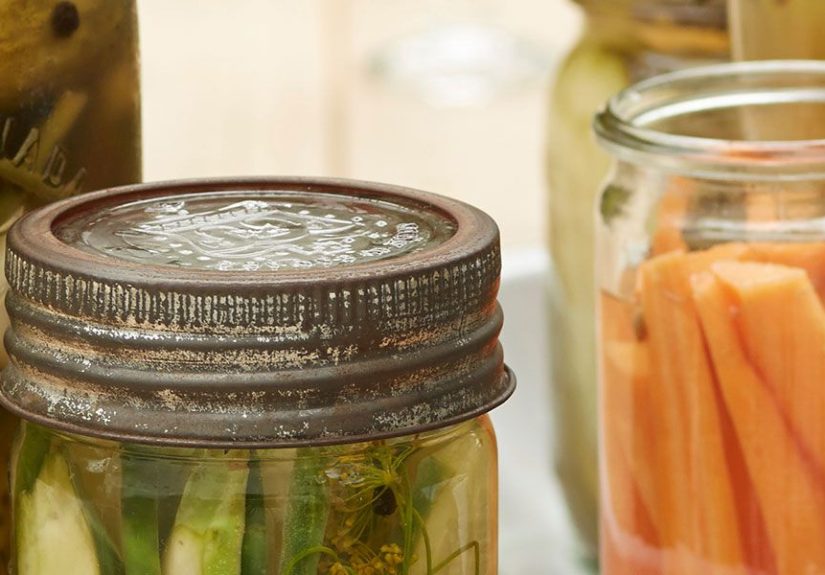
Table of Contents >> Show >> Hide
- Before You Start: Pick the Right Decal (and a Realistic Goal)
- Tools and Supplies
- How to Add Custom Decals to a Car: 13 Steps
- Step 1: Choose a Location That Won’t Make You Hate Yourself Later
- Step 2: Check the Temperature (Yes, Really)
- Step 3: Wash the Area (Not Just “Rinse and Hope”)
- Step 4: Decontaminate If Needed (The “Why Is It Still Gritty?” Step)
- Step 5: Remove Wax, Oils, and Residue with a Final Wipe
- Step 6: Dry-Fit the Decal and Measure Twice (Because You Only Stick Once)
- Step 7: Tape It in Place and Make a “Hinge”
- Step 8: Decide: Dry Application or Wet Application
- Step 9: Peel the Backing Paper Slowly (Keep the Vinyl on the Transfer Tape)
- Step 10: Tack the Decal to the Surface Gently
- Step 11: Squeegee from the Center Out with Overlapping Strokes
- Step 12: Remove the Transfer Tape the Right Way (Slow, Low, and Calm)
- Step 13: Finish the Edges, Fix Tiny Bubbles, and Let It Cure
- Common Problems (and Fixes That Don’t Involve Screaming)
- Care After Installation: Keep It Looking Sharp
- Real-World Experience: of Lessons You Don’t Want to Learn the Hard Way
- Conclusion
Custom decals are one of the few car “mods” that can make your ride look cooler without requiring a loan, a lift kit, or a deep emotional commitment to learning wiring diagrams. The catch? A decal is basically a tiny, sticky mirror that reflects your patience level back at you. Rush it, and you’ll get bubbles, crooked lines, and that one corner that lifts every time you drive past a gust of wind like it’s waving hello.
This guide walks you through a clean, repeatable process used by sign shops and wrap installers, translated into normal human language. You’ll learn where decals work best, how to prep paint (so it actually sticks), when to use a wet method (and when not to), and what to do if you trap air like you’re preserving it for winter.
Before You Start: Pick the Right Decal (and a Realistic Goal)
“Custom decal” can mean a few different things, and the installation method depends on what you’re holding:
- Die-cut vinyl with transfer tape (most logos/lettering): usually installed dry, using a squeegee and the hinge method.
- Printed vinyl stickers (full-color designs): often still installed dry, but may tolerate wet application depending on adhesive type.
- Wrap-style films (thicker cast vinyl with air-release channels): typically dry only; wet methods can interfere with the adhesive system.
- Clings (no adhesive): wet methods can help with positioning, but durability is different from adhesive vinyl.
Also: look at your paint honestly. If the clear coat is peeling, heavily oxidized, or freshly painted and still curing, decals may fail early or pull paint later during removal. If your car’s finish is delicate, test on a low-visibility spot first.
Tools and Supplies
You don’t need a professional wrap bay, but you do need a few basics. Think of this as setting up a “no-regrets” workspace.
- Decal (with transfer tape if it’s die-cut)
- Microfiber towels (clean, lint-free)
- Car wash soap + water
- Isopropyl alcohol (IPA) and water mixture for final wipe-down
- Masking tape or painter’s tape
- Measuring tape and/or a soft ruler
- Grease pencil, washable marker, or small tape tabs for alignment marks
- Squeegee (plastic applicator) or a wrapped credit card (in a pinch)
- Spray bottle (only if using a wet method)
- Pin or air-release tool for stubborn bubbles
- Hair dryer or heat gun (low setting) for curves and edge finishing
- Optional: clay bar kit if the surface feels gritty
How to Add Custom Decals to a Car: 13 Steps
Step 1: Choose a Location That Won’t Make You Hate Yourself Later
Flat or gently curved panels are easiest: doors, fenders, quarter panels, the tailgate, or the rear glass. Avoid deep recesses, sharp body lines, textured plastics, rubber trim, and areas that get blasted by road debris (unless you enjoy re-doing projects). If it’s a window decal, keep it out of your primary line of sight and away from rear wipers/defroster lines when possible.
Step 2: Check the Temperature (Yes, Really)
Vinyl adhesives behave best in mild conditions. Aim for a comfortable range (roughly “hood isn’t scorching” and “your fingers aren’t numb”). Too cold and the adhesive can get stiff; too hot and the vinyl can become overly stretchy, increasing the odds of misalignment and edge lift. If you’re outside, pick shade and avoid windy conditions that fling dust onto freshly cleaned paint like it’s confetti.
Step 3: Wash the Area (Not Just “Rinse and Hope”)
Wash the panel with car soap and water, then rinse thoroughly. You’re removing surface dirt that can scratch paint when you squeegee. Dry completely with a clean microfiber towel. Water hiding in seams will try to escape at the worst possible moment.
Step 4: Decontaminate If Needed (The “Why Is It Still Gritty?” Step)
If the paint feels rough after washing, you likely have embedded contaminants (rail dust, overspray, road grime). A clay bar (used with proper lubricant) can help create a smooth surface so the vinyl can fully contact the paint. This matters most on lower doors, rear bumpers, and behind the wheelsaka the “grime buffet.”
Step 5: Remove Wax, Oils, and Residue with a Final Wipe
Vinyl wants clean paint. Waxes, sealants, dressings, and oily fingerprints are adhesion enemies. Do a final wipe using an IPA-and-water mix on a clean microfiber towel. Use one towel to wipe, a second towel to dry-buff. Don’t flood the panel; just clean it. Then avoid touching the area with your fingers like it’s a museum exhibit.
Step 6: Dry-Fit the Decal and Measure Twice (Because You Only Stick Once)
Hold the decal in place (still on its backing) and step back. Check spacing relative to body lines, badges, and door handles. Measure from fixed reference points (panel edges, trim lines, tail light edges) so the decal is centered or evenly placed. Use small tape tabs as alignment marks. If it’s a paired set (left and right sides), write down measurements so both sides match.
Step 7: Tape It in Place and Make a “Hinge”
With the decal positioned perfectly, tape it down so it can’t drift. The classic approach is the hinge method: run a strip of masking tape through the middle (or along the top edge for smaller decals), creating a pivot point. This lets you flip the decal up, remove the liner, then flip it back down without losing alignment.
Step 8: Decide: Dry Application or Wet Application
Dry application is the go-to for most pressure-sensitive decals and is often preferred for reliability. Wet application (a light mist of water with a tiny drop of dish soap) can help with positioning on certain vinyl types, especially on glass or larger graphicsbut it’s not recommended for many wrap-style films and air-release adhesives. If you’re unsure what your vinyl wants, default to dry for standard transfer-tape decals.
Step 9: Peel the Backing Paper Slowly (Keep the Vinyl on the Transfer Tape)
Flip the decal up on the hinge. Peel the backing liner away at a sharp angle. If parts of the vinyl lift with the liner, pause and lay it back down, then rub the transfer tape firmly to re-bond the vinyl to the tape before trying again. Patience here prevents the “my letter ‘R’ is now somewhere on the driveway” moment.
Step 10: Tack the Decal to the Surface Gently
Lower the decal back onto the panel. For dry installs, lightly “tack” it down first (minimal pressure) so you can confirm alignment. For wet installs, lightly mist the surface (and sometimes the adhesive side if recommended for your vinyl type), then float it into position. The goal is controlled contactno sudden flop that traps a giant air pocket.
Step 11: Squeegee from the Center Out with Overlapping Strokes
This is where the magic happens. Use firm, even pressure and work from the center outward toward the edges. Overlap your strokes like mowing a lawnyes, it’s that vibe. This pushes air out and helps the adhesive fully contact the surface. If you’re using a wet method, keep squeegeeing until fluid stops coming out at the edges.
Step 12: Remove the Transfer Tape the Right Way (Slow, Low, and Calm)
Once the vinyl is fully squeegeed, remove the transfer tape by peeling it back on itself at a low angle (close to 180 degrees). Go slowly. If any vinyl lifts, lay the tape back down and squeegee that area again. Don’t yank upward like you’re starting a lawn mower. You want the vinyl to stay on the car, not on the tape like it’s changing its mind.
Step 13: Finish the Edges, Fix Tiny Bubbles, and Let It Cure
Run your finger (or the squeegee) along edges and corners to make sure they’re fully adhered. For mild curves or stubborn areas, gentle heat can help the vinyl conformwarm it slightly, then press it down again. If you see a tiny bubble that won’t move, you can prick it with a pin and press the air out. Finally: let the decal rest. Adhesives continue bonding after installation, and immediate washing or high-pressure spray can lift edges before they’ve settled in.
Common Problems (and Fixes That Don’t Involve Screaming)
Bubbles
- Small bubbles: Try pushing them to the nearest edge with a squeegee or your thumb wrapped in microfiber.
- Stubborn bubbles: Warm the area slightly, then re-squeegee. If needed, prick and press flat.
Wrinkles or Creases
Wrinkles usually happen when the vinyl touches down too quickly or gets stretched. For small wrinkles, gently lift that section (if the adhesive allows), warm slightly, then reapply with controlled tension. For deep creases, replacement may be the cleanest fix.
Edges Lifting
Edge lift is often contamination-related (wax, dust, moisture). Clean, warm, and re-squeegee the edge. If you’re applying near seams or openings, be extra strict about prepthese areas fail first because they collect grime and get airflow.
Care After Installation: Keep It Looking Sharp
- Wait before washing: Give the decal time to bond fully. When you do wash, hand washing is gentler than aggressive brush washes.
- Avoid blasting edges: If you use a pressure washer, keep distance and avoid aiming directly at decal edges.
- Clean contaminants quickly: Bug splatter, bird droppings, sap, and fuel can stain or degrade films if left too long.
Real-World Experience: of Lessons You Don’t Want to Learn the Hard Way
The first decal I ever helped install looked fantasticif you stood exactly three feet away, squinted slightly, and ignored the fact that it was about half a degree crooked. That’s the thing about decals: they’re not like painting a wall where you can blame “lighting.” A decal is a confidence statement. It either says “this person knows what they’re doing” or “this person applied vinyl in a hurry while a neighbor watched.”
Here’s what experience teaches quickly: prep is not optional. People love skipping the final wipe because the panel “looks clean.” But “looks clean” and “adhesive-ready” are different planets. The invisible stuffwax, spray detailer, oily residuecan turn a perfect install into edge lift within days. If you’ve ever watched a corner peel back in slow motion while you drive, you know the exact flavor of regret I’m describing. The best installs start with clean paint and clean hands. If you touch the adhesive side with your fingers, congratulations: you’ve left behind a tiny fingerprint-shaped adhesion experiment.
Next: alignment is a whole event. Measuring from a body line feels fussy until you install a decal “by eye” and realize your eye is a liar. A trick that saves sanity is using multiple reference points: measure from the panel edge and from a fixed feature like a tail light corner. For symmetrical placements (like matching side decals), write the numbers down. Memory is unreliable, especially when you’re excited and holding tape in your mouth like a multitool.
The hinge method is the unsung hero. When you tape a decal in place and flip it up like a page in a book, you stop fighting gravity and start controlling it. The first time you try to freehand a large decal without a hinge, you’ll understand why professionals don’t do that. Also: go slow when peeling the backing paper. If a letter lifts, don’t paniclay it back down, rub it firmly, and try again. Most mistakes happen in the “I can fix it quickly” zone, which is also known as “where problems multiply.”
Finally, respect temperature and time. Vinyl behaves differently on a cold morning versus a mild afternoon. In cooler temps, it’s less cooperative; in hot sun, it can stretch like taffy. And after the decal is on, the adhesive still needs time to fully settle in. Washing immediately is like planting a tree and then power-washing the soil because you’re “just checking.” Give it a little peace. The reward is a decal that looks crisp, stays put, and doesn’t require you to explain to strangers that it was “supposed to look like that.”
Conclusion
Adding custom decals to your car is equal parts art project and tiny engineering job. If you take your time, keep the surface truly clean, use the hinge method, and squeegee with calm, overlapping strokes, you’ll get a finish that looks professional (and stays that way). The best part is you can start smallone clean logo or stripethen level up to larger graphics once you trust your process.