Table of Contents >> Show >> Hide
- Introduction: Build a Backyard Tandoor Without Summoning a Fire Dragon
- What Is a Tandoor Oven?
- Materials and Tools You Will Need
- How to Make a Tandoor (Clay) Oven: 15 Steps
- Step 1: Choose a Safe Outdoor Location
- Step 2: Pick the Right Outer Container
- Step 3: Prepare the Base
- Step 4: Create an Air Vent
- Step 5: Test-Fit the Clay Pot
- Step 6: Cut the Bottom Opening if Needed
- Step 7: Set the Clay Liner in Place
- Step 8: Seal Gaps with Refractory Mortar
- Step 9: Add Insulation Around the Clay Pot
- Step 10: Build or Fit a Heat-Safe Lid
- Step 11: Let Everything Dry Thoroughly
- Step 12: Cure the Tandoor Slowly
- Step 13: Preheat Before Cooking
- Step 14: Cook Naan, Skewers, and Vegetables
- Step 15: Cool, Clean, and Store Safely
- Safety Tips for Using a Homemade Tandoor
- Best Foods to Cook in a Clay Tandoor Oven
- Common Mistakes to Avoid
- Maintenance: Keep Your Tandoor Happy
- Extra Experience Notes: What Building and Using a Tandoor Teaches You
- Conclusion
Note: This guide is written for outdoor cooking enthusiasts and should be followed only with proper adult supervision, local fire-safety awareness, heat-resistant materials, and common sense. A tandoor uses charcoal or wood heat, so it must never be used indoors, in garages, under roofs, or near flammable surfaces.
Introduction: Build a Backyard Tandoor Without Summoning a Fire Dragon
A tandoor oven is one of the most exciting cooking projects you can build at home. It is simple in concept, ancient in design, and wildly effective at turning dough into blistered naan, chicken into smoky kebabs, and vegetables into something that tastes like it got promoted. Unlike a standard grill, a tandoor is a vertical clay oven that stores heat in thick walls and cooks food with a combination of radiant heat, direct flame, hot air, and smoke.
Traditional tandoors are usually cylindrical or urn-shaped clay ovens heated by charcoal or wood. Their high heat is the secret behind fast-cooked naan, crisp edges, smoky marinades, and juicy interiors. Many tandoor-style ovens can reach temperatures around 800°F to 900°F, which is why flatbreads puff almost instantly and skewered meats cook quickly. That power is also why safety matters. Charcoal produces carbon monoxide, and U.S. safety guidance is clear that charcoal cooking equipment should be used outside only in open air.
The good news: you do not need to be a master mason or restaurant equipment importer to create a practical backyard tandoor. With a large unglazed terracotta pot, a metal outer container, fire bricks, clean insulation, and careful assembly, you can build a compact clay oven that brings serious tandoori flavor to your patio. The goal is not to create a museum-perfect village tandoor. The goal is to create a safe, sturdy, heat-holding outdoor oven that lets you cook naan, skewers, paneer, vegetables, and tandoori chicken with confidence.
What Is a Tandoor Oven?
A tandoor is a vertical oven traditionally made from clay. A charcoal or wood fire burns at the bottom, heating the oven walls. Food cooks inside the chamber: naan is slapped against the hot clay wall, while meats and vegetables are lowered vertically on long metal skewers. This design creates intense heat from several directions at once. The wall bakes bread, the fire sears food, and the trapped heat cooks everything quickly.
Food writers and culinary schools often describe tandoori cooking as a method rather than a single recipe. The oven’s shape, clay surface, and very high heat give foods their signature char, smoky aroma, and tender bite.
Materials and Tools You Will Need
Core Materials
Before you begin, gather everything. A half-built oven and a missing brick is the DIY version of losing one sock in the laundry.
- One large unglazed terracotta pot, wide enough for cooking
- One slightly smaller terracotta pot or clay liner, if using a two-pot design
- One metal trash can, steel drum, or large planter as the outer shell
- Fire bricks for the base
- Perlite or vermiculite for insulation
- Fire cement or refractory mortar rated for high heat
- Clean sand or small gravel for leveling
- A small metal ash tray or removable charcoal pan
- Long flat stainless-steel skewers
- A metal lid or heat-safe cover
- Heat-resistant gloves
- Food thermometer
- Safety glasses, dust mask, and work gloves
Tools
- Drill with metal-cutting bit
- Angle grinder or hole saw, if cutting a vent
- Marker
- Tape measure
- Trowel
- Level
- Bucket for mixing refractory mortar
Use only heat-safe materials near the fire. Avoid galvanized metal inside the high-heat zone because high temperatures can create unsafe fumes. Also avoid painted containers, plastics, unknown insulation, foam, treated wood, or anything that smells like “this was not meant to become an oven.” Practical DIY tandoor builders commonly emphasize terracotta, fire brick, refractory cement, and mineral insulation because those materials are better suited to repeated heating cycles.
How to Make a Tandoor (Clay) Oven: 15 Steps
Step 1: Choose a Safe Outdoor Location
Place your future tandoor on a flat, nonflammable surface such as concrete, stone, brick, or bare compacted earth. Keep it away from walls, fences, deck railings, dry leaves, patio furniture, overhanging branches, and roof eaves. The National Fire Protection Association advises keeping grills outdoors, away from structures and overhanging branches, and keeping children and pets at least three feet from the grill area.
Step 2: Pick the Right Outer Container
Your outer container acts as the protective shell. A steel drum, large metal planter, or clean metal trash can can work, but it must be stable and large enough to hold the terracotta liner plus insulation. Do not use a plastic container. Do not use a container with unknown chemical residue. If the container once held anything questionable, let it retire gracefully as yard art instead.
Step 3: Prepare the Base
Add a layer of sand, gravel, or small stones to the bottom of the outer container to help level the fire bricks. Then place fire bricks flat inside the base. These bricks create a heat-resistant floor for charcoal and ash. Regular bricks may crack under high heat, while fire bricks are made for hot environments and repeated thermal stress.
Step 4: Create an Air Vent
A tandoor needs airflow so the charcoal can burn efficiently. Mark a small vent near the lower side of the outer container, close to the fire-brick base. Cut or drill the opening carefully while wearing eye protection and gloves. The vent should allow air to feed the coals and give you a way to manage ash. Keep edges smooth or covered so nobody gets scratched while using the oven.
Step 5: Test-Fit the Clay Pot
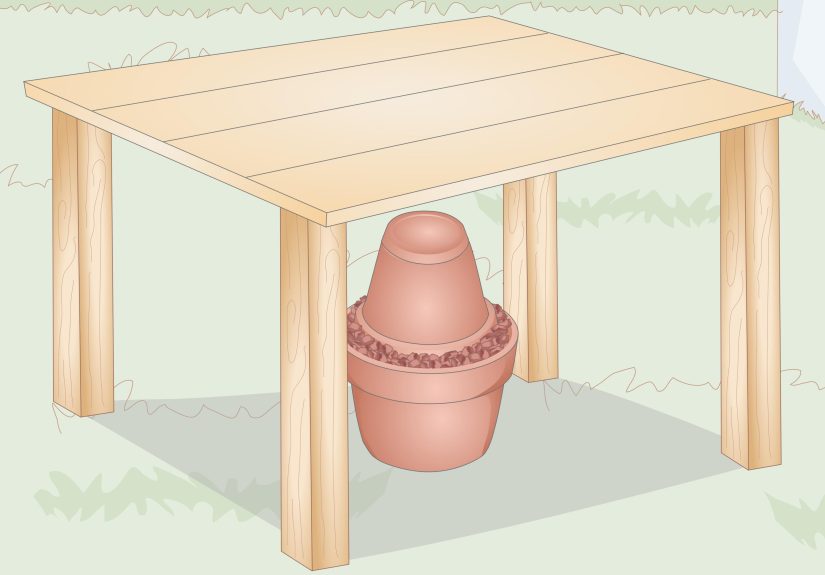
Place the terracotta pot inside the outer container to check spacing. You want enough room between the clay pot and outer shell for insulation. The mouth of the pot should face upward, forming the cooking opening. If the pot has a drainage hole, that hole can help airflow when positioned at the bottom, but it should not be so large that charcoal falls through uncontrollably.
Step 6: Cut the Bottom Opening if Needed
Some builders cut the bottom out of the terracotta pot so it becomes a smooth clay cylinder. Others use the existing drainage hole and keep the pot mostly intact. If cutting terracotta, go slowly. Clay can crack if rushed. Wear a dust mask and eye protection, and do not force the tool. A clean opening helps heat rise evenly from the fire base into the cooking chamber.
Step 7: Set the Clay Liner in Place
Lower the clay pot into the container and center it over the fire-brick base. The liner should sit firmly and not wobble. Add small amounts of sand or gravel under the liner if you need to level it. A tandoor that leans is not charmingly rustic; it is annoying, unsafe, and a future naan-dropping machine.
Step 8: Seal Gaps with Refractory Mortar
Use refractory mortar or fire cement to seal gaps where heat and ash could escape. Apply only where needed. The goal is not to bury the oven in cement; the goal is to stabilize the clay liner and protect the base. Let the mortar cure according to the manufacturer’s directions before firing the oven.
Step 9: Add Insulation Around the Clay Pot
Pour perlite or vermiculite into the space between the clay liner and the outer shell. These lightweight mineral materials help hold heat inside the tandoor while keeping the outside container from absorbing too much heat. Fill evenly and gently. Do not pack insulation too aggressively because the oven needs a little room for heat expansion.
Step 10: Build or Fit a Heat-Safe Lid
A lid helps the oven heat faster and retain temperature. You can use a fitted metal lid, a clay saucer, or a custom heat-safe cover with a small handle. Make sure the handle can tolerate heat or is positioned so it stays cooler. The lid should not seal airtight; charcoal needs airflow. Think “controlled heat,” not “tiny backyard volcano with a hat.”
Step 11: Let Everything Dry Thoroughly
Before the first firing, let the oven dry completely. Moisture trapped inside clay or mortar can expand quickly when heated and cause cracks. If the oven has been rained on, wait until it dries before firing. Refractory materials are porous, and outdoor ovens should be protected from weather when not in use.
Step 12: Cure the Tandoor Slowly
The first fire should be small. Start with a modest amount of charcoal and let the oven warm gradually. After cooling, repeat with a slightly larger fire. This curing process helps drive out remaining moisture and reduces the risk of thermal shock. Do not build a roaring fire on day one. Clay ovens are tough, but they do not enjoy surprise gym class.
Step 13: Preheat Before Cooking
When the tandoor is cured, preheat it before cooking. Add charcoal to the bottom and let the oven heat until the walls are very hot. Many tandoor-style foods rely on intense heat, so patience during preheating pays off. For naan, the wall must be hot enough for dough to stick and blister quickly. For skewers, the heat should be strong enough to sear the outside without drying the inside.
Step 14: Cook Naan, Skewers, and Vegetables
To cook naan, lightly dampen one side of the dough and press that side against the hot clay wall using a heat-safe naan pad or folded towel designed for the task. Use long tools to remove the bread once it bubbles and chars. For meat, paneer, mushrooms, onions, peppers, or cauliflower, thread food onto flat stainless-steel skewers and lower them vertically into the oven. Flat skewers help prevent food from spinning.
Step 15: Cool, Clean, and Store Safely
After cooking, let the tandoor cool naturally. Do not splash water inside the hot oven; sudden cooling can crack clay. When completely cool, remove ash and wipe tools clean. Cover the tandoor to protect it from rain. Store skewers separately and check the clay liner occasionally for cracks. Small hairline cracks may happen with repeated use, but large structural cracks need repair before the next firing.
Safety Tips for Using a Homemade Tandoor
A homemade tandoor can be wonderful, but it is still a live-fire cooking appliance. Use it outdoors only. Charcoal can release carbon monoxide, a gas you cannot see or smell, so it should never be burned inside a house, garage, tent, or enclosed patio.
Keep a dry chemical fire extinguisher nearby. Wear heat-resistant gloves. Use long tools. Keep loose clothing away from the opening. Never leave the tandoor unattended while lit. Keep children and pets at a safe distance. Do not move the oven while it is hot. Do not use lighter fluid once coals are burning. And please, do not lean your face over the opening like you are checking whether the dragon is awake.
For food safety, use a thermometer rather than guessing. The USDA recommends cooking poultry to a safe minimum internal temperature of 165°F. That matters for tandoori chicken, chicken tikka, and any poultry cooked on skewers.
Best Foods to Cook in a Clay Tandoor Oven
Naan and Flatbreads
Naan is the show-off move of tandoor cooking. A hot clay wall gives naan its signature puff, blistered spots, chewy middle, and lightly crisp edges. Start with small pieces of dough until you learn how quickly your oven cooks.
Tandoori Chicken
Yogurt-based marinades work beautifully because the yogurt helps tenderize the meat while spices bring color and flavor. Use bone-in pieces, boneless thighs, or skewered chunks. Always check internal temperature before serving.
Paneer Tikka
Paneer holds its shape well and loves high heat. Marinate cubes with yogurt, ginger, garlic, chili, turmeric, garam masala, and lemon juice, then skewer with peppers and onions.
Vegetables
Cauliflower, mushrooms, onions, zucchini, eggplant, and bell peppers all perform well in a tandoor. Cut them large enough to stay on skewers and brush lightly with oil before cooking.
Common Mistakes to Avoid
Using the Wrong Materials
Do not use painted metal, plastic, treated wood, unknown insulation, or random scrap materials near high heat. A tandoor gets much hotter than a casual backyard grill, so materials matter.
Heating Too Fast
Clay needs gradual heating, especially during the first few uses. Fast temperature jumps can crack the liner.
Skipping Insulation
Without insulation, the oven loses heat quickly and becomes harder to cook with. Perlite or vermiculite helps create a more efficient oven.
Cooking Before the Walls Are Hot
If naan falls off or refuses to blister, the wall may not be hot enough, or the dough may be too dry. Preheat longer and lightly moisten the side that touches the clay.
Ignoring Ash Management
Ash buildup blocks airflow. Clean only after the oven is fully cool, but do clean it regularly.
Maintenance: Keep Your Tandoor Happy
Protect your tandoor from rain. Moisture is one of the biggest enemies of clay and refractory materials. If water soaks into the liner and you fire the oven too quickly, steam pressure can cause cracking. Keep the oven covered with a weatherproof cover when not in use.
Inspect the air vent, base bricks, and clay liner before each cook. Remove leftover ash. Check skewers for rust or rough edges. If you see loose mortar, repair it with refractory material and let it cure fully. A well-maintained backyard tandoor can become the kind of cooking project that makes neighbors casually wander over “just to say hi” exactly when the naan comes out.
Extra Experience Notes: What Building and Using a Tandoor Teaches You
The first thing you learn when making a tandoor oven is that clay has a personality. It is strong, ancient, and wonderfully useful, but it does not like being rushed. The curing stage may feel slow, especially when you are excited to cook your first batch of naan, but patience is the difference between a reliable oven and a dramatic cracking sound followed by regret. Start small, build heat gradually, and treat the first few firings as training sessions.
The second lesson is that airflow is everything. A tandoor is not just a clay pot with charcoal in it. It is a heat system. The lower vent feeds the fire, the vertical chamber pulls heat upward, and the clay walls store that heat. When airflow is weak, charcoal smolders and food tastes flat. When airflow is balanced, the oven becomes lively, hot, and responsive. You will notice the difference immediately: the coals glow brighter, the walls heat faster, and food develops that unmistakable smoky char.
Another practical experience is learning dough behavior. Naan dough that works in a skillet may need small adjustments for a tandoor. It should be soft and slightly tacky, not dry and stiff. The side that touches the wall often needs a little moisture so it sticks long enough to bake. Too much flour on the surface can make it fall. Too much water can make it slide. The first naan may look like a geography project, but by the fifth or sixth piece, you begin to understand the rhythm: stretch, dampen, press, wait, lift, smile.
Skewer cooking also has a learning curve. Flat skewers are much better than round ones because they stop food from spinning when you turn or lift it. Cut ingredients into similar sizes so they cook evenly. For chicken, boneless thighs are forgiving because they stay juicy under high heat. For vegetables, dense items like cauliflower should be cut smaller than quick-cooking items like onions or peppers. Paneer should be firm and well-chilled before skewering so it does not crumble.
One of the most satisfying parts of using a homemade tandoor is how social it feels. A grill often has one person standing outside flipping food while everyone else disappears. A tandoor becomes a gathering point. People want to watch the naan puff, smell the smoke, and ask whether you built “that thing” yourself. The answer, proudly, is yes. Then you hand them hot bread and suddenly your backyard engineering project becomes dinner theater.
Finally, a tandoor teaches respect for heat. This oven is simple, but it is powerful. Good gloves, long tools, clear space, and calm movements make the experience enjoyable. Do not rush food in or out. Do not crowd the opening. Do not improvise with unsafe materials. Once you build good habits, the tandoor becomes less intimidating and more rewarding every time you cook.
Conclusion
Making a tandoor clay oven at home is one of those projects that combines craft, cooking, fire management, and a little backyard bragging rights. With a terracotta liner, fire-brick base, mineral insulation, safe airflow, and careful curing, you can build a practical outdoor oven for naan, kebabs, paneer tikka, vegetables, and smoky tandoori-style meals. The key is to respect the heat: use proper materials, cure slowly, cook outdoors only, and maintain the oven after each use.
A homemade tandoor will not be perfect on day one, and that is part of the fun. Your first naan may be oddly shaped. Your first skewer may cook faster than expected. Your first firing may make you stare at the oven like a nervous camp counselor. But once you understand the rhythm of heat, airflow, clay, and timing, the results are unforgettable. Few DIY cooking projects deliver such big flavor from such an ancient, elegant design.