Table of Contents >> Show >> Hide
- What Is Balayage?
- Who Is Balayage Best For?
- Tools Commonly Used for Balayage
- Before You Balayage: Preparation Matters
- How to Balayage Hair: Step-by-Step Overview
- Can You Do Balayage at Home?
- Best Balayage Ideas by Hair Color
- How Long Does Balayage Last?
- How to Maintain Balayage
- Common Balayage Mistakes to Avoid
- Professional Balayage vs. DIY Balayage
- Real-Life Experience: What Balayage Actually Feels Like
- Final Thoughts: Is Balayage Worth It?
Balayage is the hair color technique that makes people say, “Wait, did you just come back from a beach vacation?” even if your most recent trip was to the grocery store in sweatpants. Soft, sun-kissed, dimensional, and famously low-maintenance, balayage has become one of the most requested hair color services in salons across the United States.
The word “balayage” comes from the French word meaning “to sweep,” which perfectly describes the technique. Instead of using traditional foil highlights from root to tip, a stylist paints lightener or color onto the surface of selected strands in a sweeping motion. The result is a natural-looking blend that grows out more softly than classic highlights. No harsh stripe. No obvious root line. No “I forgot to book my appointment six weeks ago” panic.
This guide explains how to balayage hair, what tools are commonly used, how the process works, what to avoid, and how to care for balayage afterward. While professional balayage is safest and most customizable, understanding the steps helps you communicate better with your stylistor approach a simple at-home version with more caution and less chaos.
What Is Balayage?
Balayage is a freehand highlighting technique that creates brightness through the mid-lengths and ends of the hair while keeping the roots softer and more natural. Unlike traditional highlights, which are often placed in foils close to the scalp, balayage is painted onto selected sections so the lightness looks gradual and blended.
The beauty of balayage is that it is not one single color. It is a technique. Blonde balayage, caramel balayage, brunette balayage, copper balayage, honey balayage, ash balayage, and even pastel balayage all fall under the same family. The difference lies in the shade, placement, level of lift, toner, and how much contrast you want.
Balayage vs. Highlights
Traditional highlights usually involve foils and a more structured pattern. They often brighten from the roots down, which can create a more uniform result. Balayage, on the other hand, is softer and more customized. The lightener is usually concentrated around the face, mid-lengths, and ends, giving the hair a lived-in look.
If highlights are like perfectly lined-up soldiers, balayage is more like a well-curated playlist: intentional, but relaxed.
Balayage vs. Ombré
Ombré is a color effect where the hair gradually shifts from darker roots to lighter ends. Balayage is the technique used to paint brightness into the hair. You can use balayage to create an ombré effect, but not all balayage is ombré. Balayage tends to look more natural and dimensional, while ombré is usually more dramatic and two-toned.
Who Is Balayage Best For?
Balayage works beautifully on many hair types, textures, and colors. It can be subtle enough for someone who wants “my hair but better” or bold enough for someone who wants major brightness without a full bleach-and-tone transformation.
Balayage is especially popular for people who want:
- Natural-looking dimension
- Low-maintenance hair color
- A softer grow-out than foil highlights
- Face-framing brightness
- Warm caramel, honey, beige, or golden tones
- Customized color placement based on haircut and face shape
However, balayage may not be the fastest route if you want icy platinum blonde from very dark hair. Very dark brunettes may need several sessions to reach pale blonde safely. Hair color is not a microwave dinner; rushing the process can leave strands dry, uneven, or orange enough to start a small sunset.
Tools Commonly Used for Balayage
Professional stylists use different tools depending on the desired result, but a typical balayage setup may include:
- Lightener or hair color
- Developer
- Balayage board or paddle
- Tint brush
- Sectioning clips
- Gloves
- Plastic wrap, cotton strips, or balayage film
- Tail comb
- Toner or gloss
- Color-safe shampoo and conditioner
- Bond-building or deep-conditioning treatment
At home, people often reach for boxed highlighting kits, but professional formulas are more controlled. If you choose a DIY balayage kit, read every instruction first. Then read it again. Hair lightener does not reward improvisation.
Before You Balayage: Preparation Matters
The difference between beautiful balayage and “I need a hat immediately” often comes down to preparation. Before applying any color or lightener, consider your hair’s current condition, color history, and realistic goals.
1. Check Your Hair Health
If your hair is already dry, brittle, breaking, recently bleached, relaxed, or chemically treated, pause before adding more lightener. Balayage may be gentler-looking than full highlights, but it still often involves bleach. Lightener can weaken the hair if used incorrectly or too often.
A good rule: if your hair stretches like gum when wet, snaps easily, or feels rough and fragile, focus on repair before color. Deep conditioning, bond treatments, gentle cleansing, and heat reduction can help prepare the hair for a future session.
2. Do a Strand Test
A strand test shows how your hair reacts to the lightener or color. It helps you preview the final shade, processing time, and hair texture after rinsing. This is especially important if your hair has old box dye, henna, previous bleach, or mystery color from “that one phase.”
To strand test, apply a small amount of mixed product to a hidden strand or shed hair collected from a brush. Process according to directions, rinse, dry, and evaluate. If the hair feels damaged or the color looks strange, do not continue with a full application.
3. Do a Patch Test
Hair dye and lightening products can cause allergic reactions or irritation. Follow the product’s instructions for a patch test before applying color. Many safety guidelines recommend testing before every use because sensitivities can develop over time, even if you have colored your hair before without problems.
4. Gather Inspiration Photos
Bring or save photos showing the exact balayage look you want. “Caramel balayage” can mean soft golden ribbons to one person and bold toasted-bronze panels to another. Photos help your stylist understand the level of contrast, tone, and placement you prefer.
Also bring photos of what you do not want. If you hate brassiness, chunky highlights, or high contrast, say so clearly. Stylists are talented, but they are not mind readers with blow dryers.
How to Balayage Hair: Step-by-Step Overview
The exact process varies by stylist, formula, and hair goal, but the general balayage method follows a similar structure.
Step 1: Consultation and Color Plan
A professional balayage service starts with a consultation. The stylist looks at your natural level, current color, texture, hair history, haircut, and desired result. They decide where to place brightness and how much lift is safe.
For example, someone with medium brown hair may want caramel balayage for warmth and dimension. Someone with dark blonde hair may want beige blonde balayage for a soft summer look. Someone with black hair may need a slower plan with warm brunette ribbons first, then lighter tones over multiple sessions.
Step 2: Section the Hair
The hair is usually divided into clean sections so the stylist can control placement. Common sections include the back, sides, crown, and face-framing pieces. Sectioning keeps the work organized and prevents random light patches from appearing in places no one invited them.
Step 3: Paint the Lightener
The stylist paints lightener onto selected strands using sweeping strokes. The application is often lighter near the top of the strand and heavier toward the ends. This creates the signature balayage gradient: soft near the roots, brighter through the lengths, and lightest at the tips.
For a natural effect, the stylist may paint in a V-shape or softly feather the product upward. Face-framing pieces may be painted brighter to add glow around the complexion.
Step 4: Separate the Sections
Instead of traditional foil packets, balayage may use cotton, plastic wrap, mesh, or film to keep painted sections from bleeding onto the rest of the hair. Some stylists use open-air processing, while others use foilayage, a hybrid technique that combines balayage placement with foils for more lift.
Step 5: Process Carefully
The lightener processes until the hair reaches the desired level of lift. Timing depends on the starting color, hair condition, developer strength, product type, and target shade. This is where professional experience matters. Leaving lightener on too long can damage the hair; rinsing too soon may leave the color too warm or dark.
Step 6: Rinse and Shampoo
Once the hair reaches the correct level, the stylist rinses thoroughly and shampoos if needed. The hair may look yellow, orange, or raw at this stage. Do not panic. This is normal before toning. Think of it as the “before coffee” version of the final color.
Step 7: Tone or Gloss
Toner is often the secret sauce of balayage. It refines warmth, adds shine, and creates the final shade. A toner can turn raw yellow into champagne blonde, orange into caramel brunette, or overly bright pieces into soft beige ribbons.
Glossing treatments can also refresh balayage between appointments, especially when color starts to fade or turn brassy.
Step 8: Style and Evaluate
After toning, the hair is conditioned, dried, and styled. Waves often show off balayage beautifully because movement reveals the dimension. The final result should look blended, soft, and intentionalnot like someone painted stripes during a power outage.
Can You Do Balayage at Home?
You can attempt a simple balayage effect at home, but it is not the easiest DIY hair color project. Balayage depends on placement, pressure, saturation, timing, and tone. A professional colorist knows how to customize the formula and protect the condition of your hair.
If you still want to try DIY balayage, keep it subtle. Stay within one to two levels lighter than your current shade, avoid dramatic transformations, and do not overlap lightener on already-bleached hair. For major changes, color correction, black box dye, platinum goals, or fragile hair, book a salon appointment.
Simple At-Home Balayage Tips
- Use a kit designed for highlighting or balayage.
- Follow the instructions exactly.
- Do a patch test and strand test first.
- Work on dry, detangled hair unless the product says otherwise.
- Paint fewer pieces than you think you need.
- Focus on the mid-lengths and ends, not the scalp.
- Use a light hand near the top of each section.
- Keep face-framing pieces soft and symmetrical.
- Check processing frequently.
- Use toner or gloss if the kit includes it.
The biggest DIY mistake is overpainting. Balayage should have depth. If every strand is lightened, you lose the contrast that makes the technique beautiful.
Best Balayage Ideas by Hair Color
Brunette Balayage
Brunette balayage is one of the most flattering options because it adds dimension without completely changing your identity. Caramel, chestnut, mocha, cinnamon, and honey tones can make brown hair look richer and more expensive. Basically, your hair becomes the cozy coffee shop of hair color.
Blonde Balayage
Blonde balayage can range from soft beige to bright champagne. It works well for people who want brightness without root-heavy maintenance. A shadow root or root melt can make the grow-out even softer.
Black Hair Balayage
On black or very dark brown hair, balayage often looks best with espresso, bronze, caramel, or chocolate tones. Jumping straight to icy blonde may require multiple sessions and careful hair protection.
Red and Copper Balayage
Copper balayage adds warmth and movement, especially on auburn, brunette, or dark blonde bases. It can be bold or subtle depending on the placement and toner. Red tones may fade faster, so glossing and color-safe care are important.
Curly Hair Balayage
Balayage can be stunning on curly and coily hair because the painted pieces highlight curl shape and movement. Placement matters greatly. Many stylists paint curls according to how they naturally fall, rather than using the same pattern they would use on straight hair.
How Long Does Balayage Last?
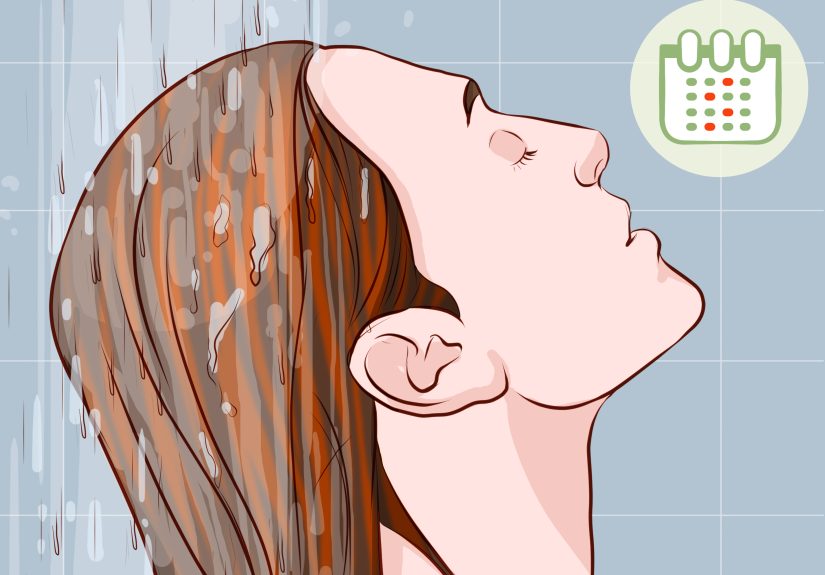
One reason people love balayage is the graceful grow-out. Because the color is usually painted away from the roots, there is no strong line of demarcation. Many people refresh balayage every three to six months, depending on how bright they want to stay, how fast their hair grows, and how quickly the tone fades.
Toner may need refreshing sooner, often every several weeks, especially for blondes or anyone fighting brassiness. Think of balayage as the furniture and toner as the throw pillows. The structure lasts, but the finishing touch may need a refresh.
How to Maintain Balayage
Use Color-Safe Shampoo
Choose a sulfate-free or color-safe shampoo to help preserve tone and shine. Washing less frequently can also help color last longer. Dry shampoo may become your new best friend, but please do not make it your entire personality.
Add Moisture
Lightened hair needs hydration. Use a nourishing conditioner and a weekly mask if your hair feels dry. Balayage may look effortless, but the hair still needs care after lightening.
Use Purple or Blue Shampoo When Needed
Purple shampoo can help reduce yellow tones in blonde balayage. Blue shampoo can help neutralize orange tones in brunette balayage. Use these products occasionally, not every day, unless you are intentionally aiming for lavender ends.
Protect Against Heat
Heat styling can fade color and increase dryness. Use a heat protectant before blow-drying, curling, or flat ironing. Lower temperatures are usually better for color-treated hair.
Protect Hair From the Sun
Sun exposure can make color fade and hair feel dry or brittle. Hats, UV-protective hair products, and leave-in conditioners can help maintain your balayage, especially during summer.
Common Balayage Mistakes to Avoid
Going Too Light Too Fast
Healthy hair should be the goal, not just lighter hair. If your dream shade requires multiple sessions, respect the process. A slow color journey is better than a fast trip to breakage town.
Ignoring Your Natural Undertone
Every hair color lifts warm. Dark hair often exposes red, orange, or gold undertones when lightened. Toner can refine warmth, but it cannot perform miracles on hair that has not lifted enough.
Painting Too Close to the Root
Balayage is known for its soft grow-out. Painting too close to the scalp can make the result look more like traditional highlights and may create obvious regrowth.
Skipping Toner
Raw lightened hair rarely looks finished. Toner creates the final shade and polish. Skipping it can leave balayage looking brassy, dull, or uneven.
Forgetting Aftercare
Even the best balayage can fade or dry out without maintenance. Color-safe products, masks, glosses, and heat protection help keep the result fresh.
Professional Balayage vs. DIY Balayage
Professional balayage is more expensive, but it offers major advantages: customized placement, controlled lift, professional toning, and damage management. A stylist can adapt the technique to your haircut, curl pattern, natural color, and long-term goals.
DIY balayage may be suitable for small, subtle brightness on healthy hair, but it carries more risk. Uneven placement, patchy lift, brassiness, and breakage are common problems when lightener is used without experience.
If your hair has previous permanent dye, especially dark box color, do not treat balayage like a casual weekend craft. Box dye can lift unpredictably, and color correction often costs more than doing it professionally in the first place.
Real-Life Experience: What Balayage Actually Feels Like
Balayage is often marketed as effortless, but the appointment itself is a whole little adventure. You walk into the salon with inspiration photos, a hopeful heart, and possibly a coffee. The stylist examines your hair like a detective reviewing evidence: old color, natural base, dry ends, haircut shape, and the mystery of what happened during your “just a quick box dye” era.
One of the most common experiences with balayage is realizing that your dream photo may not happen in one session. For example, if you have dark brown hair and want cool beige blonde, your stylist may explain that the first appointment will create caramel or honey tones. This is not failure. This is chemistry politely asking for patience. Hair has to lift through warm stages, and forcing it too quickly can cause serious dryness or breakage.
During the painting process, balayage feels less intense than traditional foils for many people. There may be fewer tight foil packets and less scalp involvement, depending on the technique. The stylist paints, separates, checks, and adjusts. You may look slightly ridiculous halfway through, with painted pieces, clips, plastic wrap, or cotton strips arranged like modern art. Trust the process. Salon mirrors are not always kind during the middle chapters.
The rinse bowl is where the suspense builds. Many clients see their wet, pre-toned hair and panic because it looks warmer than expected. This is normal. Toner is what transforms raw lift into the final shade. A yellow blonde can become creamy beige. Orange warmth can become soft caramel. Bright pieces can be muted into a natural glow. The toner step is where balayage gets its expensive-looking finish.
After styling, the result often looks best with waves because the bends show off the color placement. Straight hair can still look beautiful, but waves reveal the ribbons, depth, and brightness. This is why stylists often curl the hair at the end of a balayage appointment. It is not just for dramaalthough, let’s be honest, the reveal deserves a tiny movie soundtrack.
Living with balayage is usually easier than maintaining traditional highlights. The grow-out is softer, so you do not feel trapped in an appointment schedule every few weeks. Many people can go months before repainting the lightened pieces. However, the tone may fade earlier than the placement. That means you might still want a gloss or toner refresh between major balayage sessions.
Another real-life lesson: your shower routine matters. If you wash daily with harsh shampoo and use hot tools without protection, your beautiful beige balayage may turn dull or brassy faster. Color-safe shampoo, cooler rinses, weekly masks, and heat protectant make a noticeable difference. Balayage is low-maintenance, not no-maintenance. It is like a houseplant that forgives you sometimes, but not forever.
People with curly hair often have a different balayage experience. The best results usually come when the stylist considers how the curls naturally fall. Painted pieces should enhance the curl pattern, not disappear underneath it or create random bright spots. Curly balayage can look incredibly dimensional, but it benefits from a stylist who understands textured hair and shrinkage.
For brunettes, the most satisfying balayage experiences often involve warmth: caramel, toffee, mocha, bronze, or cinnamon. These shades complement the natural depth of brown hair and usually require less aggressive lifting than pale blonde. For blondes, balayage can create that soft, beachy brightness without a heavy root line. For redheads, copper or strawberry balayage can add fiery dimension without overwhelming the base color.
The biggest emotional benefit of balayage is flexibility. It lets you change your look without feeling like you have signed a lifelong contract with your roots. You can keep it subtle, brighten it later, add lowlights, gloss it warmer, tone it cooler, or let it grow out gracefully. That is the charm: balayage works with real life, real schedules, and real people who sometimes forget to book appointments until their calendar starts judging them.
Final Thoughts: Is Balayage Worth It?
Balayage is worth it if you want soft dimension, natural-looking brightness, and a color style that grows out gracefully. It is one of the most versatile hair color techniques because it can be customized for blondes, brunettes, redheads, curls, waves, short cuts, long layers, subtle changes, or bold transformations.
The key is realistic planning. Start with healthy hair, choose shades that complement your base color, do a strand and patch test when using hair color, and consider a professional stylist for major lightening. Balayage may look relaxed, but great balayage is strategic. The best results come from thoughtful placement, patient lifting, skilled toning, and consistent aftercare.
In other words, balayage is not just “paint some blonde on the ends and hope.” It is a blend of art, chemistry, and knowing when to stop before your hair sends a resignation letter.