Table of Contents >> Show >> Hide
- Before You Make One: Keep It Simple, Clean, and Safe
- Method 1: The Paper Cup Emergency StP
- Method 2: The Folded Plastic Sheet Version
- Method 3: The Silicone Kitchen Funnel Hack
- Method 4: The Trimmed Travel Funnel Upgrade
- How to Test Your DIY StP Device Without Regret
- Cleaning and Storage Tips
- Common Mistakes to Avoid
- Final Thoughts
- Real-World Experience: What People Usually Learn After Trying a DIY StP Device
- SEO Tags
Sometimes convenience is king. Sometimes knees are cranky. Sometimes a gas-station restroom looks like it lost a cage match with reality. And sometimes you simply want a cleaner, faster, less acrobatic bathroom option while traveling, hiking, camping, or dealing with messy public restrooms. That is where an StP (stand to pee) device comes in.
An StP device is a simple tool that helps direct the flow of urine so a person can pee while standing. Store-bought versions are popular for road trips, festivals, backpacking, long commutes, pregnancy, limited mobility, and general “I refuse to hover like a malfunctioning flamingo” situations. But if you need a quick, inexpensive option, a DIY version can work surprisingly well.
The trick is not just making one. The trick is making one that is easy, clean, smooth, portable, and safe. In this guide, you will learn four practical ways to make an easy StP device at home, plus tips for choosing materials, testing the design, cleaning it properly, and avoiding the most common rookie mistakes.
Before You Make One: Keep It Simple, Clean, and Safe
Before we jump into the four methods, let’s establish one golden rule: this is a personal hygiene device, not an arts-and-crafts rebellion. Choose materials carefully.
What to look for in a good DIY StP device
- Nonporous material: Silicone or smooth plastic is better than absorbent paper, fabric, cardboard, or foam.
- Smooth edges: Nothing sharp, jagged, or cracked.
- Easy to rinse: If it has too many folds, ridges, or hidden corners, it will be annoying to clean.
- Lightweight shape: You want something easy to carry in a pouch, bag, glove compartment, or backpack.
- Reliable flow path: The design should guide liquid forward instead of creating splashback or awkward dribbles.
What to avoid
- Anything dirty, previously used for chemicals, or impossible to sanitize
- Brittle plastic that can crack
- Very narrow tubes that trap moisture
- Materials with rough seams, staples, or exposed tape in high-contact areas
- Sharing the device with anyone else
Also, always wash your hands before and after handling the device, rinse it thoroughly after use, and let it dry as much as possible before sealing it in a pouch. If a design causes discomfort, leaks constantly, or feels like a science fair project gone wrong, retire it with dignity and try another style.
Method 1: The Paper Cup Emergency StP
This is the “I need a solution now” method. It is quick, cheap, and useful in a pinch. It is not the most durable option, but it can work well as a short-term or one-time device.
What you need
- A clean, wax-coated or smooth paper cup
- Scissors
- A small piece of tape for reinforcement if needed
How to make it
Take the cup and trim it diagonally so one side is lower and one side is higher. You are creating a scoop-and-spout shape. The lower side sits closer to the body, while the higher side helps direct flow forward. If the edges feel rough, trim them again carefully so the rim is smooth. If the cup feels flimsy, reinforce the outside with a small strip of tape, keeping the inner surface clear and smooth.
Why it works
The paper cup creates a wide catch area and a natural channel toward the narrow end. It is especially handy for testing whether you even like the concept of using an StP device before making a more durable version.
Best use case
Road trips, emergencies, festival bathrooms, or trial runs at home.
Pros
- Fast and inexpensive
- Easy to shape
- Wide opening reduces aiming anxiety
Cons
- Not very durable
- Can soften over time if it gets wet
- Not ideal for repeated use
Method 2: The Folded Plastic Sheet Version
If you want something ultralight and packable, this method is excellent. It uses a thin, flexible sheet of clean plastic to create a channel shape that folds nearly flat. Think of it as the wallet-friendly cousin of commercial travel devices.
What you need
- A new, clean plastic folder, report cover, or flexible plastic sheet
- Scissors
- Fine sandpaper or an emery board
- Optional: waterproof tape on the outside for grip
How to make it
Cut the plastic into an oval or rounded rectangle. Then shape it into a soft cone or taco-like channel so one end becomes the wider collection area and the other end forms the spout. Trim gradually until the angle feels natural and the exit end points forward. Smooth every cut edge with sandpaper or an emery board until nothing scratches.
You can add a small strip of waterproof tape to the outer side if you want extra grip, but do not place bulky tape where it could create ridges or collect moisture on the contact surface.
Why it works
This design is based on a simple gravity channel. Flexible plastic is easy to carry, easy to rinse, and surprisingly effective once the curve is right. It is also a smart option if you want a device that disappears into a pocket or toiletry pouch.
Best use case
Travel, concerts, commutes, hiking day trips, and minimalist packing.
Pros
- Very lightweight
- Reusable
- Easy to store flat
Cons
- May take a few trimming attempts to get the shape right
- Needs careful smoothing around the edges
Method 3: The Silicone Kitchen Funnel Hack
This is one of the easiest DIY routes because silicone is flexible, durable, and easy to wash. A small, new kitchen funnel can become a practical StP device with only minor modification.
What you need
- A new silicone funnel
- Scissors or a craft knife
- Warm soapy water for pre-cleaning
How to make it
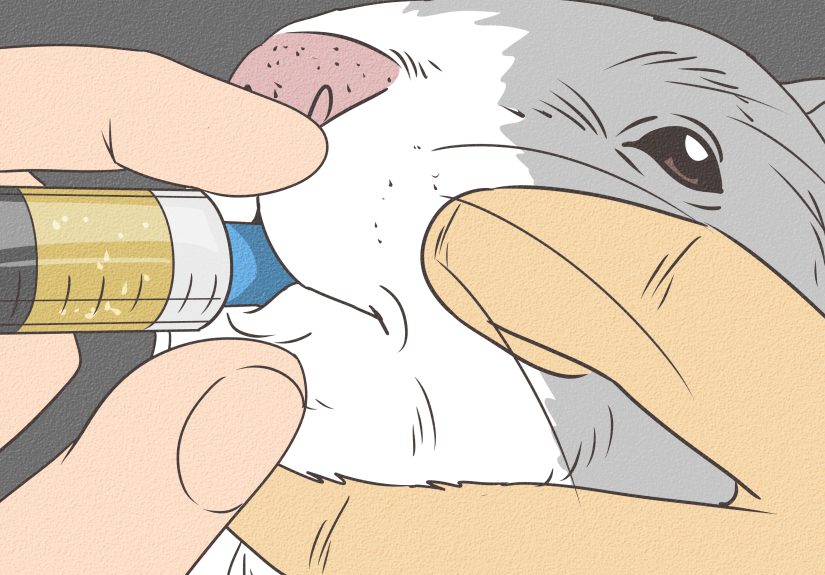
Choose a funnel with a soft, wide top and a short stem. If the stem is too long or too narrow, trim it so liquid can exit more freely. The goal is not a deep tube; it is a broad, smooth path that drains quickly. Wash the funnel thoroughly before first use. Then test the flow with water over a sink, shower, or toilet before trusting it in the real world. That little rehearsal can save your confidence and your shoes.
Why it works
Silicone is flexible enough to sit comfortably and form a better seal than stiff plastic. It also tends to rinse clean more easily, which matters because devices with tricky angles and hidden corners are annoying to maintain.
Best use case
Frequent use, car travel, camping, and people who want a sturdier reusable option.
Pros
- Comfortable and flexible
- Durable
- Simple to clean
Cons
- Bulkier than a flat plastic version
- Not every funnel shape works equally well
Method 4: The Trimmed Travel Funnel Upgrade
This version uses a small hard-plastic travel funnel, but with a few adjustments to improve flow and reduce splash risk. It is ideal if you want a reusable, budget-friendly device that feels closer to a commercial model.
What you need
- A new travel funnel with a broad top
- Scissors or a small utility knife
- Sandpaper or nail file
- A storage pouch or zip bag
How to make it
If the funnel stem is long, cut it shorter so liquid exits faster. If the top rim is too circular and awkward, trim one side slightly into a more oval shape to create a better body-side edge. File every trimmed area until it feels completely smooth. Then test with water. If the stream feels restricted, widen the opening a little more and test again.
Why it works
A travel funnel already gives you the core geometry you need: a wide entry and narrow exit. By shortening and refining the shape, you reduce the chance of backup and make the device easier to use and clean.
Best use case
Keeping in the car, suitcase, emergency kit, or festival bag.
Pros
- Cheap and sturdy
- Easy to find online or in stores
- Good for repeated practice
Cons
- Hard plastic is less forgiving than silicone
- Can feel bulky in smaller bags
How to Test Your DIY StP Device Without Regret
Testing matters. A lot. The most glamorous place to test your device is not a mountain trail, a packed concert venue, or the side of a highway at 2 a.m. The best place is at home, with privacy, running water nearby, and zero audience participation.
- First, run water through the device to check the speed and direction of flow.
- Second, practice over a toilet or in the shower so cleanup is easy.
- Third, wear clothing you do not mind washing during the learning phase.
- Fourth, test how the device fits in your hand and whether it stores neatly afterward.
The goal is to build confidence before you need to use it in a rushed or awkward setting. Most people do not master it on the first try, and that is completely normal. Even the fanciest commercial device still has a learning curve. Your DIY version deserves the same patience.
Cleaning and Storage Tips
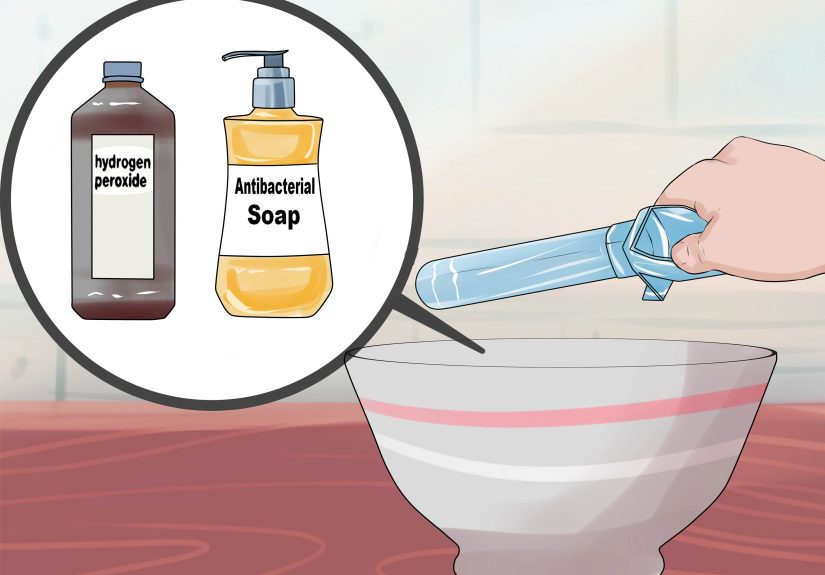
If you are using a reusable StP device, good hygiene is not optional. Rinse it after every use if possible. Wash it with plain soap and water when you can. Dry it before long-term storage, and keep it in a breathable pouch or a separate zip bag if you are on the go. Do not toss it loose into the bottom of a backpack beside old granola wrappers and mystery receipts from 2024.
For outdoor use, carry a small water bottle for rinsing, a clean cloth or tissue for drying the outside, and hand sanitizer for situations where soap and water are not available right away. If a device develops cracks, odors that do not wash away, or visible wear, replace it.
Common Mistakes to Avoid
- Using rough or sharp materials
- Choosing a tube that is too narrow
- Skipping practice before using it in public
- Storing it wet for long periods
- Ignoring comfort just because the shape “sort of works”
- Thinking every body is the same and every design will work equally well
That last point matters more than people expect. The best StP device is not the prettiest one or the one with the most clever DIY bragging rights. It is the one that fits your body comfortably, directs flow reliably, and is easy enough to clean that you will actually keep using it.
Final Thoughts
Making an easy StP device does not require engineering skills, expensive gear, or a dramatic montage with power tools. Most of the time, the best DIY solutions are simple, smooth, and practical. A paper cup can save the day in an emergency. A folded plastic sheet is light and portable. A silicone funnel offers flexibility and comfort. And a trimmed travel funnel can become a dependable reusable option.
If you remember only three things, make it these: choose safe materials, smooth the edges, and practice before you need it. Do that, and your DIY StP device can go from “strange little object in my bathroom drawer” to “honestly, this is genius.”
Real-World Experience: What People Usually Learn After Trying a DIY StP Device
The biggest surprise for first-time users is that confidence matters almost as much as design. On paper, a DIY StP device can look ridiculously simple. In real life, the first few attempts often feel awkward, mostly because there is a learning curve and because nobody wants a trial-and-error moment while wearing jeans they actually like. Many people discover that the first successful use is less about perfection and more about getting comfortable with the rhythm of the device, the angle, and the pace. Once that clicks, the entire thing suddenly feels much less mysterious.
Another common experience is realizing that wide and smooth almost always beats tiny and clever. People often start by choosing something narrow because it seems discreet and easy to carry. Then they test it and learn that narrow designs can feel slower, less forgiving, and more likely to create splashback. That is why wider catch areas and open, easy-draining shapes tend to win. They are not always the cutest option, but they are the ones people trust when they are tired, cold, or in a hurry.
Travelers frequently say the real benefit shows up in places where restroom conditions are less than inspiring. Think road trips, festivals, campgrounds, long lines, dirty public toilets, and rest stops where your spirit leaves your body the moment you open the stall door. In those moments, a simple DIY StP device can feel oddly empowering. It saves time, reduces contact with questionable surfaces, and makes bathroom breaks less stressful. That convenience is often what turns a “maybe I’ll try this” experiment into a regular habit.
Outdoor users tend to notice a second benefit: clothing management gets easier. Heavy layers, rain gear, backpacks, and winter clothing can make a regular bathroom stop feel like a full production. A standing device can simplify the process, especially during hikes or cold-weather outings when nobody wants to fully undress just to handle one basic human need. The easier the device is to grab, use, rinse, and store, the more likely it is to earn permanent space in a pack.
Then there is the hygiene lesson. People quickly learn that the best device is not only the one that works well, but the one they are willing to clean properly every single time. A beautifully improvised design is useless if it has hidden corners that trap moisture or if it is annoying to rinse. Reusable options that are open, smooth, and fast-drying usually get the highest marks in real-world use. Convenience is not just about peeing while standing. It is also about not dreading cleanup afterward.
Finally, there is the emotional side of the experience: relief. Not dramatic movie-score relief, but the practical kind. Relief that you do not need to hover over a questionable toilet seat. Relief that a long car ride no longer feels like a hydration puzzle. Relief that you found a simple solution to a very ordinary problem. And that is really the charm of a DIY StP device. It is not fancy. It is not complicated. But when it is made thoughtfully and used confidently, it can make daily life, travel, and outdoor adventures feel a whole lot easier.