Table of Contents >> Show >> Hide
Tamales are one of those foods that make you feel like you have accomplished something heroic in the kitchen. Not “I toasted bread” heroic. More like “I built tiny edible gifts out of masa, filling, and sheer determination” heroic. The good news is that learning how to make tamales is completely doable at home. The even better news is that once you understand the method, the process becomes less mysterious and a lot more fun.
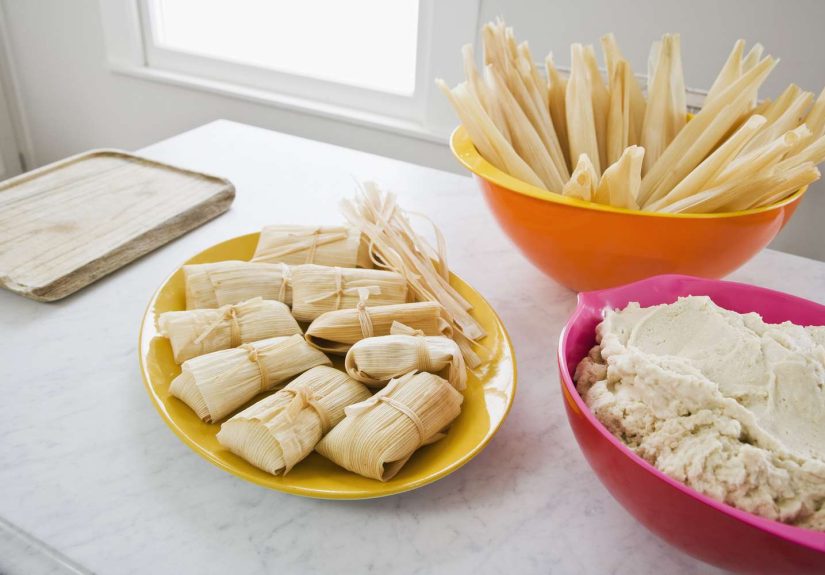
At their core, tamales are made from masa, a corn-based dough, wrapped in corn husks and steamed until tender. Inside, you can tuck in shredded pork, chicken in salsa verde, beans and cheese, roasted peppers, or even sweet fillings. That flexibility is part of the magic. Tamales are comfort food, celebration food, holiday food, and “I made a giant batch and now future me is thriving” food.
This guide breaks down exactly how to make tamales, from soaking the husks to mixing fluffy masa, assembling each parcel, steaming them properly, and fixing the common mistakes that turn a tamale session into a corn-powered personality test.
What You Need to Make Tamales
For the wrappers
Most homemade tamales in the United States are wrapped in dried corn husks. You will need to soak them in hot water until they become soft and pliable. Buy extra, because some will tear, some will be tiny, and some seem to exist only to test your patience.
For the masa
The dough is usually made with masa harina, broth, salt, and a fat such as lard, shortening, or oil. Some recipes also use baking powder for a lighter texture. The goal is a dough that feels soft, spreadable, and airy. If the masa is dry and crumbly, your tamales will be dense. If it is soupy, your tamales will slump like they had a rough morning.
For the filling
You can go traditional or creative. Popular options include:
- Red chile pork
- Chicken with green salsa
- Cheese and roasted poblano strips
- Beans and cheese
- Vegetables with sauce
The filling should be well seasoned. That is not the place to be timid. The masa is mild and comforting, so the filling needs enough salt, spice, and depth to stand out.
How to Make Tamales Step by Step
Step 1: Soak the corn husks
Place the dried corn husks in a large bowl or pot and cover them with very hot water. Weigh them down with a plate or bowl so they stay submerged. Let them soak until they are flexible. Once softened, rinse them if needed and pat them dry. Set aside the largest husks for wrapping and the smaller pieces for patching tears or lining the steamer.
This is the first place where new tamale makers tend to rush. Do not. A stiff husk cracks. A cracked husk leaks. A leaking tamale is just you being publicly humbled by corn.
Step 2: Prepare the filling first
Make your filling before mixing the masa so everything is ready when assembly begins. If you are using pork or chicken, cook it until very tender, shred it, and combine it with a sauce such as red chile sauce or salsa verde. If you are using cheese and peppers, roast and peel the peppers first, then slice them into strips.
The filling should not be watery. Wet filling can seep into the masa and interfere with texture. Think saucy, not soupy.
Step 3: Mix the masa
In a large bowl, combine masa harina, salt, and baking powder if using. In a separate bowl, whip the fat until it looks lighter and fluffier. This step matters more than people expect. Beating the fat helps incorporate air, which gives the finished tamales a softer, more tender texture.
Gradually add the dry ingredients to the whipped fat, then pour in warm broth a little at a time until the dough becomes smooth and spreadable. A good tamale masa should resemble thick hummus or very soft peanut butter. It should spread easily on a husk without tearing it apart, but still hold its shape.
If the dough feels dry, add more broth. If it feels too loose, sprinkle in a little more masa harina. Taste it, too. Bland masa makes sad tamales.
Step 4: Set up an assembly station
Before you start wrapping, arrange everything in one place:
- Softened corn husks
- Masa
- Filling
- Ties or strips of husk if you want them
- A tray for finished tamales
This is your tamale command center. Once you begin, you want a rhythm. Grab husk, spread masa, add filling, fold, stack, repeat. It is surprisingly satisfying once you get going.
Step 5: Spread the masa
Lay one corn husk on your hand or work surface with the wide end at the top. Spread a thin layer of masa over the center, leaving a border around the edges. Usually, the dough covers the top two-thirds of the husk and stays away from the narrow bottom tip.
The layer should be thick enough to hold the filling but not so thick that you are basically making corn loaf. A thin, even layer is ideal.
Step 6: Add the filling
Place a spoonful of filling down the center of the masa. Resist the urge to overfill. Too much filling makes the tamale hard to close and more likely to burst during steaming. The filling is the guest of honor, yes, but it still needs to behave.
Step 7: Fold the tamale
Fold one side of the husk toward the center, then fold the other side over it so the masa encloses the filling. Fold the narrow bottom upward. The top usually stays open. For extra security, some people tie tamales with thin strips of husk, though many home cooks simply stack them seam-side in the steamer.
Do not worry if your first few look awkward. Homemade tamales are allowed to be a little rustic. In fact, a perfectly uniform first batch would be suspicious.
Step 8: Steam the tamales
Set up a steamer pot with water below the rack or basket. The water should not touch the tamales. Line the steamer with extra husks if you like, then arrange the tamales upright with the folded ends down and the open ends up. Pack them close enough to support one another, but not so tightly that steam cannot circulate.
Bring the water to a boil, cover the pot, then reduce to a steady simmer. Steam until the masa is firm and the tamale pulls away from the husk cleanly. Depending on size and recipe, this often takes around 45 to 90 minutes. Check the water level occasionally and add more hot water as needed. Never let the pot boil dry.
Step 9: Let them rest
This is the step people skip, then wonder why the texture seems off. Once the tamales are done, let them rest for 10 to 15 minutes before unwrapping. Resting helps the masa set and finish firming up, which makes the texture much better.
Best Tips for Better Tamales
Use flavorful broth
Water works in an emergency, but broth gives the masa better flavor. Chicken, pork, beef, or vegetable broth all work depending on the filling. If you cooked meat for the filling, save that cooking liquid and use it in the masa for extra depth.
Keep the masa covered
Masa dries out quickly. Cover the bowl with a damp towel or plastic wrap while you work. Dry masa becomes harder to spread and can cook unevenly.
Season boldly
The filling should taste slightly stronger than you think it needs to. Once wrapped in masa, flavors mellow out. The same goes for the masa itself. Salt matters.
Make tamales over two days
If you are making a big batch, split the work. Prepare the filling on day one. Mix the masa, assemble, and steam on day two. That small bit of planning makes the whole process feel far less chaotic.
Make a variety
If you are already setting up a tamale assembly line, it makes sense to prepare more than one filling. A batch with half pork and half cheese-and-poblano gives your freezer, and your future dinner plans, a lot more personality.
Common Tamale Mistakes and How to Fix Them
The masa is too dry
If the dough cracks or feels stiff when you spread it, it needs more broth. Add a little at a time and mix well.
The tamales are dense
This usually means the fat was not whipped enough, the masa was too dry, or the tamales did not steam long enough. Lighter masa starts with proper mixing.
The tamales stick to the husk
If the tamale will not pull away from the husk, it may need more steaming time. Test one, then continue cooking in short intervals if needed. Also remember the resting period after steaming. That short wait really helps.
The filling leaks out
This can happen when tamales are overfilled or the masa layer is too thin in some spots. Spread evenly, fill modestly, and keep your folding calm and purposeful.
The steamer runs low on water
Check occasionally and add hot water when necessary. Cold water can disrupt the steaming environment, and no water at all is how kitchen disasters begin.
How to Store, Freeze, and Reheat Tamales
Tamales are excellent make-ahead food. Let them cool, then refrigerate them in shallow containers or well-wrapped batches. Do not leave them sitting at room temperature for hours while everyone debates whether to have one more. Food safety does not care about family traditions.
For longer storage, freeze cooked tamales tightly wrapped. They reheat well and make an excellent emergency meal that feels much more luxurious than whatever sad cracker situation you were about to settle for.
To reheat tamales
- Steam: Best for texture. Reheat until hot all the way through.
- Microwave: Wrap in a damp paper towel to keep them from drying out.
- From frozen: Thaw in the refrigerator when possible, then steam or microwave until thoroughly heated.
When reheating leftovers, make sure they are heated through properly. If your tamales contain meat or poultry, food safety matters just as much the second time around as it did the first.
Serving Ideas for Homemade Tamales
Tamales are wonderful on their own, but they also play well with a supporting cast. Serve them with salsa roja, salsa verde, crema, pickled onions, black beans, rice, or a crisp slaw for contrast. A squeeze of lime can wake everything up.
For brunch, tamales are excellent with eggs. For dinner, they pair beautifully with brothy beans and salad. For late-night snacking, they pair best with standing at the fridge door and telling yourself this is absolutely a normal adult activity.
Why Tamales Are Worth the Effort
Making tamales is not fast food. It is project cooking, celebration cooking, memory-making cooking. But that is exactly why so many people love it. The process invites people into the kitchen. One person mixes masa, one person fills, another folds, another watches the steamer like it owes them money. The result is deeply comforting food with real texture, real flavor, and real effort behind it.
Once you learn the basic method, tamales stop feeling intimidating. They become a flexible formula: soft husk, fluffy masa, bold filling, steady steam, patient rest. That is the rhythm. Follow it, and you will make tamales that feel generous, satisfying, and very much worth the pile of husks on your counter.
Kitchen Experiences and Real-World Lessons From Making Tamales
The first time many home cooks make tamales, the experience is equal parts joy and mild panic. Everything seems simple on paper, but the moment you are standing in the kitchen with soaked husks sliding around, masa on your spoon, and a pot the size of a small drum waiting on the stove, it feels like you have joined a delicious construction crew. That is normal. Tamales teach patience early.
One of the biggest surprises is how social the process can be. Tamales are not just food; they are an event. When several people gather around the table, the work moves faster, the mistakes become funny instead of frustrating, and everyone develops strong opinions about the “right” amount of filling. Someone will spread too much masa. Someone will fold one that looks like a corn-based envelope from another dimension. Someone will say, “This one is rustic,” which is family code for “absolutely not perfect, but we are eating it anyway.”
Another common experience is discovering that texture matters more than strict measurements. You can read every recipe in the world, but eventually your hands need to learn what the dough should feel like. Good masa has a softness to it. It should spread without a fight. When it is right, you can tell. When it is wrong, it clings, cracks, or behaves like wet cement with self-esteem issues. That hands-on understanding is often what separates an okay first batch from a much better second one.
People also learn quickly that tamales reward planning. Making the filling a day ahead, organizing the husks, and setting up a clean assembly line changes the mood of the entire project. Without that prep, the kitchen can become a maze of bowls, spoons, and vague confidence. With it, the process feels calm and even festive. There is something deeply satisfying about seeing rows of assembled tamales waiting to be steamed, like a little army of future comfort food.
Then there is the moment of truth: opening the first cooked tamale. Every tamale maker knows this scene. You peel back the husk like you are unwrapping an award, hoping the masa pulls away cleanly and the filling sits proudly in the center. If it sticks, you sigh and steam longer. If it opens beautifully, you feel ten feet tall. It is one of the most rewarding moments in home cooking because you can literally see technique paying off.
Perhaps the best experience of all comes later, when you realize you made enough tamales to share or freeze. A freezer full of homemade tamales feels oddly luxurious. On a busy day, you can pull out a few, reheat them, and suddenly dinner tastes like effort even when the only thing you did that evening was remember they existed. That is kitchen wisdom at its finest.
So yes, tamales take time. They ask you to slow down, organize yourself, and trust the process. But they also turn an afternoon in the kitchen into something memorable. You do not just end up with food. You end up with a story, a skill, and very likely a strong opinion about masa consistency for the rest of your life.
Note: This article is for general cooking education and is designed for web publication in clean HTML format.