Table of Contents >> Show >> Hide
- What “Best” Means for a DIY Microwave Cleaner
- The #1 Best DIY Microwave Cleaner (The One You’ll Actually Use)
- Level Up: The “Two-Phase” Clean for Stubborn Messes
- Deep Clean Your Microwave (Inside, Outside, and the Forgotten Parts)
- Odor Rescue: When Your Microwave Smells Like Yesterday’s Regrets
- What Not to Use (Unless You Enjoy Regret and Extra Scrubbing)
- How Often Should You Clean a Microwave?
- Microwave-Cleaning Pro Tips (Small Habits, Big Difference)
- FAQ: Quick Answers About DIY Microwave Cleaning
- Wrap-Up: So, What’s the Best DIY Microwave Cleaner?
- Real-Life Experiences and “Been There” Lessons (Extra Notes)
The microwave is the unsung hero of the kitchen: it reheats leftovers, revives cold coffee (no judgment), and turns
“I have nothing to eat” into “I have nachos” in under two minutes. Unfortunately, it also becomes a tiny crime scene
of splatters, mystery smells, and that one sauce explosion you swear was “just a small bubble.”
The good news: you don’t need a cabinet full of harsh chemicals to fix it. The best DIY microwave cleaner is
basically steam + a gentle, food-safe degreaser you already own. It’s cheap, fast, and oddly satisfyinglike power
washing, but for spaghetti sauce.
What “Best” Means for a DIY Microwave Cleaner
A homemade microwave cleaner earns the “best” title if it checks these boxes:
- Food-safe: Because you heat food inches away from the surface you’re cleaning.
- Effective on grease and dried splatters: Not just “makes it smell citrusy.”
- Gentle on finishes: No scratching, no stripping coatings, no weird residue.
- Fast and low-effort: The microwave does the heavy lifting (finally contributing to chores).
- Easy ingredients: Stuff you can find in a normal U.S. pantry or grocery store.
The #1 Best DIY Microwave Cleaner (The One You’ll Actually Use)
If you only memorize one method, make it this: vinegar + water steam cleaning. It softens stuck-on food,
helps cut through light grease, and makes wiping easy. Bonus: it’s basically the microwave equivalent of a spa facial,
except the spa is your appliance and the facial is removing chili splatter.
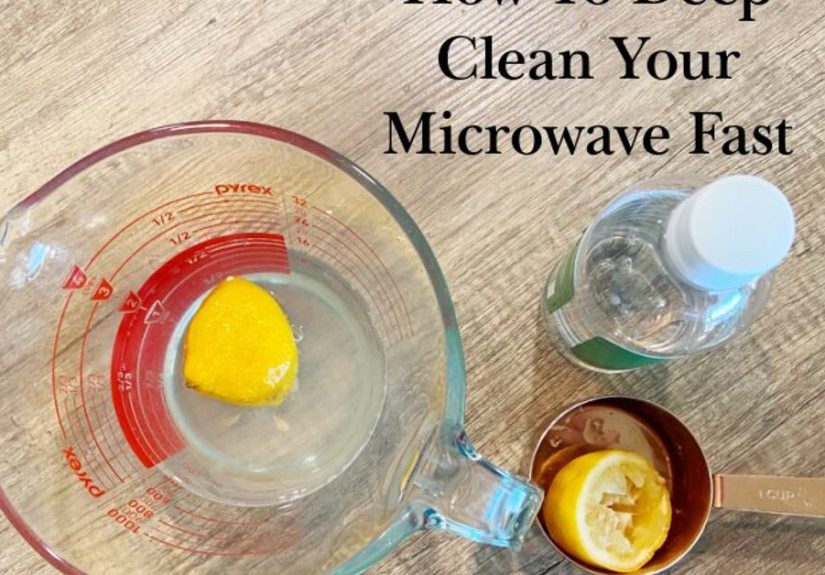
DIY Microwave Cleaner Recipe
- 1 cup water (tap is fine)
- 1–2 tablespoons distilled white vinegar
- Optional: 1–2 lemon slices or a squeeze of lemon (for scent and extra freshness)
How to Use It (Step-by-Step, No Fancy Tools)
- Choose the right container. Use a microwave-safe bowl or measuring cup. Wide is better than narrow
so steam spreads out. - Mix your solution. Add water and vinegar. If you want the “clean kitchen” vibe, toss in lemon.
- Heat until it steams. Microwave on HIGH for 3–5 minutes, until you see steam and the
mixture is hot. (Times vary by microwave strengthgo for “steamy sauna,” not “rolling boil apocalypse.”) - Let it sitdoor closed. Leave the door shut for 5 minutes. This is the secret move:
trapped steam loosens dried splatters like a charm. - Remove carefully. The bowl will be hot. Use oven mitts or a towel.
- Wipe down. Use a microfiber cloth, sponge, or paper towel. Start with the ceiling and walls, then the
floor. If gunk is stubborn, dip your cloth in the warm vinegar water and hold it on the spot for a few seconds.
Why This Works (A Little Kitchen Science, Not a Lecture)
Steam is the real MVP. It rehydrates dried food, loosens sugars and starches, and softens greasy film so it wipes away
instead of clinging on for dear life. Vinegar adds mild acidity that helps break up light grime and neutralize some odors.
Lemon does a similar job while making your microwave smell less like “leftover fish incident.”
Level Up: The “Two-Phase” Clean for Stubborn Messes
Some microwaves don’t just need cleaningthey need forgiveness. If you’ve got burned-on splatter or sticky syrupy spots,
do this:
Phase 1: Steam (Use the recipe above)
Don’t skip the steam. It prevents you from scrubbing like you’re trying to erase your cooking history.
Phase 2: Baking Soda Paste (Targeted Scrub)
Baking soda is a gentle abrasivegreat for spots that laugh at wiping.
- Mix: 2 tablespoons baking soda + 1 tablespoon water (add a few drops more if needed)
- Apply: Put paste on stubborn areas with a sponge or cloth
- Wait: 2–5 minutes
- Wipe: Damp cloth, then a final clean-water wipe so no powdery residue remains
Deep Clean Your Microwave (Inside, Outside, and the Forgotten Parts)
The best DIY microwave cleaner is only “best” if you use it the right way. Here’s a simple deep-clean routine that
covers the whole appliance without risking damage.
1) Clear the Microwave
Remove the turntable and roller ring (if your model has one). These pieces collect crumbs and sauce drips like it’s their job.
2) Steam-Clean the Interior
Use the vinegar-water steam method. While it’s steaming, you can wash the turntable in warm soapy water.
Many glass turntables can go in the dishwasher, but hand-washing is gentler if you’re unsure.
3) Wipe in the Right Order
- Ceiling first: Gravity is not your friend, so don’t clean the floor first.
- Walls and corners: Use a cloth wrapped around your fingers to get seams.
- Floor last: This is where most drips bake on.
4) Don’t Ignore the Door Area
The inside of the door and the seal area can collect greasy fingerprints and tiny food specks. Wipe gently with a damp
cloth and a little dish soap if needed, then wipe again with plain water.
5) Exterior: Keep It Simple (And Don’t Flood the Vents)
For the outsidehandle, keypad, top, sidesuse a cloth dampened with warm soapy water. Avoid spraying liquids directly
onto the microwave (especially around vents and buttons). Spray the cloth instead, then wipe. Finish with a dry cloth.
Odor Rescue: When Your Microwave Smells Like Yesterday’s Regrets
If the microwave smells “off” even after cleaning, you’re dealing with lingering odor compounds stuck to interior surfaces.
Try one of these easy fixes.
Lemon Steam (Fresh-Scent Option)
Add lemon slices or lemon juice to your steam bowl, microwave until steamy, and let it sit with the door closed. It won’t
magically erase every smell in existence, but it does a surprisingly good job on everyday odors.
Baking Soda Deodorizer (Overnight, Low-Effort)
Place an open bowl with 2–3 tablespoons of baking soda inside the cooled microwave and close the door overnight.
Baking soda helps absorb odors without perfumes or chemicals.
The “Burnt Smell” Scenario
If something actually burned (we’ve all done it), clean first, then run a lemon or vinegar steam cycle once more.
Odors often fade over a day or two as the appliance airs outespecially if you keep the door cracked open between uses.
What Not to Use (Unless You Enjoy Regret and Extra Scrubbing)
A microwave interior can be surprisingly delicate. Some cleaners and tools can scratch surfaces, damage coatings,
or leave residues that you really don’t want heating up near food.
- Abrasive scouring pads or gritty powders (can scratch and dull interiors)
- Bleach or ammonia (harsh fumes, not microwave-friendly, and not needed here)
- Oven cleaner (too aggressive for microwave interiors)
- Metal scrapers or sharp tools (scratches become stain magnets)
- Spraying strong cleaners directly inside (residue can linger; moisture can get into vents/components)
How Often Should You Clean a Microwave?
The best plan is the one you’ll actually follow. Here’s a realistic schedule:
- After messy splatters: Quick wipe while the mess is fresh (takes 20 seconds, saves 10 minutes later).
- Weekly or every other week: Steam clean + wipe (3–10 minutes total).
- Monthly: Deep clean including turntable, door edges, and exterior.
Microwave-Cleaning Pro Tips (Small Habits, Big Difference)
- Cover food: A microwave-safe cover or even a paper towel cuts splatter dramatically.
- Stir and pause: Stopping once to stir soups prevents volcanic eruptions.
- Use the right dish: Shallow, wide bowls reduce boil-overs compared to tall mugs.
- Don’t let spills bake: Heat turns tiny drips into cement.
- Keep a microfiber cloth nearby: Convenience is half the battle.
FAQ: Quick Answers About DIY Microwave Cleaning
Can I use apple cider vinegar instead of white vinegar?
Yesapple cider vinegar can work in a pinch, but white vinegar is more neutral (less color, less lingering scent) and
usually cheaper.
Will vinegar damage my microwave?
In typical diluted amounts (like 1–2 tablespoons per cup of water), vinegar is mild and commonly recommended for routine
cleaning. Just don’t soak electronic areas or vents, and don’t use abrasive scrubbing tools.
What if my microwave has a Steam Clean button?
Some microwaves include a built-in steam clean feature that uses a small amount of water and a timed cycle. You can use that,
then wipe the interior afterward. Always follow your model’s instructions if you have that option.
What’s the fastest way to clean a lightly dirty microwave?
Steam for 3 minutes, let sit 2–5 minutes, wipe. For light grime, you’ll be done before your next snack decision.
Wrap-Up: So, What’s the Best DIY Microwave Cleaner?
The winner is the vinegar-and-water steam methodsimple, food-safe, budget-friendly, and effective for everyday
splatters and odors. Pair it with a little baking soda paste for stubborn spots, and you’ve got a DIY microwave cleaning system
that handles almost everything without harsh chemicals or intense scrubbing.
If you take nothing else from this article, take this: steam is your shortcut. Don’t fight dried-on mess with brute
forcemake the microwave loosen it up for you. It’s the least it can do, after all those late-night reheats.
Real-Life Experiences and “Been There” Lessons (Extra Notes)
Here’s what tends to happen in real kitchens when people start using a DIY microwave cleaner consistentlyand what you can learn
from it. First, the spaghetti sauce explosion is practically a rite of passage. The mistake most folks make is waiting
until the sauce dries into a stubborn orange constellation. The steam method shines here because it “rehydrates” that splatter
so it wipes away in broad strokes instead of tiny, frustrating dots. If you’ve ever scrubbed sauce freckles one by one, you
already know why steam feels like cheating (in a good way).
Next up: the curry-and-fish smell hangover. Even when the microwave looks clean, strong odors can linger because
scent compounds cling to interior surfacesespecially around the door area where steam and condensation love to settle. A quick
lemon steam cycle helps, but the bigger win is leaving the door open for a bit afterward so the interior can dry and air out.
People are often surprised by how much better the microwave smells after a few hours of airflow. If you want the “I cook real
food” vibe without the “my microwave is haunted by tuna” vibe, that little bit of ventilation matters.
Another common experience: sugary spills are sneakier than greasy spills. Melted marshmallow, syrup, and sweet coffee
splatters can turn into sticky varnish once heated a few times. Steam loosens them, but they sometimes need the baking soda paste
to finish the jobespecially if the mess has “aged” through multiple reheats. The trick is to use the paste sparingly and wipe
it off completely, because nobody wants a gritty mystery residue the next time they melt butter.
Families also notice a pattern: handles and keypads get gross faster than the inside. It’s not glamorous, but the
exterior is the high-touch zone. Wiping the handle and keypad with a damp soapy cloth once or twice a week can make the whole
kitchen feel cleaner. And here’s a practical tip people learn the hard way: don’t spray cleaner directly on the keypad area.
Even “gentle” sprays can seep into seams and turn a simple wipe-down into a moisture problem. Spraying the cloth instead keeps
things controlled and drama-free.
Finally, a lot of people report this pleasant surprise: once you get into the habit of a quick steam clean, you stop needing
marathon scrubbing sessions. The microwave stays “company-ready” (or at least “not embarrassing”), and cleaning becomes a small
routine instead of a project. The best DIY microwave cleaner isn’t just a recipeit’s a system that makes cleaning easy enough
that you’ll actually do it. And if you ever feel unmotivated, just remember: the microwave has watched you eat cold pizza over
the sink at midnight. You can give it five minutes of steam.