Table of Contents >> Show >> Hide
- Before You Cook: How to Prep Brussels Sprouts for Maximum Deliciousness
- The 5 Best Ways to Cook Brussels Sprouts Everyone Will Love
- 1) High-Heat Oven Roasting (The Crispy-Edge Crowd Favorite)
- 2) Air Fryer Brussels Sprouts (Fast, Crispy, Weeknight Magic)
- 3) Skillet “Steam-Then-Sear” Brussels Sprouts (Crisp-Tender in One Pan)
- 4) Restaurant-Style Fried Brussels Sprouts (Yes, FryingHear Me Out)
- 5) Grilled Brussels Sprouts (Smoky Char + Backyard Bragging Rights)
- Common Brussels Sprouts Mistakes (and How to Avoid Them)
- Make-Ahead, Leftovers, and Reheating (So They Stay Crispy)
- Conclusion
- Real-Life Brussels Sprouts Experiences ( of Hard-Earned Sprout Wisdom)
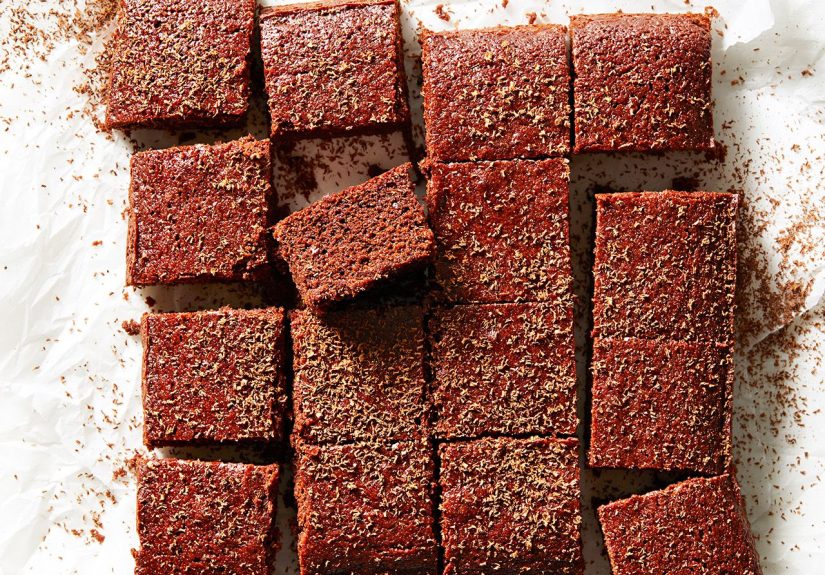
Brussels sprouts are basically tiny cabbages with a PR problem. Somewhere along the way, a generation of over-boiled sprouts
convinced the world that these little green orbs were born to be bitter and smell… like a gym bag that learned to cook.
The good news: Brussels sprouts aren’t the villain. Bad cooking is.
Cook them with high heat, smart seasoning, and a little strategy, and they turn sweet, nutty, crispy at the edges, and wildly
snackable (yes, snackablepeople “accidentally” eat half the pan before dinner). Below are the five best ways to cook Brussels sprouts
so even the sprout skeptics will ask for secondsplus flavor ideas, common mistakes, and real-life tips to make them foolproof.
Before You Cook: How to Prep Brussels Sprouts for Maximum Deliciousness
1) Buy the right sprouts (it matters more than you think)
Look for sprouts that are firm, tight, and bright green. Smaller sprouts tend to be sweeter and cook faster;
bigger ones can be great toojust cut them so they cook evenly. Avoid ones with lots of yellow leaves or a strong cabbage funk
in the bag (that’s the smell of “these have been through something”).
2) Trim like you mean it
Slice off just the dried stem end (don’t amputate the whole base) and peel away any beat-up outer leaves. Those loose leaves?
Keep somethey get shatteringly crispy in high heat and taste like vegetable chips with a college degree.
3) Choose a cut based on the cooking method
- Halved: best for roasting and air frying (more flat surface = more browning).
- Quartered: great for faster cooking and more crisp edges (especially if sprouts are large).
- Shaved: perfect for quick skillet cooking (think “sprout confetti” that turns silky and sweet).
- Whole: best for frying or grilling when you want tender centers and crisp outsides.
The 5 Best Ways to Cook Brussels Sprouts Everyone Will Love
1) High-Heat Oven Roasting (The Crispy-Edge Crowd Favorite)
If Brussels sprouts had a dating profile, “high-heat roasting” would be their best angle: caramelized, confident, and slightly charred
(in a good way). Roasting turns natural sugars sweeter, makes the edges crisp, and keeps the centers tender.
How to do it (simple + science-backed):
- Heat the oven to 450–500°F. If your oven runs hot, aim lower; if it runs lazy, go higher.
- Preheat a heavy sheet pan while the oven heats (this jump-starts browning).
- Toss halved sprouts with olive oil, salt, and pepper. Don’t be shy with the oiloil = crisp.
- Spread in a single layer and place cut-side down on the hot pan. Give them space. Crowding = steaming = sadness.
- Roast 18–28 minutes, flipping once if you want extra even color. Pull when deeply browned with crisp edges.
Flavor ideas that win people over:
- Balsamic finish: drizzle a little balsamic vinegar right after roasting for a glossy tang.
- Honey-chile glaze: warm honey + a splash of vinegar + chili flakes + butter; toss and serve.
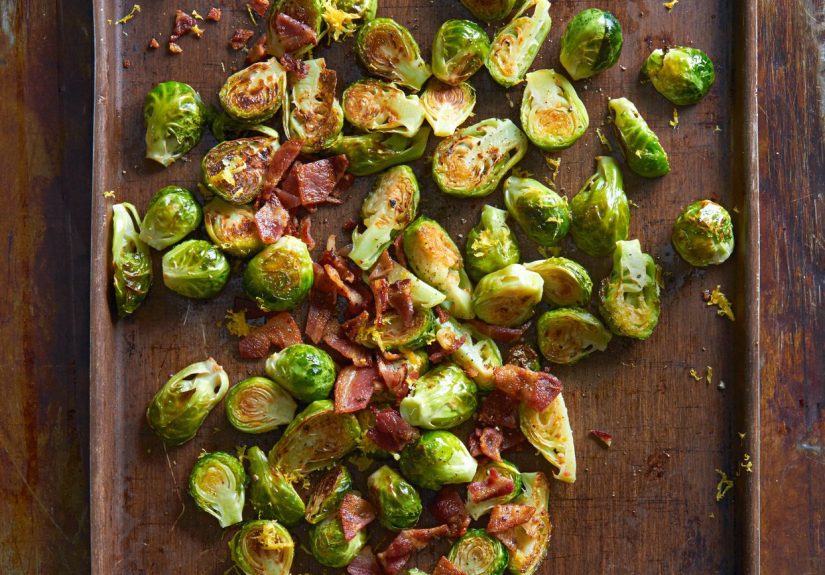
- Pancetta or bacon: roast sprouts with diced pancetta/bacon; finish with lemon for balance.
- Parmesan shower: add grated Parmesan in the last 3–5 minutes so it melts and crisps.
Pro tip: If someone says they “don’t like Brussels sprouts,” hand them a roasted one with a sticky-sweet glaze.
They’ll suddenly develop amnesia about their previous opinions.
2) Air Fryer Brussels Sprouts (Fast, Crispy, Weeknight Magic)
Air fryers are basically tiny convection ovens with main-character energy. They blast sprouts with circulating heat, giving you
that roasted crispness in less timeperfect when you want a crunchy vegetable side dish without heating the whole kitchen.
How to do it:
- Trim and halve sprouts (or quarter big ones).
- Toss with oil, salt, pepper. Optional: garlic powder, smoked paprika, or a pinch of cayenne.
- Air fry at 375°F for about 12–16 minutes, shaking the basket 2–3 times for even browning.
- If using fresh garlic, add it in the last 2–3 minutes so it doesn’t burn.
Easy “make it a restaurant appetizer” finishes:
- Garlic + lemon + Parmesan: zest, juice, a little grated cheese, done.
- Hot honey: drizzle hot honey and add flaky salt. People will hover near the basket like it’s a campfire.
- Maple + mustard: toss with maple syrup + Dijon + a splash of vinegar for sweet-tangy perfection.
Pro tip: Don’t overload the basket. Air fryers are powerfulbut only when air can actually, you know, air.
Cook in batches if needed; your taste buds will forgive you.
3) Skillet “Steam-Then-Sear” Brussels Sprouts (Crisp-Tender in One Pan)
This method is the best-kept secret for people who want crispy edges and tender centers without waiting on the oven.
You steam just enough to soften the core, then sear hard to brown the cut sides. It’s like giving sprouts a quick spa day followed by a tan.
How to do it:
- Heat a large skillet over medium-high with a tablespoon or two of oil (cast iron is great).
- Add halved sprouts cut-side down. Let them brown without stirring for 3–5 minutes.
- Add 2–4 tablespoons water, cover, and steam 3–5 minutes until bright green and just tender.
- Uncover, let water evaporate, then keep cooking to deepen browning.
- Finish with lemon juice or vinegar, plus salt and pepper to taste.
Ways to level it up:
- Bacon + onion: cook bacon first, sauté onion in the drippings, then add sprouts.
- Toasted nuts: almonds or pecans add crunch and make it feel “fancy” with zero effort.
- Chili crisp: spoon on top at the end for heat, crunch, and instant personality.
This is also a great gateway method for beginners: it’s quick, forgiving, and gives you control. If your sprouts need more color,
keep searing. If they’re getting too dark, lower heat and add a splash more water. The pan is your stage manager.
4) Restaurant-Style Fried Brussels Sprouts (Yes, FryingHear Me Out)
If you’ve ever eaten Brussels sprouts at a trendy restaurant and thought, “Why do these taste like crunchy little miracles?”
the answer is often frying. Frying creates an ultra-crispy exterior and sweet, nutty flavorthen you toss them in a sauce
that makes people forget they’re eating vegetables.
Two practical ways to fry at home:
- Shallow-fry (easier): Halved sprouts in 1/2 inch oil, turning until browned and crisp.
- Deep-fry (full restaurant mode): Whole or halved sprouts in 350°F oil until crisp and tender.
Do this so frying doesn’t become a life lesson:
- Dry them well. Water + hot oil = chaotic fireworks.
- Fry in batches. Crowding drops oil temp and turns crisp into greasy.
- Salt after. Seasoning sticks better to hot, just-fried sprouts.
Sauces that make fried sprouts “everyone food”:
- Buffalo-style: butter + hot sauce, then add blue cheese crumbles or yogurt drizzle.
- Sweet-tangy: honey + vinegar + pinch of chili flakes.
- Umami bomb: soy sauce + sesame oil + lime + toasted sesame seeds.
Is it the “healthiest” way? Not the point. This is the “convert the haters” way. Make it once and watch how quickly everyone suddenly loves Brussels sprouts.
5) Grilled Brussels Sprouts (Smoky Char + Backyard Bragging Rights)
Grilling gives Brussels sprouts something roasting can’t: smoky char. They become sweet, savory, and a little wildlike the vegetable
equivalent of wearing a leather jacket. This is especially great for cookouts when you want a side dish that can stand up to burgers, steak, or barbecue.
How to do it:
- If sprouts are large, blanch them 2–3 minutes in salted boiling water, then drain and dry well (this helps the center cook through).
- Toss with oil, salt, pepper. Add garlic powder or smoked paprika if you like.
- Thread onto skewers or use a grill basket.
- Grill over medium-high heat, turning occasionally, until charred and tenderabout 8–12 minutes (longer if not blanched).
- Finish with a glaze or bright acid to balance the smokiness.
Glazes that love the grill:
- Maple-mustard: maple syrup + Dijon + vinegar + pinch of salt.
- Lemon-herb: lemon juice + olive oil + chopped parsley + grated garlic.
- Balsamic reduction: tangy, glossy, and makes sprouts look like they dressed up for dinner.
Common Brussels Sprouts Mistakes (and How to Avoid Them)
- Overcrowding the pan: If sprouts are packed tight, they steam instead of brown. Use a bigger pan or roast in batches.
- Not enough heat: Low heat can leave sprouts pale, soft, and sometimes more bitter. Go hot for better flavor.
- Under-seasoning: Salt isn’t optional; it’s how flavor shows up. Add salt early, then adjust at the end.
- Skipping acid: A squeeze of lemon or splash of vinegar wakes up the whole dish and balances richness.
- Cooking them to oblivion: Tender is good. Mushy is how Brussels sprouts earned their bad reputation.
Make-Ahead, Leftovers, and Reheating (So They Stay Crispy)
Brussels sprouts are best fresh and hot, but leftovers can still be great if you reheat the right way. For crispy results,
reheat in a hot oven (425°F) or air fryer for a few minutes. Microwaving works, but it trades crisp for convenience.
If you’re planning ahead, you can trim and cut sprouts 1–2 days early and store them chilledthen cook right before serving.
Conclusion
The secret to Brussels sprouts everyone will love isn’t hiding in a rare spice or a complicated recipe. It’s in the method:
high heat, enough space, and a bold finish. Roast them until crisp, air fry them fast, steam-then-sear in a skillet,
fry them for restaurant crunch, or grill for smoky charthen add that final touch (lemon, vinegar, cheese, honey, or spice) that makes them pop.
Pick one of these five techniques and you’ll stop asking, “How do I make Brussels sprouts taste good?” and start asking,
“How do I stop people from eating them straight off the pan?”
Real-Life Brussels Sprouts Experiences ( of Hard-Earned Sprout Wisdom)
The first time I served Brussels sprouts to a group, I made the classic mistake: I aimed for “polite” sprouts. Medium heat, a little oil,
a sprinkle of salt. They came out… fine. Not offensive, not excitinglike the vegetable version of small talk. People ate them because they
were on the plate and because someone’s aunt was watching.
Then I learned the truth: Brussels sprouts don’t want to be “fine.” They want drama. They want high heat. They want a little char and a bold finish
like lemon juice or vinegar. The next time I roasted them at a much higher temperature on a preheated pan, the kitchen sounded like applause
that sizzle when sprouts hit hot metal is basically the opening act. When they came out, the outer leaves were crisp enough to crackle, and the cut
sides had that deep brown caramelization. People who claimed they “hated sprouts” wandered back for “just one more,” which is the most suspicious
sentence in cooking.
My biggest personal breakthrough was realizing how much space matters. I used to cram a whole pound onto one sheet pan because I wanted
fewer dishes. The sprouts punished me by steaming. Now I treat them like introverts at a party: they need personal space or they get weird.
Two sheet pans may feel excessive, but so is serving soggy sprouts.
The air fryer experience is a close second. I once made a batch for “a quick snack” while dinner was cooking, and I barely got them onto a plate
before half were gone. Air-fried sprouts are dangerously easy: shake the basket a few times, finish with Parmesan and lemon, and suddenly you’re
eating vegetables like they’re popcorn. The only downside is batch sizeair fryers teach patience, or at least teach you to buy a bigger air fryer.
For entertaining, skillet steam-then-sear is my quiet hero. If the oven is full (holiday chaos), the skillet method gives you crisp-tender sprouts in
one pan with zero baking-sheet real estate. I’ll brown them, add a splash of water, cover, then finish with lemon and toasted almonds. People assume
it took longer than it did, which is honestly one of the best compliments a cook can receive.
And yes, I’ve fried Brussels sprouts for a party. They disappeared in minutes. The lesson: if you toss crispy sprouts in a sweet-tangy glaze (honey and
vinegar is a cheat code), they stop being “the side dish” and become the main event. When a vegetable gets people hovering near the kitchen like it’s
a concert backstage, you know you’ve won.