Table of Contents >> Show >> Hide
- Why Pom-Pom Chicks Are the Perfect Easter Craft
- Supplies Checklist (Plus Easy Substitutions)
- Choose Your Pom-Pom Method
- Step-by-Step: The Classic Two-Pom Easter Chick
- Make It Kid-Friendly (and Classroom-Safe)
- Design Variations: Make Your Chick Unique
- Troubleshooting: Fix Common Pom-Pom Problems
- Ways to Use Pom-Pom Chicks Around the House
- Storage Tips: Keep Your Chicks Fluffy for Next Spring
- Crafting Experiences: What Happens When You Make a Whole Flock (Extra )
- Conclusion
There are two kinds of Easter decorations: the ones you buy because they’re adorable, and the ones you make because
they’re adorable and you get to tell everyone you made them. Pom-pom chicks live proudly in the second category.
They’re fluffy, cheerful, surprisingly forgiving for beginners, and they use supplies you probably already have
(yarn that’s been living in a drawer since the “I’m totally going to learn knitting” era counts).
In this guide, you’ll learn three reliable ways to make pompoms (tool, cardboard, and fork/fingers), then turn them
into a classic two-pom chick with eyes, a beak, tiny feet, and optional wings. You’ll also get design variations,
kid-friendly tips, troubleshooting, and decorating ideasbecause once you make one chick, you’ll accidentally make a whole flock.
Why Pom-Pom Chicks Are the Perfect Easter Craft
Pom-pom chicks hit that sweet spot between “easy enough for a casual craft night” and “cute enough to sit on the mantle.”
They work as basket fillers, place settings, gift toppers, spring garlands, and classroom crafts (with a few safety tweaks).
Best of all, a pom-pom chick doesn’t demand perfection. If it’s slightly lopsided, congratulationsyour chick has personality.
The “secret” to great pompoms is simple: more wraps = denser fluff, and tighter ties = longer-lasting shape.
Everything else is just styling.
Supplies Checklist (Plus Easy Substitutions)
Core supplies
- Yarn (yellow is classic; pastel mixes are adorable)
- Scissors (sharp scissors make cleaner trimming and less fuzz frustration)
- Yarn needle or large tapestry needle (helpful, not mandatory)
- Glue: tacky glue or craft glue (kid-friendly) OR hot glue (fast, strongadult use)
For the chick features
- Eyes: tiny googly eyes, black beads, or a fine-tip marker (marker works best for mini chicks)
- Beak: orange felt, foam, cardstock, or even a small triangle cut from an index card
- Feet (optional but charming): orange pipe cleaners, felt, or craft foam
- Wings (optional): yellow felt, craft foam, or little yarn “tufts”
Pick a pom-pom-making method
- Pom-pom maker tool (plastic clamshell style)
- DIY cardboard “donut” templates (from a cereal box)
- Fork or fingers (great for mini chicks)
Quick yarn tip: Chunky yarn makes extra-fluffy chicks fast, while medium-weight yarn makes smoother,
more “classic” chicks. Mixing two strands of medium yarn can mimic chunky yarn and add subtle color depth.
Choose Your Pom-Pom Method
Method 1: Pom-pom maker tool (fastest and neatest)
If you have a pom-pom maker, use it. Wrap yarn until it looks “too much,” because it usually isn’t. Cut along the groove,
tie tightly with a separate strand, knot twice, then trim into a sphere.
Method 2: Cardboard donut templates (classic DIY, very reliable)
Cut two matching cardboard rings (like tiny donuts). Hold them together and wrap yarn around the ring until the center
hole starts to look crowded. Cut around the outer edge, then tie a strong yarn strand tightly between the two cardboard
rings. Slide off the cardboard and trim.
Size guide: The outer circle becomes your pom-pom diameter. Bigger outer circle = bigger fluff ball.
A smaller inner hole makes denser pompoms but takes longer to wrap.
Method 3: Fork or fingers (best for mini chicks)
Wrap yarn around a fork (or two to three fingers) many times, slide a tie strand through the middle, knot tightly,
then cut the loops. This makes small pompoms quicklyperfect for tiny chicks, garlands, or cupcake toppers.
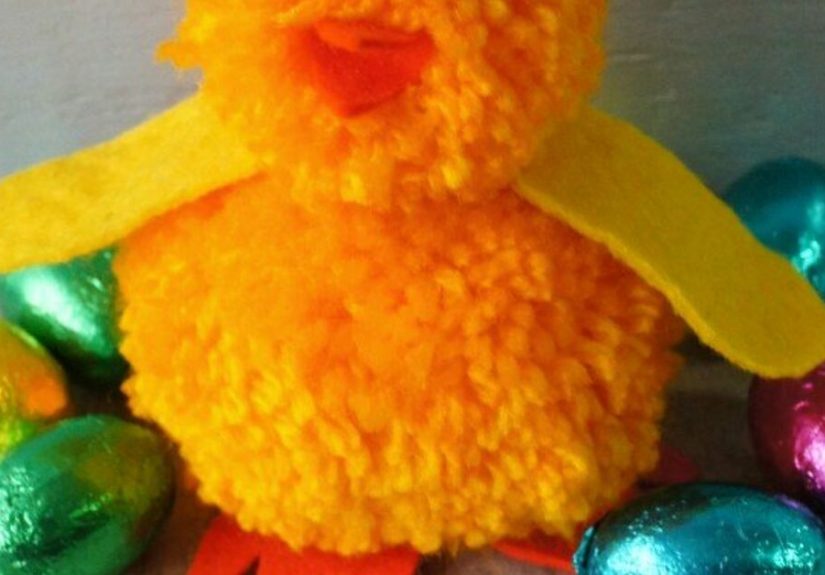
Step-by-Step: The Classic Two-Pom Easter Chick
This is the crowd-pleaser version: a larger body pom and a slightly smaller head pom. The proportions look “chick-like,”
and it sits nicely on a table without toppling (most of the timemore on that later).
Step 1: Make two pompoms (body and head)
- Body: Aim for about 2.5–3.5 inches wide for tabletop decor.
- Head: About 1.75–2.75 inches wide (roughly 70–80% of the body size).
If you’re using a tool, pick two sizes. If you’re using cardboard, cut two donut sets. If you’re using a fork/fingers,
make a smaller pom for the head and a larger for the body by wrapping more yarn (and/or using more fingers).
Step 2: Trim for shape (the “haircut phase”)
Fluff each pom and trim slowly. Rotate as you cut so it becomes round. If you want a cuter “chick silhouette,” trim the
head into a slightly tighter sphere and leave the body a little fluffier.
Pro move: Keep the long tie strands on both pompoms. They can help you attach parts securely and even
make a hanger loop if you want ornaments or garlands.
Step 3: Attach head to body
Hold the head where you want it (slightly forward gives that “baby chick” vibe). Then choose one:
- Sew/Wrap method (strongest): Use the tie strands to wrap the head onto the body, knot underneath, and hide ends in the fluff.
- Glue method (fastest): Add a small dot of glue where head meets body, press, and hold until set.
- Hybrid (recommended): Wrap once with the tie strands, then glue for extra stability.
Step 4: Add the face (eyes + beak)
For eyes, place them slightly above the midline of the head pom, about a thumbnail-width apart (closer looks “cuter,” wider looks “surprised”).
For the beak, cut a tiny orange triangle or diamond from felt/foam/cardstock and glue it between the eyes.
Mini chick tip: A fine-tip black marker for eyes is lightweight and less likely to fall off than tiny beads.
Step 5: Add feet (optional, but they help the chick stand)
Feet are both adorable and practical. Cut two short pieces of orange pipe cleaner, bend each into a simple three-toe shape,
and glue the straight end into the underside of the body pom. If using foam or felt, cut simple “duck feet” shapes and glue them on.
Step 6: Add wings (optional)
Cut two teardrop shapes from felt/foam and glue them to the sides of the body. Or, for a fuzzy look, tie two tiny mini-poms
to the sides as “fluff wings.”
Make It Kid-Friendly (and Classroom-Safe)
Pom-pom chicks are great for kids, but the tricky parts are tight knotting and sharp tools.
Here’s how to keep the fun high and the stress low:
- Pre-make the pompoms for younger kids, then let them decorate (eyes, beak, wings).
- Use tacky glue instead of hot glue; it dries slower but is safer for little hands.
- Skip small parts (beads, tiny eyes) for very young childrenuse felt circles or drawn-on faces.
- Adult handles scissors when trimming and cutting cardboard templates.
If you’re crafting with a group, set up stations: “Pom-pom making,” “Trimming salon,” and “Face + accessories.” It feels organized,
and everyone gets to be the chick’s stylist at least once.
Design Variations: Make Your Chick Unique
Once you’ve made the classic chick, you can customize like you’re running a tiny springtime fashion house.
Try these variations:
1) Speckled “egg chick”
Wrap yellow yarn with a second strand of white or light brown. The mixed strands create a speckled look without any extra steps.
2) Pastel parade
Use pale pink, mint, lavender, or sky blue yarn for a soft Easter palette. Add a tiny felt bowtie and you’ve got a formal chick.
3) Fluffy tuft head
Glue a tiny pinch of yarn on top of the head as a “baby feather tuft.” It’s small, silly, and disproportionately charming.
4) Tiny chicks for garlands
Make 1-inch fork pompoms, add drawn-on eyes, and string them as a garland for mantels, windows, or classroom bulletin boards.
5) Keychain or backpack buddy
Leave one tie strand long, knot it into a loop, and add a keyring. (Use strong knotting or a dab of glue on the knot.)
6) “Hatching” chick
Set your chick in a cracked plastic egg or a paper egg “shell” made from cardstock halves. It’s a whole story in one tiny craft.
7) Bunny-chick crossover (because why not)
Add two tiny felt ears to the head. Is it a chick? Is it a bunny? It’s Easter. Rules are flexible.
Troubleshooting: Fix Common Pom-Pom Problems
“My pompom looks thin and sad.”
Add more wraps next time. If it’s already cut, you can sometimes “bulk it up” by teasing fibers outward and trimming less aggressively.
But the real fix is density: more yarn + tight tie.
“My pompom is lumpy.”
Keep trimming while rotating the pom in your hand. Think of it like a 360-degree haircut. If one spot is flat, fluff it, then trim gently.
“The head keeps sliding off.”
Use the wrap-and-knot method with tie strands, or rough up the contact area slightly by parting the fluff so glue touches yarn fibers, not just surface fuzz.
“My chick won’t stand up.”
Add feet (they work like tiny stabilizers), or trim a small flat “base” on the underside of the body pom. You can also hide a small coin-sized cardboard circle underneath as a platform.
“Glue isn’t holding.”
Tacky glue needs time and pressure. Hold pieces together longer, or switch to hot glue (adult use). For the strongest bond, combine knotting + glue.
Ways to Use Pom-Pom Chicks Around the House
- Easter table place settings: Put one chick at each plate with a name tag.
- Basket filler: Mix chicks with shredded paper grass (less mess if you use crinkle paper).
- Spring mantel garland: String mini chicks with pastel pompoms in between.
- Gift toppers: A chick on a wrapped present instantly upgrades your wrapping game.
- Tiered tray decor: Add a couple of chicks near faux eggs and small florals.
- Party favors: Make smaller chicks and let guests “adopt” one on the way out.
If you’re decorating for a crowd, pick one “signature detail” (like speckled yarn or tiny bowties) so all your chicks look coordinated without being identical.
Storage Tips: Keep Your Chicks Fluffy for Next Spring
Pompoms can get squished, but they bounce back. Store finished chicks in a shoebox or plastic bin with light padding.
Avoid heavy stacking. If a chick looks flattened later, fluff it with your fingers and give it a quick trim to restore the round shape.
If you used tacky glue, make sure everything is fully dry before storagenobody wants an accidental “chick-to-chick friendship bond” that can’t be undone.
Crafting Experiences: What Happens When You Make a Whole Flock (Extra )
Making pom-pom chicks is one of those crafts that starts out as a single, innocent project and ends with you looking at a table full of tiny yarn birds like,
“Well… I guess I run a chick sanctuary now.” That’s not a flaw in the craft. That’s the magic. The process is repetitive in the best waywrap, tie, cut, fluff, trim
and each step has a satisfying “before and after” payoff. The first experience most people have is realizing how much difference one small change makes.
Wrap the yarn 20 more times? The chick looks plush and premium. Tie the center just a bit tighter? Suddenly it holds its shape like it’s been doing Pilates.
Another common experience: the “haircut confidence curve.” The first trim is cautioustiny snips, lots of turning the pom, mild panic about cutting too much.
Then you learn that trimming is where the chick becomes a chick. A shaggy pom is fine, but a rounded pom looks intentional. Once that clicks, people start giving
their chicks styling choices: a fluffier body, a neat head, a little tuft on top. This is also when the craft becomes social. Someone inevitably claims the role of
“Chief Barber,” another person becomes “Face Designer,” and the group starts debating eye placement like it’s a high-stakes art critique (spoiler: closer eyes read cuter,
wider eyes read goofier, and both are acceptable in the Easter universe).
If you craft with kids, you’ll notice the project naturally matches different ages to different tasks. Younger kids love picking colors and pressing on features, while older kids
can handle wrapping yarn and knotting with a little coaching. The funniest moment often happens when the chicks start getting personalities. One ends up with big eyes and becomes
“Surprised Chick.” One is slightly lopsided and becomes “Sleepy Chick.” Someone adds a bowtie and insists it’s “Fancy Chick.” And suddenly you’re not just making decorationsyou’re
making a cast of characters. That’s why pom-pom chicks are perfect for classrooms, scout groups, and family nights: they quietly turn into storytelling props.
There’s also a very real, very universal experience of underestimating how much yarn pompoms consume. The first chick feels like it barely used anything. Then the second chick happens.
Then the third. Then you realize your “little scrap yarn project” is actually a yarn buffet. The upside is that it’s a great way to use leftoversespecially if you enjoy speckled or
marled effects by wrapping two strands at once. It’s also a gentle lesson in planning: if you’re making a dozen chicks, pre-cut tie strands, keep scissors handy, and set up a trimming
area because yarn confetti will appear. (It’s not a mess. It’s… seasonal atmosphere.)
Finally, the best experience is the “where can I put these?” phase. Pom-pom chicks don’t belong in a drawer. They want to be seen. People line them up on windowsills, perch them on
bookshelves, tuck them into plants, and turn them into place cards. The craft is simple, but the joy is surprisingly biglike spring itself, showing up soft and bright and slightly
ridiculous in the best way.