Table of Contents >> Show >> Hide
- Why Under-Cabinet Lighting Works So Well
- Step 1: Choose the Right Type of Under-Cabinet Light
- Step 2: Plan Like a Pro (So It Looks Pro)
- Step 3: Gather Tools and Supplies
- Step 4: Installation Instructions by Type
- Step 5: Controls That Make the Lighting Feel “Expensive”
- Common Mistakes (And How to Avoid Them)
- Troubleshooting Quick Fixes
- When to Call a Pro
- Conclusion: Brighten the Countertop, Not Your Stress Level
- Real-World Experiences: What People Learn After the Box Is Open (Bonus ~)
Under-cabinet lighting is the kitchen upgrade that makes you feel instantly more competent. Chop an onion? Cinematic.
Read a recipe? Suddenly you’re not holding your phone like a tiny campfire. And yesyour countertops will look like
they belong in a “before-and-after” reveal.
The best part: many under-cabinet systems are DIY-friendly if you choose the right type (plug-in or low-voltage).
Hardwired installations can be fantastic toojust know when it’s time to call in a licensed electrician.
Why Under-Cabinet Lighting Works So Well
- Better task lighting: Light lands exactly where you prep, chop, and assemblewithout your body casting a shadow.
- Layered lighting: It complements ceiling lights and pendants, creating a more comfortable kitchen “scene.”
- Visual polish: Even basic cabinets look higher-end when the lighting is even and glare-free.
Step 1: Choose the Right Type of Under-Cabinet Light
Option A: LED Tape/Strip Lights (Most Flexible)
LED tape is great for long runs and a clean, modern lookespecially when installed in an aluminum channel with a diffuser
(translation: fewer “dot-dot-dot” hot spots). It’s usually low-voltage (12V or 24V) powered by a driver/transformer.
- Pros: Even light, easy to customize, fits tricky cabinet layouts.
- Cons: Needs a driver, careful wire routing, and sometimes extra connectors.
Option B: Light Bars (Easy, “Click-It-Together” Style)
Light bars are rigid fixtures that mount under the cabinet and often link together. Many models offer plug-in and/or direct-wire options.
They’re a sweet spot for DIY because mounting is straightforward and the light distribution is predictable.
- Pros: Simple mounting, neat finish, fewer accessories to guess.
- Cons: Less flexible around corners and odd cabinet segments.
Option C: Puck Lights (Best for Highlighting Zones)
Pucks create circles of lightperfect for highlighting coffee stations, display cabinets, or small prep areas.
If you want a continuous “wash” of light across the countertop, tape or bars usually win.
- Pros: Quick install, great for targeted lighting.
- Cons: Can create scallops/shadows between fixtures if spaced too far apart.
Power Styles: Plug-In vs. Battery vs. Hardwired
- Plug-in: DIY-friendly. Best when you can hide the cord and have a nearby outlet (often inside a cabinet).
- Battery/rechargeable: Fastest install. Great for renters or occasional-use spaces (pantry, wet bar).
- Hardwired: Cleanest look and “built-in” feel. Often requires electrical work and code compliancehire a pro if you’re not experienced.
Step 2: Plan Like a Pro (So It Looks Pro)
Pick Brightness That Makes Sense
For most kitchens, aim for about 200–500 lumens per linear foot for task lighting.
If you only want a soft glow at night, you can go lowerbut adding a dimmer is usually the smartest “have it both ways” move.
Choose a Color Temperature You Won’t Regret
- 2700K–3000K: Warm, cozy, classic “home” feel.
- 3500K–4000K: Neutral whiteclean and practical for cooking.
- 5000K+: Very crisp/coolgreat for workshops, sometimes harsh for kitchens.
Tip: try to keep under-cabinet lighting in the same general color temperature family as your other kitchen lights.
Mixed temperatures can make the space feel “off,” like your kitchen can’t decide what decade it’s in.
Look for High CRI (Color Rendering Index)
If you’ve ever sliced a tomato that looked gray under bad light, you already understand CRI emotionally.
Choose LEDs with high CRI (ideally 90+) for more accurate, appetizing colorespecially in food prep areas.
Plan Placement to Reduce Glare and Shadows
Mount strips/bars toward the front half of the cabinet bottomoften about 1–2 inches from the front edge.
This pushes light onto the countertop (where you need it) instead of creating a bright backsplash spotlight.
Sketch Your Layout (Yes, Really)
- Measure each cabinet run that needs light.
- Mark obstacles: sinks, ranges, microwaves, cabinet lips/trim, and corners.
- Decide where the power will live: inside an upper cabinet, inside a sink base, or at a dedicated hardwired junction.
- Decide how you’ll control it: wall switch, in-line dimmer, remote, smart app, or motion sensor.
Step 3: Gather Tools and Supplies
Basic Tools
- Tape measure, pencil, and painter’s tape (for mockups)
- Drill/driver and bits (plus a hole saw or spade bit for pass-through holes)
- Screwdriver set
- Wire management: clips, cable staples rated for low-voltage, or adhesive raceway
- Cleaning supplies: denatured alcohol or degreaser + lint-free cloth
Supplies (Depending on System)
- LED tape/bars/pucks
- Driver/transformer (matched to your LED voltage and wattage needs)
- Connectors (corner connectors, jumpers, splitters as needed)
- Dimmer/control (compatible with your LEDsespecially important to avoid flicker)
- Aluminum channel + diffuser (highly recommended for tape lights)
Step 4: Installation Instructions by Type
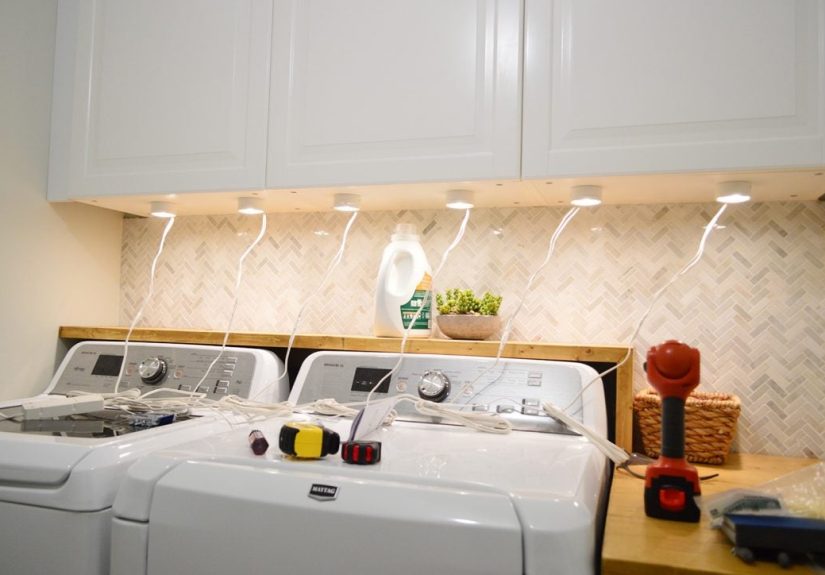
A) Installing Plug-In Under-Cabinet Lights (Most DIY-Friendly)
-
Dry-fit the fixtures. Hold them under the cabinets and mark mounting hole locations with pencil.
Use painter’s tape to visualize alignment. -
Clean the mounting surface. Oils and dust reduce adhesion and can even mess with screw seating.
Wipe the cabinet underside and let it fully dry. -
Mount the fixtures. If you’re using screws, pre-drill small pilot holes to prevent splitting.
For linkable bars, follow the manufacturer’s spacing and connection directions. -
Route cords neatly. The goal is “invisible,” not “spider habitat.”
Run cords along cabinet edges, hide them in corners, and use clips or raceway.
If plugging into an outlet inside a cabinet, drill a neat pass-through hole at the back or side. - Test and adjust. Plug in, turn on, check for dark gaps, glare, and shadowsthen fix before you commit to final cable management.
B) Installing LED Tape Lights (Cleanest Look When Done Right)
-
Confirm voltage and power. Identify whether your tape is 12V or 24V and calculate total wattage.
Add a safety buffer so your driver isn’t working at max capacity all day. -
Plan for voltage drop. Long runs can dim at the far end. If your layout is large, you may need power injection,
a higher-voltage system, or shorter parallel runs. -
Install channels (recommended). Mount aluminum channels under cabinets where the tape will go,
then snap in the diffuser after the tape is installed. This improves heat dissipation and smooths the light. -
Prep surfaces meticulously. Adhesive-backed tape lights only stick well to clean, dry surfaces.
Degrease, wipe, and let dry fully. - Cut only at marked cut lines. LED tape has designated cut pointsignore them and you’ll turn a working light into a sad ribbon.
-
Connect sections thoughtfully. Use jumpers to cross gaps (like over a sink) and corner connectors for turns.
Keep connections accessible when possible for future troubleshooting. -
Mount the tape. Peel backing gradually and press firmly as you go. Don’t stretch the tape.
If your cabinets have a front lip, hide the tape behind it for a cleaner view from standing height. -
Place the driver where it can breathe. Drivers generate heat. Don’t bury them in insulation or cram them into a space with zero airflow.
Many people place drivers inside an upper cabinet, then drill discreet pass-through holes for low-voltage wiring. - Test before finalizing. Power it on, confirm even brightness and consistent color, then tidy and secure all wiring.
C) Hardwired Under-Cabinet Lighting (When You Want “Built-In”)
Hardwired lighting can look the most seamless, but it also carries the most responsibility. If you aren’t comfortable working with
household wiring, hire a licensed electrician. Many retailers explicitly recommend professional installation for hardwired fixtures.
At a high level, hardwired projects typically involve routing cable through cabinets or walls to each fixture location, making proper
junction box connections, and tying controls into a switch/dimmer in a code-compliant way. Kitchens also have special electrical rules,
so follow local code and permitting requirements.
Step 5: Controls That Make the Lighting Feel “Expensive”
Dimmers (Usually Worth It)
Dimming transforms under-cabinet lights from “surgery suite” to “soft evening glow.” The catch: LEDs can flicker if the dimmer and LED
driver/fixture aren’t compatible. When in doubt, use manufacturer compatibility tools or recommended dimmers for your exact setup.
Smart Controls
- Smart plugs: easiest for plug-in systems.
- Smart strips: great if you want app control, scenes, or voice commands.
- Smart switches/dimmers: best for hardwired systems (again: verify compatibility).
Motion Sensors
Motion sensors are fantastic for late-night kitchen trips when you want light, not a full Broadway spotlight.
They’re also great in pantries and laundry rooms.
Common Mistakes (And How to Avoid Them)
-
Mounting too far back: If the light is near the wall, you’ll brighten the backsplash more than the workspace.
Mount closer to the front for better countertop coverage. - Ignoring glare: Glossy countertops can reflect individual LEDs. Use a diffuser/channel and adjust placement.
-
Underpowering the driver: If your driver is undersized, you may get dimming, flicker, or early failure.
Size it with headroom. - Skipping compatibility checks: Flicker often comes from mismatched dimmers/drivers/fixtures.
- Messy wire routing: The lighting can be perfect, but if cords dangle like jungle vines, the magic disappears.
Troubleshooting Quick Fixes
Flickering
- Check dimmer compatibility and driver type.
- Confirm all connectors are fully seated.
- Make sure the driver isn’t overloaded.
Dim End of a Long Strip
- Shorten the run, add power injection, or use a better layout (parallel runs instead of one long run).
- Consider 24V tape for longer distances where appropriate.
Adhesive Won’t Stick
- Clean again (seriously), then use channels or additional mounting clips instead of relying on tape alone.
- Avoid sticking to dusty, oily, or textured surfaces without proper prep.
When to Call a Pro
- You want a hardwired system and aren’t experienced with electrical work.
- You need a new switch location, new circuit, or work inside finished walls.
- You’re unsure about code requirements, permits, or safe routing methods.
Conclusion: Brighten the Countertop, Not Your Stress Level
Installing under-cabinet lighting is one of the highest-impact upgrades you can dobecause it makes your kitchen more functional
every single day. Choose the right system for your comfort level, plan your layout, prioritize glare control and color quality,
and don’t wing the power/controls piece. Your future self (and your future onions) will thank you.
Real-World Experiences: What People Learn After the Box Is Open (Bonus ~)
Here’s the funny thing about under-cabinet lighting: the “installation” isn’t usually the hard part. The hard part is everything the
instructions assume your kitchen already haslike perfectly placed outlets, magically clean cabinet bottoms, and corners that behave.
After enough installs (and enough homeowner stories), a few patterns show up.
Experience #1: The Great Adhesive Betrayal. A lot of people start with LED tape because it looks simple: peel, stick, done.
Thentwo weeks latergravity sends a polite reminder that cooking creates grease, steam, and heat. The tape slowly sags, then drops,
dangling like a sad glow-worm. The fix is almost always the same: clean the surface properly (degrease, wipe, dry), and if you want the
setup to last, use an aluminum channel or mounting clips. Adhesive can be part of the plan, but it shouldn’t be the whole plan.
Experience #2: “Why does my countertop look… polka-dotted?” That dotted reflection usually happens with bare LED tape on a glossy
surface. The LEDs are technically “even,” but the reflection is not. The best upgrade is a diffuser lens (again: channels earn their keep),
plus slightly adjusting placement toward the cabinet front. People are often surprised how much a one-inch shift changes the look. It’s like
moving a selfie ring lightsame device, wildly different vibe.
Experience #3: The Flicker Mystery That Wasn’t a Mystery. Many flicker stories end with the same plot twist: dimmer incompatibility.
Someone installs beautiful lights, adds a dimmer for ambience, and suddenly the kitchen looks like it’s sending Morse code.
The fix is rarely “replace everything.” It’s usually “match the dimmer to the LED driver/fixture,” or use the recommended control from the
manufacturer ecosystem. Once people swap to a compatible dimmer/control, the flicker disappears and they wonder why they didn’t start there.
Experience #4: The Driver Hide-and-Seek Game. Low-voltage systems need a driver, and drivers need a home. Homeowners often try to
hide it in the tightest cabinet corner possibleuntil the cabinet becomes a warm little tech sauna. A better real-world approach is placing the
driver where it has space (often an upper cabinet), then drilling neat pass-through holes for wiring. The “I don’t want to drill” feeling is
understandable, but one clean hole beats a cord draped across the backsplash like it’s auditioning for a drama.
Experience #5: Overbuying brightness (and then loving the dimmer). People worry about not having enough light, so they go big.
The first night, the under-cabinet lights are so bright the cutting board casts a shadow with its own personality. But instead of regretting it,
they add dimmingand realize the best setup is flexibility: bright for prep, low for mood, medium for “I’m just making tea.”
The takeaway from these experiences is simple: success isn’t about installing lightsit’s about installing comfort. Plan the layout,
control glare, keep wiring tidy, and choose a system you can maintain. The best under-cabinet lighting is the kind you don’t notice… until it’s off.