Table of Contents >> Show >> Hide
- Part 1: Get Your Baked Goods Ready
- Part 2: How to Wrap Different Baked Goods
- Step 4: Wrap Cookies Like a Bakery Pro
- Step 5: Package Brownies and Bars Neatly
- Step 6: Wrap Loaves and Breads to Stay Fresh
- Step 7: Protect Cupcakes and Frosted Treats
- Step 8: Line and Fill Gift Boxes the Right Way
- Step 9: Use Cellophane, Jars, and Tins for Easy Gifting
- Step 10: Add Labels and Storage Instructions
- Step 11: Wrapping Baked Goods for Shipping
- Step 12: Store or Freeze Extras Properly
- Extra Tips for Gorgeous (and Practical) Baked Good Wrapping
- Real-Life Experiences: What Bakers Learn the Hard Way
You’ve baked a mountain of cookies, a perfectly golden loaf of banana bread, and maybe
a pan of brownies “for the office” (sure, Jan). Now comes the part nobody talks about:
how to wrap baked goods so they stay fresh, look cute, and don’t arrive
as crumbs and frosting smears.
Thoughtful wrapping isn’t just about aesthetics. The way you package cookies, brownies,
cakes, and bread affects how long they stay fresh, whether they get soggy, and if they
survive a car ride or cross-country shipping. Below you’ll find a simple
12-step guidewith picture suggestionsto help you wrap baked goods
like a pro, plus extra real-world tips and experiences at the end.
Part 1: Get Your Baked Goods Ready
-
Step 1: Let Everything Cool Completely
It’s tempting to wrap warm brownies “just for a minute,” but don’t do it. Warm baked
goods release steam, and if you trap that moisture, you’ll end up with soggy tops and
condensation inside your wrapping. Let cookies, bars, and muffins cool completely on
a wire rack, and give loaves and cakes extra time so the center isn’t still warm.Picture idea: A tray of cookies on a wire rack with a thermometer or little “cooling” icon.
-
Step 2: Sort by Type and Fragility
Not all treats should be wrapped the same way. Sturdy items like chocolate chip cookies,
brownies, and pound cake tolerate tighter packaging and mailing. Delicate itemsmacarons,
frosted cupcakes, flaky pastriesneed more cushioning and often shouldn’t be mailed at all.Group items into categories: sturdy cookies and bars, loaves and breads,
frosted or filled treats, and extra fragile. This will help you decide
what type of wrapping and container each group needs.Picture idea: Different baked goods sorted into labeled sections on a table.
-
Step 3: Choose the Right Wrapping Materials
Your basic wrapping toolkit can be surprisingly simple:
- Parchment paper – Great for cookies, bars, and lining boxes.
- Wax paper – Works well for sandwiches of cookies or bars.
- Plastic wrap or cling film – Excellent for sealing moisture in breads and cakes.
- Aluminum foil – Helpful for wrapping loaves for freezing or transport.
- Cellophane bags – Ideal for individual treats or small stacks of cookies.
- Reusable wraps or tea towels – A more eco-friendly, giftable option.
For presentation, add ribbon, twine, labels, and stickers to dress things up without
sacrificing freshness.Picture idea: Flat lay of parchment, plastic wrap, cellophane bags, ribbons, and boxes.
Part 2: How to Wrap Different Baked Goods
-
Step 4: Wrap Cookies Like a Bakery Pro
For gifting or shipping, pair sturdy cookies back-to-back and wrap each pair in
plastic wrap or wax paper. This keeps the pretty tops from rubbing against anything and
helps prevent breakage. Then:- Stack wrapped pairs in a tin, plastic container, or gift box.
- Fill any empty spaces with tissue paper, crumpled parchment, or food-safe padding.
- Make sure nothing rattles when you gently shake the container.
For a simple gift, you can also stack cookies into a neat “log,” wrap tightly in parchment,
twist the ends like a candy wrapper, and tie with ribbon.Picture idea: A cookie “log” in parchment, twisted at the ends, with a cute label.
-
Step 5: Package Brownies and Bars Neatly
Bars and brownies are naturally sturdy, but the cut edges can dry out. Once cooled and cut:
- Wrap each bar in a small piece of parchment or wax paper.
- Then stack them in a snug tin or box lined with parchment.
- Add an extra layer of parchment between layers if the tops are sticky or frosted.
For bake sales or office treats, you can wrap each brownie in plastic wrap and then add a
paper label or sticker on top for a professional look.Picture idea: Individually wrapped brownies with flavor labels.
-
Step 6: Wrap Loaves and Breads to Stay Fresh
For quick breads (like banana or pumpkin) and sandwich loaves, you want to balance
freshness and airflow. A common approach is:- Wrap the completely cooled loaf tightly in plastic wrap.
- For gifting, add a decorative outer layer of parchment, kraft paper, or a tea towel.
- Tie with twine or ribbon and add a tag with the name and date.
For crusty artisan bread, short-term storage works well in a paper bag or wrapped in a
clean towel, while long-term storage is best in plastic wrap plus a freezer bag in the
freezer.Picture idea: A loaf wrapped in parchment and tied with baker’s twine.
-
Step 7: Protect Cupcakes and Frosted Treats
Frosting + gravity = chaos if you’re not careful. Cupcakes and frosted items should go
in a rigid container where tops don’t touch the lid. Use:- Insert-style cupcake boxes.
- Repurposed egg cartons for mini cupcakes.
- Tight but tall plastic containers with a non-slip liner at the bottom.
If you must wrap individually, chill the cupcakes first to firm up the frosting, then
wrap loosely in plastic or place each in a tall cellophane bag tied above the frosting.Picture idea: Cupcakes in a bakery-style box with clear window.
-
Step 8: Line and Fill Gift Boxes the Right Way
Whether you’re wrapping baked goods for Christmas, birthdays, or a random “I baked too
much, please take some,” boxes make everything feel more special. To pack a box:- Line the bottom and sides with parchment or wax paper.
- Arrange the heaviest treats at the bottom (like bars and sturdy cookies).
- Place more delicate items on top with separators in between.
- Fold the parchment over the top before closing the lid.
Tie a ribbon around the closed box and add a small card with the contents and any
storage instructions.Picture idea: Open gift box with neatly arranged cookies and bars, lined with parchment.
-
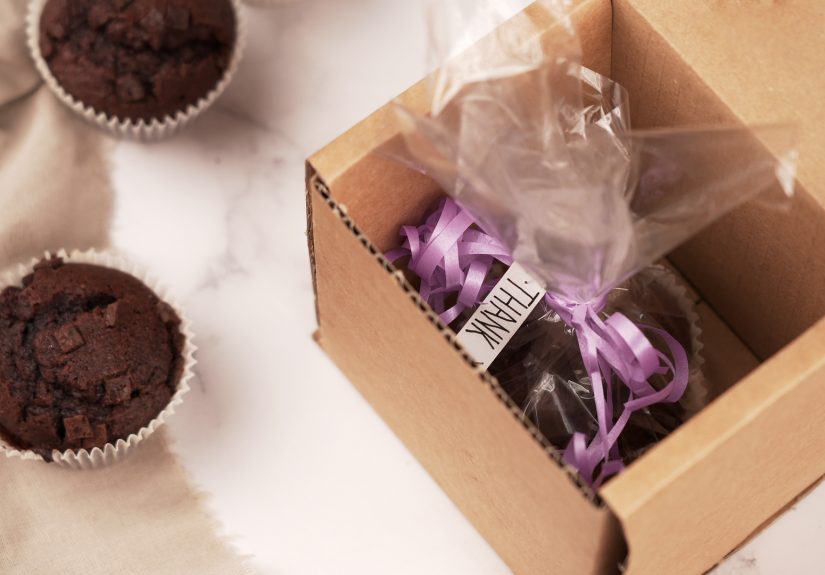
Step 9: Use Cellophane, Jars, and Tins for Easy Gifting
For a quick, charming presentation:
-
Cellophane bags: Perfect for small stacks of cookies or homemade
candies. Add a ribbon and label for instant gift vibes. -
Jars: Mason jars make adorable containers for mini cookies, biscotti,
or granola. Just make sure your treats are dry and fully cooled. -
Tins: Classic cookie tins protect fragile treats and stack well if
you’re shipping multiple containers.
Picture idea: Assorted tins and jars filled with cookies, arranged like gift sets.
-
Cellophane bags: Perfect for small stacks of cookies or homemade
-
Step 10: Add Labels and Storage Instructions
A pretty package is great, but people also want to know:
“What is this?” and “How long will it last?”Include a simple label with:
- Name of the baked good (e.g., “Orange Cranberry Biscotti”).
- Date baked.
- Basic storage tips: “Best within 3–4 days at room temp” or “Refrigerate and enjoy within 3 days.”
This is especially important for items with dairy-based frosting, cream cheese fillings,
or eggy custards, which should be stored in the refrigerator and enjoyed sooner.Picture idea: Close-up of a handwritten tag tied to a wrapped loaf.
-
Step 11: Wrapping Baked Goods for Shipping
Shipping cookies or bars to friends and family? Think
double-container protection:- Wrap individual cookies or pairs in plastic wrap or place in small bags.
- Arrange them snugly in a sturdy tin or plastic container with cushioning.
- Place that container in a shipping box with padding (crumpled paper, bubble wrap).
- Make sure nothing shifts when you shake the box gently.
Mark the box “Fragile” and “Perishable,” and choose the fastest reasonable shipping
method so your baked goods don’t spend a week touring distribution centers.Picture idea: Cross-section diagram of cookies in tin, tin in box, box with padding.
-
Step 12: Store or Freeze Extras Properly
If you’re wrapping baked goods for later instead of gifting, storage matters as much
as presentation:-
Cookies and bars: Store in an airtight container at room temperature.
Freeze for longer storage in well-sealed bags or containers. -
Breads and loaves: For a few days, keep at room temperature, wrapped.
For longer, wrap tightly in plastic and then in foil or a freezer bag and freeze. -
Cakes: Unfrosted cakes can be wrapped in plastic and frozen; frosted
cakes usually do better chilled first before wrapping.
Label everything with what it is and the date frozen. Future you will be very grateful.
Picture idea: Freezer drawer with neatly labeled wrapped loaves and containers.
-
Cookies and bars: Store in an airtight container at room temperature.
Extra Tips for Gorgeous (and Practical) Baked Good Wrapping
Think “Layers”: Inner Freshness, Outer Style
A good rule of thumb is functional inside, decorative outside. Use plastic
wrap, foil, or airtight bags as the inner layer to keep moisture where it belongs. Then
layer on a pretty outer wrap: parchment, kraft paper, a tea towel, or a reusable fabric
wrap. That way, the gift still looks charming when the recipient opens the bag or box,
but the goodies stay delicious.
Go Eco-Friendly Where You Can
If you’d like to avoid single-use plastic, reusable wraps, beeswax wraps, glass containers,
and cloth napkins can all stand in as wrapping materials. Pair them with a tag that encourages
the recipient to reuse the wrap. It becomes a “gift within a gift.”
Safety First with Perishable Fillings
Any baked goods with fresh cream, custard, cream cheese frosting, or lots of dairy should
be treated like perishable food. Store them in the refrigerator, include a note if you’re
gifting them, and avoid shipping them unless you can use cold packs and fast delivery.
Real-Life Experiences: What Bakers Learn the Hard Way
Every home baker has at least one wrapping disaster story. Maybe you lovingly decorated
a dozen cupcakes, nestled them into a container, and then watched them tip over in the car
so every swirl of frosting became a smear. Or perhaps you mailed a box of cookies only to
hear, “We loved the cookie crumbs!”
One common mistake is not filling the empty space. Think of your container
like a suitcase: if your clothes are crammed on one side and there’s nothing on the other,
everything shifts and wrinkles. Baked goods are the same. Tiny gaps inside a box turn into
runway space for cookies to slide and crash. Crumpled parchment, tissue paper, or even
clean kitchen towels make great gap-fillers.
Another lesson many bakers learn is that cooling time is non-negotiable.
A warm loaf wrapped in plastic might look fine at first, but by the time it reaches your
friend, the crust is gummy and the inside is weirdly damp. Letting bread cool completely
not only prevents condensation, it also lets the texture finish setting so slices hold up
better when served later.
Then there’s the “I didn’t label anything” problem. If you’ve ever pulled a mystery bundle
out of the freezercould be banana bread, could be meatloafyou already know how un-fun
that guessing game is. The same goes for gifts. A simple label with the name, date, and
storage advice turns your treats from “Random sweet thing?” into something reassuringly
clear: “Chocolate espresso shortbread – best within 5 days.”
Many experienced bakers also swear by test-shipping or test-transporting.
That doesn’t mean you need to mail yourself a box of cookies (although, honestly, that
sounds kind of amazing). But you can simulate the trip. Pack your cookies or bars as if
you were mailing them, close the box, and give it a good shake. If you hear rattling or
feel things slide around, you know you need more padding or tighter wrapping.
If you’re wrapping baked goods for holidays, a smart trick is to freeze in advance
and wrap later. Bake cookies or quick breads ahead of time, cool completely, wrap
well for the freezer, and then pull them out as needed, adding your cute outer packaging
right before gifting. This spreads out the workload and keeps you from trying to bake, wrap,
and deliver everything in one wildly stressful day.
Over time, you’ll develop your own “signature style.” Maybe you’re the person who always
delivers banana bread wrapped in brown parchment with a handwritten recipe card attached.
Maybe you’re the one known for cellophane bags full of color-coordinated cookies. The key
is consistency: pick materials you like working with and that fit your budget, then refine
your system so wrapping is quick and almost automatic.
The very best feedback you can get is simple: “Your package arrived, and everything was
perfect.” When that happens, mentally bookmark what you didhow you wrapped, what container
you used, how full the box was, even how long it took to arrive. That kind of informal
“data” helps you tweak your method so your baked goods show up in style every time.
In the end, how you wrap baked goods is really just an extension of your
baking itself. It’s thoughtful, it’s personal, and it says, “I cared enough to make this
and also to make sure it got to you in one delicious piece.” And honestly? That might be
the sweetest part of all.
SEO JSON