Table of Contents >> Show >> Hide
- What Are Graduation Cords (and Why Do They Exist)?
- Before You Start: 3 Quick Checks That Save a Lot of Stress
- How to Wear Graduation Cords: 8 Steps
- Step 1: Put on your outfit and gown first
- Step 2: Add your stole (if you’re wearing one) and make it even
- Step 3: Put on your hood (if applicable) and secure it correctly
- Step 4: Find the center point of your cord(s)
- Step 5: Drape the cord around the back of your neck
- Step 6: Layer multiple cords without tangling
- Step 7: Make final adjustments (length, twists, and “cord behavior”)
- Step 8: Put your cords on last, then leave them alone
- Common Mistakes (and How to Fix Them Fast)
- Graduation Cord Etiquette: What Most Schools Expect
- FAQ: How to Wear Graduation Honor Cords
- Real-World Experiences: What Graduation Cords Are Like in the Wild (Extra Tips You’ll Actually Use)
- Conclusion
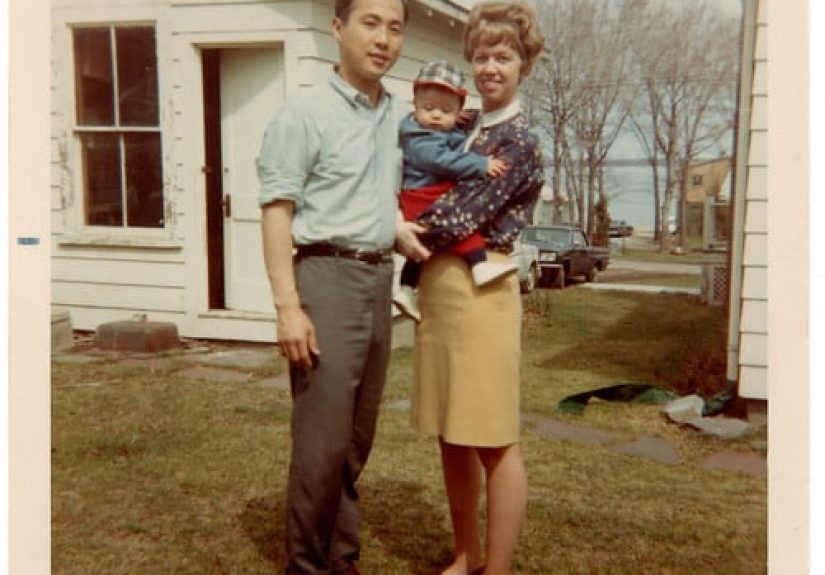
Graduation day is basically a fashion show with diplomas. You’ve got the cap. You’ve got the gown.
You’ve got family members shouting your full government name from the bleachers. And thenbamyou remember the
honor cords sitting on your chair like two fancy ropes asking, “So… where do we go?”
The good news: wearing graduation cords is simple. The even better news: doing it correctly keeps you from
accidentally looking like you’re auditioning for a nautical-themed musical. This guide walks you through
exactly how to wear graduation honor cords (including multiple cords), how they should sit with a stole or hood,
and how to avoid the most common regalia mishaps.
What Are Graduation Cords (and Why Do They Exist)?
Graduation cordsoften called honor cordsare braided ropes worn around the neck during
commencement. Schools and organizations use them to recognize achievements like academic honors, leadership,
service, membership in honor societies, and sometimes specific programs or affinities.
Here’s the key thing to know: there’s no single national rulebook for cord meanings. Cord colors
and what they represent can vary by school, department, or organization. So if your cord is gold, it might mean
academic excellence at one campus and “I survived calculus” at another (both are heroic, honestly).
Before You Start: 3 Quick Checks That Save a Lot of Stress
1) Confirm you’re actually supposed to wear the cord
Use the cords you were officially given or told to wear by your school or organization. If you’re unsure,
check your commencement instructions or email from your department. Graduation is not the day to freestyle
your regalia like it’s a “choose your own adventure” novel.
2) Identify what else you’re wearing: stole, hood, medals, leis
Cords are easy on their own, but layering matters. A stole (also called a sash) drapes over your shoulders
down the front. A hood (usually for master’s or doctoral graduates) sits around the neck and hangs down the back.
Medals typically hang at the chest. Lei flowers… do what they want.
3) Decide your “final look” and do a 30-second practice run
Practice once in front of a mirror. It’s the difference between “polished graduate” and “why is my cord trying to
escape out the side of my gown?”
Quick checklist:
- Steamed/ironed gown (or at least not aggressively wrinkled)
- Comfortable shoes you can walk in
- Safety pins or small clips (optional but clutch)
- Phone, ID, tickets, and anything your school requires
How to Wear Graduation Cords: 8 Steps
-
Step 1: Put on your outfit and gown first
Start with your clothes (business casual or whatever your school recommends), then your gown. Zip it up
or fasten it so the neckline sits properly. Cords sit at the neck and shouldersso you want the gown aligned
before you add anything on top.Example: If your gown is shifted to one side and you add cords, the cords will look uneven even if they’re not.
Fix the foundation firstlike any good life advice, honestly. -
Step 2: Add your stole (if you’re wearing one) and make it even
If you have a graduation stole, place it around your neck so both ends hang evenly down the front of your gown.
Smooth it flat over your shoulders.Pro move: Use your gown zipper or the center seam as a visual “middle line.” If your stole is symmetrical,
it should mirror itself on both sides. -
Step 3: Put on your hood (if applicable) and secure it correctly
This mainly applies to master’s and doctoral graduates. The hood goes around your neck, with the longer portion
hanging down your back. Many hoods have a loop or attachment point meant to fasten inside the gown, helping it stay in place.If you’re wearing a hood and cords, the cords usually sit so they’re visible and not trapped under other regalia.
The goal is a clean neckline and shoulders with nothing twisting or bunching. -
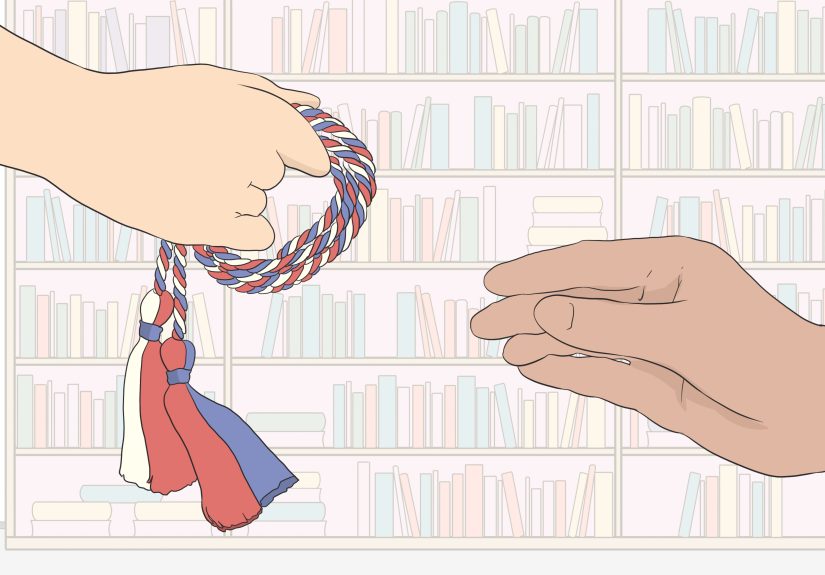
Step 4: Find the center point of your cord(s)
Most cords have a center point (sometimes a knot or a stitched midpoint). Hold the cord at its center so each side is the same length.
If you have multiple cords, separate them and identify each center point nowbefore you create a braided mystery.Tip: If your cords don’t have an obvious center, fold them in half gently to find the midpoint.
Don’t yank or stretch themthese aren’t resistance bands. -
Step 5: Drape the cord around the back of your neck
Place the midpoint of the cord at the back of your neck. Let both ends fall forward over your shoulders so they hang down the front of your gown.
Aim for symmetry: each side should be the same length and sit flat.If you’re wearing a stole, cords are commonly worn on top of the stole so they’re visible and properly displayed.
If you’re wearing a hood, keep the cord placement neat and ensure nothing pulls the hood out of position. -
Step 6: Layer multiple cords without tangling
If you have more than one cord, you have two goals: visibility and order.
Layer cords so they lie neatly side-by-side (or slightly stacked) rather than twisted together.Three simple methods that work:
- Side-by-side layering: Place one cord, then place the next cord directly on top, smoothing them so they sit parallel.
- Grouped drape: Hold all cords at their midpoints together, then drape them as one “bundle” so they fall evenly.
- Secure at the back: Use a small safety pin or discreet clip at the back of the neck to keep multiple cords from slipping apart.
Example: If you’re wearing a gold cord for honors and a blue/white cord for an organization,
layer them so both colors are visible rather than letting one hide behind the stole. -
Step 7: Make final adjustments (length, twists, and “cord behavior”)
Stand straight and check yourself in a mirror (or use your phone’s front camera). Fix these common issues:
- Uneven ends: Slide the midpoint slightly left or right at the back of your neck until both sides match.
- Twists: Rotate the cord gently so the braid faces outward and lies flat.
- Slipping cords: Use a pin at the back neckline, or tuck the cord slightly so it grips the gown fabric better.
You’re aiming for “intentional and celebratory,” not “I fought my regalia and the regalia won.”
-
Step 8: Put your cords on last, then leave them alone
As a general rule, cords should be the final layer so your recognitions are visible and the cords don’t get trapped underneath other pieces.
Once your cords are set, avoid constantly readjustingtiny fidgets become big twists.Now put on your cap, place the tassel the way your school instructs, and you’re ready to graduate like a professional.
Common Mistakes (and How to Fix Them Fast)
Wearing cords under the stole (when your school expects them on top)
If your cords are hidden, they’re not doing their job. In many ceremonies, cords are worn on top of the stole so they’re visible in photos and on stage.
If your school has specific rules, follow those first.
Letting cords slide off your shoulders all day
If your cords keep slipping, try a discreet safety pin at the back of the neck (pin the cords together or lightly to the gown fabric).
A small clip can also work. Keep it minimal so you don’t damage the cord or gown.
Overcrowding the neckline with too many items
If you’re wearing a stole, cords, medals, and a lei, the neckline can get crowded fast. Prioritize your school-required items first.
Then arrange the rest so each piece sits flat and doesn’t twist.
Not checking photos from the front
Your cords might look even from above but uneven from the front. Do a quick front-facing camera check before you leave.
It takes 10 seconds and saves you from 10 years of looking at photos thinking, “Why is my cord trying to become a scarf?”
Graduation Cord Etiquette: What Most Schools Expect
While each campus has its own traditions, most ceremonies share a few common expectations:
- Wear only cords you earned or were authorized to wear. (Yes, your cousin’s cord is very pretty. No, it’s not yours.)
- Keep cords neat and visible. Cords typically drape around the neck with the ends hanging evenly in front.
- Follow commencement instructions over internet advice. Your school’s rules win every time.
FAQ: How to Wear Graduation Honor Cords
Do graduation cords go on top of the stole?
Often, yescords are commonly worn on top of the stole so they’re visible. However, traditions vary, so follow your school’s ceremony guidelines.
How many cords can you wear at graduation?
There’s no universal limit. Some schools keep it simple; others have graduates wearing multiple cords for different honors and organizations.
If you’re wearing several, layer them neatly and consider securing them at the back of the neck to prevent slipping.
What if my cords are different lengths?
First, find the midpoint and adjust where it rests at the back of your neck. If the cords themselves are truly different lengths (it happens),
align the ends as best you can for photosusually with the longer cord slightly behind the shorter one so it looks intentional.
Do you wear cords with a master’s or doctoral hood?
Some graduates do, especially for organization honors. Make sure the hood sits properly and nothing pulls it out of place.
When in doubt, check your graduate school or commencement office instructions.
Real-World Experiences: What Graduation Cords Are Like in the Wild (Extra Tips You’ll Actually Use)
If you’ve never worn graduation cords before, here’s what most people don’t realize: the hardest part isn’t putting them on.
The hardest part is keeping them looking “photo-ready” while you do everything else graduation requireswalking, hugging, posing, sitting,
standing, sweating (depending on your venue), and trying not to trip on stadium stairs while someone films you in 4K.
Many graduates describe a very specific timeline of events:
you put the cords on in your room, look amazing, and think, “Nailed it.” Then you get to the ceremony and your cords start slowly migrating
like they’re searching for better seating. The fix is almost always the same: a tiny pin or clip at the back of the neck, placed early,
before the slipping starts. People who skip this often end up readjusting cords every time they stand up, which increases twisting and makes the cords look uneven.
It’s like stirring spaghetti and hoping it becomes less tangled.
Another common experience happens during the “group photo shuffle.”
You line up with classmates, someone says “Scoot in!” and suddenly your stole shifts, your cord slides, and your medal tries to become a necklace for your honor cord.
The simplest strategy graduates use is a two-point check before photos:
glance at the neckline (is everything centered?), then glance at the ends (are the cords even?). If both checks pass, stop touching the cords.
The more you tug, the more likely you’ll twist the braid and create a problem that wasn’t there two seconds ago.
Seating can also be a surprise. When you sit, cords may pool on your lap, especially if your gown is slick fabric.
When you stand, they can pull forward unevenly. A practical trick many people use is to gently lift the cords by the ends
right before standing, then let them fall evenly as you straighten up. It’s subtle, it looks natural, and it prevents that awkward moment
where one side is clearly longer and you’re trying to fix it while walking.
Outdoor ceremonies introduce a whole new character: wind.
Wind will flip cords over your shoulders, tuck them behind your stole, and generally behave like it has a personal vendetta against symmetry.
If you’re graduating outside, consider two quick safeguards: (1) secure multiple cords together at the back of the neck, and
(2) smooth the cords flat over the stole before you step into the main ceremony area. That way, if the wind tries something,
it has to work harderand you still look composed in photos.
Lastly, there’s the emotional side. Graduates often say the cords feel surprisingly meaningful once they’re on.
A cord might represent late nights, a mentor who pushed you, a club that became your community, or a scholarship that changed your life.
That’s why wearing them correctly matters: not because the cord police are watching (they’re not), but because it’s a visible symbol of what you did to get here.
So yestake the extra minute. Center the stole. Even the cords. Secure them if needed. Then enjoy the moment.
You earned the right to walk across that stage without your regalia trying to do interpretive dance.