Table of Contents >> Show >> Hide
- Why Use an Android Phone as Portable Storage?
- Step 1: Check Your Available Storage Before You Pretend to Be a Data Hoarder
- Step 2: Use a Real Data Cable, Not a Sneaky Charge-Only Cable
- Step 3: Change the USB Setting to File Transfer
- Step 4: Open Your Phone on the Computer Like You Would Any Other Drive
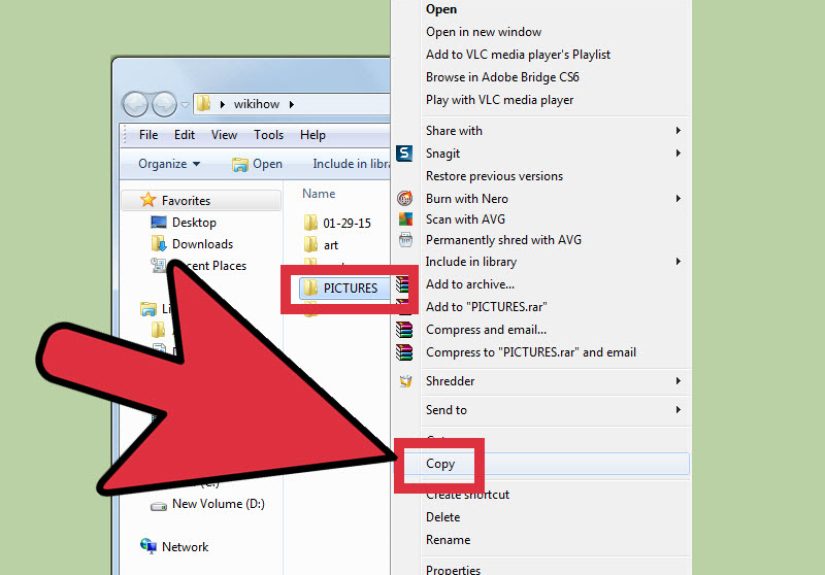
- Step 5: Copy, Move, and Organize Files Without Creating Total Folder Chaos
- Step 6: Eject Safely, Protect Your Data, and Don’t Treat Security Like an Optional Hobby
- Common Problems and How to Fix Them
- Is an Android Really a Good Replacement for a Portable Hard Drive?
- Real-World Experiences: What People Usually Notice After Using an Android as Portable Storage
- Final Thoughts
Your Android phone is already a tiny supercomputer, a camera, a map, a flashlight, a weather station, and, on some days, an unpaid therapist. But it can also pull off one more useful trick: acting like a portable hard drive for your files. If you need to move photos, videos, PDFs, music, work documents, or random folders with terrifying names like “FINAL_final_v2_REAL,” your phone can absolutely help.
There is one modern catch, though. Most newer Android phones do not behave like the old USB drives people remember from the dinosaur age of tech. Instead, they usually connect through File Transfer mode, also called MTP. In plain English, that means your computer can still browse and copy files on your phone, but the phone handles the storage in a smarter, more secure way behind the scenes. So yes, you can still use your Android like a portable hard drive. It just wears a newer outfit now.
This guide breaks the process into six simple steps, plus the common mistakes that make people yell at their cable, their laptop, and occasionally the universe.
Why Use an Android Phone as Portable Storage?
Before we jump into the steps, let’s answer the obvious question: why bother?
Using your Android as a portable hard drive is handy when you want to:
- Move files between your phone and a computer without waiting on cloud uploads.
- Carry important documents while traveling.
- Back up photos or videos quickly.
- Store music, presentations, PDFs, or class notes in one place.
- Transfer large files faster than Bluetooth or flaky Wi-Fi options.
- Use expandable storage like a microSD card or connected USB drive on supported devices.
In other words, your phone can be a pocket-size file mule. A very stylish mule, but a mule nonetheless.
Step 1: Check Your Available Storage Before You Pretend to Be a Data Hoarder
The first step is simple: make sure your Android actually has space. This sounds obvious, but many file-transfer disasters begin with someone trying to copy 18 GB of videos onto a phone that has 1.2 GB left and three dozen screenshots of food they no longer remember eating.
Open your Android’s storage settings and look at how much room is free. If your device supports a microSD card, check that too. On many phones, internal storage and removable storage appear separately, which gives you more flexibility. If your goal is to use the phone more like a true file carrier, a microSD card can make life easier because it keeps your personal apps and your portable files from fighting over the same space.
This is also the moment to organize your files. Create a folder called Work Files, Travel Docs, Media Transfer, or whatever makes sense for you. Future You will be grateful. Present You may grumble, but Future You will send a thank-you card.
Step 2: Use a Real Data Cable, Not a Sneaky Charge-Only Cable
If your computer only charges your phone and never shows any files, the cable is often the villain. Not every USB cable transfers data. Some are built for charging only, which is great if all you want is battery life and terrible if you actually need your files.
Use the cable that came with your phone if possible, or a known data-capable USB-C or Micro-USB cable, depending on your device. Then connect your phone to your computer and make sure the phone is unlocked. An Android that is locked often behaves like a nightclub with a strict door policy: no entry, no files, no fun.
If the connection still feels flaky, try another USB port on the computer. Also remove a thick phone case if it crowds the port. Sometimes the problem is not software. Sometimes the cable simply isn’t seated all the way in, which is one of the least glamorous but most common tech problems on Earth.
Step 3: Change the USB Setting to File Transfer
This is the step most people miss.
When you connect your Android to a computer, the phone may default to Charging only or No data transfer. That means your computer sees power, but not your files. To fix it, swipe down from the top of your phone screen and tap the USB notification. Then choose File Transfer, Transferring files, or MTP, depending on your phone brand.
On some devices, you may also see a prompt asking whether to allow access to your data. Tap Allow. If you do not, your computer may continue acting like your phone is an expensive paperweight.
What if you transfer files often?
Some Android phones let you change the default USB behavior in Developer Options so the device opens in File Transfer more consistently. This is an advanced convenience setting, not a required step, but it can save time if you move files regularly for work, school, or content creation.
Step 4: Open Your Phone on the Computer Like You Would Any Other Drive
Once File Transfer mode is active, your computer should recognize the phone. What happens next depends on your computer.
On Windows
Open File Explorer, then look for your phone under This PC or in the sidebar. Click into the device and browse folders such as DCIM for camera photos, Download, Documents, Music, Movies, or Pictures. If your phone has a microSD card, you may see that storage separately.
On Chromebook
Open the Files app after connecting the phone. Chromebooks usually play nicely with Android, which is one of those rare tech moments that feels almost suspiciously smooth.
On Mac
Mac users sometimes have a slightly bumpier road. Depending on your setup, you may need a compatible Android file-transfer utility to browse the device properly. The core idea stays the same: connect the phone, unlock it, switch to File Transfer mode, and then use the transfer tool to move files between devices.
If your phone appears but the folders seem empty, double-check that the device is unlocked and that File Transfer mode is still selected. Some phones love to quietly switch back to charging mode when you least expect it, like a cat knocking a pen off a desk just to remind you who is in charge.
Step 5: Copy, Move, and Organize Files Without Creating Total Folder Chaos
Now the useful part begins. Drag and drop files between your computer and your Android just as you would with a flash drive or external storage device. You can copy files onto the phone for travel, meetings, school, or offline access. You can also pull files off the phone to free up space or create backups.
Here are a few smart ways to do it:
Use clear folders
Create folders like Client Files, Receipts, Flight Docs, Music Backup, or Video Exports. Dumping everything into Download is tempting, but it turns your storage into a digital junk drawer.
Move big files by cable, not Bluetooth
If you are moving a 4K video, a big ZIP archive, or a pile of RAW photos, USB is usually the better choice. Wired transfer tends to be faster and more reliable for larger files.
Know the most useful folders
- DCIM: camera photos and videos
- Download: downloaded files
- Documents: PDFs, Word files, spreadsheets
- Music: audio files
- Pictures: saved images
- Movies or Videos: video files
Use your phone with external storage too
If your phone supports USB OTG, you may be able to plug in a flash drive or other USB storage device directly. That gives you another way to move files without a computer at all. Some users also rely on microSD cards for the same reason. This is especially useful when traveling or working in places with weak internet.
At this point, your Android is doing exactly what you wanted: carrying files around like a portable hard drive, but with a touchscreen, apps, and enough notifications to ruin a peaceful afternoon.
Step 6: Eject Safely, Protect Your Data, and Don’t Treat Security Like an Optional Hobby
After the transfer is complete, do not just yank the cable out like you are pulling a weed.
First, close any open files or folders on your computer. Then eject the device if your computer offers that option. After that, unplug the cable. This reduces the risk of incomplete transfers or file corruption.
Now let’s talk security, because portable storage is useful right up until it goes missing.
Lock your phone
If you are using your Android to carry work documents, tax records, IDs, or private media, use a strong screen lock. That is the bare minimum.
Be careful with public USB ports
Public charging stations can be convenient, but they are not always the best place to connect a device that carries your data. When possible, use your own charger, your own wall adapter, or a charge-only connection instead of exposing file transfer unnecessarily.
Back up important files somewhere else too
Your phone is handy, but it should not be the only home for critical files. If the device gets lost, damaged, or stolen, your data should still exist somewhere else. Think of your phone as a portable copy, not your entire digital life in one nervous rectangle.
Avoid risky modifications
Rooting or heavily modifying a device can introduce security and stability problems. For most people, a standard, up-to-date Android setup is the safer route when the phone is carrying important files.
Common Problems and How to Fix Them
The computer only charges the phone
Switch the USB setting to File Transfer. Also try a different cable because the current one may be charge-only.
The phone does not appear in File Explorer
Unlock the phone, reconnect it, and try another USB port. If needed, restart both devices.
The phone appears, but the folders are empty
Make sure you tapped Allow access to data on the phone. Also confirm that File Transfer mode is still selected.
Transfers keep failing
Try moving smaller batches of files at a time. Faulty cables, unstable ports, and overloaded storage can all cause hiccups. On some devices, turning off USB debugging may also help if file transfer is acting weird.
You want an easier long-term setup
If you transfer files frequently between Android and Windows, tools like Phone Link and Link to Windows can make wireless sharing more convenient. They do not replace a direct cable for every job, but they are helpful when you want fast everyday access to files and photos.
Is an Android Really a Good Replacement for a Portable Hard Drive?
For everyday use, yes, within reason.
An Android phone works well as a casual portable storage solution for documents, media, and quick transfers. It is especially useful if you already carry the phone everywhere and do not want to bring a separate flash drive. It is fast enough for normal use, convenient for travel, and flexible if your device supports microSD cards or USB OTG accessories.
That said, it is not always the perfect substitute for a dedicated external SSD or hard drive. A dedicated drive usually offers more storage, fewer permission quirks, broader compatibility, and less risk of draining the battery on the device you actually need for calls, messages, maps, and everything else.
So the smart answer is this: your Android can absolutely act like a portable hard drive, and for a lot of people it is more than enough. Just do not confuse “good enough for daily file carrying” with “best tool for massive archives, long-term backup, or professional media workflows.”
Real-World Experiences: What People Usually Notice After Using an Android as Portable Storage
In real life, people tend to discover that using an Android as a portable hard drive is less dramatic than they expected. The first surprise is usually how easy it feels once the USB setting is correct. A student might plug the phone into a campus computer, move over a lecture recording, save a PowerPoint, and head to class without ever opening a cloud app. A freelancer may copy invoices, proposal PDFs, and brand assets onto the phone before leaving for a client meeting. A parent may dump family photos onto a laptop after a weekend trip and clear space for the next round of birthday-cake pictures. None of this feels glamorous, but that is exactly why it works. It is practical.
Another common experience is learning that the cable matters more than expected. Many people assume all USB cables do the same job, then spend twenty minutes wondering why the phone charges but never appears on the computer. Swap the cable, and suddenly the phone shows up like magic. That moment is equal parts relief and mild annoyance. The good news is that once you know the trick, you stop blaming the phone for crimes committed by a bargain-bin cable.
Travelers also tend to appreciate this setup more than they expected. Imagine being at an airport, a hotel, or a coworking space with unreliable Wi-Fi. Instead of waiting for a cloud upload to finish sometime before retirement, you can move boarding passes, scanned IDs, tickets, or work files directly between the phone and a laptop. If your Android supports a microSD card or a USB flash drive through OTG, the experience gets even better. You end up with a flexible little pocket storage system that does not depend on internet speed or app logins.
There is also a weirdly satisfying organizational side to it. Once people start using their Android for file storage, they often become more disciplined about folders. Suddenly, Receipts, Tax Docs, Video Projects, and Road Trip Photos seem like brilliant ideas instead of overthinking. The phone becomes less of a digital junk drawer and more of a useful carry-all. That change alone can make it feel more like a real portable drive.
Of course, some people learn the hard way that a phone is still a phone first. They fill it with giant videos, forget how much space apps need, and then wonder why everything slows down or the camera refuses to save new photos. Others keep important files only on the device, then panic when the phone is lost, broken, or dropped face-first into a puddle with the confidence of a stunt performer. That is why the best experience usually comes from balance: use the phone as a portable storage helper, keep it organized, protect it with a lock screen, and back up anything that truly matters.
The overall experience is simple: when set up properly, using your Android like a portable hard drive feels convenient, fast, and surprisingly modern. It is not a perfect replacement for a giant external SSD, but for everyday file carrying, quick transfers, and life on the move, it does the job better than many people realize.
Final Thoughts
If you have ever wondered how to use your Android as a portable hard drive, the answer is refreshingly simple: connect it with a real data cable, switch the USB mode to File Transfer, open it on your computer, move your files, and eject it safely when you are done.
The trick is not some secret app or hidden hacker move. It is mostly about knowing where Android hides the USB option and avoiding the common mistakes that make file transfers fail. Once you understand that, your phone becomes a flexible little storage tool you can carry everywhere.
So yes, your Android can be a portable hard drive. It just happens to be one that also takes selfies, plays music, and insists on reminding you about app updates at the worst possible moment.