Table of Contents >> Show >> Hide
- What Is a Dermaroller (and How Is It Different From Professional Microneedling)?
- How Dermarollers Work (The Science Without the Snooze)
- What a Dermaroller Can Help With (and What It Can’t)
- Needle Length 101: Pick the Right Roller (Or Don’t Pick One Yet)
- Who Should Avoid Dermarolling at Home
- Before You Roll: Prep Like You Actually Like Your Skin
- How to Use a Dermaroller on Your Face: Step-by-Step
- How to Use a Dermaroller on Your Scalp
- How Often Should You Dermaroll?
- Aftercare: Your 48-Hour “Don’t Ruin It” Plan
- Cleaning and Storing Your Dermaroller (Non-Negotiable)
- Common Dermarolling Mistakes (That “Mysteriously” Cause Bad Results)
- When to Choose Professional Help Instead
- FAQ
- Conclusion
- Real-World Experiences: What People Notice When They Start Dermarolling (500+ Words)
Dermarollers are one of those skincare gadgets that look like a tiny medieval torture device… and somehow ended up in a cute pastel box on your bathroom shelf.
Used correctly, a dermaroller can support smoother texture and help certain concerns look softer over time. Used incorrectly, it can also turn “self-care”
into “why is my face spicy?” real fast.
This guide covers what dermarollers do, how they work, how to use one step-by-step, what to avoid, and the biggest mistakes that make results worse
(or riskier). You’ll also find a longer “real-world experiences” section at the endbecause the instructions are only half the story.
What Is a Dermaroller (and How Is It Different From Professional Microneedling)?
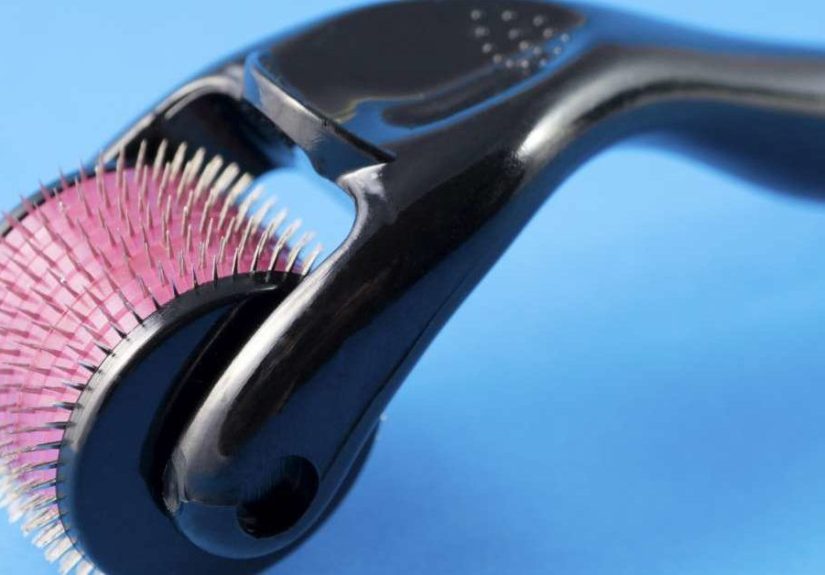
A dermaroller is a handheld tool with a rolling barrel covered in tiny needles. Rolling it across the skin creates small, controlled
micro-injuries (think: pinprick-sized channels). This is a form of microneedling, but it’s typically less controlled than
in-office devices.
Professional microneedling is usually performed with medical-grade, sterile equipment (often a pen-style device) with adjustable depth, better precision,
and a stronger safety setup. Dermarollers are more “DIY,” which means your technique and hygiene matter a lot more.
How Dermarollers Work (The Science Without the Snooze)
Dermarolling works through two main mechanisms:
-
Wound-healing signals: Those tiny micro-injuries kick your skin’s repair process into gear. Over time, this can support collagen and
elastin activity, which is why dermarolling is often discussed for texture, fine lines, and the look of certain scars. -
Micro-channels = temporary pathways: The tiny channels can make certain gentle, barrier-friendly products feel more effective because
they can penetrate a bit more easily right after rolling. (This is also why you should be picky about what you apply afterward.)
The key phrase here is over time. Dermarolling is not a “roll once, wake up reborn” situation. Think months, not minutes.
What a Dermaroller Can Help With (and What It Can’t)
Common uses
- Texture: “Bumpy,” uneven-feeling skin may gradually feel smoother.
- Fine lines: Especially early, shallow lines that are more “texture” than “crease.”
- Post-acne marks and mild scarring: Some people see softening over time (deep scars usually respond better to professional care).
- Large-looking pores: Pores don’t actually open/close, but their appearance can look less obvious if texture improves.
- Stretch marks: Often targeted on the body, but results tend to be gradual and variable.
- Scalp support: Dermarolling is sometimes paired with topical hair treatments for thinning concerns.
Not-so-great uses
- Active acne breakouts: Rolling over inflamed pimples can spread bacteria and irritation.
- Melasma: Pigment issues can worsen with irritation in some peoplethis is one to treat carefully.
- “Instant glass skin”: If a tool promises that, it’s marketing talking, not biology.
Needle Length 101: Pick the Right Roller (Or Don’t Pick One Yet)
Needle length is not a “the bigger the better” situation. Longer needles increase intensity and risk. For most at-home users,
shorter is safer.
| Needle length | Common at-home goal | What it typically feels like | Practical note |
|---|---|---|---|
| 0.2–0.3 mm | Gentle texture support, product “boost” | Light prickly sensation | Often the easiest starting point for cautious beginners |
| 0.5 mm | More noticeable texture work | More sting, possible pinpoint redness | Use less often; technique and hygiene matter even more |
| 1.0 mm+ | Scar/stretch mark intensity (often professional territory) | More pain; may trigger bleeding | Not recommended for most at-home users |
If you’re unsure, start with the lowest needle length that matches your goal. The best dermaroller is the one you can use correctly, consistently,
and safelynot the one that makes you brave for five minutes and then regretful for five days.
Who Should Avoid Dermarolling at Home
Skip at-home dermarolling (or talk to a qualified clinician first) if you have:
- Active acne cysts or open breakouts
- Any skin infection (including cold sores) or suspicious lesions
- Inflammatory skin conditions that flare with irritation (common examples: eczema-like rashes, rosacea flares)
- A history of keloid scarring or poor wound healing
- Recent aggressive treatments (strong peels, resurfacing procedures) unless cleared by a professional
- Bleeding disorders or medication that affects clotting (ask your clinician)
Before You Roll: Prep Like You Actually Like Your Skin
What you’ll need
- A dermaroller with an appropriate needle length
- 70% isopropyl alcohol (for disinfecting the tool)
- A gentle cleanser
- A clean towel or paper towels
- A bland, fragrance-free moisturizer (and/or a simple hydrating serum)
- Broad-spectrum sunscreen (for the next morning and beyond)
Prep checklist
- Wash your hands like you’re about to handle contact lenses.
- Cleanse your skin with a gentle cleanser and pat dry.
- Disinfect the roller: soak the head in 70% isopropyl alcohol for about 5–10 minutes, then let it air-dry on a clean surface.
- Pull hair back and keep your working area clean.
- Do not apply strong actives beforehand (retinoids, exfoliating acids, strong vitamin C, benzoyl peroxide). You want calm skin, not a chemistry experiment.
How to Use a Dermaroller on Your Face: Step-by-Step
The goal is controlled, light micro-stimulationnot scraping, digging, or trying to “feel it working.”
Step 1: Divide and conquer
Split your face into zones: forehead, right cheek, left cheek, chin/jawline. Avoid eyelids and the immediate under-eye area.
Be cautious around the nose and upper lip because the skin can be more sensitive.
Step 2: Roll with a pattern (not chaos)
- Start with one zone (for example, your right cheek).
- Roll lightly in one direction (vertical) for a few passes. Lift the roller between passesdon’t drag it sideways while it’s pressed in.
- Repeat horizontally for a few passes.
- Optionally repeat diagonally (one diagonal direction only) if your skin tolerates it well.
- Move to the next zone and repeat.
Step 3: Pressure, passes, and the “don’t-make-it-bleed” rule
For most at-home routines, you should use light pressure. Pinpoint redness is common; obvious bleeding is a sign you’re going too hard
and/or your needle length is too long for home use. More pressure doesn’t equal more collagenit often equals more irritation.
Step 4: Apply simple aftercare
Right after rolling, your skin is more receptive. Keep it boring (boring = safe).
- Good options: fragrance-free moisturizer, a basic hydrating serum, or a calming barrier product.
- Skip for now: retinoids, exfoliating acids, harsh vitamin C, alcohol-heavy toners, fragrance, essential oils.
How to Use a Dermaroller on Your Scalp
Scalp dermarolling is often used as a companion habit alongside topical hair routines. It can be helpful for some people, but the scalp is also easy to
irritateespecially if you roll aggressively.
Scalp steps
- Start with a clean scalp (freshly washed or at least free of heavy product buildup).
- Disinfect the roller and wash your hands.
- Part your hair to expose a small strip of scalp.
- Roll gently along the part for a few passes, then move to the next part.
- Keep aftercare simple and avoid layering irritating products immediately if you’re prone to sensitivity.
If you use a topical treatment that can sting or irritate, consider waiting until your scalp has calmed down (many people choose a delay rather than
applying immediately). When in doubt, ask a qualified clinicianscalps can be dramatic.
How Often Should You Dermaroll?
Frequency depends on needle length and how your skin responds. Think of dermarolling like strength training: recovery is part of the process.
| Needle length | Conservative maximum frequency (at home) | Beginner-friendly approach |
|---|---|---|
| 0.2–0.3 mm | Up to every other day (if well tolerated) | 1–2x/week for the first month |
| 0.5 mm | 1–3x/week (many do better with less) | Once every 1–2 weeks at first |
| 1.0 mm+ | Infrequent; often not advised at home | Consider professional guidance instead |
If you’re getting persistent redness, tenderness, flaking, or breakouts after rolling, reduce frequency (or stop). Your skin barrier is not a video game
characteryou don’t unlock extra power by taking more damage.
Aftercare: Your 48-Hour “Don’t Ruin It” Plan
First 24 hours
- Keep products gentle and minimal
- Avoid heavy sweating, hot yoga, saunas, and very hot showers if you’re easily irritated
- Skip makeup if your skin feels raw or sensitive
- Don’t pick or scrub
24–48 hours
- Introduce sunscreen the next morning (broad-spectrum, reapply if outdoors)
- Hold off on strong actives until your skin feels normal again
- Hydrate and protect the barrier (moisturizer is your best friend here)
Cleaning and Storing Your Dermaroller (Non-Negotiable)
Dermarollers can’t be “kind of clean.” They’re either disinfected, or they’re a tiny rolling invitation for problems.
- Rinse the roller head (carefully) to remove debris.
- Soak in 70% isopropyl alcohol for about 5–10 minutes.
- Let it air-dry completely on a clean surface.
- Store in a clean case in a dry place.
- Never share your dermaroller. Not with a friend. Not with a soulmate. Not with a twin you were separated from at birth.
Also: rollers get dull. If the needles snag, scratch, or feel rough, replace the tool. Dull needles increase irritation and defeat the point.
Common Dermarolling Mistakes (That “Mysteriously” Cause Bad Results)
- Using needles that are too long for at-home skill and hygiene
- Pressing too hard (pain is not proof)
- Rolling over active acne or irritated patches
- Applying strong actives immediately after (hello, burning)
- Overdoing frequency (collagen needs recovery time)
- Not disinfecting properly (this one is self-explanatory)
When to Choose Professional Help Instead
At-home dermarolling can be a reasonable “small improvement” tool for some peoplebut professional treatments can be a better fit when:
- You have deep acne scars or significant texture changes
- You’re targeting stretch marks extensively
- You’re prone to pigmentation problems or react easily
- You want stronger results with better depth control and sterile technique
In other words: if your goal is big, your best move is usually a pro. Your face deserves more than guesswork.
FAQ
Does dermarolling hurt?
With short needles and light pressure, discomfort is usually mild. Longer needles and heavier pressure hurt more and carry more riskespecially at home.
How long until I see results?
Many people notice temporary plumpness from hydration early on, but meaningful texture changes usually take consistent sessions over weeks to months.
Can a dermaroller help skincare products absorb better?
It can create temporary micro-channels that may increase penetration. That’s why you should only apply gentle, barrier-friendly products after rolling.
Conclusion
Dermarolling is simple in theoryroll tiny needles across skinbut the difference between “nice glow” and “why am I itchy?” is all in the details:
needle length, light pressure, clean technique, smart frequency, and calm aftercare.
Start conservatively, stay consistent, and treat hygiene like part of the skincare routine (because it is). If you want stronger results or you have
complicated skin concerns, consider professional microneedling instead of turning your bathroom into a DIY clinic.
Real-World Experiences: What People Notice When They Start Dermarolling (500+ Words)
The first thing many people notice isn’t a miracleit’s awareness. Dermarolling makes you pay attention to your skin barrier. If your
routine was already gentle and consistent, you may find dermarolling fits in smoothly. If your routine was a rotating cast of strong acids, retinoids,
scrubs, and “this burned but I powered through,” dermarolling tends to expose that approach fast.
A common early experience is a “tight but glowy” look right after rolling, especially if you apply a basic hydrating product. That glow
is often part hydration, part mild swelling, and part the psychological thrill of “I did a thing.” Over the next day, some people get mild redness or a
sandpapery feeling if they went too hard or used too long of a needle. The lesson that usually follows is: light pressure wins. People often
report better tolerance and more consistent progress when they stop chasing intensity and start chasing routine.
Another frequent experience is the “product regret” moment. Someone rolls, then applies a strong active out of habitmaybe a retinoid or
an exfoliating acidand realizes immediately that their face has filed a formal complaint. The smarter long-term users tend to become minimalist for the
first 24–48 hours after rolling: gentle cleanser, simple moisturizer, sunscreen the next morning. Over time, this “boring aftercare” often becomes the
secret sauce. The best results stories are surprisingly unglamorous: less irritation, fewer experiments, more consistency.
People who dermaroll for texture or old acne marks often describe progress as “photos help, mirrors lie.” Day-to-day, it’s easy to miss
slow improvement. Month-to-month, subtle smoothing can become noticeableespecially in lighting that used to highlight uneven texture. Many also report
that the most obvious changes show up in how makeup sits (less clingy foundation, smoother-looking cheeks), not necessarily in a dramatic “before/after”
moment.
For scalp dermarolling, experiences are even more variable. Some people report that it helps their scalp feel “more responsive” when paired with a
consistent topical routine, while others find it irritates them and they stop. A common pattern among those who stick with it is careful spacing: they
treat scalp rolling like a scheduled event, not a daily habit. They also tend to be very strict about cleanlinessbecause scalp irritation plus product
buildup is a fast track to “why is my head angry?”
The biggest real-world takeaway is that dermarolling rewards people who can be patient. The folks who do best usually:
(1) start with short needles, (2) keep pressure light, (3) disinfect every time,
(4) avoid harsh products right after, and (5) give their skin recovery time. The people who struggle are often the ones
treating dermarolling like a shortcut. It’s not a shortcutit’s a slow-build habit. The good news? Slow-build habits are usually the ones that actually
last.