Table of Contents >> Show >> Hide
- What Window Grids Actually Are
- Why DIY Window Grids Are Worth It
- Choose a Grid Pattern That Matches Your House
- The Best DIY Window Grid Materials
- Inside, Outside, or Between the Glass?
- How to Make DIY Window Grids: Step by Step
- Design Tips That Make DIY Window Grids Look Custom
- Common DIY Window Grid Mistakes to Avoid
- How to Clean and Maintain DIY Window Grids
- Is This Upgrade Worth It?
- Real-Life Experience and Lessons From DIY Window Grid Projects
- SEO Tags
Plain windows are a little like plain toast. Perfectly useful? Absolutely. Exciting? Not always. If your home feels like it needs more character, symmetry, and that subtle someone in this house has their life together energy, DIY window grids can make a surprisingly big difference. They add visual structure, help tie a room to a specific architectural style, and can make builder-basic windows look far more intentional without replacing the entire unit.
The best part is that you do not have to tear out windows, call in a crane, or pretend you suddenly enjoy spending five figures on custom millwork. A well-planned DIY window grid project can be affordable, beginner-friendly, and reversible if you choose the right method. The trick is knowing which style fits your house, which materials look polished instead of flimsy, and how to install everything so the finished result looks custom rather than crafty.
This guide walks you through the smart way to upgrade plain windows with DIY window grids, from choosing the pattern to cutting the pieces, finishing them, and avoiding the little mistakes that scream, “I rushed this on a Saturday.”
What Window Grids Actually Are
You will hear several terms tossed around in the world of windows: grids, grilles, muntins, mullions, divided lites, simulated divided lites. It sounds like a vocabulary test written by a carpenter who skipped lunch. For your project, here is the practical version: window grids are the bars that visually divide one pane of glass into smaller sections. On modern homes, these pieces are usually decorative rather than structural.
That distinction matters because it gives DIYers freedom. Since you are creating the look of divided panes rather than rebuilding the whole window, you can focus on lightweight, attractive, removable solutions. In other words, you can get the charm without inviting chaos.
Why DIY Window Grids Are Worth It
Adding DIY window grids is one of those rare home upgrades that hits several sweet spots at once. It is visual, practical, and relatively low-cost compared with full window replacement. When done well, grids can:
- Make plain windows look more architectural
- Support a farmhouse, colonial, craftsman, cottage, or traditional design style
- Create better curb appeal from both inside and outside
- Help mismatched windows feel more consistent
- Give a room a more finished, intentional look
They also work especially well in rooms that already need a little extra personality, such as dining rooms, breakfast nooks, offices, mudrooms, and bathrooms. A grid pattern can visually “dress” a window even when the rest of the treatment is simple.
Choose a Grid Pattern That Matches Your House
The fastest way to make a DIY window grid look wrong is to choose a pattern that fights the architecture of the home. Before you cut a single strip of moulding, step outside and study the style of the house. Your goal is not just to add lines. Your goal is to add the right lines.
Colonial Grids
Colonial grids use evenly divided squares or rectangles across the sash. They feel classic, balanced, and traditional. If your home has symmetrical trim, shutters, or older-style detailing, this is usually a safe bet.
Prairie Grids
Prairie-style grids place bars around the perimeter of the glass and leave the center open. The result is clean and geometric. This style works beautifully in craftsman-influenced homes, transitional spaces, and houses where you want detail without blocking too much of the view.
Craftsman or Farmhouse-Inspired Top Grids
These patterns often cluster smaller panes along the top portion of the window while leaving the lower section more open. They feel relaxed, charming, and less formal than a full colonial pattern. This is a great option if you like the idea of grids but do not want your window to look too busy.
Diamond or Custom Grids
These can be beautiful in the right setting, especially cottage-style or historic homes, but they are less forgiving for beginners. If this is your first project, start with straight lines. Your future self will thank you while sanding fewer mistakes.
The Best DIY Window Grid Materials
If you want your finished window grids to look crisp and intentional, materials matter. Thin, straight, lightweight pieces are your friend. Heavy stock can look clunky and make installation harder.
- Lattice moulding: A popular option because it is thin, flat, lightweight, and easy to cut. It is widely available in wood and PVC.
- Screen moulding or narrow trim strips: Good for a slightly more dimensional look.
- PVC trim: Great for moisture-prone areas like bathrooms and sunrooms. It is stable and low-maintenance.
- Wood trim: Best if you want a painted custom look and do not mind priming and sanding.
- Primer and trim paint: A satin or semi-gloss finish usually gives the cleanest, most window-like appearance.
- Wood filler or paintable caulk: Helpful for smoothing joints on a more permanent insert.
For tools, gather a tape measure, combination square, pencil, miter saw or miter box, fine-grit sandpaper, painter’s tape, level, and a clean work surface. If you are building a removable insert, small turn buttons, magnetic catches, or other trim-safe fasteners are more polished than gluing anything directly to the glass.
Inside, Outside, or Between the Glass?
For most DIYers, the smartest approach is an interior removable grid insert. It gives you the visual effect of divided panes without permanently altering the window. It is easier to paint, easier to clean around, and much easier to fix if your first attempt is slightly off.
Attaching thin strips directly to the glass can work for some decorative projects, but it demands very accurate spacing and a careful choice of adhesive. It is less forgiving and can become annoying when it is time to clean the glass.
Exterior-mounted grids or anything that tries to mimic factory-installed between-the-glass systems is usually better left to manufacturers and replacement-window specialists. For a DIY upgrade, removable interior inserts are the sweet spot between style, practicality, and sanity.
How to Make DIY Window Grids: Step by Step
1. Measure the Opening Carefully
Measure the inside area where your insert will sit. If the grid will rest against the interior stop or trim, measure width and height in three places and use the smallest dimensions. Subtract about 1/16 to 1/8 inch so the insert can fit without fighting you like a shopping cart with one bad wheel.
2. Mock Up the Pattern First
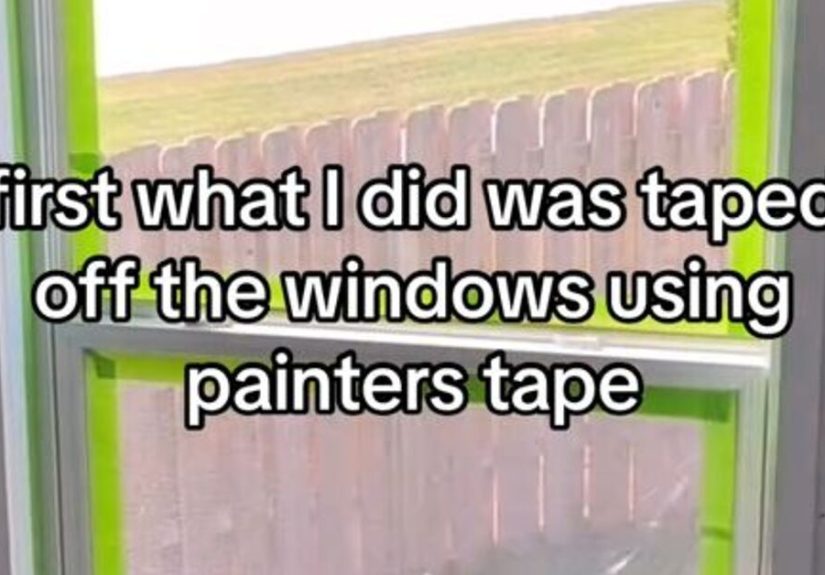
Before cutting trim, use painter’s tape on the glass to test your pattern. This is the easiest way to decide whether the window needs four panes, six panes, a prairie border, or a top-row design. The mock-up also helps you judge sight lines from across the room and from outside.
3. Build the Outer Frame
Cut the perimeter pieces first. Dry-fit them on a flat surface and check for square. A simple rectangular frame creates the structure for the grid and makes the insert easier to install and remove. If you are a beginner, square-cut joints can be easier than tiny miters. Clean lines matter more than fancy cuts.
4. Add the Interior Grid Bars
Measure and cut the horizontal and vertical bars based on your chosen pattern. Keep spacing consistent. Uneven panes are one of the quickest tells that a project is homemade in the wrong way. Use a spacer block or mark all pieces from a single reference point to maintain repeatable measurements.
5. Assemble on a Flat Surface
Lay the frame and grid bars on your workbench. Check alignment with a square. For a lightweight insert, many DIYers use wood glue, pin nails, or small backing pieces at the joints. If you want a cleaner painted result, fill tiny seams and sand them smooth after the assembly dries.
6. Prime, Paint, and Let It Cure
Do not skip the finishing stage. Raw wood looks unfinished, and thick paint drips make delicate grids look bulky. Prime first, then apply thin coats of paint. White is a classic choice because it blends with most trim and reads like a real window detail, but black, soft taupe, or a frame-matched color can look stunning in more modern interiors.
7. Install the Insert Gently
Once the paint is fully dry, place the insert in the window. Secure it with small turn buttons, discreet magnetic catches, or another removable fastening method attached to the interior trim rather than the glass. You want the insert to stay put without becoming a permanent hostage situation.
8. Step Back and Evaluate
Look at the window from several angles and at different times of day. Natural light is wonderfully honest. If the pattern feels too heavy, the bars are too thick, or one section looks visually off, now is the time to adjust it before you copy the design on every window in the house.
Design Tips That Make DIY Window Grids Look Custom
The magic is in proportion. On larger windows, slightly wider bars can look balanced. On smaller windows, bulky trim can overwhelm the glass and make the whole unit look cramped. In most cases, less is more.
Match your grid finish to the surrounding trim for the most seamless result. If your room already has white baseboards, white crown, and white casings, white grids will feel original to the house. If your style is more modern, a slim black grid can echo steel-style windows without the replacement cost.
Also think about repetition. One lonely grid window in a room can look accidental. Two or more windows with the same treatment look deliberate. Consistency is what turns a quick DIY trick into a believable design feature.
Common DIY Window Grid Mistakes to Avoid
- Choosing bars that are too thick: This blocks light and looks clumsy.
- Ignoring the home’s architecture: The pattern should fit the style of the house.
- Skipping a tape mock-up: Testing first prevents a lot of regret.
- Rushing the paint: Thick, gummy paint ruins crisp lines fast.
- Using a non-paintable sealant where paint is needed: Always check finish compatibility.
- Forgetting cleaning access: A removable insert is easier to live with long-term.
How to Clean and Maintain DIY Window Grids
If you build removable inserts, maintenance is simple. Take them down occasionally, wipe them with a soft cloth, and clean the glass normally. This is one of the biggest advantages over anything permanently fixed in place. No awkward scrubbing around tiny bars. No muttering at the window while holding a spray bottle and questioning your decisions.
For painted wood grids, touch up chips early before they become obvious. In high-humidity rooms, make sure the material is appropriate for moisture exposure. PVC and properly sealed wood hold up better than unfinished stock.
Is This Upgrade Worth It?
Yes, especially if your windows are structurally sound but visually bland. DIY window grids are one of the most effective ways to add charm without replacing the window itself. They can make new windows feel more traditional, help plain rooms feel more tailored, and give your home an architectural detail that looks far more expensive than it is.
The real value is that this project lets you control the look. You are not stuck with whatever pattern came from the factory. You can choose a design that suits your house, your room, and your style. That flexibility is what makes DIY window grids so appealing. They are decorative, approachable, and surprisingly transformative.
If your windows have been sitting there doing the bare minimum, this is their moment. Give them a little structure, a little charm, and a little main-character energy.
Real-Life Experience and Lessons From DIY Window Grid Projects
One of the most interesting things about DIY window grids is how often people expect a dramatic “before and after” only from the outside, then end up loving the interior change even more. In real homes, the effect tends to show up slowly and then all at once. At first, the room just feels a little more finished. Then you notice the breakfast nook looks cozier in the morning. Then you realize the office finally has some personality. Then a friend walks in and asks whether the windows are original. That is when the project really earns its keep.
A common experience is discovering that pattern matters more than material cost. Homeowners often assume they need expensive specialty trim to get a high-end look, but the bigger difference usually comes from proportions, spacing, and paint finish. A simple, straight lattice moulding can look excellent when the bars are evenly spaced and the finish matches the existing trim. Meanwhile, a pricier material can still look awkward if the panes are uneven or the pattern does not suit the house. That is good news for budget-conscious DIYers, because it means careful planning beats overspending.
Another recurring lesson is that mock-ups save the day. People who tape the design on the glass before building almost always make better decisions. A full colonial pattern may look charming in theory but too busy on a small bathroom window. A prairie pattern may seem too simple until you see how elegantly it frames the view. Seeing the lines at full scale changes everything. It also prevents the classic DIY situation where you finish a project beautifully and then realize you do not actually like the design.
Many people also learn that removable inserts are easier to live with than permanent adhesive solutions. The first time it is time to clean pollen, fingerprints, or pet nose art off the glass, easy removal feels like genius. This matters even more in kitchens, bathrooms, and sun-facing rooms where glass gets dirty faster than anyone wants to admit. A project that looks good but becomes irritating to maintain is not really a win. Grids that come out easily tend to stay lovable longer.
There is also a confidence boost that comes from the project itself. DIY window grids are approachable enough for a beginner but detailed enough to feel satisfying. You practice measuring, cutting, finishing, and fitting without taking on a major renovation. That makes the project a favorite for homeowners who want a visible improvement without opening the kind of home-improvement spiral that ends with three extra store runs and a mild identity crisis in the trim aisle.
Perhaps the best real-world takeaway is this: windows do not need to be replaced to feel special. In many homes, they simply need more definition. DIY window grids add that definition in a way that feels architectural rather than trendy. They catch light differently, frame the outdoors more intentionally, and make plain glass look like a design decision instead of a default setting. That is why so many people finish one window, admire it for a few days, and then start looking around the house for the next candidate. Apparently, plain windows are very persuasive once they realize an upgrade is possible.