Table of Contents >> Show >> Hide
- What “High Quality Uploads” Actually Does
- Step-by-Step: Turn On High Quality Uploads
- Don’t Let Data Saver Undo Your Hard Work
- Use the Right Sizes and Ratios for Cleaner Uploads
- Make Videos Look Better Too
- Common Reasons Your Uploads Still Look Blurry
- Quick Checklist: High Quality Uploads in Under a Minute
- Real-World Experiences: What Actually Works Day to Day
- Bringing It All Together
If your Instagram photos keep turning into fuzzy potatoes the moment you hit “Post,”
it’s not (only) your imagination. Instagram compresses images and videos to save data
and load everything faster. Good for your data plan, bad for your carefully edited
shots. The good news? There’s a hidden(-ish) setting called
“Upload at highest quality” that can dramatically improve how sharp
your posts look plus a few simple habits that make a big difference.
In this guide, you’ll learn exactly how to turn on high quality uploads on Instagram
in just a few taps, how data saver settings can sabotage your content, and how to
prep photos and videos so they still look crisp after Instagram does its
compression magic. We’ll walk through iPhone and Android steps, best image sizes,
and real-world tips creators use every day.
What “High Quality Uploads” Actually Does
Instagram always compresses your media to some extent, but the
high quality upload option tells the app to prioritize visual
quality over speed and data savings. When this setting is enabled, Instagram is more
likely to:
- Upload at a higher resolution instead of aggressively shrinking files.
- Preserve more detail and texture in your photos and videos.
- Use more data and sometimes take a bit longer to upload.
Instagram’s own documentation says that if you upload a photo that’s at least
1080 pixels wide with a supported aspect ratio (between 1.91:1 and
4:5), it stores it at the “best possible resolution.” So if you
combine the right file size and dimensions with the
“Upload at highest quality” toggle, you give Instagram the best starting
point for a clean result.
Of course, this doesn’t give you lossless, uncompressed perfection it’s still a
social media app, not a RAW photo sharing service but it can easily be the
difference between “eh, that’s fine” and “wow, that looks super sharp.”
Step-by-Step: Turn On High Quality Uploads
Instagram loves to rearrange its menus, but as of late 2024–2025, the controls
generally live under Settings and privacy → Media quality or
Settings and privacy → Data usage and media quality, depending on
your app version. Guides that walk through the current interface all point to the
same idea: find the “Upload at highest quality” switch and turn it
on.
On iPhone (iOS)
- Open the Instagram app.
- Tap your profile picture in the bottom-right corner.
- Tap the three lines (☰) in the top-right corner.
- Select “Settings and privacy.”
-
Scroll down to the “Your app and media” or similar section and
tap “Media quality” or
“Data usage and media quality.” -
Find “Upload at highest quality” or
“Upload in highest quality” and toggle it ON.
From now on, the app will attempt to upload your photos and videos in their best
possible quality, even on mobile data. Some tutorials specifically note that this
may use more data and take a bit longer to post, but the visual payoff is worth it
for most creators.
On Android
- Open the Instagram app.
- Tap your profile picture in the bottom-right corner.
- Tap the three lines (☰) in the top-right corner.
- Choose “Settings and privacy.”
-
Scroll down and tap “Media quality” or
“Data usage and media quality.” - Toggle “Upload at highest quality” to ON.
Older app versions and some international guides refer to this under
Account → Cellular data use → Upload at highest quality, but the
logic is exactly the same: go to the data/media section and turn on the highest
quality upload option.
If your app menus look a bit different, don’t panic. Look for key words like
Media quality, Data usage, or Cellular data use they
all live in the same general corner of Instagram’s settings.
Don’t Let Data Saver Undo Your Hard Work
Here’s the plot twist: Instagram also has a Data Saver setting
designed to use less mobile data. That sounds nice until you realize it can
reduce your viewing and uploading quality in the process.
Many data-usage guides mention that turning on Data Saver reduces preload behavior
and may limit how high Instagram pushes quality when you’re not on Wi-Fi. If you’re serious about sharp content, you have
two options:
-
Leave Data Saver OFF, especially when you’re uploading important
posts (like client work, campaigns, or portfolio pieces). -
Or, upload big posts when you’re on Wi-Fi, then you can turn
Data Saver back on if you really need to conserve mobile data.
How to Check Data Saver
- Go to Settings and privacy in Instagram.
- Tap “Data usage” or “Cellular data use.”
- Look for “Data Saver” or “Use less data.”
- Toggle it OFF if you want the best possible quality.
Think of Data Saver as the “Instagram is on a diet” mode great when you’re
roaming, not so great when you want your work to look its absolute best.
Use the Right Sizes and Ratios for Cleaner Uploads
Even with high quality uploads turned on, sending Instagram the wrong size image is
like handing a barista a mug that’s twice too big: the app will try to fill it, but
it won’t look right.
Current Instagram size guides generally agree on these sweet spots for sharp
images:
- Square posts: 1080 × 1080 px (1:1).
-
Portrait (vertical) posts: 1080 × 1350 px (4:5) and Instagram
now supports up to 1080 × 1440 px (3:4) for even taller images. - Landscape posts: around 1080 × 566–608 px (16:9-ish).
-
Stories & Reels: 1080 × 1920 px (9:16 vertical) is the
standard.
Many photography and social media guides recommend resizing your images
before uploading to these exact dimensions. That way, Instagram doesn’t
have to do heavy, automatic resizing that can lead to softness and artifacts.
TL;DR: export your photos at 1080 px wide with the right aspect ratio, keep file
quality high (JPEG at 80–100%), and then let Instagram do its thing.
Make Videos Look Better Too
High quality uploads apply to videos as well, and modern video guides for Instagram
all point in the same direction: 1080p resolution, decent bitrate, and the
correct aspect ratio for the format you’re posting.
For crisp videos, try these baseline settings when you export:
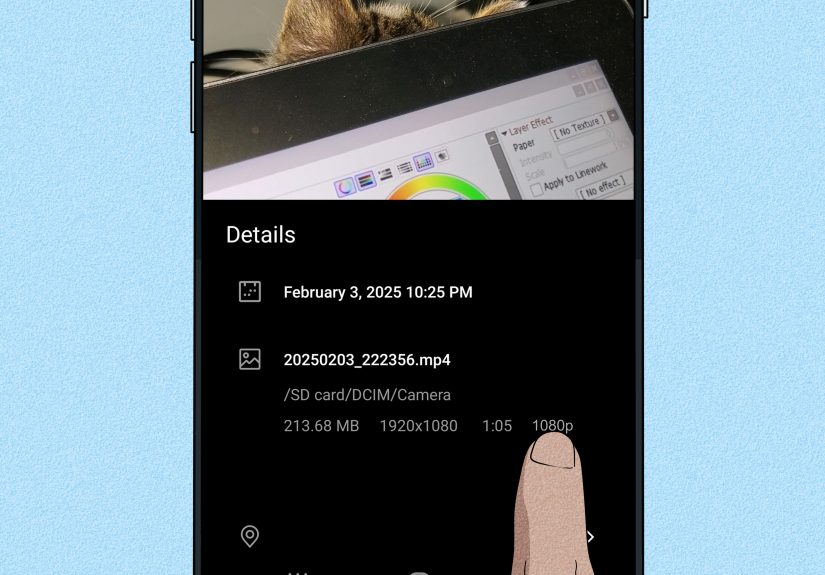
- Resolution: 1080p (1920 × 1080 or 1080 × 1920 for vertical).
- Frame rate: 30 fps (or match your original footage).
- Codec: H.264, MP4 file format.
-
Bitrate: around 3,500 kbps or higher for standard 1080p social
content. -
Aspect ratio: 9:16 for Stories/Reels, 4:5 or 1:1 for feed,
depending on your layout.
Then, upload with “Upload at highest quality” turned on and
preferably while on a strong Wi-Fi connection. Video creators often note that a
slow or unstable connection can cause the app to be more aggressive with
compression.
Common Reasons Your Uploads Still Look Blurry
Turned on high quality uploads and still unimpressed? Here are some usual suspects
that can ruin your image before it ever hits Instagram’s servers:
-
Screenshotting your photos. A screenshot is usually a compressed
copy of a compressed copy. Always upload the original file if you can. -
Editing and exporting multiple times. Each export slightly
degrades a JPEG. Try to keep edits in one workflow (for example, edit in Lightroom
or your favorite app and export once at final size). -
Letting Instagram do the cropping. Some photographers report
better results when they crop to the correct ratio themselves before uploading,
instead of dragging the crop box in the Instagram editor. -
Mixing aspect ratios in a carousel. Instagram may handle a
carousel more aggressively when it has to reconcile several different sizes at
once. -
Using very small original files. If your starting image is
smaller than 1080 px, Instagram has to upscale it, which usually looks soft.
If you’re still stuck, one good test is to upload a single, freshly exported 1080 ×
1350 px photo with high quality uploads turned on and Data Saver off, then compare
how it looks inside Instagram versus your camera roll. If there’s a small
difference, that’s normal. If it looks like it went through a blender, something
else is wrong.
Quick Checklist: High Quality Uploads in Under a Minute
Before we jump into real-world experiences, here’s a rapid-fire checklist:
- ✅ Export photo at 1080 px wide in the correct aspect ratio.
- ✅ Avoid over-compressing; keep JPEG quality 80–100%.
- ✅ In Instagram: Settings and privacy → Media quality → “Upload at highest quality” ON.
- ✅ In Data usage: turn Data Saver OFF while posting.
- ✅ Upload on Wi-Fi when possible.
- ✅ Use original files, not screenshots or repeatedly exported images.
Real-World Experiences: What Actually Works Day to Day
Settings are great, but what does this look like in real life when you’re juggling
content calendars, coffee, and a cat walking across your keyboard? Let’s look at a
few common scenarios where turning on high quality uploads (and using them well)
really pays off.
1. The Food Blogger with Melted-Looking Cheese
Imagine a food blogger who shoots gorgeous 4K photos of grilled cheese sandwiches.
In their camera roll, you can see every bubble and char mark. On Instagram? The
cheese looks like a yellow smudge.
After a little detective work, they realize three things are happening:
-
They’re editing in multiple apps and exporting each time, so the
file is being recompressed three or four times before Instagram even touches it. -
They’re letting Instagram auto-crop, which means the app has to
resize aggressively on the fly. - Data Saver is on because they travel a lot and are always on mobile data.
Fixing it looks like this:
- Do all edits in one app, then export once at 1080 × 1350 px.
- Turn on “Upload at highest quality” in Media quality.
- Temporarily turn Data Saver off and upload on Wi-Fi at home.
The next grilled cheese photo looks noticeably sharper. You can see the crispy
edges again, and the color banding in the background is reduced. Is it 100%
perfect? No. But it jumps from “meh” to “mouth-watering,” which is what really
matters for engagement.
2. The Small Business Owner Shooting on Their Phone
A small jewelry shop posts daily reels and feed posts straight from a mid-range
smartphone. They don’t have time to obsess over file formats, but they do care that
their gemstones don’t look dull.
Their simple system:
-
Use the phone’s native camera app (not the Instagram camera)
because it usually captures higher quality photos and videos. -
Turn on “Upload at highest quality” once and forget it the
setting stays on unless they change it. -
Record vertical video in 9:16 at 1080p, then trim and add music/text in
Instagram.
They’re not running professional color grading or high-end editing, but just using
the phone’s best camera mode plus high quality uploads makes a big visual
difference. Their products look sharper in close-ups, and fine details like chain
links hold up better after posting.
3. The Traveler Dealing with Bad Hotel Wi-Fi
Then there’s the travel creator, uploading from airports, trains, and wildly
suspicious hotel networks. They’ve turned on high quality uploads, but they notice
that when the connection is terrible, some videos still look softer than expected.
Their workaround:
-
Export videos in advance at the right resolution and bitrate on
their laptop or tablet. -
Schedule uploads or post when they hit a café or coworking space with decent
Wi-Fi. -
Keep Data Saver off while uploading, then turn it back on when they’re just
browsing.
The result is a more consistent feed no random “why is this reel suddenly 144p?”
moments and fewer failed uploads. In their analytics, they see better watch time
because viewers aren’t bailing on a blurry video in the first three seconds.
4. The Casual User Who Just Wants Cute Pet Photos to Look Good
Finally, there’s the everyday user who just wants their dog to look as majestic
online as he does when he’s stealing socks. They don’t want to think about
bitrates, but they are willing to spend 30 seconds in Settings.
Here’s their strategy:
-
Take photos in good light using the rear camera
(front cameras are often softer). - Crop once in the phone’s gallery to 4:5 or 1:1 and export/copy that version.
- Turn on “Upload at highest quality” and leave it on forever.
- Upload mostly on Wi-Fi.
They’re not chasing perfection, but suddenly their pet photos look a lot closer to
what they see on their phone and far less like someone smeared Vaseline on the
lens.
Bringing It All Together
Turning on high quality uploads on Instagram is a tiny setting with a big impact.
On its own, it won’t magically transform a low-resolution screenshot into a gallery
-ready photo, but combined with the right export sizes, good lighting, and a decent
connection, it can significantly boost how professional and polished your feed
looks.
Think of it as part of your “Instagram hygiene”: prep your files, flip the right
switches, and stop leaving your images at the mercy of default compression. Your
followers may not know exactly what changed they’ll just know your content
suddenly looks a lot better.
And once you set everything up, you don’t have to redo it every time. High quality
uploads is a “set it and forget it” upgrade. Flip it on once, build good posting
habits, and let Instagram do its thing with a little more respect for your pixels.