Table of Contents >> Show >> Hide
- Why Tin Can Lids Make Great Christmas Ornaments
- Gathering and Preparing Your Tin Can Lids
- Basic Supplies for Tin Can Lid Christmas Ornaments
- Project 1: Classic Punched-Tin Snowflake Ornament
- Project 2: Vintage Collage Tin Can Lid Ornaments
- Project 3: Hand-Painted Character Faces
- Project 4: Cozy Fabric & Button Ornaments
- Design Tips to Make Your Tin Can Lid Ornaments Look Store-Bought
- Safety, Sustainability, and Kid-Friendly Variations
- Creative Ways to Display and Gift Your Tin Can Lid Ornaments
- Real-Life Experiences: Extra Tips for Tin Can Lid Ornaments
- Final Thoughts: From Recycling Bin to Christmas Magic
If you open a lot of soup, veggies, or coffee during the year, chances are you’ve been tossing a very underrated craft supply straight into the recycling bin: tin can lids. With a little paint, some glue, and a few cozy Christmas touches, those plain metal circles can become charming DIY Christmas ornaments that look like something you’d find in a boutique gift shop, not in last night’s trash.
This tutorial walks you through how to transform tin can lids into cute Christmas ornaments inspired by the upcycled projects you often see on Hometalk. We’ll cover essential safety tips, a basic supply list, several ornament styles (from punched-tin snowflakes to vintage collage and hand-painted faces), plus real-life experience-based tricks for getting a polished finish. By the end, you’ll see why “tin can lid ornaments” might become your favorite holiday craft.
Why Tin Can Lids Make Great Christmas Ornaments
Before we dive into the how-to, it helps to understand why tin can lids are such a smart material for DIY Christmas crafts:
- Budget-friendly: You’ve already paid for the cans with your groceries. The lids are essentially free crafting blanks.
- Eco-conscious: Upcycling keeps metal out of the landfill and turns it into something you’ll actually cherish.
- Surprisingly sturdy: Tin lids are thin enough to punch or drill, but strong enough to survive years of hanging on the tree.
- Endlessly customizable: You can paint them, decoupage them, layer paper or fabric, add beads, glitter, buttonsyou name it.
- Kid-friendly (with tweaks): With edges smoothed and an adult handling sharp tools, kids can help paint, glue, and decorate.
Think of each lid like a mini canvas or frame. Once you start noticing them that way, every empty can starts looking a little bit like a Christmas miracle.
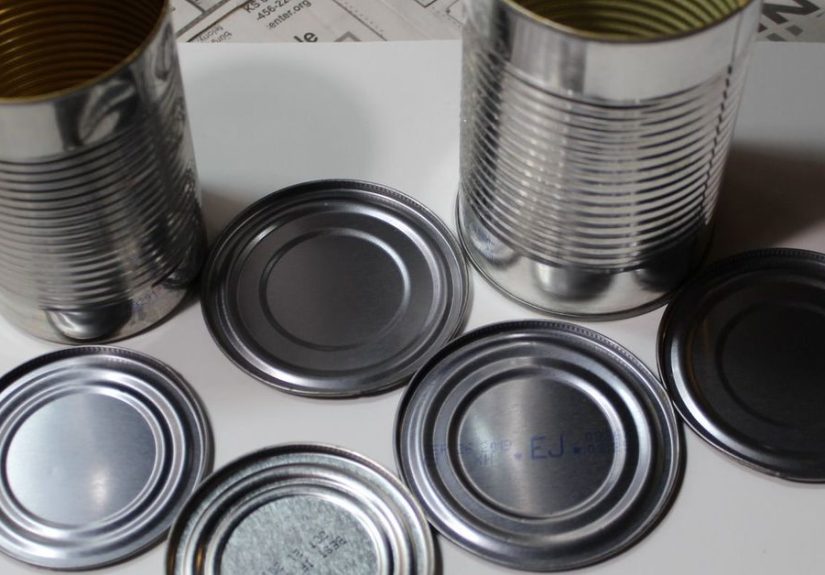
Gathering and Preparing Your Tin Can Lids
Choosing the Right Lids
You can use almost any flat metal lid: soup cans, veggie cans, coffee cans, even pet food cans. For a cohesive look on your tree, try to collect sets of similar sizes. A mix of small and large lids can also be gorgeous if you plan a layered, eclectic style.
If you have a can opener that leaves a smooth, “safety” edge, that’s ideal. If not, don’t worryyou’ll just need to spend a little extra time smoothing with a metal file or sandpaper and be mindful about handling.
Cleaning and Safety Prep
Safety comes first, especially with sharp metal. Follow these steps before any decorating happens:
- Wash thoroughly: Clean the lids with warm, soapy water and dry them completely to avoid rust and lingering food smells.
- Smooth the edges: Use a metal file, fine-grit sandpaper, or a metal nail board to gently round off sharp spots along the rim.
- Check for warping: If a lid is badly bent or cracked, skip it. You want relatively flat, sturdy pieces.
- Prime if needed: For lids with slick coatings or printed labels, add a quick coat of metal or multipurpose primer so your paint and glue adhere better.
Once the lids are cleaned and prepped, line them up like little soldiers on a piece of cardboard. Now the fun part can really start.
Basic Supplies for Tin Can Lid Christmas Ornaments
You do not need a fancy craft room to make these ornaments. Most supplies are inexpensive and easy to find at big-box stores or dollar stores.
- Clean tin can lids (similar or mixed sizes)
- Acrylic craft paint or chalk paint (white, red, green, metallics, etc.)
- Small paintbrushes and paint pens
- Mod Podge or other decoupage glue
- Holiday scrapbook paper, tissue paper, napkins, or old Christmas cards
- Scrap fabric, felt, or batting (for cozy, stuffed ornaments)
- Ribbon, baker’s twine, jute, or yarn for hanging loops
- Buttons, faux greenery, wood cutouts, small bells, sequins, or beads for embellishments
- Hole punch for metal, small drill, or nail and hammer for making hanging holes
- Hot glue gun and glue sticks
- Pencil, scissors, and a simple circle template (tracing a lid works fine)
With these basics, you can copy a ton of tin can lid ornament ideas just by changing the surface treatment and decorations.
Project 1: Classic Punched-Tin Snowflake Ornament
Punched-tin ornaments look like something rescued from your great-grandma’s farmhouse attic, but they’re surprisingly simple to make. This style lets the metal itself be the star, so it’s perfect if you love a rustic, old-fashioned tree.
Step-by-Step Instructions
- Draw your design: On a piece of paper, trace your lid to create a circle. Sketch a simple snowflake, star, tree, or word like “JOY” using dots where you want holes to be. Keep the design bold and not too detailedtiny flourishes are harder to punch cleanly.
- Transfer the pattern: Tape the paper circle onto the lid. Place the lid on a piece of scrap wood or a folded towel to protect your work surface.
- Punch the holes: Using a small nail and a lightweight hammer, gently tap holes through each dot in your design. Work slowly and keep your fingers far from the nail. Rotate the lid if needed to hit from comfortable angles.
- Make a hanging hole: Punch one extra hole near the top edge for the ribbon or twine hanger.
- Clean up the back: Flip the lid and gently flatten any sharp metal burrs with the hammer or file them down.
- Add color (optional): If you want a more festive look, spray paint or brush paint the lid with white, gold, or silver. A quick coat of clear sealant helps prevent rust.
- Finish with a ribbon: Thread twine or ribbon through the top hole and knot into a loop. Add a small bow or jingle bell if you want extra charm.
Hang your punched-tin ornament where your tree lights can shine through the holes. The tiny glimmers of light make the design sparkle in a subtle, old-fashioned way.
Project 2: Vintage Collage Tin Can Lid Ornaments
If you love the cozy, layered look of vintage holiday decor, collage-style ornaments might be your favorite. This method is similar to what you often see in Hometalk-style tutorials: a base, a pretty image, some dimensional details, and a ribbon to finish it off.
How to Make a Vintage Collage Ornament
- Create your background: Trace your lid onto decorative scrapbook paper, sheet music, or the printed part of an old Christmas card. Cut out the circle and test-fit it inside the lid.
- Decoupage it in place: Brush a thin layer of Mod Podge inside the lid, press the paper circle down, and smooth out any bubbles. Top with another light coat of Mod Podge to seal.
- Add a focal image: Cut out a small Santa, reindeer, ornament, or phrase like “Merry & Bright” from a card or printed image. Glue it in the center or slightly off-center for a playful look.
- Layer the details: Add tiny stars, sequins, faux snow, or mini wood cutouts using hot glue. You can also run thin ribbon or yarn around the rim to give it a framed look.
- Drill or punch a hanging hole: Create a hole near the top and thread ribbon or jute through it. Tie a knot to form a loop and finish with a small bow.
These ornaments are especially fun if you use old family Christmas cards or photos. Suddenly, that stack of saved holiday mail becomes a memory-filled ornament collection.
Project 3: Hand-Painted Character Faces
Got a steady hand and a love for cute faces? Transform your tin can lids into tiny characters: snowmen, gingerbread people, Santa, or even a grumpy “Bah Humbug” cat.
Painting Tips for Adorable Faces
- Prime first: Start with a base coat of white or another light color so your details pop.
- Keep it simple: Use basic shapesround eyes, a carrot triangle nose, rosy cheeks, and a big smile. You don’t need fine-art skills to make something adorable.
- Use paint pens for details: Paint pens or markers designed for metal give you more control for tiny lines and dots.
- Layer and outline: Once your main colors are dry, add thin outlines and highlights. A few dots of white on eyes or cheeks make characters look instantly more lively.
- Seal your work: Finish with a clear sealer to protect from scratches and humidity.
Don’t stress about getting each face perfect. Part of the charm of handmade Christmas ornaments is that each one looks a little differentlike a quirky, festive family.
Project 4: Cozy Fabric & Button Ornaments
If you love soft textures on your tree, combine your tin can lids with fabric and buttons. This style feels like a tiny quilt block framed in metal, and it’s a great way to use leftover flannel or Christmas-print fabric.
- Cut your fabric circle: Trace your lid onto the wrong side of the fabric, then cut the circle slightly larger than the lid.
- Add a soft layer: Place a bit of batting or a cotton ball in the center of the lid for a padded look.
- Glue and stretch: Press the fabric circle over the batting and glue its edges to the back of the lid, stretching it gently so the front stays smooth.
- Decorate the front: Stitch or hot glue buttons into a simple tree shape, snowflake, or heart. You can also tie on a small bow or add a mini wooden star at the top of a “tree.”
- Hide the back: Cut a second circle of felt and glue it over the back of the lid to cover fabric edges and make everything look finished.
- Add a hanger: Glue a folded ribbon or twine loop between the lid and the felt backing, or punch a hole through the metal before adding fabric.
These ornaments have a soft, farmhouse feel and look especially good on trees decorated with buffalo plaid, burlap, or natural wood elements.
Design Tips to Make Your Tin Can Lid Ornaments Look Store-Bought
You can absolutely embrace a quirky, anything-goes style. But if you’re aiming for a cohesive, “I totally bought these at a boutique” vibe, a little planning helps.
- Pick a color palette: Limit yourself to three or four main colorsmaybe red, white, green, and gold. When every ornament fits the same palette, your tree instantly looks more intentional.
- Repeat elements: Use the same ribbon, twine, or type of greenery across multiple ornaments. Repetition ties the whole collection together.
- Mix texture but keep balance: Combine shiny metal lids with matte paint, cozy fabric, and a touch of sparkle, but avoid going overboard on glitter or busy patterns.
- Add words sparingly: Short words or phrases like “JOY,” “NOEL,” or the year can be lovely. Keep the fonts simple and easy to read.
- Finish the backs: A quick felt backing or coat of paint on the reverse side makes ornaments look polished when they spin on the tree.
Safety, Sustainability, and Kid-Friendly Variations
Because you’re working with metal and tools, it’s smart to plan aheadespecially if kids are helping.
- Let adults handle cutting and punching: Drilling holes and punching designs with nails or awls should be grown-up jobs.
- Use safety can openers when possible: They leave a smoother edge and make the whole project less stressful.
- Try plastic lids for younger crafters: If you want a similar project for small kids, use plastic lids from yogurt or coffee containers with paper and stickers instead of metal.
- Reuse everything you can: Ribbon scraps, fabric offcuts, old gift wrap, leftover beadsthis is the perfect project to empty your “someday I’ll use this” craft drawer.
That combination of safety and sustainability is exactly why so many upcycling fans love tin can lid ornaments: they’re thrifty, greener than buying new decor, and surprisingly satisfying to create.
Creative Ways to Display and Gift Your Tin Can Lid Ornaments
Of course, your ornaments will look fantastic on a Christmas tree, but don’t stop there.
- Gift toppers: Tie a tin can lid ornament onto wrapped presents as a bonus keepsake.
- Garlands: String several lids onto a length of jute or ribbon and drape across a mantel or window.
- Mini wreath accents: Attach a lid ornament to the center of a small grapevine wreath for a layered look.
- Place cards: Write guests’ names on the ornaments and hang them on the backs of dining chairs or place them on plates.
- Advent countdown: Number each ornament and hang them on a branch or display board, then flip one around each day in December.
With so many ways to use them, it’s worth making more ornaments than you think you’ll needyou’ll find a spot for every last one.
Real-Life Experiences: Extra Tips for Tin Can Lid Ornaments
Once you start making these ornaments, you’ll notice a few patterns and “aha!” moments, especially if you craft season after season. Here are some experience-based insights that can save you time and make your ornaments look even better.
1. Prep sessions make everything faster. It’s tempting to tackle one ornament from start to finish, but most crafters find it easier to work in stages. Set aside one afternoon just for washing, smoothing edges, and priming all your lids. Another night, punch designs or cut paper backgrounds. When you finally sit down to decorate, you’ll have a whole stash of ready-to-go bases, which makes the creative part more relaxing.
2. Simple designs age the best. In the excitement of a new craft, it’s easy to get wild with color and glitter. Over time, many people notice they reach for the simpler ornamentsthe white snowflakes, classic red-and-green designs, or neutral farmhouse styleswhen they decorate year after year. Bold, trendy looks are fun, but a few timeless designs will stay on your tree for decades.
3. Lights matter more than you think. Punched-tin ornaments look completely different depending on how light hits them. If you hang them deep inside the tree where the lights are, they glow. If they’re on the outer branches without backlighting, the design can look a little flat. After decorating, take a step back and re-hang a few in front of twinkle lights. It’s a small adjustment that makes a big difference.
4. Test your adhesives. Different lid coatings (especially from coffee or specialty food cans) can react differently to glue. Before you commit to an entire collection, test your chosen glue or Mod Podge on one lid and let it dry fully. If the paper curls, yellows, or peels, lightly sand the surface or switch to a stronger adhesive. This extra test run can prevent heartbreak when you pull ornaments out next year.
5. Keep a “scrap bowl” nearby. As you work, you’ll end up with tiny cutouts, bits of ribbon, and single sequins. Toss them into a small bowl instead of the trash. That bowl becomes your treasure chest for last-minute framing, borders, or filling in an empty corner on an ornament. Some of the cutest detailsfrom mini banner flags to faux snowbanksoften come from that scrap pile.
6. Involve friends and family. One of the sweetest parts of tin can lid ornaments is how personal they can become. Host a casual ornament night with cocoa and snacks. Let each person design one or two lids with their initials, favorite colors, or a tiny drawing that represents them. In a few years, your tree will feel like a scrapbook of those eveningsespecially when you recognize someone’s style in a certain ornament.
7. Label the year on the back. Use a paint pen or permanent marker to write the year and maybe a short note on the back of each ornament: “First year in new house,” “Baby’s first Christmas,” or “Tin Lid Experiment 2025.” It seems like a tiny detail now, but down the road, these notes turn your upcycled ornaments into a personal timeline of holidays and milestones.
8. Don’t fear “imperfections.” Sometimes a punched hole lands slightly off or a painted eye looks a bit crooked. Instead of starting over, lean into the handmade character. Tilt a mouth to become a cheeky grin, or add a tiny star to balance the design. The goal isn’t perfection; it’s personality. Those quirks are exactly what separate your ornaments from mass-produced decor.
9. Store them thoughtfully. Because they’re metal, tin can lid ornaments hold up well, but they can still scratch or bend. Wrap each one in tissue paper or tuck them into a small box with dividers. If you’ve used 3D embellishments like beads or clay pieces, give them a little extra padding. Good storage means your recycled ornaments will look fresh year after year, even if they started life as last night’s chili cans.
10. Let the project evolve. The first year you might only make simple punched designs. The next year you might add collage ornaments with old cards. Eventually, you may incorporate photos, fabric, or even tiny 3D scenes inside larger lids. That evolution is part of the fun. You’re not just saving metal; you’re building a handmade collection that grows with your creativity.
In other words, tin can lid ornaments are more than a money-saving hack. They’re a way to slow down, get creative, and turn everyday items into memory-filled treasures. Once you see how charming they look on your treeand how proud you feel saying, “I made those from soup can lids”you may never look at an empty can the same way again.
Final Thoughts: From Recycling Bin to Christmas Magic
Transforming tin can lids into cute Christmas ornaments is one of those projects that checks all the boxes: it’s budget-conscious, eco-friendly, customizable, and just plain fun. With a little prep and a few basic supplies, you can create punched-tin snowflakes, vintage collage pieces, painted character faces, and cozy fabric ornaments that fit right in with your favorite holiday decor.
Whether you’re crafting alone with a movie in the background or hosting a full-on ornament-making party, your tree will end up with something store-bought decorations can’t match: handmade pieces filled with stories. And every time you hang those tiny metal circles, you’ll remember that Christmas magic doesn’t have to come from a shopping cartit can come from the recycling bin, a paintbrush, and a bit of imagination.