Table of Contents >> Show >> Hide
- What Stone Washing Really Means
- Before You Start: Pick the Right Denim
- What You’ll Need
- How to Stone Wash Denim at Home in 8 Easy Steps
- Step 1: Read the Care Label and Test a Hidden Area
- Step 2: Wash or Dampen the Denim First
- Step 3: Identify Natural Wear Zones
- Step 4: Start with Gentle Abrasion
- Step 5: Build Depth in Layers
- Step 6: Add Optional Fading with a Diluted Bleach Touch
- Step 7: Wash the Denim the Right Way
- Step 8: Air-Dry and Reassess
- Mistakes to Avoid When Stone Washing Denim at Home
- Tips for Making Your Stone-Washed Denim Look More Natural
- What the Experience Is Really Like: from the Denim Trenches
- Final Thoughts
If your jeans are giving “fresh off the shelf” when you want “I’ve lived a little,” stone washing at home can help. That soft, faded, broken-in denim look has been cool for decades because it makes jeans feel less stiff, less precious, and a lot more personal. The catch? You do not want to turn your favorite pair into a tragic pile of blue threads and regret.
The good news is that you can create a stone-washed effect at home with patience, a light touch, and a little laundry common sense. The even better news is that you do not need a fashion factory, a giant rotary drum, or the confidence of a reality-show contestant who says, “I’ve never done this before, but how hard can it be?”
In this guide, you’ll learn what stone washing really is, which jeans work best, what tools to use, and how to get that worn-in look in eight easy steps. You’ll also find practical tips, common mistakes to avoid, and a real-world section on what the experience actually feels like when you try this project at home.
What Stone Washing Really Means
Traditional stone washing was developed to make denim look older, softer, and more relaxed by using abrasive stones, often pumice, together with tumbling and washing. In commercial settings, the process is aggressive, carefully controlled, and designed for industrial equipment. At home, you are not truly recreating factory stone washing in the exact technical sense. You are creating a safer, gentler version of the same visual idea: soft abrasion, strategic fading, and a washed-down finish.
That distinction matters. If you toss random rocks into your home washer and hope for the best, your denim may not be the only thing that gets distressed. The smarter approach is to mimic the look by working on damp denim with controlled abrasion, then washing and drying it correctly to finish the effect.
Before You Start: Pick the Right Denim
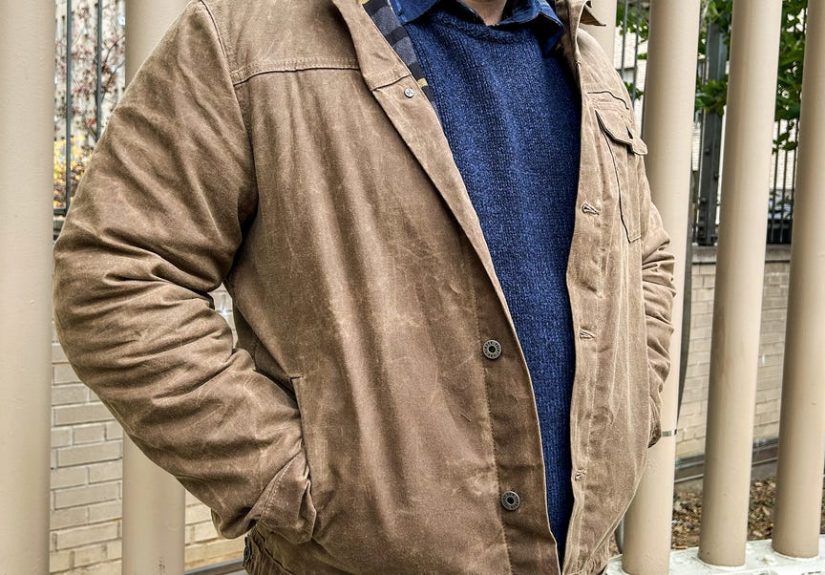
The best candidates for home stone washing are sturdy jeans or denim jackets made from mostly cotton denim. Midweight and heavyweight denim usually gives the most predictable results because it can handle abrasion better without immediately thinning out. Vintage-style jeans, thrifted denim, workwear denim, and plain blue jeans are all great choices.
Use extra caution with stretch denim, skinny jeans with lots of elastane, black denim, very lightweight fashion denim, or anything with embroidery, rhinestones, coating, or a “dry clean only” label. Stretch jeans can lose shape more easily, and embellished pieces can end up looking less “coolly faded” and more “survived a small natural disaster.”
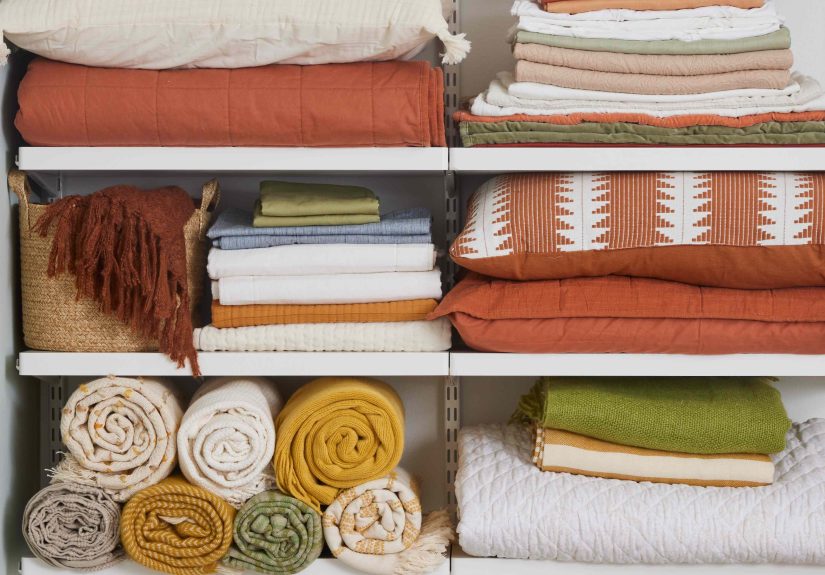
What You’ll Need
- One pair of denim jeans, shorts, or a denim jacket
- A pumice stone, sanding sponge, or fine-grit sandpaper
- Mild liquid laundry detergent
- A bucket, sink, or basin
- Spray bottle with water
- Old towels or a drop cloth
- Rubber gloves
- Optional: diluted bleach solution for extra fading on sturdy cotton denim only
- Optional: an old toothbrush for seam work
If you are using bleach for a stronger faded effect, always do a hidden test first and keep the application light. Never pour full-strength bleach directly onto denim. That is how you get surprise holes, weird yellowing, and a sudden need to pretend you “meant for it to look avant-garde.”
How to Stone Wash Denim at Home in 8 Easy Steps
Step 1: Read the Care Label and Test a Hidden Area
Start with the boring but important part: the care label. If the garment says “dry clean only,” back away slowly. If it is machine washable, you are in business. Before doing anything visible, test your abrasion tool on an inside hem, pocket edge, or other hidden area. Rub gently for 10 to 15 seconds and see how the fabric reacts.
This tiny test tells you a lot. Some denim fades beautifully. Some barely changes. Some turns fuzzy faster than expected. A hidden test also helps you decide whether your pumice stone, sanding sponge, or sandpaper is too rough. Think of this like a movie trailer for the full project: short, revealing, and much cheaper than fixing a mistake later.
Step 2: Wash or Dampen the Denim First
Stone-washed denim looks best when the fabric is clean and slightly softened before you begin distressing. Give the garment a quick wash in cold water with a small amount of mild detergent, then let it air-dry until it is just damp. If the jeans are already clean, you can simply dampen them with a spray bottle or soak them briefly and squeeze out excess water.
Damp denim is easier to work with than bone-dry denim because the fibers are more relaxed, and the abrasion tends to look more natural. You are not trying to shred the fabric in one dramatic moment. You are trying to encourage controlled wear, like the jeans just lived through years of coffee runs, concerts, road trips, and sitting on every hard bench in America.
Step 3: Identify Natural Wear Zones
Before you start rubbing away, study your jeans. Real stone-washed denim does not fade randomly. It usually shows wear on the thighs, knees, seat, pocket edges, hems, fly area, and seams. On a denim jacket, common wear zones include the elbows, cuffs, collar, pocket flaps, and front placket.
Lay the garment flat and decide where you want a soft faded look versus stronger contrast. For a natural finish, focus on raised areas and seams rather than broad flat sections. If you go too hard in the middle of the fabric, the result can look less like “perfectly broken-in denim” and more like “your jeans lost an argument with a sidewalk.”
Step 4: Start with Gentle Abrasion
Now the fun begins. Place a towel inside the leg or under the area you’re treating so you have a firm surface and don’t accidentally overwork the back side. Rub the damp denim with a pumice stone or fine sandpaper using light, short strokes. Move in one direction at first, then soften the look with a few cross-strokes.
Do not rush. Check your progress every 20 to 30 seconds. You can always add more fading, but you cannot un-distress denim once the fibers are gone. Seams, pocket openings, and hems usually fade fastest and look the most convincing. If you want texture without heavy color loss, a sanding sponge is often gentler than sandpaper and easier for beginners to control.
Step 5: Build Depth in Layers
After the first round of abrasion, step back and look at the garment from a few feet away. Good stone washing is layered. It has lighter high points, softer mid-tones, and intact areas that still give the denim shape and depth. That is what keeps it looking expensive instead of overworked.
Go back and add a second light pass only where you want more contrast. Work extra carefully on knees and upper thighs if you want that classic lived-in look. You can use an old toothbrush on thick seams and pocket corners to soften them without aggressively thinning the surrounding denim. This stage is where patience pays off. Denim responds best to “a little, then evaluate” rather than “chaos, then panic.”
Step 6: Add Optional Fading with a Diluted Bleach Touch
If you want a brighter, more dramatic fade, you can add a very small amount of diluted bleach after the abrasion step. This is optional, and it is best reserved for sturdy, mostly cotton denim. Mix and use the product according to its label directions, test it on a hidden area first, and apply it sparingly with a sponge, cloth, or spray bottle aimed only at the faded zones.
Do not soak the entire garment unless you are intentionally trying to lighten the whole piece. For most home projects, less is more. Dab, wait briefly, monitor the color shift, and rinse thoroughly once you like the effect. Never use undiluted bleach directly on denim, and never mix bleach with vinegar or other cleaners. This step is the difference between “subtle vintage fade” and “oops, my jeans now look like a science fair warning label.”
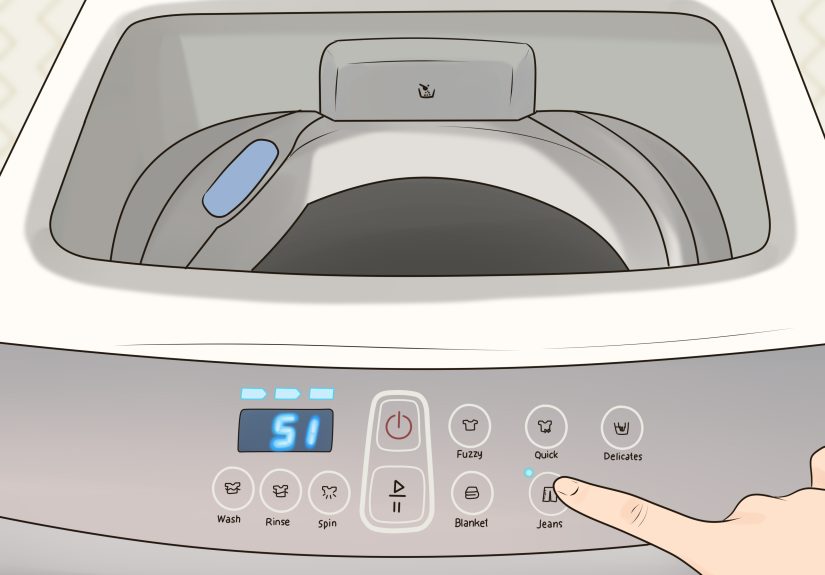
Step 7: Wash the Denim the Right Way
Once you are happy with the look, wash the denim to remove loose fibers, detergent, and any remaining treatment residue. Turn the garment inside out, wash it in cold water, and choose a gentle or delicate cycle. Washing inside out helps protect the outer surface from unnecessary friction while still letting the newly distressed areas settle into a more natural finish.
Wash denim by itself or with similarly dark items, especially if it is new or heavily dyed. Avoid overloading the washer, and skip heavy heat. If the project involved bleach, make sure the garment is thoroughly rinsed before it goes into a full wash. This finishing wash is where the whole project stops looking “freshly attacked with a pumice stone” and starts looking intentionally softened and lived-in.
Step 8: Air-Dry and Reassess
After washing, hang the denim to air-dry. High dryer heat can shrink cotton, stress stretch fibers, and flatten some of the visual character you just worked to create. Air-drying also lets you inspect the final fade clearly before deciding whether you want another round of gentle abrasion later.
Once dry, try the garment on. Denim often looks a little different when worn than it does lying flat. Creases form, the faded areas catch the light differently, and the overall effect becomes more obvious. If you want slightly more wear, repeat the process lightly rather than trying to nail the “perfect wash” in a single round. Great denim is usually built in layers, not in one dramatic afternoon of overconfidence.
Mistakes to Avoid When Stone Washing Denim at Home
- Using too much force: Heavy abrasion can weaken the fabric fast, especially around knees and seat seams.
- Skipping the test area: Different denim reacts differently, even within the same closet.
- Working on dry fabric only: Dry denim can produce harsher, fuzzier damage instead of soft fading.
- Ignoring the care label: Not every pair of jeans is a good DIY candidate.
- Overdoing bleach: Too much can weaken fibers, change color unpredictably, or cause holes over time.
- Using high dryer heat: Heat can shrink and stress denim, especially stretch blends.
Tips for Making Your Stone-Washed Denim Look More Natural
If your goal is designer-looking denim instead of accidental costume denim, keep the fade asymmetrical and slightly imperfect. Real wear patterns are not mirror images. One knee may fade more than the other. Pocket edges may soften unevenly. That subtle inconsistency is what makes denim feel authentic.
Another smart move is to stop just before you think you are done. Denim almost always looks a little stronger after it is fully dry and worn once or twice. In other words, your jeans may still have one last plot twist left in them. Give them a chance before you decide they need more sanding.
What the Experience Is Really Like: from the Denim Trenches
The first time you stone wash denim at home, the experience is half craft project, half trust exercise, and half standing over a pair of jeans wondering whether you are a genius or a person making very bold choices in the laundry area. Yes, that is three halves. Denim does that to people.
What surprises most beginners is how slow the process feels at first. You rub a thigh area for 20 seconds, step back dramatically, and realize almost nothing happened. Then you do another pass, and another, and suddenly the fabric starts to change in a way that feels weirdly satisfying. The denim softens visually before it softens physically. The color lifts a little. The seams start to pop. The jeans begin to look less “store mannequin” and more “favorite weekend pair that has seen actual daylight.”
Another common experience is learning that small areas matter more than you expected. People often assume the magic is in attacking large sections of fabric, but the real transformation usually happens around edges: the top of a pocket, the side seam, the hem, the knee crease. When those areas catch a softer, lighter tone, the whole garment looks more natural. It is a tiny style lesson disguised as laundry.
There is also a moment of fear that seems nearly universal. It usually happens about halfway through the project, when one leg looks more faded than the other or one knee suddenly seems too aggressive. This is normal. Denim is moody. It changes when damp, changes again when rinsed, and changes yet again when dry. The best experience comes from working in layers, taking breaks, and refusing to make decisions based on one slightly panicked glance under bad laundry-room lighting.
If you use a diluted bleach touch, the experience gets even more suspenseful. Bleach moves fast compared with abrasion, and it has the emotional energy of a reality TV elimination round. You dab a little on, wait, stare, rinse, stare again, and promise yourself that subtlety is your friend now. When it goes well, the effect is fantastic: the denim gets dimension, the faded zones brighten, and the whole piece looks more broken-in. When it goes badly, it teaches respect immediately. Usually with weird spots.
One of the best parts of the process is that it makes denim feel personal. After one careful DIY session, the jeans do not just fit your body. They reflect your choices. Maybe you wanted a vintage thigh fade, softer hems, or a jacket that looked a little less stiff and a little more rock-and-roll. That shift is part of the fun. You are not only altering color; you are changing character.
And finally, the biggest experience people report is confidence. Once you finish one successful stone-wash project, other denim in your closet starts looking suspiciously full of potential. Old jeans become experiments. A thrifted jacket becomes a weekend plan. Suddenly the laundry area is not just for chores. It is a tiny denim studio, and you are the slightly overcaffeinated creative director.
Final Thoughts
Learning how to stone wash denim at home is really about control. The best results come from understanding what makes denim fade naturally, using abrasion strategically, and finishing the garment with smart washing and drying habits. You do not need factory equipment to get a cool stone-washed look, but you do need patience, restraint, and a healthy respect for bleach.
Start with sturdy denim, work on damp fabric, fade the high-wear areas first, and wash gently when you are done. That is the formula. Keep it simple, keep it gradual, and keep the dramatic decisions to a minimum. Your jeans will thank you by looking relaxed, vintage-inspired, and just the right amount of rebellious.