Table of Contents >> Show >> Hide
- What “Sterilizing Bird Seed” Actually Means
- When It Makes Sense to Sterilize (or Treat) Bird Seed
- Before You Start: A Few Safety and Quality Rules
- Method 1: Oven Heat-Treating to Stop Sprouting (Best for “No-Grow” Goals)
- Method 2: Gentle Heat to Kill Pantry Pests (Insects/Eggs)
- Method 3: Freezing Seed to Stop Insects (Easy, Low Mess)
- Method 4: Microwave Treatment (Fast, But Tricky)
- The Bigger Win: Prevent Mold and Bacteria by Controlling Moisture
- Don’t Skip This: Clean Feeders to Prevent Disease Spread
- Quick Decision Guide: Which Method Should You Use?
- FAQs
- Real-Life Experiences: What Actually Worked (and What Didn’t)
- SEO Tags
Bird seed is supposed to attract birdsnot surprise vegetables. Yet somehow, many of us have looked under a feeder and discovered a tiny “bonus garden” of sprouting millet,
mystery greens, and what appears to be a sunflower that’s auditioning for a Pixar movie.
If you’re here because you’re tired of sprouting seed, worried about bugs in your storage bin, or just want to keep backyard feeding as safe and clean as possible, you’re in
the right place. “Sterilize” is a popular word online, but it can mean a few different thingsso let’s define it clearly, then walk through the best at-home methods (with
realistic expectations and zero lab coats).
What “Sterilizing Bird Seed” Actually Means
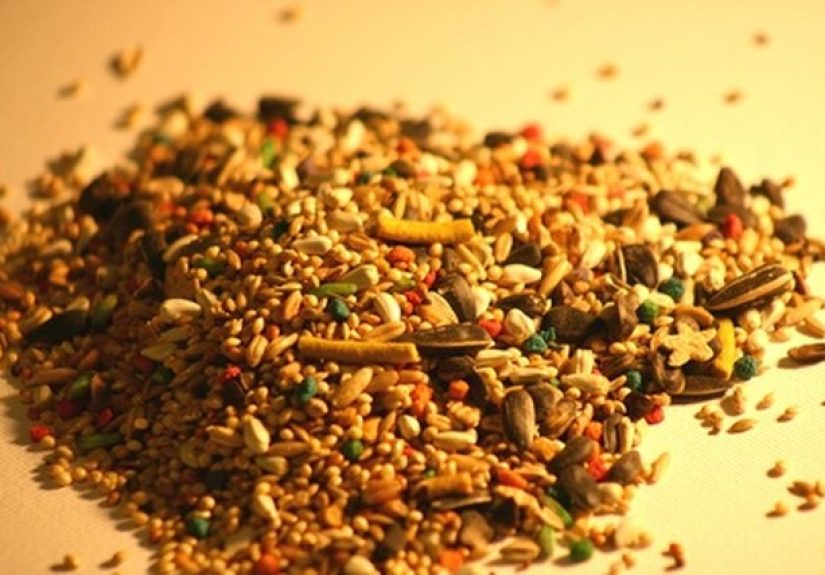
In everyday backyard-bird language, people usually mean one (or more) of these goals:
- Devitalize the seed: Make the seed unable to sprout (“no-grow” bird seed).
- De-infest the seed: Kill insects, larvae, or eggs (like pantry moths) that hitchhike home in seed bags.
- Reduce microbial risk: Lower the chance of mold and bacteria problems by managing moisture, freshness, and feeder hygiene.
Here’s the key reality check: true “medical-grade sterilization” isn’t the goal for bird seed at home (and it’s not very practical). What you can dovery effectivelyis
heat-treat or freeze seed for specific outcomes and, just as importantly, keep feeding equipment clean and seed dry.
When It Makes Sense to Sterilize (or Treat) Bird Seed
Consider treating bird seed if any of these sound familiar:
- Your yard is sprouting seed under the feeder and you want to stop the “free weeds with every refill” program.
- Your seed is labeled heat-treated/no-grow but you still see sprouts (it happens).
- You’ve spotted pantry moths (or webby clumps) in stored seed.
- Your seed smells musty or clumps easilysigns moisture is sneaking in.
- You’re using homegrown/DIY seed mixes and want more control over what’s going into your feeder area.
Before You Start: A Few Safety and Quality Rules
- If seed is moldy, damp, or smells “off,” throw it out. No heat trick is worth feeding questionable seed to wildlife.
- Don’t use chemicals on seed (bleach, disinfectant sprays, etc.). Chemicals belong on feeders, not food.
- Work in small batches until you know what your oven/microwave does with your specific seed mix.
- Cool completely before storage to prevent condensation (the silent villain of “I treated it… and it molded anyway”).
Method 1: Oven Heat-Treating to Stop Sprouting (Best for “No-Grow” Goals)
If your #1 goal is stopping germination, gentle oven heat is the most reliable at-home option. One particularly useful real-world example comes from guidance on
niger seed (thistle seed) in bird feed: if it’s labeled “heat-treated” but still sprouts, you can re-heat-treat it at home.
Step-by-Step: Oven Heat Treatment (No-Grow Focus)
- Preheat your oven to 200°F. Low and slow is the theme.
- Spread seed in a baking dish (or on a rimmed sheet) in an even layerno mountain ranges.
- Heat for 2 hours. Stir every 20–30 minutes so heat distributes more evenly.
- Cool completely on the counter (uncovered or loosely covered) until no warmth remains.
- Store in a dry, airtight container (more on storage below).
Why this works: devitalizing a seed is about damaging the embryo enough that it can’t germinate. You’re not trying to toast it like granolajust
remove its “future plant” ambitions.
Example: If you love feeding finches niger seed but hate the mini meadows under your feeder, this method is a practical resetespecially if you’ve
noticed sprouts from a bag labeled “heat-treated.”
Tips to Avoid Burning (Because Smoke Alarms Are Not Bird Calls)
- Use an oven thermometer if your oven runs hot.
- Don’t crank the heat to “speed it up.” Higher heat can scorch oils (especially in sunflower seeds), reduce palatability, and create rancid odors.
- Let seed cool fully before sealing it. Warm seed + tight container = condensation = mold party.
Method 2: Gentle Heat to Kill Pantry Pests (Insects/Eggs)
If your problem is pantry peststhink insects in stored seedyour goal is different: you want to kill eggs, larvae, or adults that might be hiding in the mix. A gentle
heat approach can help, especially when you need a non-chemical method.
Step-by-Step: Low-Temp Heat for Stored-Product Insects
- Spread seed in shallow pans so heat can reach it evenly.
- Warm at about 130°F for at least 30 minutes. (This temperature/time is often cited for killing eggs and insects in stored products.)
- Stir once or twice for more even warming.
- Cool completely and store in a sealed container.
Reality check: This is more about de-infesting than devitalizing. It may not reliably stop germination in all seeds, but it can be helpful
for the “ew, bugs” scenario.
Method 3: Freezing Seed to Stop Insects (Easy, Low Mess)
Freezing is the low-effort hero of pest control. If you suspect pantry moths or other stored-product pests, freezing can kill insects and eggs when done correctly.
It also avoids the “my kitchen smells like warm sunflower chips” situation.
Step-by-Step: Freezer Treatment
- Seal seed in an airtight bag or container. (This prevents moisture pickup and keeps your freezer from smelling like a bird buffet.)
- Freeze at 0°F for at least 4 days.
- Thaw while still sealed to prevent condensation forming on the seed.
- Store sealed in a cool, dry place.
Best use case: You bought a big bag on sale (we’ve all done it), and you want to make sure you’re not also adopting an insect colony.
What freezing won’t do: It won’t reliably make seed “no-grow.” If your main goal is stopping sprouting, use the oven method.
Method 4: Microwave Treatment (Fast, But Tricky)
Microwaves can heat quickly, but they’re famously uneven. That means some seeds can get scorching hot while others barely warm upespecially in a dense pile.
If you choose this method, treat it like a small-batch experiment.
Safer Microwave Approach for Small Batches
- Work in 1–2 cup batches in a microwave-safe bowl.
- Microwave in short bursts (15–30 seconds), then stir thoroughly.
- Repeat until the seed feels uniformly warm/hot (not smoking, not popping aggressively).
- Cool completely before storing.
Warning: Seeds can scorch, especially oily seeds, and overheated seed can smell rancid. If you see smoke or smell burning, stop. Birds deserve better than
“charcoal notes with a hint of regret.”
The Bigger Win: Prevent Mold and Bacteria by Controlling Moisture
If you’re worried about “sterilizing” for bird health, here’s the most practical truth: the biggest risk in everyday bird feeding is often moisture. Wet seed can clump,
spoil, and grow mold. Your best defense is keeping seed dry, using fresh seed, and cleaning feeders properly.
Smart Storage Rules (So Your Seed Stays Seed)
- Store indoors in a cool, dry place out of sun and humidity (think: not on the porch in July).
- Use airtight, rodent-proof containers.
- Don’t mix old seed with new seed. Finish one batch first.
- Buy amounts you can use fairly quickly, especially in warm weather.
- Watch for clumping or musty odors. That’s your cue to toss it.
Example storage upgrade: If you’ve been keeping seed in the original paper bag in a humid garage, moving it into a sealed plastic bin indoors can make a
dramatic differenceless mold risk, fewer pests, and better seed freshness.
Don’t Skip This: Clean Feeders to Prevent Disease Spread
Even perfectly treated seed can become a problem if your feeder is basically a tiny public cafeteria with sticky counters. Regular cleaning reduces buildup of old seed,
droppings, and bacteria.
Simple Feeder Cleaning Routine
- Empty the feeder and discard old, wet, or clumped seed.
- Wash with warm, soapy water and scrub crevices and ports.
- Disinfect with a diluted bleach solution (commonly 1 part bleach to 9 parts water) and soak briefly.
- Rinse thoroughly and let it dry completely before refilling.
When to pause feeding: If you notice sick or dead birds near your feeder, it’s wise to take feeders down for a period, clean them outdoors, and let birds
disperse to natural food sources while you reset the area.
Quick Decision Guide: Which Method Should You Use?
- Stop sprouting (“no-grow”): Oven heat-treat at 200°F for 2 hours (best practical option).
- Kill pantry pests: Freeze at 0°F for 4+ days, or use gentle heat around 130°F for 30+ minutes.
- Reduce mold risk: Keep seed dry, store it correctly, and never feed damp or musty seed.
- Protect bird health: Clean feeders regularly and keep the feeding area tidy.
FAQs
Will heat-treated seed hurt birds?
When done gently (low temperature, no scorching, fully cooled and dry), heat treatment is generally used specifically to make seed less likely to sprout, not to make it
unsafe. The big “don’t” is overheating: burned seed can taste off and oily seeds can go rancid.
Can I sterilize bird seed with bleach or disinfectant?
No. Save bleach for feeder cleaning and rinse thoroughly afterward. Bird seed is food; chemicals belong nowhere near it.
What about wet seed in my feeder after rain?
Don’t “dry it out and hope.” Wet seed can spoil quickly. Dump it, clean the feeder if needed, and refill with fresh, dry seed in a sheltered setup.
Real-Life Experiences: What Actually Worked (and What Didn’t)
The first time I tried to “solve” sprouting bird seed, I approached it with the confidence of someone who has watched exactly three cooking videos and now believes they are
a food scientist. I had a finch feeder, a big bag of niger seed, and a yard that looked like it was growing a carpet of tiny seedlings under the feeding station. The birds
were thrilled. My garden beds, however, were sending strongly worded letters.
My initial mistake was assuming any heat would do. I tried a higher oven temperature “just for a little bit” (famous last words), and the seed developed a slightly toasted
smellpleasant to me, suspicious to the birds, and absolutely not what I was aiming for. Lesson one: low and slow matters. When I switched to a gentle, steady heat
treatmentspreading seed in a thin layer, stirring occasionally, and letting it cool fully before sealing itthe sprouting under the feeder dropped dramatically within a
couple of weeks. Not to zero (nature always finds a way), but enough that my yard stopped auditioning for “Little Shop of Birdseed.”
Then came the pest era. One summer, I opened a storage bin and found the telltale signs: webby clumps and a few tiny moths doing figure eights like they owned the place.
I didn’t want to spray anything near seed, and I also didn’t want to throw away a large bag if I could safely salvage it. Freezing was the cleanest fix. I sealed the seed
in heavy-duty bags, froze it for several days, and thawed it while still sealed so condensation wouldn’t form. The difference was obvious: no more surprise moths when I
opened the container, and no new webbing over timeassuming I kept the bin sealed and the storage area dry.
The biggest “aha” wasn’t even the heat or freezing, though. It was moisture management. During a rainy stretch, I noticed seed in the feeder clumping faster, and birds
started kicking more out (which then sat damp on the ground). That’s when I started treating “keep seed dry” as the main strategy, not an afterthought. I moved my feeder
slightly under cover, shortened the amount I put out at once (refilling more often with smaller portions), and stuck to a strict cleaning routine. That routine mattered
more than any fancy seed treatment: a clean, dry feeder plus fresh seed is like the difference between a good picnic and eating potato salad that’s been in the sun since
yesterday.
If you want a simple takeaway from real backyard trial-and-error, it’s this: use oven heat treatment when sprouting is your main enemy, use freezing when pests are the
problem, and treat dryness and feeder hygiene as the “always” rules. Birds will forgive a lot. Mold and bacteria won’t.