Table of Contents >> Show >> Hide
- Before You Start: 7 Smart Things to Do First
- Method 1: Use Quick Start for the Fastest iPhone-to-iPhone Setup
- Method 2: Restore Your New iPhone From an iCloud Backup
- Method 3: Restore From a Mac or PC Backup
- Method 4: Move From Android to iPhone
- How to Transfer Your SIM or eSIM
- Settings to Check Right After Setup
- Common New iPhone Setup Problems and Fixes
- Should You Transfer Everything or Start Fresh?
- Final Thoughts
- Real-World Experiences: What New iPhone Setup Actually Feels Like
- SEO Tags
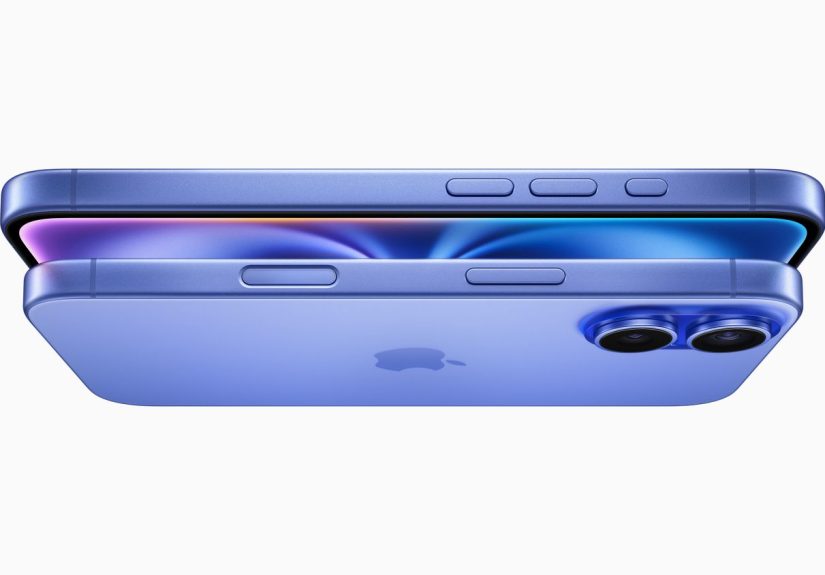
Nothing says “fresh start” quite like opening a new iPhone box and immediately wondering whether you are about to lose 14,000 photos, your text history, and that one notes app document with your Wi-Fi passwords from 2019. The good news? Setting up a new iPhone is usually much easier than people expect. Apple has made the process faster, smarter, and far less dramatic than it used to be.
If you are upgrading from an older iPhone, moving over from Android, or restoring everything from a backup, this guide walks you through the fastest and safest way to get your new device up and running. We will cover Quick Start, iCloud restore, computer backups, data transfer tips, eSIM setup, and the small but mighty settings you should check before you call the job done.
So grab both phones, a charger, your Apple Account password, and maybe a snack. New iPhone setup is not hard, but it does go a lot smoother when your battery is not hanging on at 7% like a hero in the final movie scene.
Before You Start: 7 Smart Things to Do First
Before you begin the iPhone setup process, do a little prep work. Five to ten minutes here can save you a full hour of muttering later.
1. Back up your old phone
If your current iPhone is still working, make a fresh backup before you touch the new one. That gives you the latest messages, photos, settings, and app data. If you use iCloud, back up over Wi-Fi. If you use a Mac or PC, make a local backup with Finder, Apple Devices, or iTunes.
2. Charge both devices
Data transfer can take a while, especially if your old phone is packed with photos, videos, and apps you downloaded for “productivity” but mostly use for memes. Plug both phones into power before you begin.
3. Turn on Wi-Fi and Bluetooth
Quick Setup on iPhone depends on both. If you are transferring from one iPhone to another, stable Wi-Fi and Bluetooth are your best friends.
4. Have your Apple Account information ready
You may need your Apple Account password during setup, especially for iCloud restore, app downloads, and security checks. If you use two-factor authentication, keep your old phone nearby until setup is complete.
5. Know your cellular situation
Some users will move a physical SIM card. Others will transfer an eSIM. Many newer iPhones use eSIM activation, and depending on your carrier, your phone number may move during setup or shortly after.
6. Install any setup update if prompted
Sometimes a new iPhone asks for a software update before transferring data. Do it. This is not the moment to rebel against updates on principle.
7. Check storage space
If you are restoring from backup or moving data from Android, make sure the new iPhone has enough space for everything you want to keep. A 128GB phone cannot magically swallow 240GB of memories just because you believe in it.
Method 1: Use Quick Start for the Fastest iPhone-to-iPhone Setup
If you are moving from an old iPhone to a new iPhone, Quick Start is usually the easiest method. It lets you use your current iPhone to begin the setup automatically and transfer settings, Apple Account details, and much of your content.
How Quick Start works
You place the new iPhone near the old one, confirm the setup prompt, scan the animation on the new device with the old device’s camera, and follow the on-screen steps. From there, you can transfer data directly from iPhone to iPhone or restore from a backup.
Why Quick Start is so popular
- It is fast and beginner-friendly.
- It reduces manual typing during setup.
- It can transfer many settings automatically.
- It works especially well when both phones are in front of you.
Steps to use Quick Start
- Turn on your new iPhone and place it near your current iPhone.
- Make sure the old iPhone has Bluetooth turned on and is connected to Wi-Fi.
- Wait for the Quick Start prompt to appear on the old iPhone.
- Tap Continue.
- Use the old iPhone to scan the animation on the new iPhone.
- Enter your old iPhone passcode on the new iPhone if asked.
- Set up Face ID or Touch ID.
- Choose whether to transfer directly from the old device or restore from a backup.
- Keep both phones close together and plugged in until the transfer finishes.
If you want the most seamless experience, direct device-to-device transfer is usually the sweet spot. It is ideal when your old iPhone still works and you want apps, messages, settings, and photos to move over with minimal fuss.
When Quick Start might not be the best choice
If your old iPhone is damaged, unavailable, or has not been backed up in ages, restoring from iCloud or a computer may be the better route. Quick Start also works best when your connection is stable and both devices behave like civilized technology.
Method 2: Restore Your New iPhone From an iCloud Backup
If your old phone is gone, wiped, traded in, or simply not nearby, restoring from an iCloud backup is the next-best option. This method pulls your data from Apple’s cloud during setup.
When iCloud restore makes sense
- Your old iPhone is no longer with you.
- You already made a recent iCloud backup.
- You want a cable-free setup.
- You prefer the convenience of restoring over Wi-Fi.
How to restore from iCloud
- Turn on the new iPhone.
- Follow the setup screens until you reach the apps and data options.
- Select Restore from iCloud Backup.
- Sign in with your Apple Account.
- Choose the most recent relevant backup.
- Stay connected to Wi-Fi and power while the restore begins.
One nice detail: your iPhone may become usable before every app fully finishes downloading. In other words, the phone starts feeling alive fairly quickly, even if the full restoration keeps chugging along in the background.
What about temporary iCloud storage?
If you are low on iCloud space, Apple may offer temporary iCloud storage when you prepare your old device for transfer. That can be incredibly helpful if your storage situation is “five gigabytes free and a dream.” For many people, this removes the need to buy extra space just to move to a new iPhone.
Method 3: Restore From a Mac or PC Backup
Some users prefer old-school reliability. If you keep backups on your computer, you can restore your new iPhone from that backup during setup. This is a great option if your internet connection is slow or your iCloud storage is cramped.
Why a computer backup can be a great choice
- It can be faster than cloud restore for large backups.
- It is useful when Wi-Fi is unreliable.
- It gives some users more control over the process.
- It is handy for people who already back up locally on a regular basis.
How to do it
- Connect your new iPhone to your Mac or PC.
- Open Finder on a Mac, or Apple Devices/iTunes on a Windows PC.
- Select your iPhone.
- Choose Restore Backup.
- Select the backup you want and begin the restore.
- Keep the device connected until the process is finished.
This method is especially useful if you like keeping an encrypted local backup, which can preserve more sensitive data like saved passwords and health-related information.
Method 4: Move From Android to iPhone
If you are switching teams and joining the iPhone crowd, welcome. The process is much less painful than it used to be. Apple’s Move to iOS app helps transfer content such as contacts, message history, photos, videos, mail accounts, and calendars from Android to iPhone.
Important note before you start
Move to iOS is designed to work during the initial setup of your new iPhone. If you already finished setup, you generally need to erase the iPhone and start over to use it properly. Yes, this is annoying. No, your phone does not care about your feelings.
How to transfer from Android to iPhone
- Turn on your new iPhone and begin setup.
- At the apps and data screen, choose Move Data from Android.
- Install the Move to iOS app on your Android phone.
- Open the app and follow the instructions.
- Enter the code shown on the iPhone into the Android device.
- Select the content you want to move.
- Wait for the transfer to complete before using either phone.
If some files do not transfer, you can move them later with cloud storage services, email, direct downloads, or manual file transfers. Photos and documents are usually easy. App-specific data is where life gets more interesting.
How to Transfer Your SIM or eSIM
Cellular activation is the step that makes some people nervous, but it is usually straightforward. Depending on your carrier and iPhone model, you may use a physical SIM, transfer an existing eSIM, scan a QR code, or activate through a carrier app.
Physical SIM
If your carrier still uses a physical SIM for your line, move it from the old phone to the new one if compatible. Insert it into the SIM tray, then continue setup.
eSIM Quick Transfer
Many carriers support transferring your number from one iPhone to another during setup. On the new iPhone, go to cellular setup and choose to transfer from a nearby iPhone if prompted. Confirm the transfer on the old device. Once activated, the number stops working on the previous phone.
If eSIM does not transfer automatically
You may need to:
- scan a QR code from your carrier,
- use your carrier’s app,
- log in to your wireless account, or
- contact the carrier for manual activation.
This is why “How to transfer data to new iPhone” and “How to activate a new iPhone” are related but not identical questions. Your photos may be ready to go while your phone number is still negotiating its contract with the universe.
Settings to Check Right After Setup
Once your iPhone turns on and looks normal, do not sprint away just yet. A few quick checks will save you headaches later.
Review these first
- Cellular service: Make sure calls, texts, and data work.
- iMessage and FaceTime: Confirm your phone number and Apple Account are activated.
- Photos: Check whether your library is still syncing.
- Mail: Open your main email accounts and verify they load correctly.
- Apps: Wait for key apps to finish downloading, then sign back in where needed.
- Apple Pay: Add your cards again if necessary.
- Find My: Make sure it is enabled.
- Emergency contacts and Medical ID: Worth checking, always.
- Software update: Install the latest available iOS update after setup if one remains pending.
Common New iPhone Setup Problems and Fixes
Quick Start does not appear
Restart both phones, turn Bluetooth off and back on, and make sure both devices are close together. Also confirm the old iPhone is unlocked and connected to Wi-Fi.
Transfer is taking forever
Large photo libraries and lots of apps can slow things down. Keep both phones plugged in and resist the urge to poke every button. The transfer may still be working even when it feels suspiciously quiet.
Not enough iCloud storage
Use temporary iCloud storage if available, buy extra storage temporarily, or switch to a computer backup method.
Backup will not restore
Check whether the new iPhone needs a software update first. Sometimes an older backup requires a newer iOS version before the restore can continue.
Move to iOS failed
Keep both phones on power, maintain a stable connection, and retry the transfer. For stubborn cases, move the essentials first, then transfer remaining content manually.
No cellular service after setup
Double-check whether your SIM or eSIM fully activated. Restart the phone, look for a carrier update, and contact your carrier if the line still has not moved over.
Should You Transfer Everything or Start Fresh?
This is the annual debate. Do you move your digital life exactly as it is, or do you treat the new iPhone like a clean apartment and leave half your junk at the curb?
Transfer everything if you want convenience, continuity, and your phone to feel familiar right away.
Start fresh if your old phone was cluttered, buggy, full of forgotten apps, or mysteriously low on storage despite your best efforts and several emotional speeches.
For most people, the best compromise is this: transfer everything first, then spend an hour cleaning up the new iPhone. It is safer than starting from scratch and usually much less stressful.
Final Thoughts
Setting up a new iPhone does not have to be complicated. For most upgrades, Quick Start is the fastest and easiest method. If your old phone is unavailable, iCloud backup restore is an excellent backup plan. If you like full control or have a huge backup, a computer restore still works beautifully. And if you are moving from Android, Move to iOS gets you much closer to a painless switch than older methods ever did.
The big secret is not technical genius. It is preparation. Back up first, keep both devices charged, know your Apple Account password, and do not rush the transfer. Once that is done, the rest is mostly tapping through prompts and pretending you were never worried in the first place.
In short, if you have been putting off your upgrade because you feared the setup process, relax. Your new iPhone is much more likely to become your new best friend than your new weekend project.
Real-World Experiences: What New iPhone Setup Actually Feels Like
In real life, setting up a new iPhone is rarely a perfect one-minute magic trick, but it is also not the disaster some people imagine. Most users fall into one of a few familiar camps. The first group is the confident upgrader: they put the old iPhone beside the new one, tap through Quick Start, and are texting from the new device before their coffee gets cold. These users usually have decent Wi-Fi, enough storage, and the kind of calm energy the rest of us find mildly suspicious.
The second group is the anxious photo archivist. This person has 60,000 photos, 900 videos, three cloud accounts, and a deep fear that one screenshot from 2017 will vanish forever. For them, the best experience usually comes from making a fresh backup first, then using either Quick Start or iCloud restore and patiently waiting for the photo library to finish syncing. The phone may look “done” early, but the memories often continue loading quietly in the background. That is normal, and it saves a lot of stress when people know it in advance.
Then there is the cross-platform switcher moving from Android to iPhone. Their experience is often a mix of relief and confusion. Relief, because Move to iOS handles more than many people expect. Confusion, because certain app data, game progress, and platform-specific settings do not always move neatly. The smartest switchers go in with realistic expectations: transfer the essentials first, then spend a little time signing in again, reorganizing apps, and learning where Apple hides settings that Android placed somewhere totally different for fun.
Carrier activation also shapes the experience more than people expect. Some users breeze through eSIM transfer in a minute. Others get everything copied perfectly and then spend twenty extra minutes persuading their phone number to join the party. That is why the smoothest setups happen when users treat data transfer and cellular activation as two separate wins. If your photos and apps are already there, you are not failing. You are just waiting on the last piece.
The most successful new iPhone setups usually have one thing in common: patience. Not expert knowledge. Not elite technical skills. Just patience, power cables, and a willingness to let the phone finish what it started. In other words, the best setup tool is not hidden in a menu. It is resisting the urge to panic when the progress bar pauses for ten minutes like it is thinking about its future.