Table of Contents >> Show >> Hide
- Can You Restore It, or Should You Replace It?
- Tools and Supplies You’ll Need
- Step-by-Step: How To Restore A Rusty Old BBQ Grill
- Step 1: Prep a Safe Work Zone
- Step 2: Disassemble and Photograph as You Go
- Step 3: Degrease First, Rust Second
- Step 4: Remove Rust from Each Material the Right Way
- Step 5: Handle Exterior Rust and Repaint (If Needed)
- Step 6: Inspect Parts and Replace What Isn’t Trustworthy
- Step 7: Reassemble and Do a Safety Check
- Step 8: Burn-In and Re-Season
- Common Restoration Mistakes (and How to Avoid Them)
- How to Keep Your Restored Grill Rust-Free
- Restore vs. Replace: Cost Snapshot
- Troubleshooting After Restoration
- Real Backyard Experiences: What Restoration Actually Feels Like (About )
- Conclusion
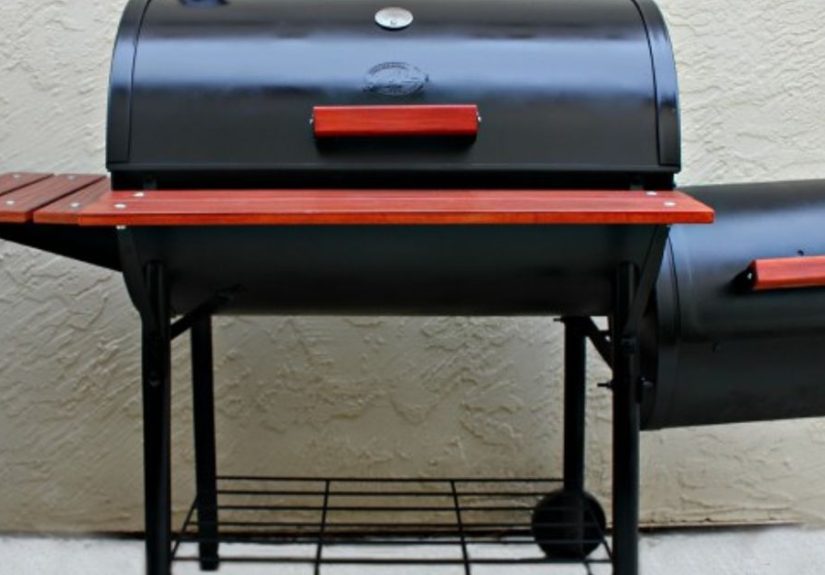
If your grill looks like it survived three hurricanes, two backyard birthdays, and one “experimental” marinade phasegood news: it might still have a glorious second life. Restoring a rusty old BBQ grill is often cheaper than replacing it, surprisingly satisfying, and a great way to get better flavor and safer cooking at the same time. The trick is knowing what to restore, how to restore it, and when to retire it with dignity.
This guide walks you through the full process in plain English, with practical steps for gas and charcoal models, cast-iron and stainless grates, rust treatment, repainting, reassembly, and long-term rust prevention. You’ll also get real-world restoration experiences at the end, so you can avoid the “I fixed it… then ruined it in 48 hours” cycle.
Can You Restore It, or Should You Replace It?
Before you deep-clean anything, decide whether your grill is a restoration candidate or a metal sculpture-in-progress.
Restore it if:
- Rust is mostly surface-level on grates, heat tents, or firebox walls.
- The lid and body are still structurally sound (no major holes, no severe warping).
- Burners and igniter can be replaced easily and affordably.
- The frame and wheels are stable.
Replace it if:
- The firebox is perforated with multiple through-holes.
- Critical load-bearing parts are cracked or failing.
- Repair parts plus labor approach the cost of a safer new unit.
- You smell persistent gas after replacing hoses/regulator and checking connections.
Quick rule: If the skeleton is solid, restoration makes sense. If the skeleton is compromised, replacement wins.
Tools and Supplies You’ll Need
- Heavy-duty gloves, safety glasses, dust mask
- Stiff nylon brush, scraper, non-scratch pads
- Mild dish soap + warm water
- Degreaser suitable for grills
- White vinegar and baking soda (for rust loosening)
- Sandpaper (80/120/220 grit) or wire wheel (for removable parts only)
- Microfiber cloths or shop towels
- Neutral high-smoke-point oil (canola/vegetable)
- Food-safe replacement grates (if current grates are beyond recovery)
- High-heat grill paint for exterior-only metal
- Optional: rust converter (for non-food-contact areas)
Important: Never apply paint, rust converter, or unknown coatings to food-contact surfaces (grates, interior cooking surfaces where food touches).
Step-by-Step: How To Restore A Rusty Old BBQ Grill
Step 1: Prep a Safe Work Zone
Move the grill outdoors to a flat surface away from structures. For gas grills, shut off fuel and disconnect the tank. Remove battery-powered igniter cells if applicable. Keep a small bucket for screws and clips so you don’t invent “leftover hardware art.”
Step 2: Disassemble and Photograph as You Go
Take photos before each disassembly stage. Remove grates, warming racks, heat plates/flavorizer bars, drip tray, and catch pan. If parts are heavily corroded, do not force them with wild torqueapply penetrating oil, wait, then loosen gently.
Step 3: Degrease First, Rust Second
People often attack rust immediately. Better move: remove grease and carbon first. Mix warm water and mild dish soap, scrub removable parts, and rinse. For stubborn grease, use a grill-safe degreaser on non-painted internal areas. Dry thoroughly.
Why this matters: grease hides rust, and wet grease residue can sabotage sanding, coating, and reassembly.
Step 4: Remove Rust from Each Material the Right Way
Cast-Iron Grates
- Scrub rust with steel wool or abrasive pad until you reach stable metal.
- Wash with warm soapy water, rinse, and dry completely.
- Apply a thin coat of neutral oil and heat-cycle later to re-season.
Porcelain-Coated Cast Iron
- Use gentler tools (nylon brush, non-abrasive pads).
- Avoid aggressive scraping that chips porcelain.
- If coating is heavily chipped and rusting through, replacement is usually the safer choice.
Stainless Grates and Racks
- Use non-chlorine cleaner and a non-scratch pad.
- Remove oxidation with light sanding and thorough rinse.
- Dry fully to prevent flash rust on mixed-metal components.
Firebox and Non-Food-Contact Metal
- Scrape flaky rust and soot.
- Sand to smooth edges and remove loose corrosion.
- Wipe with damp cloth and let dry before any protective coating.
Step 5: Handle Exterior Rust and Repaint (If Needed)
For exterior shell or cart rust, sand to a sound surface, clean thoroughly, and apply high-heat paint according to label directions. Most high-heat coatings require dry time plus heat curing to reach full durability. Expect brief smoke/odor on first cure cycle.
Do not paint: burners, burner ports, valves, regulators, inside cooking surfaces, or grates.
Step 6: Inspect Parts and Replace What Isn’t Trustworthy
Restoration is not a contest to save every part. Replace low-cost, high-impact components:
- Cracked or warped grates
- Burners with split seams or blocked ports
- Brittle hose/regulator assemblies
- Corroded ignition electrodes
- Missing heat shields or drip components
If your model supports OEM replacement parts, use them. Correct fit improves performance and reduces flare-up drama.
Step 7: Reassemble and Do a Safety Check
Reassemble in reverse order using your photos. Confirm all fasteners are secure but not over-torqued. For gas grills, do a leak check at connections with a soap-water solution before lighting. If bubbles grow, stop and fix the leak before use.
Step 8: Burn-In and Re-Season
Run the grill hot with lid closed (no food) to burn off residues and cure coatings per product guidance. On cast iron, apply a very thin oil layer after cooling slightly, then heat again to set seasoning. Thin coats beat thick sticky coats every time.
Common Restoration Mistakes (and How to Avoid Them)
- Mistake: Painting interior cooking surfaces.
Fix: Keep all coatings to approved exterior/non-food-contact areas. - Mistake: Deep-scratching porcelain grates.
Fix: Use gentler tools; replace chipped grates when needed. - Mistake: Reassembling while parts are damp.
Fix: Dry completely to prevent immediate re-rusting. - Mistake: Ignoring grease channels and drip trays.
Fix: Clean these first to reduce flare-ups and odor. - Mistake: Using damaged wire-bristle brushes indefinitely.
Fix: Inspect brush heads regularly or switch to safer alternatives.
How to Keep Your Restored Grill Rust-Free
After Every Cook (5 minutes)
- Brush grates while still warm (not blazing hot).
- Wipe with a lightly oiled towel if grate type allows.
- Empty grease tray once cool.
Monthly (15–30 minutes)
- Remove and wash grates and heat plates.
- Scrape firebox walls and vacuum dry debris.
- Check burner ports for blockage and even flame pattern.
Seasonally (Start and End of Grilling Season)
- Inspect hose, regulator, and fittings.
- Spot-sand exterior chips and touch up high-heat paint.
- Store under a breathable, fitted cover once completely dry.
- Keep the grill out of standing water zones.
Restore vs. Replace: Cost Snapshot
Typical restoration spend:
- Cleaning + rust removal supplies: $20–$60
- High-heat paint and prep materials: $15–$40
- Replacement grates/burners/igniter: $40–$180+
- Total: roughly $75–$280 for many mid-range grills
If your repairs are approaching the price of a dependable new grill with warranty, replacement may be smarter. But if the frame is healthy and parts are available, restoration can deliver premium performance for less.
Troubleshooting After Restoration
Problem: Uneven heat
Likely cause: clogged burner ports, misaligned heat plates, or incorrect grate seating. Recheck burner flame and plate placement.
Problem: Metallic smell during first cook
Likely cause: incomplete burn-in or uncured coating residue on non-food-contact areas. Run one more high-heat burn-in cycle with no food.
Problem: Rust came back quickly
Likely cause: moisture trapped under cover, incomplete drying, or no protective oiling on compatible grates. Dry fully after every wash; use thin protective oil film where appropriate.
Problem: Flare-ups increased
Likely cause: grease tray/channel not fully cleaned. Remove and clean all drip components and check for blocked grease paths.
Real Backyard Experiences: What Restoration Actually Feels Like (About )
Experience #1: “The Grill That Looked Unsalvageable”
One homeowner pulled a five-year-old gas grill from behind a shed where it had spent two rainy seasons collecting rust, spider webs, and what can only be described as “mystery sludge.” The first instinct was to toss it. But after a close inspection, the lid, frame, and firebox were still solid. They removed everything, soaked what could soak, scrubbed the grates, replaced the burners and igniter, and repainted the exterior cabinet. The transformation was dramatic. The lesson? Cosmetics lie. Orange-brown surface rust looks terrifying, but many grills are more recoverable than they appear.
Experience #2: “The Porcelain Grate Mistake”
Another restorer attacked porcelain-coated cast-iron grates with aggressive metal tools and stripped/chipped the coating in multiple areas. The grill technically worked afterward, but rust returned quickly and food started sticking badly. They ended up replacing the grates anyway. The takeaway was expensive but useful: the right tool matters more than elbow grease. If porcelain is compromised, replacement is often cheaper than endless frustration and repeat cleaning.
Experience #3: “The Grease Trap Plot Twist”
A weekend DIY cleanup focused on shiny grates and polished exterior, but skipped the drip tray channel. First cook looked great for ten minutesthen flare-ups turned dinner into an accidental fire show. After cooling down (emotionally and mechanically), they deep-cleaned the grease system and the grill performed perfectly. The hidden systems matter as much as visible surfaces. A grill can look pristine and still behave badly if grease paths are clogged.
Experience #4: “The Cover Problem”
One family restored their grill beautifully, then covered it while still damp after a stormy cookout. Two weeks later, surface rust was back on fasteners and edges. They switched to a simple routine: cool, dry wipe, leave uncovered briefly for ventilation, then cover. Rust recurrence dropped dramatically. The insight: moisture management is half the battle. Restoration is not a one-time event; it’s a maintenance rhythm.
Experience #5: “The Over-Oiling Trap”
A cast-iron fan applied thick oil to freshly cleaned grates, thinking “more protection = better.” Instead, the first burn-in created sticky residue and smoke. They stripped back, reapplied ultra-thin coats, and heat-cycled properly. Result: smooth cooking surface, fewer sticking issues, and no gummy buildup. Thin, even coats win every time in seasoning tasks.
Experience #6: “The Parts-First Upgrade”
One practical approach that worked well: skip heroic restoration of obviously failing components and replace high-impact parts firstburners, igniter, and gratesthen clean everything else. This delivered immediate performance gains and made the remaining cleanup feel worthwhile. Not every part deserves a comeback story.
What all these experiences have in common: successful grill restoration is less about one miracle cleaner and more about sequence: inspect, degrease, remove rust, replace weak links, verify safety, then maintain consistently. If you follow that order, even a crusty old grill can return to reliable, delicious service.
Conclusion
Restoring a rusty old BBQ grill is one of those projects that pays you back every weekend. You save money, reduce waste, and get a better-cooking machine that feels like yours again. Start with an honest inspection, clean methodically, treat each material correctly, and replace parts that are truly done. Finish with a safe burn-in and a simple maintenance plan. Your grill doesn’t need to be newit needs to be clean, stable, and trustworthy.
And once you hear that first confident sizzle on a grate you rescued yourself, you’ll wonder why you almost threw it away in the first place.