Table of Contents >> Show >> Hide
- Before You Begin: What Makes a Pedicure “Professional”
- Professional Pedicure Supplies Checklist
- Step-by-Step: How to Perform a Professional Salon Pedicure
- Step 1: Client consult (yes, even if the “client” is you)
- Step 2: Sanitize your station like you mean it
- Step 3: Remove old polish and reset the canvas
- Step 4: The soak (short, warm, and purposeful)
- Step 5: Nail shaping (the “prevention” step)
- Step 6: Cuticle care (gentle, not gladiator)
- Step 7: Exfoliation and callus smoothing (smooth, not slippery)
- Step 8: Clean, rinse, and prep for polish
- Step 9: Massage and hydration (but not on the nail plate)
- Step 10: Polish application (the “salon finish” moment)
- Step 11: Dry time strategy (because life happens)
- Step 12: Finish and aftercare
- Professional Pedicure Add-Ons (Optional, But Very “Salon”)
- Common Pedicure Mistakes (and How Pros Fix Them)
- When to Skip the Pedicure and Seek Professional Medical Foot Care
- Real-World Experiences and Pro Lessons (Extra Deep Dive)
- 1) The Ticklish Client Problem (AKA: the surprise dance-off)
- 2) “Baby-Soft Heels” vs. “I Need to Walk Tomorrow”
- 3) The Polish That Chips in 24 Hours (and the detective work behind it)
- 4) The “My Big Toe Nail Is Weird” Conversation
- 5) The Timing Trick That Makes Everything Feel Luxurious
- 6) The Best Compliment Isn’t “Cute Color”It’s “My Feet Feel Amazing”
- Conclusion
A professional salon pedicure is part self-care ritual, part miniature engineering project: you’re softening skin without overdoing it, shaping nails to prevent problems, and polishing like you’re trying to impress a tiny, extremely judgmental jury.
Done right, a salon-quality pedicure looks polished (literally), feels comfortable in shoes, and holds up through real lifecommutes, workouts, and that one friend who always “accidentally” steps on your toes.
This guide breaks down a true salon pedicure step-by-step workflowprep, sanitation, soak, exfoliation, cuticle care, massage, and a crisp polish applicationplus pro-level timing and troubleshooting.
You’ll also get a longer “real-world experience” section at the end, because what happens in theory and what happens when someone is ticklish are… not the same thing.
Before You Begin: What Makes a Pedicure “Professional”
The difference between “I did my feet” and “I could charge money for this” usually comes down to three things:
- Sanitation and safety: clean tools, clean surfaces, and smart choices that reduce infection risk.
- Technique: nail shaping that prevents snags and ingrowns, cuticle care that doesn’t cause tears, and exfoliation that smooths without shredding.
- Finish: thin, even coats of polish, capped edges, and a top coat that actually protects.
A professional approach also means knowing when to not do something. If there are open cuts, signs of infection, severe pain, or medical foot concerns (like poor circulation or diabetes-related issues),
it’s safer to pause and refer to a healthcare professional or podiatrist rather than “power through.”
Professional Pedicure Supplies Checklist
You don’t need a salon-size cabinet, but you do need the right basics. Here’s a streamlined kit that covers a classic polish pedicure.
Sanitation and setup
- Hand soap, clean towels, and disposable paper towels
- EPA-registered disinfectant for tools/surfaces (follow label contact time)
- Gloves (recommended if you’re working on someone else)
- Disposable toe separators, disposable nail files/buffers (ideal), or disinfectable alternatives
- Foot basin (or salon foot spa) and optional disposable liner
Nail and skin tools
- Toenail clippers (straight-edge works best)
- Medium-grit nail file + buffer block
- Cuticle softener (optional), cuticle pusher (wooden orangewood stick or metal)
- Soft nail brush
- Pumice stone or foot file (avoid blades/razors for safety)
Products for the finish
- Polish remover (acetone or non-acetone) + lint-free wipes
- Base coat, color polish, top coat
- Quick-dry drops/spray (optional), cleanup brush (small angled brush) for edges
- Cuticle oil and foot cream
Step-by-Step: How to Perform a Professional Salon Pedicure
Step 1: Client consult (yes, even if the “client” is you)
A 30-second consult saves you from 30 minutes of regret. Ask (or note):
- Any pain, ingrown toenail history, or recent foot procedures?
- Any visible fungus, warts, open cuts, or skin cracks?
- Polish preference: classic, sheer, bold, French, or no polish (a “clean pedi”)?
- Lifestyle: runner vs. office worker (callus strategy changes), closed-toe shoes vs. sandals (chip risk changes).
If you see redness, swelling, drainage, or significant tenderness around the nail folds, don’t do aggressive cuticle work or callus removal. Comfort and safety come first.
Step 2: Sanitize your station like you mean it
Professional pedicures start with cleanliness. Wash hands, disinfect surfaces, and use clean linens for each person.
Tools should be cleaned of visible debris first, then disinfected according to the product label (immersion time matters).
- Clean: soap + water to remove oils, dust, and product residue.
- Disinfect: fully immerse reusable metal tools in an appropriate disinfectant for the required contact time.
- Dry and store: keep sanitized tools in a clean, covered container.
If you’re using a foot spa basin: drain, scrub, and disinfect between clients and at the end of the day. If you’re at home, the same principle appliesclean it thoroughly and disinfect appropriately.
Step 3: Remove old polish and reset the canvas
Remove existing polish with remover and lint-free wipes (cotton can leave fuzz that becomes “mystery texture” under polish).
Then quickly wash the feet or wipe nails clean so polish remover residue doesn’t mess with your base coat.
Step 4: The soak (short, warm, and purposeful)
Fill the basin with warm (not hot) water. Soak for about 5–10 minuteslong enough to soften skin and cuticles, not so long the nails become waterlogged and bendy.
Pro tip: If you plan to do any exfoliation, soaking first makes the job easier and gentler. Also, avoid doing anything that risks breaking the skin before the soak.
Step 5: Nail shaping (the “prevention” step)
Trim toenails straight across, keeping a moderate length. Then lightly file the corners just enough to remove sharp edgesdon’t carve a curve.
This helps reduce the risk of ingrown toenails and painful corner pressure in shoes.
Example: If someone wears narrow work shoes, keep nails slightly shorter (but not too short) and file edges smooth so socks don’t snag.
For runners, keep the free edge neat and straight so repetitive toe impact doesn’t drive corners into skin.
Step 6: Cuticle care (gentle, not gladiator)
Apply a tiny amount of cuticle softener or oil, then gently push back cuticles with a pusher or orangewood stick.
The goal is to tidy the nail platenot create open pathways for bacteria.
- Do: push back gently, remove only loose dead skin if needed.
- Don’t: aggressively cut living cuticle tissue or dig into nail folds.
If you use nippers, use them sparingly and only on clearly dead, lifted bits (hangnail-style). “Perfectly clean” isn’t worth micro-cuts that sting for a week.
Step 7: Exfoliation and callus smoothing (smooth, not slippery)
After soaking, use a pumice stone or foot file to gently reduce rough areasheels, balls of feet, and pressure points.
Use light pressure and keep checking your progress. Overdoing it can cause irritation, cracking, or even bleeding (which is a full stop).
Pro perspective: Calluses are also protective. The professional move is to smooth and blend, not remove everything until the foot is “baby soft” and then painful in sneakers.
- Work in small sections.
- Rinse and feel the skin between passes.
- Avoid sharp callus bladesfast isn’t worth risky.
Step 8: Clean, rinse, and prep for polish
Rinse feet, then dry thoroughlyespecially between toes. Use a nail brush to clean around nails if needed.
Before polish, wipe each nail with a little alcohol or remover on a lint-free pad to remove oils and lotion residue.
Oil on the nail plate is the #1 reason “my polish peeled in one sheet like a sticker.”
Step 9: Massage and hydration (but not on the nail plate)
Apply a rich foot cream and massage from toes to ankle and up the lower leg (avoid deep pressure over varicose veins or painful areas).
Massage is where the pedicure feels luxuriousbut keep lotion away from the nails right before painting. If you accidentally moisturize the nails, do another quick wipe.
Step 10: Polish application (the “salon finish” moment)
Use toe separators and good lighting. Then follow this classic, clean system:
- Base coat: a thin layer to protect the nail and help color adhere.
- Color: two thin coats beat one thick coat every time. Let each coat dry before the next.
- Cap the free edge: lightly swipe the brush across the nail tip to reduce chipping.
- Top coat: seal for shine and durability.
Technique tip: Use three strokes when possiblecenter, left, rightthen stop fussing. Over-brushing creates streaks and bubbles.
Clean edges with a tiny brush dipped in remover for that crisp, professional outline.
If you want a French pedicure, paint the sheer base first, then use a thin brush to shape the white tipsmile lines look best when they match the curve of the toe, not a ruler.
Step 11: Dry time strategy (because life happens)
Even “dry to the touch” polish can dent if you shove your feet into jeans and boots immediately.
Give yourself a real buffer: at least 15–20 minutes for standard polish to set, plus extra time if coats were thicker.
Quick-dry drops help, but they’re not magic spells.
Step 12: Finish and aftercare
- Apply cuticle oil around the nail (not under it) once polish is set.
- Moisturize dailyheels stay smoother when you hydrate consistently.
- To extend wear, reapply top coat mid-week.
- Wear breathable socks and properly fitting shoes to reduce friction and nail trauma.
Professional Pedicure Add-Ons (Optional, But Very “Salon”)
Hot towel wrap
Wrap feet in warm, damp towels for a minute after exfoliation. It softens skin and makes moisturizer absorb better. It also feels like you’re being cared for by a five-star hotel.
Hydrating mask + occlusion
Apply a thick foot mask or heavy cream, then cover with plastic wrap or disposable booties for 5–10 minutes (while you prep polish).
This boosts hydrationespecially in winter or dry climates.
Gel polish upgrade (only if you have the right setup)
Gel pedicures can last longer, but they require proper curing, careful prep, and correct removal.
Peeling gel off is a shortcut to thin, unhappy nails. If you’re not ready for that commitment, classic polish is still a pro look.
Common Pedicure Mistakes (and How Pros Fix Them)
-
Mistake: Cutting nails too short or rounding corners.
Fix: Trim straight across, file gently, and keep a modest free edge to reduce ingrowns. -
Mistake: Over-exfoliating until skin feels “raw.”
Fix: Smooth gradually and leave protective callus where it prevents friction. -
Mistake: Putting lotion on nails right before polish.
Fix: Wipe nails with alcohol/remover before base coat. -
Mistake: Thick polish coats.
Fix: Two thin coats, patience between layers, and cap the edge.
When to Skip the Pedicure and Seek Professional Medical Foot Care
A salon pedicure is cosmetic carenot medical treatment. Consider postponing or getting medical guidance if there’s:
- Open wounds, bleeding, or severe cracking
- Signs of infection (redness, swelling, warmth, drainage, significant pain)
- Severe ingrown toenails or recurring nail infections
- Medical risk factors like diabetes, poor circulation, neuropathy, or immune suppression
In these situations, a podiatrist is the real MVP.
Real-World Experiences and Pro Lessons (Extra Deep Dive)
The “perfect pedicure” in a tutorial has calm lighting, cooperative toes, and a timeline that doesn’t include someone checking their phone every 12 seconds. In real life, professional results come from adapting.
Here are common salon-level experiences (the kind nail techs learn the hard way) that can help you level up fast.
1) The Ticklish Client Problem (AKA: the surprise dance-off)
Some people are ticklish to the point where a light brush across the arch triggers a full-body flinch. Pros handle this by switching technique:
they use firm, steady pressure instead of feathery strokes, and they keep one hand grounded on the foot to reduce startling sensations.
If you’re working on yourself, this translates to: don’t “scritch-scratch” your sole with a file like you’re petting a cat. Use controlled, even motion.
2) “Baby-Soft Heels” vs. “I Need to Walk Tomorrow”
A common beginner instinct is to file calluses until the foot feels brand-newthen the person stands up, walks, and immediately regrets everything.
In salons, seasoned techs aim for smooth and comfortable, not “newborn dolphin.”
The practical rule: reduce roughness and edges, but leave enough skin integrity that shoes and pavement don’t feel like sandpaper the next day.
This is especially true for runners and people who stand for work; a little callus is functional armor.
3) The Polish That Chips in 24 Hours (and the detective work behind it)
When polish fails fast, pros troubleshoot like mechanics. The usual culprits:
oil on the nail plate, coats applied too thick, or not enough dry time. There’s also the “sabotage factor”: socks or tight shoes immediately after painting.
Nail techs often do a final nail wipe before base coat, then apply thin layers and cap the free edge.
If you want that salon-grade wear, think of it as building a sandwich: neat layers, properly set, not a single towering blob.
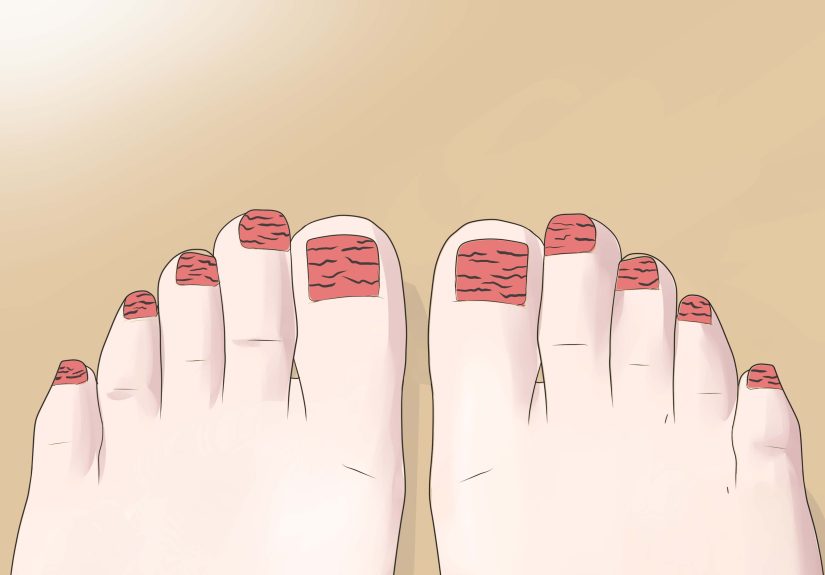
4) The “My Big Toe Nail Is Weird” Conversation
Big toes can be dramatic. They get thicker, they get ridges, they get discolored from old trauma, and they refuse to look like the other nine nails.
Professionals don’t panicthey adjust expectations and technique. If the nail plate is uneven, they lightly buff (without over-thinning), then choose a smoothing base coat.
They also know when to avoid cosmetic “fixes” and recommend medical evaluation if something looks suspicious or changes rapidly.
The experience lesson: you can create a beautiful finish without forcing every nail to match an Instagram fantasy.
5) The Timing Trick That Makes Everything Feel Luxurious
In salons, the pedicure feels premium partly because steps overlap efficiently. While feet soak, the station is organized. While product sits, nails are shaped.
While the mask hydrates, polish is laid out. That rhythm creates calm.
At home, you can copy the same flow: set up tools first, keep towels ready, and do steps in a logical order so you’re not dripping across the floor looking for a top coat like it’s a lost artifact.
6) The Best Compliment Isn’t “Cute Color”It’s “My Feet Feel Amazing”
Clients remember comfort. A professional pedicure isn’t just polish; it’s the absence of sharp nail corners, the relief of smoothed pressure points,
and skin that feels hydrated instead of tight. That’s why pros focus on preventing snags (filing edges), avoiding irritation (gentle exfoliation),
and finishing with hydration that lasts more than the walk to the car.
The big takeaway from real-world pedicure experience is simple: professional results come from restraint.
Clean tools, careful technique, and thin, tidy polish layers beat aggressive scraping and rushed painting every time.
And if something feels painful, looks infected, or seems medically “off,” the most professional move is to stop and get the right help.