Table of Contents >> Show >> Hide
- How App Store Payments Work
- Before You Buy: What You Need
- How to Add a Payment Method on iPhone or iPad
- How to Buy an App in the App Store
- Paid Apps, In-App Purchases, and Subscriptions: Know the Difference
- How to Manage Subscriptions and Purchase History
- What to Do If Your Payment Method Is Declined
- Can You Use Apple Gift Card or Apple Account Balance?
- How Family Sharing Affects App Store Payments
- How to Avoid Accidental Purchases
- Refunds, Billing Questions, and Other Cleanup Jobs
- A Quick Note About Paying Outside the App Store
- Best Practices for Paying Safely on the App Store
- Conclusion
- Extended User Experiences: What Paying for Apps on iPhone or iPad Really Feels Like
Buying an app on an iPhone or iPad should feel like ordering coffee, not filing your taxes. Tap, confirm, done. But if you are new to Apple devices, the App Store can seem a little mysterious at first. Where do you add a card? Can you use PayPal? Why did a “free” app ask for payment information? And why does your iPhone sometimes look at you with Face ID like a suspicious cashier?
This guide breaks it all down in plain English. You will learn how App Store payments work, how to add or change a payment method, what to do when a payment gets declined, and how to avoid accidental charges. We will also cover in-app purchases, subscriptions, Family Sharing, and a few common mistakes that trip up otherwise intelligent adults who can run a business but still somehow buy an extra bag of gems in a mobile game.
How App Store Payments Work
When you buy an app, a subscription, or an in-app purchase on an iPhone or iPad, the charge is usually processed through your Apple Account billing setup. In other words, the App Store pulls payment from the method you attached to your Apple Account, not from sheer optimism.
In the United States, common App Store payment options can include major credit and debit cards, PayPal, Apple Account balance, Apple Cash, Apple Card, and Apple Pay-supported billing options connected to your Apple Account. The exact choices you see depend on your account, region, and what Apple currently supports.
That payment setup powers more than paid apps. It can also cover:
- One-time app purchases
- In-app purchases such as coins, extra features, or digital items
- Auto-renewing subscriptions
- Apple services such as iCloud+ or Apple Music
- Eligible media and digital content purchased through Apple
So yes, one payment method can do a lot of heavy lifting. That is convenient when everything works and mildly dramatic when it does not.
Before You Buy: What You Need
Before you pay for apps on iPhone or iPad, make sure you have three basics covered:
1. An Apple Account
You need to be signed in with your Apple Account on the device. No account, no checkout, no app. The App Store is many things, but it is not a trust-based honor system.
2. A Valid Payment Method
Your Apple Account should have at least one valid payment method on file if you want to buy paid apps, subscriptions, or most in-app purchases. Some users can also rely on Apple Account balance, but certain purchases may still require another valid payment method to remain on file.
3. Purchase Authentication
Apple may ask you to confirm purchases with Face ID, Touch ID, or your device passcode. This is normal, helpful, and far better than discovering your toddler just bought a monthly dragon battle pass.
How to Add a Payment Method on iPhone or iPad
If you have never set up billing before, start here. The process is simple and takes less time than choosing a Netflix show.
- Open Settings.
- Tap your name at the top.
- Tap Payment & Shipping.
- Tap Add Payment Method.
- Enter your payment details.
- Tap Done.
That is the core setup for both iPhone and iPad. Once your payment method is saved, the App Store can use it for paid apps, subscriptions, and in-app purchases.
How to Reorder Payment Methods
If you have multiple payment methods, Apple will generally attempt to charge them in the order they appear. So if you want one card to be your main method, move it to the top.
- Go to Settings > Your Name > Payment & Shipping.
- Tap Edit.
- Drag your preferred payment method higher in the list.
- Tap Done.
This is a small detail, but it matters. It is the difference between your work card and your personal card getting the charge. One of those leads to convenience. The other leads to awkward accounting.
How to Buy an App in the App Store
Once your payment method is ready, buying an app is easy:
- Open the App Store.
- Find the app you want.
- Tap the price button or Get.
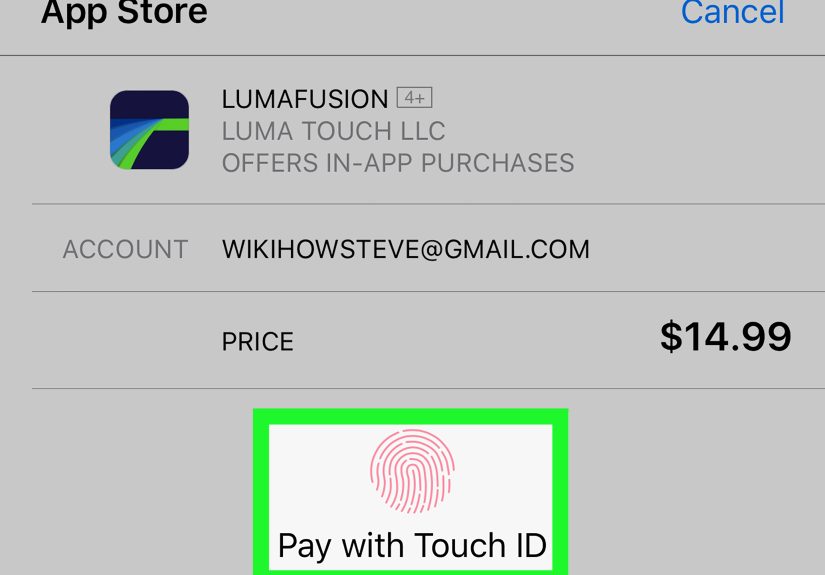
- Authenticate with Face ID, Touch ID, or your passcode.
- Wait for the download to begin.
If the app is free, Apple may still ask you to authenticate. That is not Apple being dramatic. It is part security, part account verification, and part prevention against accidental downloads or unauthorized purchases later.
Example
Say you want to buy a $4.99 note-taking app on your iPad. You tap the price, double-click the top button to confirm with Face ID, and the charge goes to the payment method listed at the top of your Payment & Shipping section. The app downloads, your productivity dreams begin, and the folder named “Important Stuff” finally gets some use.
Paid Apps, In-App Purchases, and Subscriptions: Know the Difference
One reason App Store billing confuses people is that there are several ways to spend money inside Apple’s ecosystem.
Paid Apps
You pay once to download the app itself.
In-App Purchases
The app is often free or low-cost, but offers extra content or features inside the app. Think premium filters, additional storage, game currency, or an ad-free upgrade.
Subscriptions
You pay on a recurring basis, usually monthly or yearly. These renew automatically until you cancel.
This distinction matters because a free app can still cost money later. Many users think, “It said free!” Then five screens later they are deciding whether they need the Platinum Productivity Unicorn plan. Spoiler: maybe not.
How to Manage Subscriptions and Purchase History
If you buy apps regularly, you should know where to review charges. This is how you stay organized and avoid paying for three habit trackers at the same time.
To See Purchase History
- Open the App Store.
- Tap your profile picture.
- Tap Purchase History.
Your purchase history can include free downloads, paid apps, in-app purchases, subscriptions, and other Apple-related purchases.
To Manage Subscriptions
- Open the App Store.
- Tap your profile picture.
- Tap Subscriptions.
- Select the subscription you want to change or cancel.
This is especially useful when you signed up for a free trial and forgot about it until the charge arrived like a tiny digital jump scare.
What to Do If Your Payment Method Is Declined
A declined payment is one of the most common App Store headaches. The good news: it is usually fixable.
Common reasons include:
- An expired card
- Outdated billing information
- Insufficient funds
- A bank flagging the charge
- A regional or account mismatch
- A pending unpaid balance on your Apple Account
The fastest fix is often this:
- Open Settings.
- Tap your name.
- Tap Payment & Shipping.
- Add a different payment method.
- Remove the old one if needed.
- Try the purchase again.
If the same payment method keeps failing, check the billing address, expiration date, ZIP code, and card security details. If all of that looks correct, contact your bank or payment provider. Sometimes the problem is not Apple. Sometimes your bank simply sees “digital purchase at 1:14 a.m.” and decides it is time to become protective.
Can You Use Apple Gift Card or Apple Account Balance?
Yes, in many cases. If you redeem an Apple Gift Card or add funds to your Apple Account balance, you can often use that balance to buy apps, games, in-app purchases, subscriptions, and Apple services.
However, there are a few important catches:
- Some purchases may still require another valid payment method on file
- Some recurring services may not start using Apple Account balance alone
- Your Apple Account balance is generally personal and not shared with family members through Family Sharing
- You cannot use that balance for every type of Apple transaction
Think of Apple Account balance as very useful, but not all-powerful. It is more “helpful sidekick” than “supreme ruler of all billing.”
How Family Sharing Affects App Store Payments
Family Sharing can make App Store buying easier, but it can also surprise people if they do not understand how the billing works.
When purchase sharing is turned on, the family organizer’s shared payment method usually becomes the default family payment source for eligible purchases. Family members can access shared apps and content from one another, although not every purchase is shareable.
There are two important details to remember:
- Not all content or purchases are eligible for sharing
- Apple Account balance that belongs to one person is not available for other family members to spend
If children are part of the family group, Ask to Buy is a smart move. It lets a parent or family organizer approve or deny app purchases and even free downloads before they go through. Yes, even “free” should sometimes require adult supervision. Especially when “free” somehow comes with a $19.99 sword bundle.
How to Avoid Accidental Purchases
If you share an iPad with kids, use your phone half-asleep, or have ever purchased something by tapping too fast, these settings matter.
Require a Password for Every Purchase
Apple lets you require a password every time you buy something, or every 15 minutes. If you want tighter control, choose the stricter option.
Use Screen Time
Screen Time can block in-app purchases entirely or limit certain purchase behavior. This is one of the best tools for families.
Turn On Ask to Buy for Kids
With Ask to Buy enabled, children must send a request before making purchases or downloading apps. It is like putting a small but effective gate between curiosity and your credit card.
Refunds, Billing Questions, and Other Cleanup Jobs
If you bought the wrong app, got charged unexpectedly, or ran into an accidental purchase, you may be able to request a refund from Apple. Refund approval is not automatic, but Apple does provide a process for eligible purchases.
You should also review your purchase history before assuming something strange happened. Sometimes an unfamiliar charge is simply a subscription renewal, an in-app purchase, or a family member’s approved download.
A Quick Note About Paying Outside the App Store
In the United States, some apps may now show links or buttons that send users to a developer’s website for purchases instead of using Apple’s in-app payment flow. That does not mean the App Store disappeared. It simply means users may occasionally see another route to pay for digital content.
For many people, though, the built-in App Store billing system is still the easiest option because it keeps payment details, subscriptions, purchase history, and account controls in one place. It is not the only path anymore, but it is still the cleanest one for most everyday users.
Best Practices for Paying Safely on the App Store
- Keep your payment information updated
- Use Face ID, Touch ID, or a passcode on your device
- Review subscriptions regularly
- Turn on Ask to Buy for children
- Use Screen Time if you want stricter controls
- Check purchase history before disputing a charge
- Keep one backup payment method on file if you rely on subscriptions
These habits make App Store payments smoother and far less chaotic. In other words, they help your phone behave more like a smart assistant and less like a tiny casino.
Conclusion
If you want to pay for apps on an iPhone or iPad using the iOS App Store, the process is straightforward once your Apple Account billing is set up correctly. Add a payment method, confirm the purchase, and manage everything from your account settings and App Store profile.
The key is understanding that App Store payments are tied to your Apple Account, not just the app you happen to be downloading. Once you know where to add payment methods, manage subscriptions, fix declined cards, and lock down family settings, the whole system feels much easier.
So the next time your iPhone asks whether you want to buy that app, you can answer with confidence. Or at least with enough confidence to know you are buying the app on purpose this time.
Extended User Experiences: What Paying for Apps on iPhone or iPad Really Feels Like
For many users, the first App Store purchase is surprisingly smooth. You add a card in Settings, tap the price of an app, confirm with Face ID, and the download starts almost instantly. That speed is one of Apple’s biggest strengths. It feels polished, secure, and simple enough that even non-tech-savvy users can figure it out without a tutorial. In real life, that convenience is exactly why so many people stick with App Store billing once they set it up.
At the same time, everyday experience teaches people a few lessons quickly. One is that “free” does not always mean totally free. A lot of users download a free app expecting zero cost forever, only to find premium upgrades, subscriptions, or in-app purchases waiting inside. That is not automatically a bad thing, but it does mean smart users learn to read the pricing details before tapping too fast. The App Store is easy to use, and that ease can make spending feel almost invisible.
Another common experience is the declined-payment surprise. Plenty of users only discover their saved card expired when a subscription fails at the exact moment they need it most. Maybe cloud storage stops renewing, or a work app locks premium features behind a billing update. The good news is that Apple gives users a centralized place to fix it. The bad news is that nobody enjoys doing account maintenance when they were just trying to open an app and move on with their day.
Families often have the most complicated experiences. Family Sharing is incredibly helpful when it is set up correctly, because shared purchases can save money and reduce duplicate app spending. But it can also confuse people when one family member’s payment method becomes the default for shared purchases. Parents usually appreciate Ask to Buy once they understand how it works, especially after the first time a child tries to install a game with ten different upgrade packs and a suspicious amount of glitter.
Many longtime iPhone and iPad users also appreciate how the App Store keeps purchase history and subscriptions in one ecosystem. Instead of hunting through emails, random websites, and forgotten passwords, they can usually review charges in one place. That convenience becomes even more valuable over time, especially for people juggling work tools, creative apps, cloud storage, and streaming subscriptions.
In practical terms, the overall experience of paying for apps on iPhone or iPad is usually positive when users keep their billing info current and review subscriptions once in a while. The system is designed to reduce friction, and for the most part, it succeeds. The downside is that reduced friction can also make impulse purchases easier. So the App Store experience works best when convenience meets a little self-control. Your phone may be smart, but it still cannot stop you from buying three photo-editing apps in one night because you briefly believed you were about to become a design legend.