Table of Contents >> Show >> Hide
- What You’ll Learn
- The Quick Plan (For Impatient Adults)
- Before You Start: Factory Primer Isn’t a Force Field
- Tools and Materials (What Matters, What’s Optional)
- Step-by-Step: How to Paint an Exterior Factory-Primed Steel Door
- Step 1: Choose a smart painting window
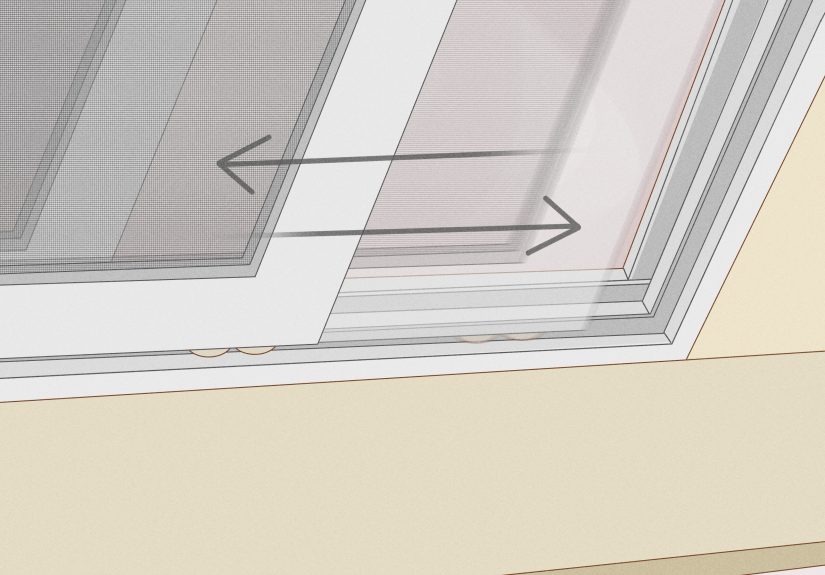
- Step 2: Remove hardware (or mask like a pro)
- Step 3: Clean until you’re slightly annoyed at how dirty a “clean” door was
- Step 4: Scuff-sand (degloss) the factory primer
- Step 5: Repair dents, chips, and rust (before paint makes them “permanent”)
- Step 6: Prime only where needed
- Step 7: Paint in a logical order (so you don’t smear your own work)
- Step 8: Two thin coats beat one heavy coat every time
- Step 9: Don’t forget the edges (yes, all of them)
- Step 10: Cure time is not the same as “dry to the touch”
- Pro Tips for a Smoother Finish
- Common Mistakes (And How to Avoid Them)
- FAQ
- Real-World Experiences: What DIYers Wish They Knew (About )
- Wrap-Up
- SEO Tags
A factory-primed steel door is basically the “I already put on my base layer” version of a front door. It’s not finished,
it’s not weatherproof, and it’s definitely not begging to be left as-is while you “get around to it” sometime around the
next solar eclipse.
The good news: painting a factory-primed steel exterior door is one of the most satisfying weekend upgrades you can do.
The bad news: the door will absolutely expose you if you rush prep, skip edges, or paint in direct sun like you’re
auditioning for a drip-and-run reality show.
The Quick Plan (For Impatient Adults)
If you want the “do this, not that” version, here it is:
- Clean thoroughly to remove oils and grime (doors get touched constantly).
- Scuff-sand/degloss the factory primer so paint can grip.
- Fix damage (chips, dings, rust) before paint hides the evidence poorly.
- Prime only where needed (bare metal, repairs, rust treatment, questionable primer).
- Apply two thin topcoats of exterior-grade paint/enamel.
- Paint edges (top, bottom, hinge side, latch side) and let it cure before heavy use.
Now let’s do it the right waybecause “it looked fine until the first rain” is not a vibe.
Before You Start: Factory Primer Isn’t a Force Field
1) Confirm what “factory-primed” means on your specific door
Most factory primers are designed as a paint-ready base coat, not as long-term protection. They often sit through
shipping, handling, fingerprints, and jobsite dustso even if the primer is good, the surface can be contaminated.
That’s why cleaning and scuffing matter even on a brand-new door.
2) Timing matters (and sometimes your warranty cares)
Many door manufacturers require finishing within a certain window after installation to maintain warranty coverage.
Translation: “I’ll paint it later” might be fine for your mood board, but not for your paperwork. If your door paperwork
includes finishing instructions, follow them like they’re the door’s user manual (because they are).
3) Decide whether to remove the door or paint it in place
You can paint a steel door while it’s hanging, but removing it often makes it easier to get a smoother finish, especially
if you want to paint horizontally to reduce runs. If you remove it, protect it from dents (steel doors can be dramatic:
one sharp hit and you’ve got a forever-dimple).
Tools and Materials (What Matters, What’s Optional)
Paint: pick a durable exterior finish meant for doors/trim or metal
Look for an exterior-grade paint that cures hard and resists stickingbecause doors are high-touch and high-friction.
Good options include:
- Exterior acrylic latex (quality matterscheap paint stays tacky and collects fingerprints).
- Waterborne alkyd / urethane-trim enamel (great leveling, tougher feel, often a “door favorite”).
- DTM (direct-to-metal) coatings if you have bare steel areas or want a metal-focused system.
Finish/sheens: satin or semi-gloss are popular for exterior doors because they clean easily and look “intentional,”
not “I ran out of wall paint.”
Primer: use it strategically, not automatically
A factory-primed door may not need full priming if the primer is intact and you paint within the recommended window.
But you do want primer in these situations:
- Any bare metal is visible (scratches, corners, hardware areas).
- You have rust or you sanded down to metal while fixing damage.
- You repaired dents with filler and need to seal patched spots.
- The factory primer is chalky, dirty-stained, or questionable after long exposure.
Primer types to consider: bonding primer (for adhesion), rust-inhibiting primer (for steel exposure), and acrylic/alkyd
primers compatible with your topcoat.
Sandpaper and cleaners: the unglamorous heroes
- Sandpaper: 180–220 grit for scuffing; coarser only for rust or heavy defects.
- Cleaner: mild detergent + water for general cleaning, plus a degreaser if needed.
- Solvent wipe (optional but helpful): mineral spirits can remove oils; allow full evaporation.
- Tack cloth or microfiber: to remove dust before paint.
- Painters tape + plastic/drop cloth: for glass, hardware areas, and floors.
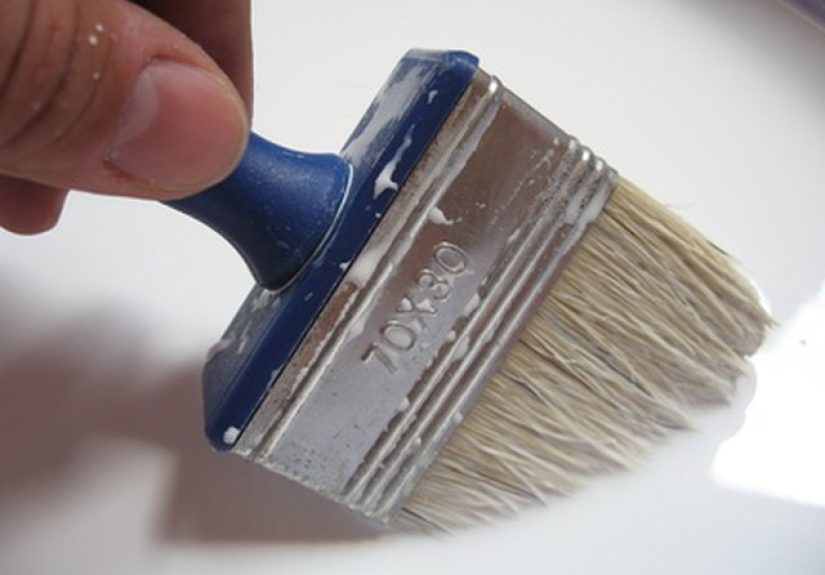
Application tools: choose your finish adventure
- Foam roller (mini) for smooth skins and fewer roller marks.
- High-quality angled brush for panels, edges, and “tipping off.”
- Sprayer for the smoothest lookif you can control overspray and prep the area well.
Step-by-Step: How to Paint an Exterior Factory-Primed Steel Door
Step 1: Choose a smart painting window
Aim for mild, dry weather. Painting in extreme heat, direct sun, or high humidity can cause brush marks, lap lines,
slow drying, or tacky paint that never quite feels “done.” If the door is in full sun, plan your work so you’re painting
it while it’s shaded (early morning or later afternoon is often friendlier).
Step 2: Remove hardware (or mask like a pro)
Remove knobs, deadbolts, kick plates, numbers, and weatherstripping when possible. If you can’t remove something,
tape it carefully. Avoid painting over weatherstrippingit can stick, tear, and create sealing problems later.
Step 3: Clean until you’re slightly annoyed at how dirty a “clean” door was
Wash the entire door with mild detergent and water, rinse well, and let it dry completely. Pay extra attention around
the handle area (hand oils sabotage adhesion). If the door feels greasy or has construction residue, a solvent wipe
can helpjust ensure it fully evaporates before sanding or painting.
Step 4: Scuff-sand (degloss) the factory primer
Factory primer can be slick, dusty, or slightly glossy. Your goal is not to remove itjust to give your topcoat some
tooth. Use 180–220 grit sandpaper or a sanding sponge and lightly scuff all surfaces, including panel edges and
profiles. Wipe away dust thoroughly afterward.
If you’re repainting over an older glossy finish (not just primer), you may need more deliberate deglossingeither by
sanding or using a liquid deglosserso the new paint bonds reliably.
Step 5: Repair dents, chips, and rust (before paint makes them “permanent”)
Steel doors can dent. Fill shallow dents with an exterior-rated filler, sand smooth, and feather edges so repairs
disappear. If you find rust, don’t paint over it and hope for the best. Sand rust back to sound material, smooth the
area, and use a rust-inhibiting primer where bare steel is exposed.
Step 6: Prime only where needed
Spot-prime repaired or bare areas with a compatible primer. If you waited a long time to paint and the factory primer
has degraded or the door shows rust-through scratches, a broader prime coat may be wise. Let primer dry fully and
sand lightly if the primer feels roughyour finish coat only looks as smooth as what’s underneath it.
Step 7: Paint in a logical order (so you don’t smear your own work)
For paneled doors, paint the detailed areas first, then the flats. A common approach:
- Panels and recessed details
- Vertical sections (mullions/stiles)
- Horizontal rails
- Outer frame areas
Use a brush for corners and profiles, then roll the larger flat areas with a foam roller. If you want fewer roller marks,
“tip off” lightly with a brush: gently drag the brush in one direction while paint is still wet. Think “smooth haircut,”
not “aggressive brushing.”
Step 8: Two thin coats beat one heavy coat every time
Apply the first coat thin and even. Let it dry per the paint label. Lightly sand between coats if the surface feels gritty
(dust happens, bugs happen, the universe is chaotic). Then apply a second coat for durability and uniform sheen.
Step 9: Don’t forget the edges (yes, all of them)
Paint the hinge edge, latch edge, top edge, and bottom edge (especially important for outswing doors or doors with
removable sweeps). Skipping edges is a classic way to invite moisture problems and premature failure. Let the paint
dry fully before closing the door to avoid sticking.
Step 10: Cure time is not the same as “dry to the touch”
Paint can feel dry quickly but still be soft underneath. Treat the door gently for the first several days:
avoid slamming it, avoid leaning backpacks on it, and try not to test whether your new finish can survive a fingernail
scratch (it cannot, not yet).
Pro Tips for a Smoother Finish
Work in shade when you can
Sun-warmed steel makes paint dry too fast, which can create lap marks and drag. If the door is hot to the touch,
wait for shade or cooler temperatures.
Control dust like it owes you money
Paint is basically a magnet for floating particles. Sweep, vacuum, and wipe down your work area. If you’re painting
horizontally, elevate the door on padded supports so you can paint edges without gluing the door to your sawhorses.
Use the right brush for the right paint
Oil/alkyd products usually prefer natural bristles; water-based paints prefer synthetic. Using the right brush helps leveling
and reduces streaks.
Keep coats thinespecially near weatherstripping and jambs
Thick paint buildup can cause sticking and tight clearances. If your door already fits snugly, heavy coats on edges can make
it rub or latch poorly.
Be cautious with very dark colors or storm doors
Dark colors can heat up dramatically in direct sun, and storm doors can trap heat. That extra heat can stress coatings and
make surfaces unpleasantly hot. If you want a deep, moody color, choose a premium exterior enamel and follow door-maker
guidance closely.
Common Mistakes (And How to Avoid Them)
- Skipping the scuff-sand: Paint sticks best to a lightly abraded surface. Gloss + paint = disappointment.
- Painting over grease: Handle-area oils are sneaky. Clean like you mean it.
- Forgetting edges: Doors are exposed on more than one face. Seal the whole “box.”
- Painting in direct sun: Fast-drying paint can leave lap lines and texture.
- Closing the door too soon: Fresh paint can stick to weatherstripping or jamb stops and peel.
- Ignoring lead safety on older paint: If you’re sanding an older, previously painted door or trim, use lead-safe practices.
FAQ
Do I have to prime a factory-primed steel door?
Not always. If the factory primer is intact and you’re painting within the recommended time window, you may only need
cleaning, scuffing, and topcoats. However, bare metal spots, repairs, rust, or long delays can make priming necessary.
What’s the best paint type for an exterior steel door?
Look for a premium exterior enamel or trim/door paint that cures hard and resists blocking (sticking). Many people have
great results with exterior acrylics, waterborne alkyd/urethane enamels, or DTM products when bare metal is involved.
Brush, roller, or sprayer?
A foam roller plus a good brush can look excellent. Sprayers can look factory-smooth, but they require more masking and
control. Your best tool is the one you can use steadily without rushing.
How long should I wait before closing the door?
Follow your paint label. As a rule, wait longer than you think you need, especially in humidity. “Dry to touch” is not the
same as “ready for weatherstripping contact.”
Can I paint the door in winter?
Only if temperatures (and surface temperature) meet the product requirements. Many coatings struggle to cure in cold
weather. If you’re on the edge of the temperature range, the paint may stay soft longer and attract dirt.
Real-World Experiences: What DIYers Wish They Knew (About )
Here’s the part most tutorials don’t say out loud: painting a steel exterior door is less about “painting” and more about
preventing chaos. People who love their finished door usually didn’t discover a magical brush techniquethey avoided
a few predictable traps.
First, the “brand-new door” myth. Many homeowners assume factory-primed means factory-clean. In real life, doors
get handled, stored, leaned against garages, bumped by contractors, and touched by every curious human who walks by.
That’s why the cleaning step feels oddly dramatic. Plenty of DIYers report that their “clean” door still turned a rag gray
once they did a proper wash and wipe. The finish lasts longer when you remove invisible oils and jobsite dust before the
first coat goes on.
Next: sunlight is a paint bully. A common experience is starting the first coat when the door is cool, then halfway
through, the sun swings around and turns the steel into a warm griddle. Suddenly the paint drags, the roller starts to
texture, and brush marks appear like they were summoned. The fix people love most is simple: paint in shade, even if it
means splitting the project across two shorter sessions. The door doesn’t care about your schedule; it cares about surface
temperature.
Another repeat lesson: two thin coats feel slower but finish faster. DIYers often try to “save time” with one thick
coat. That’s when sags happen near panel corners, edges get gummy, and the door sticks to weatherstripping like it’s
emotionally attached. People who go thin usually find the first coat looks a little disappointing (normal!), then the second
coat delivers that “wow” momentsmooth sheen, stronger color, and better durability.
Then there’s the underdog detail: edges and the bottom rail. Many homeowners forget them because they’re not visible
from the sidewalk. But edges are where moisture and wear love to start drama. DIYers who painted every exposed surface
often report fewer chips and less peeling laterespecially on doors that face rain or get blasted by afternoon storms.
And if your door has a sweep or tight clearances, you’ll hear the same advice repeatedly: paint edges lightly, or you may
create rub points that scuff the new finish before it’s even cured.
Finally, the biggest “wish I knew”: curing takes patience. A door can feel dry the same day and still be soft enough to
fingerprint or stick a week later if conditions are humid or cool. Homeowners who treated their newly painted door gently
for several daysno heavy scrubbing, no tape tests, no repeated slammingusually ended up with a finish that looked
cleaner for years. The door becomes durable when the coating has time to harden, not when it stops feeling wet.
Bottom line: the best-looking steel doors aren’t necessarily painted by prosthey’re painted by people who respected prep,
temperature, and cure time. The technique is learnable. The patience is the real upgrade.
Wrap-Up
Painting a factory-primed steel exterior door is absolutely DIY-friendlyif you treat prep as part of the “paint job,” not an
optional warm-up act. Clean thoroughly, scuff-sand for adhesion, prime only where it makes sense, and apply two thin coats
of a durable exterior paint. Finish the edges, give the coating time to cure, and you’ll end up with a door that looks sharp
and holds up to real-world weather and constant use.
SEO Tags