Table of Contents >> Show >> Hide
- Step 1: Plan Your Project Like a Professional
- Step 2: Gather the Right Tools and Materials
- Step 3: Prep the Walls (This Is Where the Magic Happens)
- Step 4: Tape, Protect, and Cut In
- Step 5: Roll on Paint Like a Pro
- Step 6: Let It Dry, Recoat, and Touch Up
- Step 7: Clean Up and Care for Your Freshly Painted Walls
- Pro-Level Troubleshooting: Common Painting Mistakes and Fixes
- Real-World Lessons: Experience from Painting a Lot of Walls
- Lesson 1: Prep always takes longer than you think (and it’s always worth it)
- Lesson 2: Good tape and good brushes are sanity savers
- Lesson 3: Lighting is part of your toolkit
- Lesson 4: Your pace matters more than your strength
- Lesson 5: Color changes look awful… right until they look amazing
- Lesson 6: Your future touch-ups depend on today’s notes
- Lesson 7: A pro finish is mostly consistency
- Conclusion
If you’ve ever stepped back from a freshly painted wall and thought, “Huh… why does this look like a patchy zebra?”welcome, friend. The difference between “I did this on a random Saturday” and “Whoa, did you hire a painter?” is not a secret handshake. It’s a repeatable process. Learn that process, and you can paint a wall like a pro every time.
Professional painters obsess over three things: prep, technique, and patience. The good news? You can absolutely copy all three at home, without a truck full of tools or a painter named Mike who only listens to ‘80s rock. This step-by-step guide walks you through planning, prepping, painting, and finishing a wall so it looks crisp, smooth, and totally brag-worthy.
Step 1: Plan Your Project Like a Professional
Choose the right color (and test it in real life)
Scrolling paint colors on your phone at midnight is fun, but walls exist in actual light. Before you commit, grab a few paint chips or small sample cans and paint swatches on the wall in different spots. Look at them in morning light, afternoon light, and at night with your lamps on. Pros and designers do this religiously because paint can shift from “cozy beige” to “sad yellow” depending on lighting and surroundings.
Pick a pro-level paint finish
Pros don’t just pick a colorthey pick a sheen that matches the room:
- Matte/Flat: Great at hiding wall imperfections but less washable. Better for low-traffic rooms or ceilings.
- Eggshell: The go-to for many interior walls. Soft low sheen, hides minor flaws, more durable than flat, and easier to clean. Ideal for living rooms, bedrooms, and dining rooms.
- Satin: Slightly shinier and more durable than eggshell; excellent for hallways, kids’ rooms, and sometimes kitchens and baths where more scrubbing happens.
- Semi-gloss / Gloss: Usually for trim, doors, and cabinets. Tough and wipeable, but will highlight every bump or brush mark, so not ideal for imperfect walls.
As a simple rule of thumb: use eggshell or matte on walls, semi-gloss on trim and doors, and save high-gloss for when you’re really confident in your prep work.
Step 2: Gather the Right Tools and Materials
Painting pros aren’t just good with a brushthey’re picky about tools. The right gear makes your job faster, neater, and way less frustrating.
Basic tools checklist
- Quality painter’s tape (don’t cheap out here)
- Angled sash brush (2–2.5 inch) for cutting in
- 9-inch roller frame and extension pole
- Roller covers (3/8″ or 1/2″ nap for most smooth/medium walls)
- Paint tray and disposable liners or a 5-gallon bucket with roller grid
- Spackle/patching compound and a putty knife
- Sandpaper or sanding sponge (120–220 grit)
- Drop cloths or rosin paper
- Mild detergent or cleaner, sponge, and a bucket
- Primer (especially for bare drywall, stains, drastic color changes, or glossy surfaces)
Paint manufacturers and pros repeatedly emphasize that rollers, brushes, and prep tools matter just as much as the paint itself. Better tools give you smoother coverage, fewer roller marks, and less splatter.
Step 3: Prep the Walls (This Is Where the Magic Happens)
This is the part most DIYers rushand the reason so many walls look blotchy or peel later. Pros treat prep like 70% of the job. You should, too.
Clean the walls
Dust, grease, and mystery fingerprints stop paint from bonding properly. Clean the walls with a mixture of mild detergent and warm water, or a dedicated wall cleaner. In kitchens, pay extra attention to greasy areas near stoves. Let the walls dry completely before moving on.
Repair imperfections
- Fill holes and cracks: Use spackle or joint compound and a putty knife for nail holes and small dents. For larger cracks, follow the instructions on your patching productsome may need mesh tape.
- Sand smooth: Once dry, lightly sand the patched areas until they’re flush with the wall. Wipe away dust with a damp cloth.
- Deal with flaking paint: Scrape off any loose or peeling paint, then sand the edges so they feather into the surrounding surface. Painting on top of cracked or flaking paint basically guarantees it’ll peel again.
Prime like a pro
Primer is the foundation of a pro-level finish. Use it when:
- You’re covering stains, smoke, or water marks
- You’re going from dark to light (navy to white, for example)
- The wall is new drywall or very porous
- You’ve done a lot of patching and repairs
Primer helps paint adhere better, evens out porosity, and gives you a more consistent color and sheen on the final coat.
Step 4: Tape, Protect, and Cut In
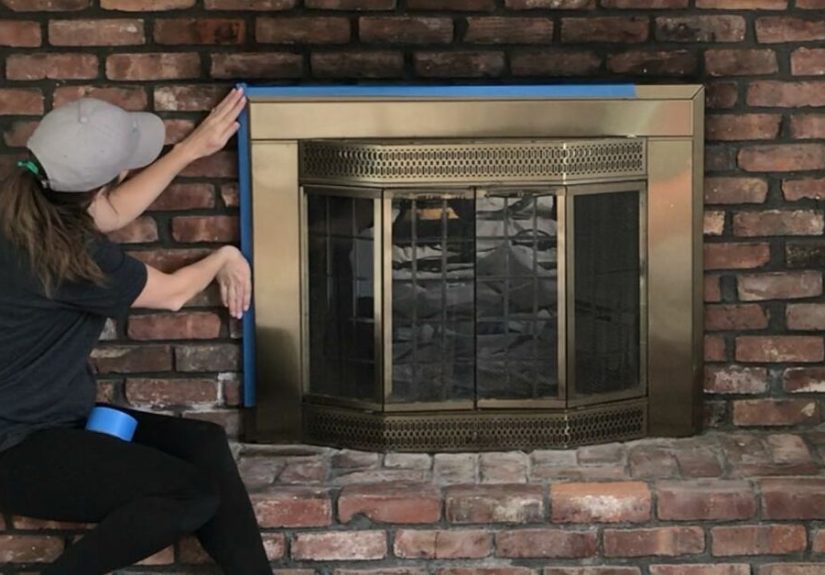
Protect floors and fixtures
Lay down drop cloths or rosin paper on floors. Cover outlets and switches with painter’s tape (after turning off the power if you remove the plates). Tape off baseboards, window trim, and door casings if you’re not confident cutting in freehand.
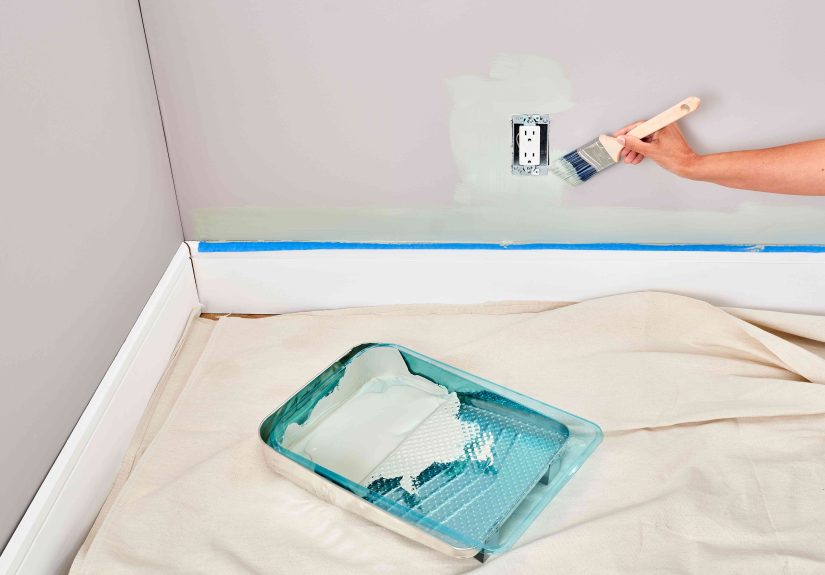
How to “cut in” like a pro
Cutting in means painting the edgesaround ceilings, trim, and cornersbefore you roll the big open areas. Pros almost always cut in first.
- Dip an angled brush into your paint, then tap off excess on the side of the can or bucket.
- Start about 1/2 inch away from the edge (ceiling line or trim), then gently work the brush closer as you move.
- Use smooth, controlled strokes about 2–3 feet long.
- Feather the bottom edge of your cut-in line slightly so the roller can blend into it.
Don’t let your cut-in areas dry completely before rolling. Professional results come from keeping a “wet edge” so brush and roller marks blend together.
Step 5: Roll on Paint Like a Pro
Load the roller correctly
- Pour paint into a tray or bucket with a roller grid.
- Dip the roller into the paint, then roll it back and forth on the tray/grid to evenly distribute paint and remove excess.
- The roller should look saturated but not dripping. If you’re sprinting from the tray to the wall trying to beat gravity, it’s overloaded.
Use the “W” or “M” pattern
Pros don’t just roll straight up and down in one spot. They usually work in sections about 3′ x 3′ and use a “W” or “M” pattern on the wall: roll a big W/M, then fill it in without lifting the roller too much. This spreads paint evenly and avoids heavy spots and “racing stripes.”
Maintain a wet edge
Always slightly overlap the last area you painted while it’s still wet. This prevents lap marksthose darker stripes you see when one section starts to dry before the next one goes on. Several pro guides emphasize working steadily along the wall instead of jumping randomly from place to place.
Don’t overwork the paint
One of the most common DIY mistakes is going back over an area again and again as it starts to dry. That can drag and leave ridges or rough patches. Put the paint on, even it out in a few passes, then move on and leave it alone.
Step 6: Let It Dry, Recoat, and Touch Up
Respect drying times
The can isn’t joking about “recoat after X hours.” If you recoat too soon, you can get uneven color, roller pull (where the roller lifts partially dried paint), or a gummy surface. Many brands recommend waiting 2–4 hours between coats for latex interior paint, but always check your specific product.
Apply a second (or third) coat
Most walls need at least two coats, especially when changing colors or using a lighter shade. Follow the same process as the first coat: cut in, then roll in sections, keeping a wet edge. If after the second coat you still see shadowy spots or roller marks, a third coat may be worth it for a flawless finish.
Remove tape at the right time
Remove painter’s tape while the paint is still slightly tacky, not fully cured. Pull it back on itself at a 45-degree angle for a clean line. Waiting until everything is rock-hard increases your chances of peeling off dried paint along with the tape.
Step 7: Clean Up and Care for Your Freshly Painted Walls
Clean brushes and rollers properly
For water-based (latex) paints, rinse brushes and rollers with warm, soapy water until the water runs clear. Spin or squeeze out excess water and let them dry fully. Taking care of your tools means you can reuse them for future projects and keep that pro-level finish going.
Let the paint cure before heavy use
Paint may feel dry to the touch in a few hours, but full curing can take a couple of weeks. During that time, avoid scrubbing the walls or sticking anything with strong adhesive (like hooks or heavy-duty tape) on them. Many experts recommend gentle handling for the first 14–30 days for the best long-term durability.
Clean walls the right way
When your wall finally does meet life (kids, pets, spaghetti), spot-clean with a soft sponge or cloth and mild soap. Glossier finishes can handle more scrubbing; matte finishes need a lighter touch to avoid burnishing or shiny spots.
Pro-Level Troubleshooting: Common Painting Mistakes and Fixes
Problem: Roller marks and lap lines
Likely cause: Letting one section dry before overlapping, or rolling with uneven pressure.
Fix: Lightly sand any heavy ridges once dry, wipe clean, and apply another coat, working in smaller sections and maintaining a wet edge.
Problem: Peeling or flaking paint
Likely cause: Painting over dust, grease, loose paint, or moisture issues.
Fix: Scrape loose paint, sand the edges, clean the surface, address any moisture source, prime, then repaint. This is why pros stress surface prep so much.
Problem: Stains bleeding through
Likely cause: Tannin, smoke, water damage, or marker crayon not sealed with primer.
Fix: Spot-prime with a stain-blocking primer, then repaint. Don’t keep adding regular paint and hoping it’ll magically hide stainsit won’t.
Problem: Patchy, uneven color
Likely cause: Skipping primer on patchy walls, not loading the roller consistently, or stopping after a single coat.
Fix: Prime areas with different porosity (like patches) and apply at least two full coats with consistent roller technique.
Real-World Lessons: Experience from Painting a Lot of Walls
You can read all the pro tips in the world, but there are some lessons you only truly “get” once you’ve had paint on your elbows, your hair, and somehow your dog. Here are experience-based insights that make “How to paint a wall like a pro” feel less like theory and more like muscle memory.
Lesson 1: Prep always takes longer than you think (and it’s always worth it)
The first time many people paint, they budget an hour to “wipe things down” and then wonder why the finish still looks tired. After you’ve done a few rooms, you start budgeting more time for cleaning, patching, and priming than for the actual painting. That’s not overkillthat’s how you get the buttery-smooth wall that looks good in every kind of light.
Experienced DIYers learn to treat every ding and nail hole like a tiny red flag. It takes a few extra minutes to fill and sand, but the payoff is huge. You notice it most when sunlight hits the wall at an angle; that’s when imperfections either jump outor quietly don’t exist because you did your homework.
Lesson 2: Good tape and good brushes are sanity savers
Cheap painter’s tape is like cheap umbrellas: technically it works until the moment you actually need it. After a few painful tape-bleed disasters or sticky residue battles, you realize spending a little more for high-quality tape is cheaper than repainting trim. Same with brushesyour future self will thank you for buying one great angled brush and cleaning it well instead of fighting with stiff, streaky bargain brushes on every project.
Lesson 3: Lighting is part of your toolkit
Pros often bring work lights to jobs, and you eventually understand why. That wall that looked flawless in soft evening light suddenly reveals roller marks the next morning. If you want a truly pro-level result, check your work using strong light at an angle. It’s a ruthless, honest mirrorbut it lets you fix problems while they’re still wet and fixable.
Lesson 4: Your pace matters more than your strength
Painting isn’t a race; it’s a rhythm. Rushing usually shows up as drips, missed spots, and harsh lap lines. Working at a steady pacecutting in a section, rolling it, then moving onkeeps your wet edge alive and your shoulders attached. An extension pole on the roller lets you cover big areas without climbing a ladder every five seconds, and it spreads your effort through your body instead of just your wrists and shoulders.
Lesson 5: Color changes look awful… right until they look amazing
The first coat when you’re changing from a dark color to a lighter one can be terrifying. The wall looks patchy, the old color is ghosting through, and you may briefly question all your life choices. This is normal. As long as you’ve primed properly and are applying even coats, it almost always evens out by the second or third coat. Pros learn to trust the process instead of judging the job halfway through.
Lesson 6: Your future touch-ups depend on today’s notes
Once you’ve needed to touch up a scuff and realized you don’t remember the brand, the color name, or the sheen, you become a documentation person. Write the paint brand, color, and finish on a piece of painter’s tape and stick it on the back of a switch plate or inside a nearby closet. Future-you can grab the exact match or at least get very close without having to guess in the paint aisle.
Lesson 7: A pro finish is mostly consistency
When you compare pro work to amateur work, the biggest difference is consistent decisions. Same roller nap across the whole wall. Same pressure and pattern. Same sheen throughout the room. Same respect for prep and drying times. You don’t have to be born “good at painting”you just have to follow the same good habits every time you open a can.
The more walls you paint, the more intuitive all of this becomes. You’ll start noticing things like how the roller feels when it’s perfectly loaded or how far you can comfortably work before your edge starts to dry. That’s when “How to paint a wall like a pro” stops being a headline and starts being the way you naturally work.
Conclusion
Painting a wall like a pro isn’t about fancy tricks or secret products. It’s about thoughtful planning, thorough prep, the right tools, controlled technique, and enough patience to let everything dry properly. When you clean and repair the surface, choose an appropriate sheen, cut in carefully, roll with a wet edge, avoid common mistakes, and treat your new wall gently while it cures, you end up with a finish that looks polished and lasts longer.
Do it once and you’ll save money versus hiring out. Do it well and you’ll also earn something more: the quiet, very satisfying feeling of walking into a room and thinking, “Yep. I did thatand it looks seriously good.”