Table of Contents >> Show >> Hide
- Why electrical tools get messy faster than other toolkits
- The goal: a toolbox that follows your workflow
- Step 1: Empty everything and sort like a grown-up (for 20 minutes)
- Step 2: Pick the right toolbox style for how you DIY
- Step 3: Build your “electrical essentials” kit
- Step 4: Use “micro-containers” for small parts (or accept your fate)
- Step 5: Tame tape, cords, and “squiggly stuff”
- Step 6: Create a “safety + support” pocket
- Step 7: Set up a layout that “locks in” organization
- Three example setups (steal these shamelessly)
- Maintenance: the 60-second reset that keeps you organized
- FAQ: Electrical toolbox organization questions people actually ask
- Real-life experiences organizing an electrical toolbox DIY (about )
- Conclusion: A toolbox that works as hard as you do
An electrical toolbox is basically a tiny traveling hardware storeexcept the shelves are your elbows, the
inventory system is “vibes,” and the cashier is your future self angrily whispering, “Where did I put the wire
strippers?” If you’ve ever opened your toolbox and been greeted by a chaotic tangle of extension cords, mystery
screws, and at least three rolls of tape that are all somehow empty… welcome. You’re among friends.
The good news: organizing an electrical toolbox isn’t about buying a fancy new box (though, yes, it’s fun to
browse). It’s about setting up a simple system that matches how you actually workso your tester isn’t buried
under a pound of drywall anchors, your labels don’t smear into modern art, and you can find the right bit
before your patience trips a breaker.
Why electrical tools get messy faster than other toolkits
Electrical toolkits are uniquely prone to “toolbox soup” because they mix three types of stuff that hate each
other:
- Tools (bulky, sharp, heavy, pokey)
- Small parts (tiny, identical-looking, eager to escape)
- Consumables (tape, heat shrink, zip tiesmultiplies when you’re not looking)
If you store everything in one big compartment, the heavy tools win every time. That’s how you end up with a
crushed voltage tester and a bag of wire nuts that now contains… wire nut dust.
The goal: a toolbox that follows your workflow
The best organization system isn’t the prettiestit’s the one that helps you complete common tasks with minimal
rummaging. A practical electrical toolbox usually needs four “zones”:
- Grab-and-go essentials (tools you reach for constantly)
- Task tools (used regularly, but not every minute)
- Parts (connectors, fasteners, terminals, fuses)
- Safety + support (PPE, spare batteries, flashlight, labels)
Build your toolbox around those zones and you’ll spend less time digging and more time doing. Also, your toolbox
will stop making that “I’ve given up on you” noise when you close it.
Step 1: Empty everything and sort like a grown-up (for 20 minutes)
Yes, this step is annoying. Yes, it’s also the step that fixes the whole problem.
Do a “tabletop inventory”
Dump everything onto a table or clean floor. Then sort into piles:
- Must-have: tools and parts you actually use
- Nice-to-have: useful, but not essential
- Why do I own this?: duplicates, worn-out items, mystery hardware
Purge with purpose (not guilt)
Keep duplicates only if they serve a real role. Example: two tape measures is normal. Seven flathead screwdrivers
is… a cry for help. Toss dried-out markers, cracked handles, and anything rusty enough to qualify as “archaeology.”
Quick safety check before items go back in
You don’t need to turn this into a laboratory inspection, but you do want to remove anything damaged.
Look for cracked handles, loose jaws on pliers, frayed cords, broken cases, missing guards/covers, or tools that
don’t operate smoothly. If something looks unsafe, tag it and take it out of the toolbox until repaired or replaced.
Step 2: Pick the right toolbox style for how you DIY
The container you choose determines what “organized” even means. Pick based on your real-life habits, not your
fantasy life where you always put tools back perfectly and never buy extra zip ties.
Option A: Tool bag or backpack
Best for: moving room-to-room, quick household fixes, working on ladders, or carrying essentials.
Tool bags shine because pockets separate tools automatically. The downside: small parts can vanish into the
pocket dimension if you don’t use dedicated organizers.
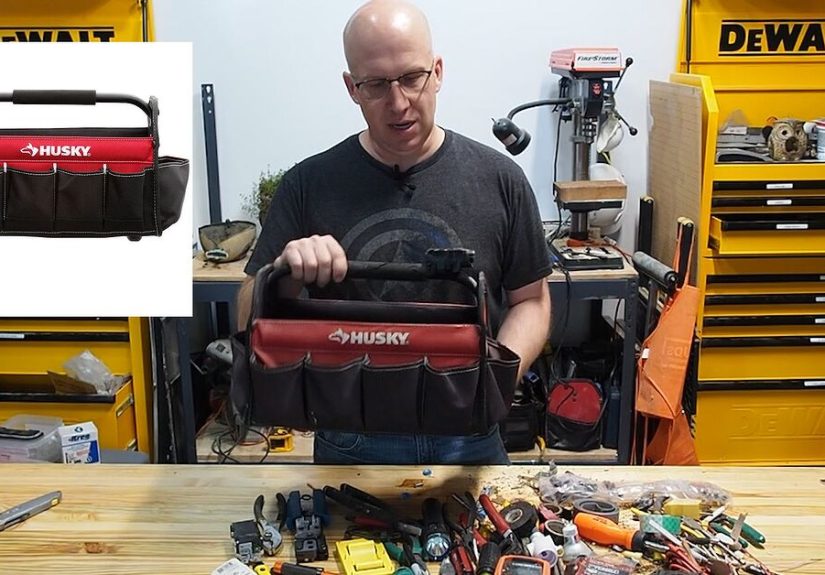
Option B: Traditional toolbox (with tray)
Best for: a home “electrical kit” that lives in the garage or closet.
The top tray is prime real estate for essentials. The lower compartment holds bulkier items like a drill, extra
tape, and cord wrapsif you keep small parts contained.
Option C: Modular stacking system
Best for: bigger DIYers, frequent projects, and anyone who loves clicking boxes together like adult LEGO.
Modular systems make it easy to separate parts by project and keep organizers sealed. If you like “grab one box and
go,” this is your speed.
Step 3: Build your “electrical essentials” kit
The trick is to keep your most-used items easy to reach. Think of this as your “front row seats” section. For many
DIYers, essentials typically include:
- Screwdrivers or a multi-bit driver
- Wire strippers and/or a small cutter
- Needle-nose pliers
- Non-contact voltage tester (stored protected)
- Electrical tape (fresh roll)
- Flashlight or headlamp
- Small measuring tape
- Sharpie/marker and a pencil
Put these in the easiest-access spots: bag outer pockets, the toolbox tray, or the top drawer/upper module. If you
have to open three latches and excavate a cable pile to find your tester, you’ll start “temporarily” setting tools
downaka the first step toward toolbox chaos.
Step 4: Use “micro-containers” for small parts (or accept your fate)
Small parts are the main reason electrical toolboxes become messy. The solution is not willpower. It’s
containment.
Choose a small-parts organizer with removable bins
Look for an organizer with tight latches and bins/dividers so items don’t migrate during transport. Removable bins
are huge: you can pull out exactly what you need and keep the rest sealed.
Sort parts by function, not by “random handful”
A practical starter layout could be:
- Connectors (wire connectors, lever connectors, crimp terminals)
- Fasteners (assorted screws, anchors you actually use)
- Consumables (zip ties, small heat shrink pieces)
- Spares (batteries, fuse assortment if relevant)
- Labels (label tape, tags, or a small marker)
Label bins like you’re helping “future you” at 9 PM
Use clear labels with big text. If you have a label maker, great. If not, painter’s tape and a marker works.
The key is consistency: same naming style, same placement, and no cryptic shorthand like “THINGIES.”
Step 5: Tame tape, cords, and “squiggly stuff”
Tape rolls and cords are toolbox gremlins. Left unchecked, they multiply, tangle, and swallow other items.
Here’s how to keep them civilized:
Make a tape station
Put tape in one dedicated spot: a side pocket, a small box, or a bin. Keep one “active” roll of electrical tape
and store backups separately. Otherwise you’ll carry five half-rolls like an electrical tape dragon hoarding
treasure.
Wrap cords properly
Use reusable hook-and-loop straps or simple cord wraps. Store extension cords and charger cords coiled and secured.
Also: don’t store cords that are damaged. If you spot cuts, exposed conductors, or badly worn insulation, remove the
cord from service.
Step 6: Create a “safety + support” pocket
If your toolbox is for electrical DIY, dedicate a small section to safety items and support gear. This keeps them
from being buriedand makes you more likely to actually use them.
- Safety glasses
- Work gloves (appropriate for your tasks)
- Ear protection (if power tools are involved)
- Spare batteries (tester/flashlight)
- Small first-aid basics (bandages, wipes)
This isn’t about being dramatic. It’s about not searching for safety glasses while holding a tool. Your eyes are
great. Keep them.
Step 7: Set up a layout that “locks in” organization
The easiest organization systems are the ones that physically prevent mess. Try one (or more) of these:
Foam inserts for delicate tools
If you have a meter/tester or delicate hand tools, foam inserts can protect them and show instantly when something
is missing. Bonus: it’s very satisfying. It’s like a hotel bed for your tools.
Tool rolls or pouches
A tool roll keeps pliers, cutters, and drivers from clanging into each other. It also makes it easy to pull out
your “hand tools set” as one bundle.
“One bin per category” rule
Don’t allow categories to sprawl across the toolbox. If connectors don’t fit in their bin, you don’t need a second
binyou need fewer connector types in the box. Simplify.
Three example setups (steal these shamelessly)
Here are three layouts you can adapt. The best setup is the one that matches your DIY reality.
1) The apartment/condo “quick fix” kit
- Tool bag with pockets
- Driver + bits, small pliers, compact wire stripper/cutter
- Non-contact tester in a protected pocket
- Mini organizer: a few connectors, zip ties, tape
- Flashlight/headlamp
Keep it light. If it feels heavy, you won’t grab it. And a toolbox you don’t grab is just a very sad plastic box.
2) The homeowner “weekend projects” kit
- Toolbox with tray + small parts organizer
- Tray: driver set, strippers, cutters, needle-nose, tester, marker, tape
- Bottom: drill/driver (optional), spare bits, cord wraps, backup tape
- Organizer: connectors, fasteners, zip ties, heat shrink
3) The garage “project-ready” modular kit
- Modular stack with a top tool box + small parts module + drawer module
- Top: hand tools (easy access)
- Parts module: connectors and consumables sorted by function
- Drawer: testers/meters, specialty tools, spare batteries, labels
Maintenance: the 60-second reset that keeps you organized
Organization doesn’t fail because you’re messy. It fails because life is busy. So give yourself a tiny routine:
- After each session (60 seconds): return essentials to their “home pockets,” close bins, coil cords.
- Weekly (3 minutes): toss trash (wire scraps, empty tape cores), refill a few frequently used parts.
- Monthly (10 minutes): quick inventoryreplace dead batteries, remove damaged items, relabel if needed.
The goal isn’t perfection. The goal is “I can find the thing I need without becoming a person I don’t like.”
FAQ: Electrical toolbox organization questions people actually ask
What’s the best way to store a voltage tester or meter?
Keep it in a protected pocket, padded pouch, or foam-cut compartment so it can’t get crushed by heavier tools.
Store spare batteries nearby so you’re not testing anything with a dead tester (which is basically just a
very confident plastic stick).
How do I stop small parts from spilling everywhere?
Use a dedicated organizer with dividers and tight latches. Avoid loose bags inside the main compartment unless
the bags are sealed and labeled clearly.
Should I keep everything in one toolbox?
Not always. Many DIYers do better with a small “daily driver” kit for quick tasks and a larger box for
project-specific items. Less weight, less chaos, faster work.
How do I organize if I’m on a budget?
Start with what you have: zip bags + painter’s tape labels + one affordable small-parts organizer. The system matters
more than the container. Your toolbox doesn’t need to be expensiveit needs to be predictable.
Real-life experiences organizing an electrical toolbox DIY (about )
The first time I tried to “organize” an electrical toolbox, I did what many people do: I made it look neat for
exactly one day. I lined up tools like they were posing for a catalog. I separated parts into perfect little piles.
I even felt smug about it. Then I started an actual projectand my organization system immediately collapsed like a
folding chair in a comedy sketch.
Here’s what I learned the hard way: your toolbox isn’t a museum display. It’s a working kitchen. If your setup
doesn’t support your workflow, you’ll stop using it the moment you’re in a hurry (which is always). I discovered
that my biggest “mess makers” weren’t the big toolsthey were the tiny things I grabbed constantly: tape, zip ties,
connectors, and spare bits. I’d pull them out, use one, and then toss the rest back in “for now.” “For now,” by the
way, is the official language of clutter.
The breakthrough was giving every tiny thing a container that was faster to use than tossing it loose. Once I put
connectors into a small organizer with labeled bins, cleanup became almost automatic. Not because I became a more
disciplined person overnight (I did not), but because the bin was right there, openable with one hand, and the label
told me where things go. “Put it away” stopped being a moral challenge and became a simple motion.
Another lesson: I had too many versions of the same item. Five types of connectors, three sizes of random anchors,
and enough loose screws to rebuild a small satellite. It felt “prepared,” but it actually made everything harder to
find. When I simplified to the connectors and fasteners I used most often, the whole toolbox got calmer. Suddenly
there was space to see what I had, and refilling became obvious. (Also, fewer mystery parts means fewer moments of
staring at a tiny metal piece like it’s a puzzle from an escape room.)
I also learned to protect delicate items. A tester tossed into the main compartment will eventually get smacked,
scratched, or crushed by heavier tools. Once I gave it a protected pocket (or a simple pouch), it lasted longer and
I stopped doing that panicked “Is this thing broken?” check every time I needed it.
Finally, the biggest habit that kept the system alive was the 60-second reset. I don’t do hour-long cleaning
sessions. I do quick resets: tools back to their homes, bins closed, cords wrapped. It’s like brushing your teeth
you’re not trying to win an award for dental artistry; you’re just preventing future problems. And when your toolbox
stays organized, you start projects with more confidence because you’re not beginning with a scavenger hunt.
Organized tools don’t just save timethey save your mood. And honestly, that’s priceless.
Conclusion: A toolbox that works as hard as you do
Organizing your electrical toolbox DIY-style is mostly about choosing a simple structure (zones + micro-containers)
and sticking to it with tiny maintenance habits. Keep essentials easy to reach, contain small parts like they’re
trying to escape (because they are), protect delicate testers, and simplify duplicates. Do that, and your toolbox
becomes less of a chaotic junk drawer and more of a reliable sidekickready when you are, without the drama.